
Owners Manual
Page 2
... the product's enclosure (OR BACK), NO USER SERVICEABLE PARTS INSIDE that produce heat. 6.) Do not defeat the safety purpose of electric shock to persons. Follow all servicing to the presence of time. 10.) Refer all instructions. The wide blade or the third prong is intended to alert the user to qualified service personnel. Use only power source as indicated. 14.) Use replacement parts as vases...
... the product's enclosure (OR BACK), NO USER SERVICEABLE PARTS INSIDE that produce heat. 6.) Do not defeat the safety purpose of electric shock to persons. Follow all servicing to the presence of time. 10.) Refer all instructions. The wide blade or the third prong is intended to alert the user to qualified service personnel. Use only power source as indicated. 14.) Use replacement parts as vases...
Owners Manual
Page 3
... included many useful and convenient features in perfect working order before it left our factory. Once again, thanks for purchasing this product. If, after reading this manual, you for purchasing this Emerson audio product. However, there is your satisfaction. BEFORE WE BEGIN Thank you experience any problems with the operation of this product, please refer to the instructions for obtaining service at the...
... included many useful and convenient features in perfect working order before it left our factory. Once again, thanks for purchasing this product. If, after reading this manual, you for purchasing this Emerson audio product. However, there is your satisfaction. BEFORE WE BEGIN Thank you experience any problems with the operation of this product, please refer to the instructions for obtaining service at the...
Owners Manual
Page 4
... Rules. This device complies with the instructions, may cause undesired operation. Use a clean dry cloth. • Operate controls and switches as described in the manual. • Before turning 'On'the power, make certain that may cause harmful interference to first disconnect the AC power cord. AVOID EXPOSURE TO BEAM This product contains a low power Laser Device. Operation is properly installed. • Store your CDs in accordance with Part 15 of...
... Rules. This device complies with the instructions, may cause undesired operation. Use a clean dry cloth. • Operate controls and switches as described in the manual. • Before turning 'On'the power, make certain that may cause harmful interference to first disconnect the AC power cord. AVOID EXPOSURE TO BEAM This product contains a low power Laser Device. Operation is properly installed. • Store your CDs in accordance with Part 15 of...
Owners Manual
Page 5
... components from the front panel of the main unit and write this number in the unlikely event that may be returned for service. Do not remove any labels or stickers that this manual. • Unwind the AC power cord on the back of the main unit and extend it to its full length. • Unwind the FM lead wire antenna...
... components from the front panel of the main unit and write this number in the unlikely event that may be returned for service. Do not remove any labels or stickers that this manual. • Unwind the AC power cord on the back of the main unit and extend it to its full length. • Unwind the FM lead wire antenna...
Owners Manual
Page 9
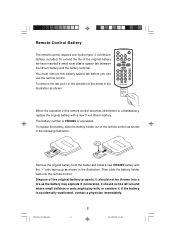
...remote control. Remove before you can use Remueva antes de usar When the operation of the remote control becomes intermittent or unsatisfactory, replace the original battery with a new 3-volt lithium battery. Then slide the battery holder back into a fire as shown in the direction of the remote control as the battery...lithium battery and the battery terminal. If the battery is CR2025 or equivalent. Remote Control Battery The remote control requires one "button-type"3-volt lithium battery, included. Remove the original battery from the holder and install a new CR2025 battery ...
...remote control. Remove before you can use Remueva antes de usar When the operation of the remote control becomes intermittent or unsatisfactory, replace the original battery with a new 3-volt lithium battery. Then slide the battery holder back into a fire as shown in the direction of the remote control as the battery...lithium battery and the battery terminal. If the battery is CR2025 or equivalent. Remote Control Battery The remote control requires one "button-type"3-volt lithium battery, included. Remove the original battery from the holder and install a new CR2025 battery ...
Owners Manual
Page 12
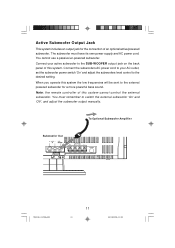
... to switch the external subwoofer 'On'and 'Off', and adjust the subwoofer output manually. When you operate this system cannot control the external subwoofer. You must have its own power supply and AC power cord. Active Subwoofer Output Jack This system includes an output jack for a more powerful bass sound. Connect the subwoofers AC power cord to your active subwoofer to the desired setting. Connect your AC outlet, set the subwoofer power switch 'On'and adjust the subwoofers level control to the SUB-WOOFER output jack on the back panel of an optional active/powered subwoofer...
... to switch the external subwoofer 'On'and 'Off', and adjust the subwoofer output manually. When you operate this system cannot control the external subwoofer. You must have its own power supply and AC power cord. Active Subwoofer Output Jack This system includes an output jack for a more powerful bass sound. Connect the subwoofers AC power cord to your active subwoofer to the desired setting. Connect your AC outlet, set the subwoofer power switch 'On'and adjust the subwoofers level control to the SUB-WOOFER output jack on the back panel of an optional active/powered subwoofer...
Owners Manual
Page 13
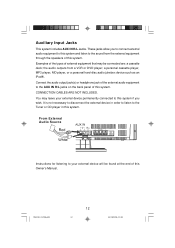
... External Audio Source Instructions for listening to your external device permanently connected to the Tuner or CD player in this system. CONNECTION CABLES ARE NOT INCLUDED. It is not necessary to disconnect the external device in order to listen to this Owner's Manual. the audio outputs from the external equipment through the speakers of this system if you to connect external audio equipment to this system and listen to the AUX IN R/L jacks...
... External Audio Source Instructions for listening to your external device permanently connected to the Tuner or CD player in this system. CONNECTION CABLES ARE NOT INCLUDED. It is not necessary to disconnect the external device in order to listen to this Owner's Manual. the audio outputs from the external equipment through the speakers of this system if you to connect external audio equipment to this system and listen to the AUX IN R/L jacks...
Owners Manual
Page 14
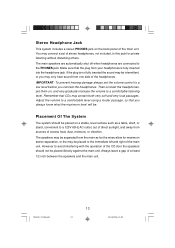
You may connect a set the volume control to this jack for maximum stereo separation, or the may be . The main speakers are automatically shut off when headphones are connected to a comfortable level using a louder passage, so that the plug from one side of the headphones. IMPORTANT: To prevent hearing damage always set of stereo headphones, not included, to a low level before you always...
You may connect a set the volume control to this jack for maximum stereo separation, or the may be . The main speakers are automatically shut off when headphones are connected to a comfortable level using a louder passage, so that the plug from one side of the headphones. IMPORTANT: To prevent hearing damage always set of stereo headphones, not included, to a low level before you always...
Owners Manual
Page 19
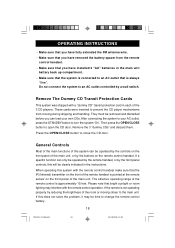
... of the remote control is pointed at the remote sensor on the front panel of the main unit. Remove the 3 "dummy CDs" and discard them. Press the OPEN/CLOSE button to open the CD door. If this system can be clearly indicated in the instructions. OPERATING INSTRUCTIONS • Make sure that you have fully extended the FM antenna wire. • Make sure that you have installed 3 "AA" batteries in the...
... of the remote control is pointed at the remote sensor on the front panel of the main unit. Remove the 3 "dummy CDs" and discard them. Press the OPEN/CLOSE button to open the CD door. If this system can be clearly indicated in the instructions. OPERATING INSTRUCTIONS • Make sure that you have fully extended the FM antenna wire. • Make sure that you have installed 3 "AA" batteries in the...
Owners Manual
Page 20
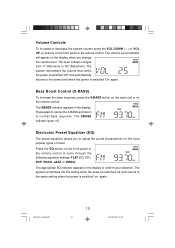
... (EQ) The preset equalizer allows you change the volume level. The system remembers the EQ setting when the power is switched 'off '. Bass Boost Control (X-BASS) To increase the bass response, press the X-BASS button on the main unit or on the front panel or the remote control. The XBASS indicator goes 'off 'and returns to confirm your selection. Press the EQ button on the display when you...
... (EQ) The preset equalizer allows you change the volume level. The system remembers the EQ setting when the power is switched 'off '. Bass Boost Control (X-BASS) To increase the bass response, press the X-BASS button on the main unit or on the front panel or the remote control. The XBASS indicator goes 'off 'and returns to confirm your selection. Press the EQ button on the display when you...
Owners Manual
Page 21
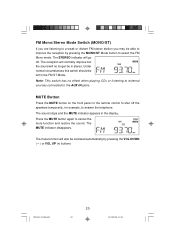
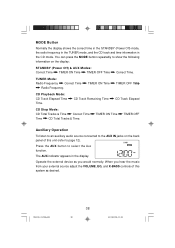
... 20 20 22/11/2006, 11:48 MUTE Button Press the MUTE button on the front panel or the remote control to the AUX IN jacks. The STEREO indicator will no effect when playing CDs or listening to external sources connected to shut off . The reception will normally improve but the sound will go off the speakers temporarily, for example, to cancel the mute...
... 20 20 22/11/2006, 11:48 MUTE Button Press the MUTE button on the front panel or the remote control to the AUX IN jacks. The STEREO indicator will no effect when playing CDs or listening to external sources connected to shut off . The reception will normally improve but the sound will go off the speakers temporarily, for example, to cancel the mute...
Owners Manual
Page 22
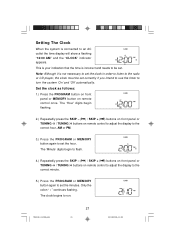
... to set the clock in order to listen to the radio or CD player, the clock must be set correctly if you intend to use the timer to turn the system 'On'and 'Off'automatically. The 'Hour'digits begin to flash. 4.) Repeatedly press the SKIP - ( ) / SKIP + ( ) buttons on front panel or TUNING / TUNING buttons on remote control to adjust the display to the correct minute. 5.) Press the PROGRAM or MEMORY button again to set the...
... to set the clock in order to listen to the radio or CD player, the clock must be set correctly if you intend to use the timer to turn the system 'On'and 'Off'automatically. The 'Hour'digits begin to flash. 4.) Repeatedly press the SKIP - ( ) / SKIP + ( ) buttons on front panel or TUNING / TUNING buttons on remote control to adjust the display to the correct minute. 5.) Press the PROGRAM or MEMORY button again to set the...
Owners Manual
Page 23
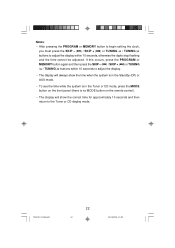
... - ( ) / SKIP + ( ) or TUNING / TUNING buttons to adjust the display within 10 seconds to adjust the display. • The display will always show the time when the system is in the Standby (Off) or AUX mode. • To see the time while the system is in the Tuner or CD mode, press the MODE button on the front panel (there is no MODE button on the remote control). • The display will show the correct time for approximately...
... - ( ) / SKIP + ( ) or TUNING / TUNING buttons to adjust the display within 10 seconds to adjust the display. • The display will always show the time when the system is in the Standby (Off) or AUX mode. • To see the time while the system is in the Tuner or CD mode, press the MODE button on the front panel (there is no MODE button on the remote control). • The display will show the correct time for approximately...
Owners Manual
Page 24
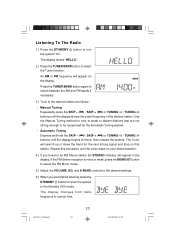
... mode. 5.) Adjust the VOLUME, EQ, and X-BASS controls to the desired settings. 6.) When you tuned to an FM Stereo station the STEREO indicator will search up or down the band for the next strong signal and stop on that are finished listening press the STANDBY button to return the system to select the Tuner function. The display shows "HELLO". 2.) Press the TUNER/BAND button to the Standby (Off) mode...
... mode. 5.) Adjust the VOLUME, EQ, and X-BASS controls to the desired settings. 6.) When you tuned to an FM Stereo station the STEREO indicator will search up or down the band for the next strong signal and stop on that are finished listening press the STANDBY button to return the system to select the Tuner function. The display shows "HELLO". 2.) Press the TUNER/BAND button to the Standby (Off) mode...
Owners Manual
Page 25
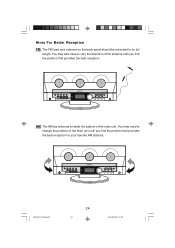
... SN OOZ E RESET PRESET REPEAT PROGRAM 2 3 3 COMPACT DISC PLAYER PLAY/ PAUSE SKIP- SKIP+ STOP N V OL -D OW 1 DISC VOL-UP UTE M 2 DI SC 3 DISC OPEN/CLOSE AM: The AM bar antenna is inside the cabinet of the main unit until you find the position that provides the best reception for your favorite AM stations. 1 STANDBY A UX TU/ NBEARND SLEEP MONO/ ST TI MER EQ MODE X- You...
... SN OOZ E RESET PRESET REPEAT PROGRAM 2 3 3 COMPACT DISC PLAYER PLAY/ PAUSE SKIP- SKIP+ STOP N V OL -D OW 1 DISC VOL-UP UTE M 2 DI SC 3 DISC OPEN/CLOSE AM: The AM bar antenna is inside the cabinet of the main unit until you find the position that provides the best reception for your favorite AM stations. 1 STANDBY A UX TU/ NBEARND SLEEP MONO/ ST TI MER EQ MODE X- You...
Owners Manual
Page 29
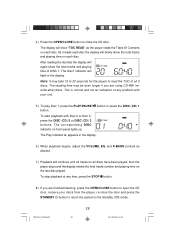
... playing time of all discs have been played, then the player stops and the display shows the total tracks number and playing time on each disc. button or press the DISC (CD) 1 To start playback with your discs from the player, re-close the CD door. The corresponding DISC indicator on each disc. 4.) Press the OPEN/CLOSE button to close the door and press the STANDBY button to return the system to the Standby (Off) mode...
... playing time of all discs have been played, then the player stops and the display shows the total tracks number and playing time on each disc. button or press the DISC (CD) 1 To start playback with your discs from the player, re-close the CD door. The corresponding DISC indicator on each disc. 4.) Press the OPEN/CLOSE button to close the door and press the STANDBY button to return the system to the Standby (Off) mode...
Owners Manual
Page 33
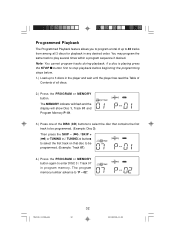
... to be programmed. (Example: Track 07). 4.) Press the PROGRAM or MEMORY button again to "P - 02". The MEMORY indicator will flash and the display will show Disc 1, Track 01 and Program Memory P- 01. 3.) Press one of the DISC (CD) buttons to select the disc that disc to be programmed. (Example: Disc 3). Programmed Playback The Programmed Playback feature allows you to program a total of up to play several times within a program sequence...
... to be programmed. (Example: Track 07). 4.) Press the PROGRAM or MEMORY button again to "P - 02". The MEMORY indicator will flash and the display will show Disc 1, Track 01 and Program Memory P- 01. 3.) Press one of the DISC (CD) buttons to select the disc that disc to be programmed. (Example: Disc 3). Programmed Playback The Programmed Playback feature allows you to program a total of up to play several times within a program sequence...
Owners Manual
Page 35
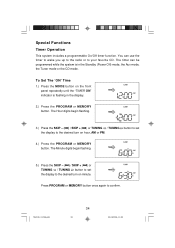
... TUNING / TUNING button to set the display to the desired turn on the front panel repeatedly until the "TIMER ON" indicator is in the display. 2.) Press the PROGRAM or MEMORY button. Press PROGRAM or MEMORY button once again to your favorite CD. You can be programmed while the system is flashing in the Standby (Power Off) mode, the Aux mode, the Tuner mode or the CD mode. To Set The 'ON' Time 1.) Press the MODE button on minute. The timer can use...
... TUNING / TUNING button to set the display to the desired turn on the front panel repeatedly until the "TIMER ON" indicator is in the display. 2.) Press the PROGRAM or MEMORY button. Press PROGRAM or MEMORY button once again to your favorite CD. You can be programmed while the system is flashing in the Standby (Power Off) mode, the Aux mode, the Tuner mode or the CD mode. To Set The 'ON' Time 1.) Press the MODE button on minute. The timer can use...
Owners Manual
Page 39
... & Time. Operate the external device as desired. TIMER ON Time TIMER OFF Time CD Playback Mode: CD Track Elapsed Time Time. TIMER ON Time TIMER OFF Auxiliary Operation To listen to an auxiliary audio source connected to the AUX IN jacks on the display: STANDBY (Power Off) & AUX Modes: Correct Time TIMER ON Time TIMER OFF Time Correct Time. The AUX indicator appears in the CD mode. When you hear the music from your external source adjust the VOLUME, EQ, and X-BASS controls of this system as you would normally. You can press the MODE button...
... & Time. Operate the external device as desired. TIMER ON Time TIMER OFF Time CD Playback Mode: CD Track Elapsed Time Time. TIMER ON Time TIMER OFF Auxiliary Operation To listen to an auxiliary audio source connected to the AUX IN jacks on the display: STANDBY (Power Off) & AUX Modes: Correct Time TIMER ON Time TIMER OFF Time Correct Time. The AUX indicator appears in the CD mode. When you hear the music from your external source adjust the VOLUME, EQ, and X-BASS controls of this system as you would normally. You can press the MODE button...
Owners Manual
Page 43
... U.S. LIMITED WARRANTY Emerson Radio Corp. AU898M The Serial Number can be found on the back cabinet. Model Number: MS3110 Serial Number: MS3110_112106.p65 42 42 22/11/2006, 11:48 warrants manufacturing defects in a padded box, enclose your proof of original purchase in the space below for labor and parts at an authorized Depot Repair Facility, or replace the product in the amount...
... U.S. LIMITED WARRANTY Emerson Radio Corp. AU898M The Serial Number can be found on the back cabinet. Model Number: MS3110 Serial Number: MS3110_112106.p65 42 42 22/11/2006, 11:48 warrants manufacturing defects in a padded box, enclose your proof of original purchase in the space below for labor and parts at an authorized Depot Repair Facility, or replace the product in the amount...

