
Owners Manual
Page 2
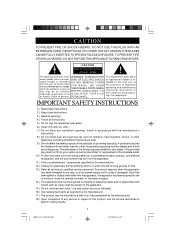
... and no object filled with dry cloth. 7.) Do not block any way, such as power-supply cord or plug is intended to alert the user to the presence of important operating and maintenance (servicing) instructions in accordance with the manufacturer's instructions. 8.) Do not install near water. 6.) Clean only with liquids such as vases shall be exposed to rain or moisture, does...
... and no object filled with dry cloth. 7.) Do not block any way, such as power-supply cord or plug is intended to alert the user to the presence of important operating and maintenance (servicing) instructions in accordance with the manufacturer's instructions. 8.) Do not install near water. 6.) Clean only with liquids such as vases shall be exposed to rain or moisture, does...
Owners Manual
Page 3
has produced this manual for future reference. You may need this unit in case your unit is located on a label on the bottom cabinet. You may cause the unit to request warranty service. NOTES: • Please avoid using or storing this number in dusty or sandy locations. The serial number of enjoyment and trouble free operation. Model No: SB250/SB251 Serial No: SB250_251_ib071703.p65...
has produced this manual for future reference. You may need this unit in case your unit is located on a label on the bottom cabinet. You may cause the unit to request warranty service. NOTES: • Please avoid using or storing this number in dusty or sandy locations. The serial number of enjoyment and trouble free operation. Model No: SB250/SB251 Serial No: SB250_251_ib071703.p65...
Owners Manual
Page 4
... received, including interference that power cord is connected. • Consult the dealer or an experienced radio/TV technician for a Class B digital device, pursuant to radio communications. Operation is no guarantee that to which can radiate radio frequency energy and, if not installed and used in accordance with chemical solvents as this unit in places exposed to direct sunlight or close to heat...
... received, including interference that power cord is connected. • Consult the dealer or an experienced radio/TV technician for a Class B digital device, pursuant to radio communications. Operation is no guarantee that to which can radiate radio frequency energy and, if not installed and used in accordance with chemical solvents as this unit in places exposed to direct sunlight or close to heat...
Owners Manual
Page 5
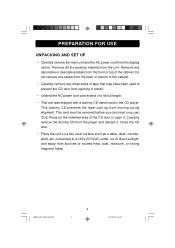
...of tape that may have been used to prevent the CD door from opening in the CD player. This card must be removed before you can insert your own CDs. SB250_251_ib071703.p65 4 4 17/7/2003, 14:27 This dummy CD prevents the laser pick up from the display carton. Carefully remove the dummy CD from...outlet, out of direct sunlight, and away from the player and discard it . PREPARATION FOR USE UNPACKING AND SET UP • Carefully remove the main unit and the AC power cord from moving during shipment. Remove all the packing material from the front or top of the CD door to open it .
...of tape that may have been used to prevent the CD door from opening in the CD player. This card must be removed before you can insert your own CDs. SB250_251_ib071703.p65 4 4 17/7/2003, 14:27 This dummy CD prevents the laser pick up from the display carton. Carefully remove the dummy CD from...outlet, out of direct sunlight, and away from the player and discard it . PREPARATION FOR USE UNPACKING AND SET UP • Carefully remove the main unit and the AC power cord from moving during shipment. Remove all the packing material from the front or top of the CD door to open it .
Owners Manual
Page 6
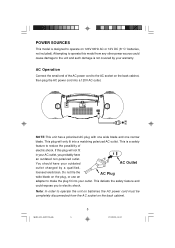
... blade on the plug, or use an AC Plug adapter to operate the unit on batteries the AC power cord must be completely disconnected from any other power source could expose you probably have your outdated AC Outlet outlet changed by your warranty. If this model from the AC socket on 120V 60Hz AC or 12V DC (8 "C" batteries, not included). PHONES NOTE:This...
... blade on the plug, or use an AC Plug adapter to operate the unit on batteries the AC power cord must be completely disconnected from any other power source could expose you probably have your outdated AC Outlet outlet changed by your warranty. If this model from the AC socket on 120V 60Hz AC or 12V DC (8 "C" batteries, not included). PHONES NOTE:This...
Owners Manual
Page 7
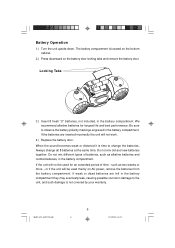
... to change all 8 batteries at the same time. When the sound becomes weak or distorted it is not covered by your warranty. Always change the batteries. The battery compartment is located on the bottom cabinet. 2.) Press downward on AC power, remove the batteries from the battery compartment. Do not mix different types of time - If the unit will not work. 4.) Replace the battery door...
... to change all 8 batteries at the same time. When the sound becomes weak or distorted it is not covered by your warranty. Always change the batteries. The battery compartment is located on the bottom cabinet. 2.) Press downward on AC power, remove the batteries from the battery compartment. Do not mix different types of time - If the unit will not work. 4.) Replace the battery door...
Owners Manual
Page 8
... cleaning sprays may cause damage to be used for a long period of batteries specified. 2. Do not try to recharge batteries not intended to the device. 3. they can overheat and rupture. (Follow battery manufacturer's directions.) PROTECT YOUR FURNITURE This model is not to your furniture. However certain types of batteries together (e.g. Use only the size and type of time, remove the batteries...
... cleaning sprays may cause damage to be used for a long period of batteries specified. 2. Do not try to recharge batteries not intended to the device. 3. they can overheat and rupture. (Follow battery manufacturer's directions.) PROTECT YOUR FURNITURE This model is not to your furniture. However certain types of batteries together (e.g. Use only the size and type of time, remove the batteries...
Owners Manual
Page 9
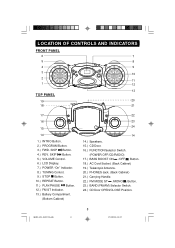
... Button. 5.) VOLUME Control. 6.) LCD Display. 7.) POWER "On" Indicator. 8.) TUNING Control. 9.) STOP Button. 10.) REPEAT Button. 11.) PLAY/PAUSE Button. 12.) FM ST Indicator. 13.) Battery Compartment. (Bottom Cabinet) 22 23 24 14 14.) Speakers. 15.) CD Door. 16.) FUNCTION Selector Switch. (POWER OFF/CD/RADIO) 17.) BASS BOOST ON /OFF Button. 18.) AC Cord Socket. (Back Cabinet) 19.) Telescopic Antenna. 20.) PHONES Jack. (Back Cabinet) 21.) Carrying Handle. 22.) FM MODE ST /MONO Button. 23.) BAND (FM/AM) Selector Switch...
... Button. 5.) VOLUME Control. 6.) LCD Display. 7.) POWER "On" Indicator. 8.) TUNING Control. 9.) STOP Button. 10.) REPEAT Button. 11.) PLAY/PAUSE Button. 12.) FM ST Indicator. 13.) Battery Compartment. (Bottom Cabinet) 22 23 24 14 14.) Speakers. 15.) CD Door. 16.) FUNCTION Selector Switch. (POWER OFF/CD/RADIO) 17.) BASS BOOST ON /OFF Button. 18.) AC Cord Socket. (Back Cabinet) 19.) Telescopic Antenna. 20.) PHONES Jack. (Back Cabinet) 21.) Carrying Handle. 22.) FM MODE ST /MONO Button. 23.) BAND (FM/AM) Selector Switch...
Owners Manual
Page 10
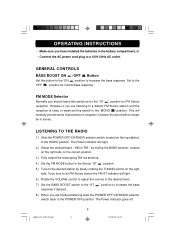
.../CD/RADIO selector switch, located on the top cabinet, to the desired station by sliding the BAND selector, located on the right side. OPERATING INSTRUCTIONS • Make sure you have installed the batteries in stereo. Set to a 120V 60Hz AC outlet. If you tune to an FM Stereo station the FM ST indicator will light. 6.) Rotate the VOLUME control to adjust the volume to the desired level. 7.) Set the BASS...
.../CD/RADIO selector switch, located on the top cabinet, to the desired station by sliding the BAND selector, located on the right side. OPERATING INSTRUCTIONS • Make sure you have installed the batteries in stereo. Set to a 120V 60Hz AC outlet. If you tune to an FM Stereo station the FM ST indicator will light. 6.) Rotate the VOLUME control to adjust the volume to the desired level. 7.) Set the BASS...
Owners Manual
Page 11
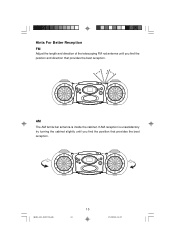
SB250_251_ib071703.p65 10 10 17/7/2003, 14:27 AM The AM ferrite bar antenna is unsatisfactory try turning the cabinet slightly until you find the position and direction that provides the best reception. If AM reception is inside the cabinet. Hints For Better Reception FM Adjust the length and direction of the telescoping FM rod antenna until you find the position that provides the best reception.
SB250_251_ib071703.p65 10 10 17/7/2003, 14:27 AM The AM ferrite bar antenna is unsatisfactory try turning the cabinet slightly until you find the position and direction that provides the best reception. If AM reception is inside the cabinet. Hints For Better Reception FM Adjust the length and direction of the telescoping FM rod antenna until you find the position that provides the best reception.
Owners Manual
Page 12
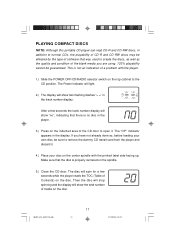
... a problem with the printed label side facing up. PLAYING COMPACT DISCS NOTE: Although this portable CD player can read CD-R and CD-RW discs, in addition to normal CDs, the playability of CD-R and CD-RW discs may be effected by the type of software that there is properly centered on the disc. The Power indicator will light. 2.) The display will show two flashing dashes "- -" in the track number display...
... a problem with the printed label side facing up. PLAYING COMPACT DISCS NOTE: Although this portable CD player can read CD-R and CD-RW discs, in addition to normal CDs, the playability of CD-R and CD-RW discs may be effected by the type of software that there is properly centered on the disc. The Power indicator will light. 2.) The display will show two flashing dashes "- -" in the track number display...
Owners Manual
Page 13
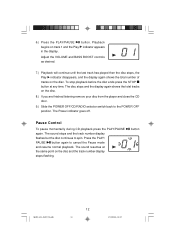
... disc stops and the display again shows the total tracks on the disc and the track number display stops flashing. The sound resumes at any time. Press the PLAY/ PAUSE button again to cancel the Pause mode and resume normal playback. Playback begins on the disc. The Power indicator goes off. 6.) Press the PLAY/PAUSE button. Adjust the VOLUME and BASS BOOST controls as desired. 7.) Playback will continue until the last track has played then the disc stops, the Play...
... disc stops and the display again shows the total tracks on the disc and the track number display stops flashing. The sound resumes at any time. Press the PLAY/ PAUSE button again to cancel the Pause mode and resume normal playback. Playback begins on the disc. The Power indicator goes off. 6.) Press the PLAY/PAUSE button. Adjust the VOLUME and BASS BOOST controls as desired. 7.) Playback will continue until the last track has played then the disc stops, the Play...
Owners Manual
Page 14
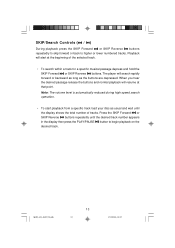
... the PLAY/PAUSE button to higher or lower numbered tracks. Press the SKIP Forward or SKIP Reverse buttons repeatedly until the display shows the total number of the selected track. • To search within a track for a specific musical passage depress and hold the SKIP Forward or SKIP Reverse buttons. When you hear the desired passage release the buttons and normal playback will start playback from a specific track load your disc...
... the PLAY/PAUSE button to higher or lower numbered tracks. Press the SKIP Forward or SKIP Reverse buttons repeatedly until the display shows the total number of the selected track. • To search within a track for a specific musical passage depress and hold the SKIP Forward or SKIP Reverse buttons. When you hear the desired passage release the buttons and normal playback will start playback from a specific track load your disc...
Owners Manual
Page 15
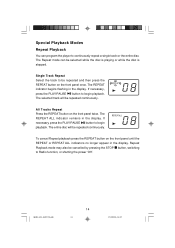
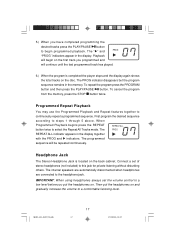
The Repeat mode can program the player to Radio function, or shutting the power 'Off'. The entire disc will be repeated continuously. If necessary, press the PLAY/PAUSE button to begin playback. If necessary, press the PLAY/PAUSE button to begin playback. The REPEAT indicator begins flashing in the display. The selected track will be repeated continuously. To cancel Repeat playback press the REPEAT button on the front panel until the REPEAT or REPEAT ALL indicators...
The Repeat mode can program the player to Radio function, or shutting the power 'Off'. The entire disc will be repeated continuously. If necessary, press the PLAY/PAUSE button to begin playback. If necessary, press the PLAY/PAUSE button to begin playback. The REPEAT indicator begins flashing in the display. The selected track will be repeated continuously. To cancel Repeat playback press the REPEAT button on the front panel until the REPEAT or REPEAT ALL indicators...
Owners Manual
Page 16
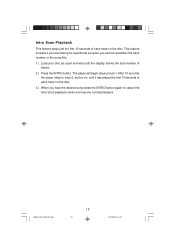
... to cancel the Intro Scan playback mode and resume normal playback. The player will begin playing track 1. Intro Scan Playback This feature plays just the first 10 seconds of tracks. 2.) Press the INTRO button. This feature is useful if you are looking for a particular song but you cannot remember the track number or the song title. 1.) Load your disc as usual and wait until...
... to cancel the Intro Scan playback mode and resume normal playback. The player will begin playing track 1. Intro Scan Playback This feature plays just the first 10 seconds of tracks. 2.) Press the INTRO button. This feature is useful if you are looking for a particular song but you cannot remember the track number or the song title. 1.) Load your disc as usual and wait until...
Owners Manual
Page 17
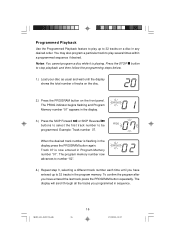
... until you programmed in the display press the PROGRAM button again. Example: Track number 07. When the desired track number is flashing in sequence. The display will scroll through all the tracks you have entered the last track press the PROGRAM button repeatedly. Notes: You cannot program a disc while it is now entered in any desired order. Track 07 is playing. Programmed Playback Use the Programmed Playback feature to play several times within a programmed sequence if...
... until you programmed in the display press the PROGRAM button again. Example: Track number 07. When the desired track number is flashing in sequence. The display will scroll through all the tracks you have entered the last track press the PROGRAM button repeatedly. Notes: You cannot program a disc while it is now entered in any desired order. Track 07 is playing. Programmed Playback Use the Programmed Playback feature to play several times within a programmed sequence if...
Owners Manual
Page 18
... press the PLAY/PAUSE button. The REPEAT ALL indicator appears in the display. Connect a set the volume control to a low level before you put the headphones on and gradually increase the volume to a comfortable listening level. SB250_251_ib071703.p65 17 17 17/7/2003, 14:27 When Programmed Playback begins press the REPEAT button twice to steps 1 through 5 above. IMPORTANT: When using headphones always set of stereo headphones...
... press the PLAY/PAUSE button. The REPEAT ALL indicator appears in the display. Connect a set the volume control to a low level before you put the headphones on and gradually increase the volume to a comfortable listening level. SB250_251_ib071703.p65 17 17 17/7/2003, 14:27 When Programmed Playback begins press the REPEAT button twice to steps 1 through 5 above. IMPORTANT: When using headphones always set of stereo headphones...
Owners Manual
Page 19
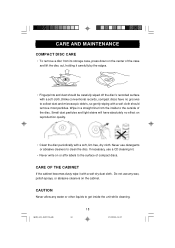
....Unlike conventional records, compact discs have absolutely no grooves to the outside of the disc. CAUTION Never allow any wax, polish sprays, or abrasive cleaners on reproduction quality. • Clean the disc periodically with a soft dry dust cloth. Wipe in a straight line from its ...If necessary, use detergents or abrasive cleaners to the surface of the case and lift the disc out, holding it with a soft, lint-free, dry cloth. CARE AND MAINTENANCE COMPACT DISC CARE • To remove a disc from the inside the unit while cleaning. Never use a CD cleaning kit. &#...
....Unlike conventional records, compact discs have absolutely no grooves to the outside of the disc. CAUTION Never allow any wax, polish sprays, or abrasive cleaners on reproduction quality. • Clean the disc periodically with a soft dry dust cloth. Wipe in a straight line from its ...If necessary, use detergents or abrasive cleaners to the surface of the case and lift the disc out, holding it with a soft, lint-free, dry cloth. CARE AND MAINTENANCE COMPACT DISC CARE • To remove a disc from the inside the unit while cleaning. Never use a CD cleaning kit. &#...
Owners Manual
Page 20
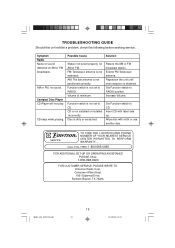
... RADIO position. Function switch is not positioned correctly. Solution Retune the AM or FM broadcast station. AM or FM, no sound. Compact Disc Player CD Player will not play. Wipe disc with Iabel side up. AM: The bar antenna is not set to CD. CD is not installed or installed incorrectly. SERVICE TO FIND THE LOCATION AND PHONE R NUMBER OF YOUR NEAREST SERVICE CENTER PERMITTED TO PERFORM WARRANTY... TROUBLESHOOTING GUIDE Should this unit exhibit a problem...
... RADIO position. Function switch is not positioned correctly. Solution Retune the AM or FM broadcast station. AM or FM, no sound. Compact Disc Player CD Player will not play. Wipe disc with Iabel side up. AM: The bar antenna is not set to CD. CD is not installed or installed incorrectly. SERVICE TO FIND THE LOCATION AND PHONE R NUMBER OF YOUR NEAREST SERVICE CENTER PERMITTED TO PERFORM WARRANTY... TROUBLESHOOTING GUIDE Should this unit exhibit a problem...
Owners Manual
Page 21
... your dated proof of purchase, we will provide repair service at an authorized Depot Repair Facility, or replace the product in the U.S. AU898M SB250_251_ib071703.p65 20 20 17/7/2003, 14:27 LIMITED WARRANTY Emerson Radio Corp. warrants manufacturing defects in original material, including original parts and workmanship, under normal use , rental, repairs by California residents) to Emerson Radio Corp. THIS WARRANTY GIVES YOU SPECIFIC...
... your dated proof of purchase, we will provide repair service at an authorized Depot Repair Facility, or replace the product in the U.S. AU898M SB250_251_ib071703.p65 20 20 17/7/2003, 14:27 LIMITED WARRANTY Emerson Radio Corp. warrants manufacturing defects in original material, including original parts and workmanship, under normal use , rental, repairs by California residents) to Emerson Radio Corp. THIS WARRANTY GIVES YOU SPECIFIC...