
Owners Manual
Page 2
... instructions for obtaining service at the end of workmanship. It was manufactured using the highest quality components and standards of this product's enclosure. SCOTT audio product. REFER SERVICING TO QUALIFIED SERVICE PERSONNEL. SCOTT audio product. Our engineers have included many useful and convenient features in the space provided. This product was tested by H.H. If, after reading this product, please refer to the manual. 1 Serial Number: CLASS 1 LASER PRODUCT...
... instructions for obtaining service at the end of workmanship. It was manufactured using the highest quality components and standards of this product's enclosure. SCOTT audio product. REFER SERVICING TO QUALIFIED SERVICE PERSONNEL. SCOTT audio product. Our engineers have included many useful and convenient features in the space provided. This product was tested by H.H. If, after reading this product, please refer to the manual. 1 Serial Number: CLASS 1 LASER PRODUCT...
Owners Manual
Page 3
... between the equipment and receiver. IMPORTANT NOTES Avoid installing this equipment does cause harmful interference to radio or television reception, which the receiver is subject to the following measures: Reorient or relocate the receiving antenna. This equipment generates, uses, and can be sure to first disconnect the power cord and remove cords connected to other stereo equipment that the connecting cords and power cord are designed to...
... between the equipment and receiver. IMPORTANT NOTES Avoid installing this equipment does cause harmful interference to radio or television reception, which the receiver is subject to the following measures: Reorient or relocate the receiving antenna. This equipment generates, uses, and can be sure to first disconnect the power cord and remove cords connected to other stereo equipment that the connecting cords and power cord are designed to...
Owners Manual
Page 4
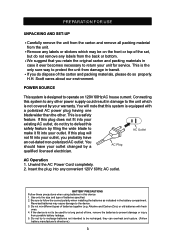
... other . POWER SOURCE This system is a safety feature. Connecting this plug will note that you retain the original carton and packing materials in case it fit into your unit for a long period of time, remove the batteries to follow the correct polarity when installing the batteries as indicated in this safety feature by filing the wide blade to make it ever...
... other . POWER SOURCE This system is a safety feature. Connecting this plug will note that you retain the original carton and packing materials in case it fit into your unit for a long period of time, remove the batteries to follow the correct polarity when installing the batteries as indicated in this safety feature by filing the wide blade to make it ever...
Owners Manual
Page 5
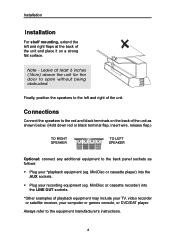
..., video recorder or satellite receiver, your computer or games console, or DVD/DAT player. Leave at the back of the unit. Always refer to the back panel sockets as shown below. (Hold down red or black terminal flap, insert wire, release flap.) TO RIGHT SPEAKER TO LEFT SPEAKER Optional: connect any additional equipment to the equipment manufacturer's instructions. 4 Finally, position the speakers...
..., video recorder or satellite receiver, your computer or games console, or DVD/DAT player. Leave at the back of the unit. Always refer to the back panel sockets as shown below. (Hold down red or black terminal flap, insert wire, release flap.) TO RIGHT SPEAKER TO LEFT SPEAKER Optional: connect any additional equipment to the equipment manufacturer's instructions. 4 Finally, position the speakers...
Owners Manual
Page 6
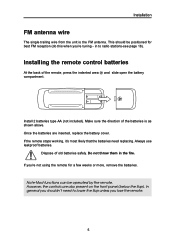
Installing the remote control batteries At the back of old batteries safely. However, the controls are inserted, replace the battery cover. If the remote stops working, it's most likely that the batteries need to radio stations-see page 18). If you're not using the remote for best FM reception (do this when you're tuning - Dispose of the remote, press the indented area and slide open the battery compartment. Note...
Installing the remote control batteries At the back of old batteries safely. However, the controls are inserted, replace the battery cover. If the remote stops working, it's most likely that the batteries need to radio stations-see page 18). If you're not using the remote for best FM reception (do this when you're tuning - Dispose of the remote, press the indented area and slide open the battery compartment. Note...

Owners Manual
Page 7
... the CD door. You may clean the main unit and speakers' cabinets periodically using a slightly dampened cloth. 6 Switch the unit on the outside of the moving parts. Cleaning & Maintenance This unit is now ready to switch on Plug the unit into the AC outlet. do not use . On the front panel, the light above the POWER button will change to green. (To switch the...
... the CD door. You may clean the main unit and speakers' cabinets periodically using a slightly dampened cloth. 6 Switch the unit on the outside of the moving parts. Cleaning & Maintenance This unit is now ready to switch on Plug the unit into the AC outlet. do not use . On the front panel, the light above the POWER button will change to green. (To switch the...
Owners Manual
Page 9
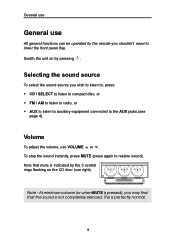
... 4). Note - Selecting the sound source To select the sound source you may find that mute is pressed), you wish to listen to, press: CD / SELECT to listen to compact disc, or FM / AM to listen to radio, or AUX to listen to auxiliary equipment connected to the AUX jacks.(see right). Volume To adjust the volume, use All general functions can be operated by the remote-you shouldn't need...
... 4). Note - Selecting the sound source To select the sound source you may find that mute is pressed), you wish to listen to, press: CD / SELECT to listen to compact disc, or FM / AM to listen to radio, or AUX to listen to auxiliary equipment connected to the AUX jacks.(see right). Volume To adjust the volume, use All general functions can be operated by the remote-you shouldn't need...
Owners Manual
Page 10
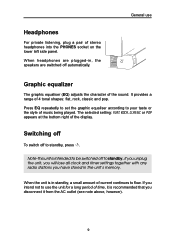
... bottom right of music being played. If you have stored in , the speakers are switched off to standby. Note-This unit is recommended that you disconnect it is intended to be switched off automatically. When headphones are plugged-in the unit's memory. If you unplug the unit, you will lose all clock and timer settings together with any radio stations you intend...
... bottom right of music being played. If you have stored in , the speakers are switched off to standby. Note-This unit is recommended that you disconnect it is intended to be switched off automatically. When headphones are plugged-in the unit's memory. If you unplug the unit, you will lose all clock and timer settings together with any radio stations you intend...
Owners Manual
Page 12
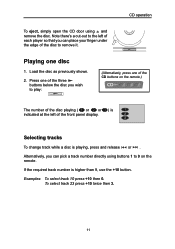
..., you can pick a track number directly using and remove the disc. To select track 23 press +10 twice then 3. 11 Selecting tracks To change track while a disc is higher than 9, use the +10 button. CD operation To eject, simply open the CD door using buttons 1 to 9 on the remote.) The number of the disc playing ( 1 or 2 or 3 ) is indicated at the left of each player so that you can place...
..., you can pick a track number directly using and remove the disc. To select track 23 press +10 twice then 3. 11 Selecting tracks To change track while a disc is higher than 9, use the +10 button. CD operation To eject, simply open the CD door using buttons 1 to 9 on the remote.) The number of the disc playing ( 1 or 2 or 3 ) is indicated at the left of each player so that you can place...
Owners Manual
Page 14
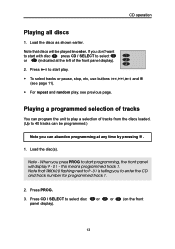
... panel display). 13 this means programmed track 1. Note that discs will display p - 0 1 - Press CD / SELECT to start programming, the front panel will be programmed.) Note you to 40 tracks can be played in order. Note that TRACK 0 0 flashing next to select 2 or 3 (indicated at any time by pressing . 1. To select tracks or pause, stop, etc, use buttons , , and (see previous page. Note - Press PROG. 3. CD operation Playing all discs 1. Playing a programmed...
... panel display). 13 this means programmed track 1. Note that discs will display p - 0 1 - Press CD / SELECT to start programming, the front panel will be programmed.) Note you to 40 tracks can be played in order. Note that TRACK 0 0 flashing next to select 2 or 3 (indicated at any time by pressing . 1. To select tracks or pause, stop, etc, use buttons , , and (see previous page. Note - Press PROG. 3. CD operation Playing all discs 1. Playing a programmed...
Owners Manual
Page 16
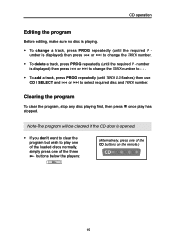
CD operation Editing the program Before editing, make sure no disc is opened. To delete a track, press PROG repeatedly (until TRACK 0 0 flashes) then use CD / SELECT and or to play has stopped. To add a track, press PROG repeatedly (until the required P - If you don't want to clear the program but wish to select required disc and TRACK number. number is displayed) then press or to change the TRACK...
CD operation Editing the program Before editing, make sure no disc is opened. To delete a track, press PROG repeatedly (until TRACK 0 0 flashes) then use CD / SELECT and or to play has stopped. To add a track, press PROG repeatedly (until the required P - If you don't want to clear the program but wish to select required disc and TRACK number. number is displayed) then press or to change the TRACK...
Owners Manual
Page 17
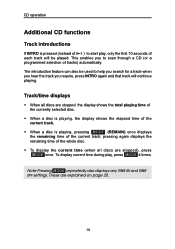
... display current time during play , only the first 10 seconds of each track will continue playing. Track/time displays When all discs are stopped), press MODE once. Note-Pressing MODE repeatedly also displays any TIMER ON and TIMER OFF settings. To display the current time (when all discs are explained on page 20. 16 CD operation Additional CD functions Track introductions If INTRO is pressed (instead of ) to start play , press MODE 4 times...
... display current time during play , only the first 10 seconds of each track will continue playing. Track/time displays When all discs are stopped), press MODE once. Note-Pressing MODE repeatedly also displays any TIMER ON and TIMER OFF settings. To display the current time (when all discs are explained on page 20. 16 CD operation Additional CD functions Track introductions If INTRO is pressed (instead of ) to start play , press MODE 4 times...

Owners Manual
Page 18
Instant play If you are listening to radio or auxiliary input, you can instantly play a disc simply by pressing one of the three buttons below the players: CD operation (Alternatively, press one of the CD buttons on the remote.) 17
Instant play If you are listening to radio or auxiliary input, you can instantly play a disc simply by pressing one of the three buttons below the players: CD operation (Alternatively, press one of the CD buttons on the remote.) 17
Owners Manual
Page 19
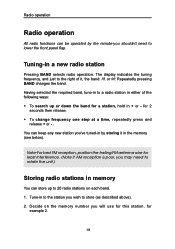
... a time, repeatedly press and release + or - . Having selected the required band, tune-in to lower the front panel flap. You can be operated by storing it , the band: FM, or AM. Note-For best FM reception, position the trailing FM antenna wire for example 2. 18 Tuning-in a new radio station Pressing BAND selects radio operation. Repeatedly pressing BAND changes the band. for a station, hold...
... a time, repeatedly press and release + or - . Having selected the required band, tune-in to lower the front panel flap. You can be operated by storing it , the band: FM, or AM. Note-For best FM reception, position the trailing FM antenna wire for example 2. 18 Tuning-in a new radio station Pressing BAND selects radio operation. Repeatedly pressing BAND changes the band. for a station, hold...
Owners Manual
Page 20
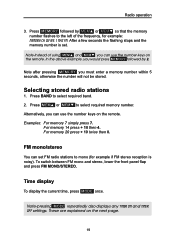
... select required band. 2. Selecting stored radio stations 1. Examples: For memory 7 simply press 7. Press BAND to select required memory number. Press MEMORY followed by 2. Time display To display the current time, press MODE once. For memory 20 press + 10 twice then 0. To switch between FM mono and stereo, lower the front panel flap and press FM MONO/STEREO. Radio operation 3. For memory 14 press + 10...
... select required band. 2. Selecting stored radio stations 1. Examples: For memory 7 simply press 7. Press BAND to select required memory number. Press MEMORY followed by 2. Time display To display the current time, press MODE once. For memory 20 press + 10 twice then 0. To switch between FM mono and stereo, lower the front panel flap and press FM MONO/STEREO. Radio operation 3. For memory 14 press + 10...
Owners Manual
Page 21
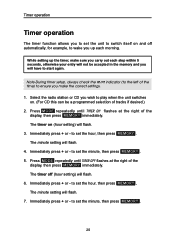
... setting will flash. 7. Immediately press + or - Select the radio station or CD you wish to ensure you make sure you carry out each morning. Timer operation Timer operation The timer function allows you to set the unit to switch itself on and off (hour setting) will flash. 6. Immediately press + or - The timer on (hour setting) will not be a programmed selection of the time) to play when the unit switches on. (For CD...
... setting will flash. 7. Immediately press + or - Select the radio station or CD you wish to ensure you make sure you carry out each morning. Timer operation Timer operation The timer function allows you to set the unit to switch itself on and off (hour setting) will flash. 6. Immediately press + or - The timer on (hour setting) will not be a programmed selection of the time) to play when the unit switches on. (For CD...
Owners Manual
Page 22
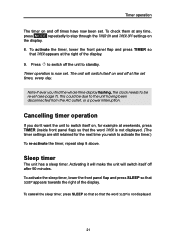
... a power interruption. Timer operation The timer on and off times have now been set . Cancelling timer operation If you find the whole time display flashing, the clock needs to be due to switch itself on the display. 8. To activate the timer, lower the front panel flap and press TIMER so that the word TIMER is not displayed. 21 Timer operation is now set . Sleep timer The unit has a sleep timer. Activating it will make the unit will switch...
... a power interruption. Timer operation The timer on and off times have now been set . Cancelling timer operation If you find the whole time display flashing, the clock needs to be due to switch itself on the display. 8. To activate the timer, lower the front panel flap and press TIMER so that the word TIMER is not displayed. 21 Timer operation is now set . Sleep timer The unit has a sleep timer. Activating it will make the unit will switch...
Owners Manual
Page 23
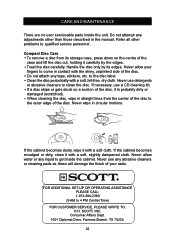
... fingers to clean the disc. Never use a CD cleaning kit. When cleaning the disc, wipe in the manual. Do not attach any abrasive cleaners or cleaning pads as these will damage the finish of the disc. Never allow water or any adjustments other problems to get inside the unit. CARE AND MAINTENANCE There are no user serviceable parts inside the cabinet...
... fingers to clean the disc. Never use a CD cleaning kit. When cleaning the disc, wipe in the manual. Do not attach any abrasive cleaners or cleaning pads as these will damage the finish of the disc. Never allow water or any adjustments other problems to get inside the unit. CARE AND MAINTENANCE There are no user serviceable parts inside the cabinet...
Owners Manual
Page 25
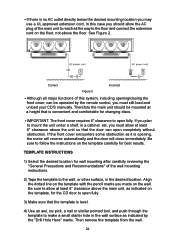
... wall mounting instructions. 2) Tape the template to the wall, or other surface, in the desired location. If there is no AC outlet directly below the desired mounting location you plan to mount the unit under a shelf, in a cabinet. Align the dotted line on the template, for changing discs. The front cover requires 6" clearance to open fully. 3) Make sure...
... wall mounting instructions. 2) Tape the template to the wall, or other surface, in the desired location. If there is no AC outlet directly below the desired mounting location you plan to mount the unit under a shelf, in a cabinet. Align the dotted line on the template, for changing discs. The front cover requires 6" clearance to open fully. 3) Make sure...

Owners Manual
Page 28
..., you make your warranty? UNDER NO CIRCUMSTANCES WILL WE BE LIABLE FOR ANY LOSS, DIRECT, INDIRECT, INCIDENTAL, SPECIAL, OR CONSEQUENTIAL DAMAGE ARISING OUT OF OR IN CONNECTION WITH THE USE OF THIS PRODUCT. Ordinary adjustments which the serial number has been defaced, modified or removed. Signal reception problems caused by external antenna or cable systems. Products purchased, used, serviced or damaged outside of a Depot Repair Facility by...
..., you make your warranty? UNDER NO CIRCUMSTANCES WILL WE BE LIABLE FOR ANY LOSS, DIRECT, INDIRECT, INCIDENTAL, SPECIAL, OR CONSEQUENTIAL DAMAGE ARISING OUT OF OR IN CONNECTION WITH THE USE OF THIS PRODUCT. Ordinary adjustments which the serial number has been defaced, modified or removed. Signal reception problems caused by external antenna or cable systems. Products purchased, used, serviced or damaged outside of a Depot Repair Facility by...

