
Operation Manual
Page 6
... 1-1 Selecting the Place 1-2 Attaching the Paper Roll Near-End Detector (Option 1-2 Connecting the Printer to the Computer 1-4 TM-U200B 1-4 TM-U200PB 1-5 Connecting the Printer to the Drawer 1-6 Grounding the Printer 1-8 Connecting the Power Supply 1-9 Installing the Ribbon Cassette 1-11 Installing the Paper Roll 1-13 Running the Self Test 1-17 Setting the DIP Switches 1-18 Using the Power...
... 1-1 Selecting the Place 1-2 Attaching the Paper Roll Near-End Detector (Option 1-2 Connecting the Printer to the Computer 1-4 TM-U200B 1-4 TM-U200PB 1-5 Connecting the Printer to the Drawer 1-6 Grounding the Printer 1-8 Connecting the Power Supply 1-9 Installing the Ribbon Cassette 1-11 Installing the Paper Roll 1-13 Running the Self Test 1-17 Setting the DIP Switches 1-18 Using the Power...

Operation Manual
Page 9
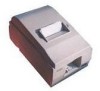
Note: See the Note on the screws. Chapter 1 Setting Up the Printer Unpacking When you unpack the TM-U200 Series Type B printer, make sure you have these items. Printer Ribbon cassette Power supply (The power supply may not be included with the printer with the serial interface.) Hexagonal lock screw (2 pcs) (only for the printer with the serial interface and only included when the power supply is also included) Roll paper Power switch cover If any item is missing or damaged, please contact your dealer for information on page 1-5 for assistance. Setting Up the Printer 1-1
Note: See the Note on the screws. Chapter 1 Setting Up the Printer Unpacking When you unpack the TM-U200 Series Type B printer, make sure you have these items. Printer Ribbon cassette Power supply (The power supply may not be included with the printer with the serial interface.) Hexagonal lock screw (2 pcs) (only for the printer with the serial interface and only included when the power supply is also included) Roll paper Power switch cover If any item is missing or damaged, please contact your dealer for information on page 1-5 for assistance. Setting Up the Printer 1-1

Operation Manual
Page 19
... pulling the tab up any slack in the ribbon. 3. Be sure the printer is not receiving data when you . 4. Setting Up the Printer 1-11 otherwise the ribbon cassette may be damaged. Note: Use the EPSON ERC-38 ribbon cassette for your printer. 1. Installing the Ribbon Cassette CAUTION: Never turn the ribbon cassette's feed knob in the opposite direction of...
... pulling the tab up any slack in the ribbon. 3. Be sure the printer is not receiving data when you . 4. Setting Up the Printer 1-11 otherwise the ribbon cassette may be damaged. Note: Use the EPSON ERC-38 ribbon cassette for your printer. 1. Installing the Ribbon Cassette CAUTION: Never turn the ribbon cassette's feed knob in the opposite direction of...

Operation Manual
Page 20
Close the auto cutter by using the tab. 7. Turn the ribbon cassette's knob 5 or 6 times in the direction of the arrow again to take up any slack in the ribbon. 6. Close the printer cover. 1-12 Setting Up the Printer Note: Make sure the ribbon is installed between the print head and the platen without wrinkles or creases. 5.
Close the auto cutter by using the tab. 7. Turn the ribbon cassette's knob 5 or 6 times in the direction of the arrow again to take up any slack in the ribbon. 6. Close the printer cover. 1-12 Setting Up the Printer Note: Make sure the ribbon is installed between the print head and the platen without wrinkles or creases. 5.

Operation Manual
Page 25
...press the PAPER FEED button. The printer prints the current printer settings and then the PAPER OUT light blinks to indicate that you want to install the ribbon cassette and the paper roll before you turn on the printer with the power switch. 2. After the printer completes a certain number of the... test, in which the printer prints a pattern using the built-in character set. 4. Setting...
...press the PAPER FEED button. The printer prints the current printer settings and then the PAPER OUT light blinks to indicate that you want to install the ribbon cassette and the paper roll before you turn on the printer with the power switch. 2. After the printer completes a certain number of the... test, in which the printer prints a pattern using the built-in character set. 4. Setting...

Operation Manual
Page 35
...are the same as the computer's. Make sure that the printer works properly. See the instructions in Chapter 1. 3-2 Troubleshooting The ribbon may be worn out. If the self test works properly, check the following: 1. If the printer still does not print, contact your dealer or a qualified ...a qualified service person. Replace the ribbon cassette as described in Chapter 1 to run the self test to run the self test. The ribbon may be worn out. Replace the ribbon cassette as described in Chapter 1. Try to check that the printer's DIP switch settings for both ends...
...are the same as the computer's. Make sure that the printer works properly. See the instructions in Chapter 1. 3-2 Troubleshooting The ribbon may be worn out. If the self test works properly, check the following: 1. If the printer still does not print, contact your dealer or a qualified ...a qualified service person. Replace the ribbon cassette as described in Chapter 1 to run the self test to run the self test. The ribbon may be worn out. Replace the ribbon cassette as described in Chapter 1. Try to check that the printer's DIP switch settings for both ends...

Operation Manual
Page 37
5. Remove the ribbon cassette. 3-4 Troubleshooting Remove the jammed paper by pulling it in the direction of paper feeding. 6. If paper still remains in the opposite direction of paper feeding. Note: Do not pull the jammed paper in the printer, follow the steps below. 7.
5. Remove the ribbon cassette. 3-4 Troubleshooting Remove the jammed paper by pulling it in the direction of paper feeding. 6. If paper still remains in the opposite direction of paper feeding. Note: Do not pull the jammed paper in the printer, follow the steps below. 7.

Operation Manual
Page 39
Note: Do not pull the jammed paper in the direction opposite of paper feeding. 11. Replace the ribbon cassette and close the auto cutter 3-6 Troubleshooting Lift up the print head cover. 10. Replace the print head cover and secure it with the screw. 12. 9. Remove all the jammed paper.
Note: Do not pull the jammed paper in the direction opposite of paper feeding. 11. Replace the ribbon cassette and close the auto cutter 3-6 Troubleshooting Lift up the print head cover. 10. Replace the print head cover and secure it with the screw. 12. 9. Remove all the jammed paper.

Operation Manual
Page 47
...lines (excluding the print head) Life: 7,500,000 lines 800,000 automatic cut (The printer is defined to have reached the end of its life when it cannot function properly because of... out of the main parts (motors, solenoids, frames, shafts) 100 million characters (when printing in average 2 dots/wire per character) Environmental Conditions Temperature Operating: Storage: Humidity Operating: Storage: 0 to 50 ° C (32...-10 to 50 ° C (14 to 122° F) (except for paper, and a ribbon) 10 to 90% RH 10 to 122 ° F) (when the temperature is 30 ° C or more, there is...
...lines (excluding the print head) Life: 7,500,000 lines 800,000 automatic cut (The printer is defined to have reached the end of its life when it cannot function properly because of... out of the main parts (motors, solenoids, frames, shafts) 100 million characters (when printing in average 2 dots/wire per character) Environmental Conditions Temperature Operating: Storage: Humidity Operating: Storage: 0 to 50 ° C (32...-10 to 50 ° C (14 to 122° F) (except for paper, and a ribbon) 10 to 90% RH 10 to 122 ° F) (when the temperature is 30 ° C or more, there is...


