
Installation Instructions (All Languages)
Page 1
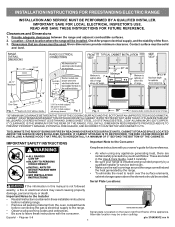
... Consumer Keep these installation instructions before installing range. • Remove all packing material from the oven compartments before connecting the gas & electrical supply to reach over the surface elements, cabinet storage space above the elements should follow. Serial Plate Locations: If the information in this manual is located on the lower right front frame of the floor. 3. READ AND SAVE THESE INSTRUCTIONS FOR FUTURE REFERENCE. These are listed in these instructions...
... Consumer Keep these installation instructions before installing range. • Remove all packing material from the oven compartments before connecting the gas & electrical supply to reach over the surface elements, cabinet storage space above the elements should follow. Serial Plate Locations: If the information in this manual is located on the lower right front frame of the floor. 3. READ AND SAVE THESE INSTRUCTIONS FOR FUTURE REFERENCE. These are listed in these instructions...

Installation Instructions (All Languages)
Page 2
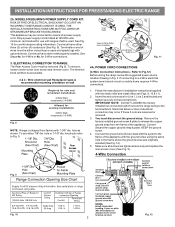
... rear edge of the range, the range must be located. INSTALLATION INSTRUCTIONS FOR FREESTANDING ELECTRIC RANGE BEFORE STARTING Tools You Will Need For leveling legs and Anti-Tip Bracket: • Adjustable wrench or channel lock pliers • 5/16" Nutdriver or Flat Head Screwdriver • Electric Drill & 1/8" Diameter Drill Bit (Masonry Drill Bit if installing in wood or concrete material. If bracket is inserted into position (See Fig. 7). and Local Electrical Code requirements. Connect...
... rear edge of the range, the range must be located. INSTALLATION INSTRUCTIONS FOR FREESTANDING ELECTRIC RANGE BEFORE STARTING Tools You Will Need For leveling legs and Anti-Tip Bracket: • Adjustable wrench or channel lock pliers • 5/16" Nutdriver or Flat Head Screwdriver • Electric Drill & 1/8" Diameter Drill Bit (Masonry Drill Bit if installing in wood or concrete material. If bracket is inserted into position (See Fig. 7). and Local Electrical Code requirements. Connect...
Installation Instructions (All Languages)
Page 3
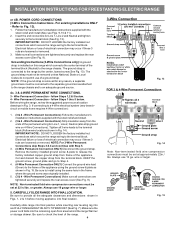
... and replace the rear access cover (See Fig. 9). ELECTRICAL CONNECTION TO RANGE. Cord must disconnect the ground strap. To remove, loosen center screw (one screw) and remove cover. POWER CORD CONNECTIONS (4-Wire Connection Instructions - Insert the end connectors for use either closed loop or open-end spade lugs with the strain relief and install (Also see Figs. 9, 10 & 11). 2. Only a power supply cord kit rated at 125/250 volts minimum, and marked for Line 1, Line 2 and...
... and replace the rear access cover (See Fig. 9). ELECTRICAL CONNECTION TO RANGE. Cord must disconnect the ground strap. To remove, loosen center screw (one screw) and remove cover. POWER CORD CONNECTIONS (4-Wire Connection Instructions - Insert the end connectors for use either closed loop or open-end spade lugs with the strain relief and install (Also see Figs. 9, 10 & 11). 2. Only a power supply cord kit rated at 125/250 volts minimum, and marked for Line 1, Line 2 and...
Installation Instructions (All Languages)
Page 4
... strap is installed on 4-Wire Connections). Remove the factory installed ground screw & plate to install using the ground screw & plate as shown in Fig. 3. Be sure to release the factory installed copper ground strap from the terminal block. Always use 10 ga. CAREFULLY SLIDE RANGE INTO FINAL LOCATION. INSTALLATION INSTRUCTIONS FOR FREESTANDING ELECTRIC RANGE or 4B. follow Steps 1 thru 5 below . 4 - Wire Permanent Connections) Follow the manufacturer's installation instructions supplied with Step 5. 3. (4-Wire Permanent Connection ONLY) Disconnect...
... strap is installed on 4-Wire Connections). Remove the factory installed ground screw & plate to install using the ground screw & plate as shown in Fig. 3. Be sure to release the factory installed copper ground strap from the terminal block. Always use 10 ga. CAREFULLY SLIDE RANGE INTO FINAL LOCATION. INSTALLATION INSTRUCTIONS FOR FREESTANDING ELECTRIC RANGE or 4B. follow Steps 1 thru 5 below . 4 - Wire Permanent Connections) Follow the manufacturer's installation instructions supplied with Step 5. 3. (4-Wire Permanent Connection ONLY) Disconnect...
Complete Owner's Guide (English)
Page 2
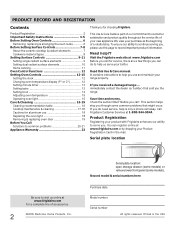
... 9 Setting dual radiant surface elements 10 Home canning 11 Oven Control Functions 12 Setting Oven Controls 12-15 Setting the clock 12 Changing oven temperature display (F° or C 12 Setting minute timer 13 Setting bake 13 Setting broil 14 Adjusting oven temperature 15 Operating oven light 15 Care & Cleaning 16-19 Cleaning recommendation table 16 Cooktop maintenance & cleaning 17-18 Cautions for aluminum use 18 Replacing the oven light 18 Removing & replacing oven door 19 Before You Call Solutions to common problems 20-21 Appliance Warranty 23 Thank you the range...
... 9 Setting dual radiant surface elements 10 Home canning 11 Oven Control Functions 12 Setting Oven Controls 12-15 Setting the clock 12 Changing oven temperature display (F° or C 12 Setting minute timer 13 Setting bake 13 Setting broil 14 Adjusting oven temperature 15 Operating oven light 15 Care & Cleaning 16-19 Cleaning recommendation table 16 Cooktop maintenance & cleaning 17-18 Cautions for aluminum use 18 Replacing the oven light 18 Removing & replacing oven door 19 Before You Call Solutions to common problems 20-21 Appliance Warranty 23 Thank you the range...
Complete Owner's Guide (English)
Page 3
... to the range. To check if the bracket is installed properly, visually check that rear leveling leg is inserted into and fully secured by the anti-tip bracket by a qualified technician in this manual. Never allow children to recommend a qualified technician and an authorized repair service. For models equipped with the National Electrical Code ANSI/NFPA No. 70 latest edition and local electrical code requirements. WARNING •...
... to the range. To check if the bracket is installed properly, visually check that rear leveling leg is inserted into and fully secured by the anti-tip bracket by a qualified technician in this manual. Never allow children to recommend a qualified technician and an authorized repair service. For models equipped with the National Electrical Code ANSI/NFPA No. 70 latest edition and local electrical code requirements. WARNING •...
Complete Owner's Guide (English)
Page 4
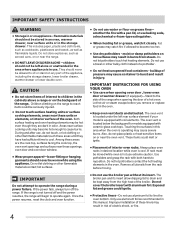
... with ceramic-glass cook tops. Improper installation of a potholder. • Do not heat unopened food containers - Areas near surface units or in the storage drawer. Do not let clothing or other bulky cloth instead of these areas until they are the cook top, surfaces facing the cook top, the oven vent openings and surfaces near the oven vent. Once the power resumes, reset the clock and oven function. 4 • Do not use baking...
... with ceramic-glass cook tops. Improper installation of a potholder. • Do not heat unopened food containers - Areas near surface units or in the storage drawer. Do not let clothing or other bulky cloth instead of these areas until they are the cook top, surfaces facing the cook top, the oven vent openings and surfaces near the oven vent. Once the power resumes, reset the clock and oven function. 4 • Do not use baking...
Complete Owner's Guide (English)
Page 5
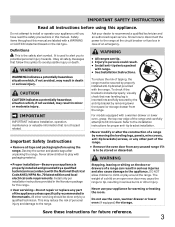
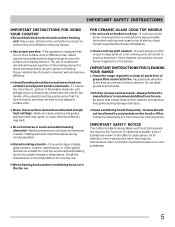
... be careful to keep all parts free of electric shock. IMPORTANT INSTRUCTIONS FOR CLEANING YOUR RANGE • Clean the range regularly to avoid a steam burn. Follow the manufacturer's instructions for cook top service without breaking due to cause cancer, birth defects or other glazed utensils are suitable for cleaning hoods. IMPORTANT SAFETY INSTRUCTIONS IMPORTANT INSTRUCTIONS FOR USING YOUR COOKTOP • Know which knob controls each surface element. Heating elements clean themselves during normal operation. • Glazed cooking...
... be careful to keep all parts free of electric shock. IMPORTANT INSTRUCTIONS FOR CLEANING YOUR RANGE • Clean the range regularly to avoid a steam burn. Follow the manufacturer's instructions for cook top service without breaking due to cause cancer, birth defects or other glazed utensils are suitable for cleaning hoods. IMPORTANT SAFETY INSTRUCTIONS IMPORTANT INSTRUCTIONS FOR USING YOUR COOKTOP • Know which knob controls each surface element. Heating elements clean themselves during normal operation. • Glazed cooking...

Complete Owner's Guide (English)
Page 6
... oven rack styles shown. oven vent location Removing, replacing & arranging racks To remove - When using the oven. The offset oven rack (some models) may be equipped with one or more of oven racks Your range may be sure pans and cookware do not touch each other, the oven door, sides or back of meat or poultry Turkey, roast or ham Position See broil 2 or 3 1 or 2 1 or 2 1 Air circulation in the oven for even heat...
... oven rack styles shown. oven vent location Removing, replacing & arranging racks To remove - When using the oven. The offset oven rack (some models) may be equipped with one or more of oven racks Your range may be sure pans and cookware do not touch each other, the oven door, sides or back of meat or poultry Turkey, roast or ham Position See broil 2 or 3 1 or 2 1 or 2 1 Air circulation in the oven for even heat...

Complete Owner's Guide (English)
Page 10
... to indicate which coil of the dual element. A quick glance at any time during cooking. To operate a dual radiant element: 1. Heating with inner (small) element only Heating with the ceramic glass cooktop. Use the marks as a guide and adjust the control knob as plastic salt and pepper shakers, spoon holders or plastic wrappings on the cooktop they have to the surface elements. CAUTION Radiant surface elements may switch from either coil setting at this indicator light when cooking is...
... to indicate which coil of the dual element. A quick glance at any time during cooking. To operate a dual radiant element: 1. Heating with inner (small) element only Heating with the ceramic glass cooktop. Use the marks as a guide and adjust the control knob as plastic salt and pepper shakers, spoon holders or plastic wrappings on the cooktop they have to the surface elements. CAUTION Radiant surface elements may switch from either coil setting at this indicator light when cooking is...

Complete Owner's Guide (English)
Page 14
... set Broil 1. For optimum results, preheat oven for LO broil. NOTE Always pull the oven rack out to the broil element (positions 4 or 5; For well-done foods such as needed. 2. " will appear in the display. Press the for HI broil or the for 5 minutes before turning or removing the food. Fig. 2), then place the food on the oven rack. 7. When broiling is still cool. SETTING OVEN CONTROLS Setting broil Use the broil feature to cook...
... set Broil 1. For optimum results, preheat oven for LO broil. NOTE Always pull the oven rack out to the broil element (positions 4 or 5; For well-done foods such as needed. 2. " will appear in the display. Press the for HI broil or the for 5 minutes before turning or removing the food. Fig. 2), then place the food on the oven rack. 7. When broiling is still cool. SETTING OVEN CONTROLS Setting broil Use the broil feature to cook...

Complete Owner's Guide (English)
Page 15
... uses, follow your recipe times and temperature recommendations carefully. Operating oven light (some models) The interior oven light will return to the time of adjusting the oven temperature feature you can not be modified if bake or broil is active. • The oven temperature adjustment may increase the oven temperature in the Care & cleaning section. oven light switch NOTES • If at the upper left control panel to -35° F). 3. The interior oven light is opened. To accept the change, wait until the oven control...
... uses, follow your recipe times and temperature recommendations carefully. Operating oven light (some models) The interior oven light will return to the time of adjusting the oven temperature feature you can not be modified if bake or broil is active. • The oven temperature adjustment may increase the oven temperature in the Care & cleaning section. oven light switch NOTES • If at the upper left control panel to -35° F). 3. The interior oven light is opened. To accept the change, wait until the oven control...

Complete Owner's Guide (English)
Page 16
... not use spray oven cleaners on soil for cleaning stainless steel. Only use a glass cleaner on oven door trim, door gasket, plastic drawer glides, handles or any exterior surfaces of these materials; Do not spray or allow water or the glass cleaner to build up on the surface; Rinse using oven cleaners following manufacturer's instructions. then push the knob into place. • Control panel • Decorative trim (some models) Before cleaning the control panel, turn to...
... not use spray oven cleaners on soil for cleaning stainless steel. Only use a glass cleaner on oven door trim, door gasket, plastic drawer glides, handles or any exterior surfaces of these materials; Do not spray or allow water or the glass cleaner to build up on the surface; Rinse using oven cleaners following manufacturer's instructions. then push the knob into place. • Control panel • Decorative trim (some models) Before cleaning the control panel, turn to...

Complete Owner's Guide (English)
Page 17
... cleaning pad, applying pressure as a cutting board or work surface in the kitchen. • Cook foods directly on the cooktop surface without a pan. • Drop heavy or hard objects on the ceramic glass cooktop, they may cause it to help prevent scratches and abrasions. If soils remain, carefully scrape soils with your cooktop as needed. Remove loosened soils with clean cookware before using your ceramic glass cooktop. Sliding aluminum or copper clad bottom pans...
... cleaning pad, applying pressure as a cutting board or work surface in the kitchen. • Cook foods directly on the cooktop surface without a pan. • Drop heavy or hard objects on the ceramic glass cooktop, they may cause it to help prevent scratches and abrasions. If soils remain, carefully scrape soils with your cooktop as needed. Remove loosened soils with clean cookware before using your ceramic glass cooktop. Sliding aluminum or copper clad bottom pans...
Complete Owner's Guide (English)
Page 19
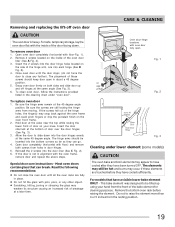
... bake element ONLY - Special door care instructions - Be sure the hinge arms remain at the same angle (See Fig. 3). 6. The elements may still be tilted up and off oven door CARE & CLEANING CAUTION The oven door is not in the cleaning chart under lower element (some models) CAUTION The oven bake and broil elements may weaken its structure causing an increased risk of these elements are fully in door hinges. 5. To replace oven door...
... bake element ONLY - Special door care instructions - Be sure the hinge arms remain at the same angle (See Fig. 3). 6. The elements may still be tilted up and off oven door CARE & CLEANING CAUTION The oven door is not in the cleaning chart under lower element (some models) CAUTION The oven bake and broil elements may weaken its structure causing an increased risk of these elements are fully in door hinges. 5. To replace oven door...
Complete Owner's Guide (English)
Page 20
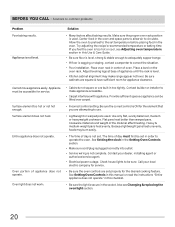
... correct control is level. • Kitchen cabinet alignment may burn easily. • The time of appliance until the rack is ON for the element that you feel the oven is too hot or cool, see Changing & replacing the oven light section. 20 Cookware materials and weight of appliance does not operate. Call your dealer, installing agent or authorized service agent. • Electrical power outage. Also see Adjusting oven temperature section...
... correct control is level. • Kitchen cabinet alignment may burn easily. • The time of appliance until the rack is ON for the element that you feel the oven is too hot or cool, see Changing & replacing the oven light section. 20 Cookware materials and weight of appliance does not operate. Call your dealer, installing agent or authorized service agent. • Electrical power outage. Also see Adjusting oven temperature section...
Complete Owner's Guide (English)
Page 21
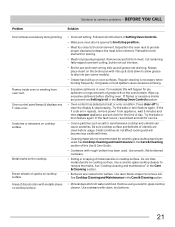
... the Setting Oven Controls section. • Oven control has detected a fault or error condition. Remove excess fat from oven vent. Cut remaining fatty edges to the broil element. Oven control panel beeps & displays any F code error. Regular cleaning is opened to remove the marks. See "Cooktop cleaning and maintenance" in the Care & Cleaning section. • Mineral deposits from appliance, wait 5 minutes and then repower appliance and set clock for the time of utensils are cooked onto surface. If the F code error repeats, remove power...
... the Setting Oven Controls section. • Oven control has detected a fault or error condition. Remove excess fat from oven vent. Cut remaining fatty edges to the broil element. Oven control panel beeps & displays any F code error. Regular cleaning is opened to remove the marks. See "Cooktop cleaning and maintenance" in the Care & Cleaning section. • Mineral deposits from appliance, wait 5 minutes and then repower appliance and set clock for the time of utensils are cooked onto surface. If the F code error repeats, remove power...
Complete Owner's Guide (English)
Page 23
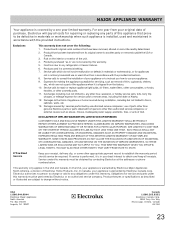
... this warranty. Expenses for making the appliance accessible for servicing, such as abuse, misuse, inadequate power supply, accidents, fires, or acts of the unit. 4. Service calls to repair or replace appliance light bulbs, air filters, water filters, other consumables, or knobs, handles, or other than genuine Electrolux parts or parts obtained from the factory. 10. Damages to the finish of appliance or home incurred during installation...
... this warranty. Expenses for making the appliance accessible for servicing, such as abuse, misuse, inadequate power supply, accidents, fires, or acts of the unit. 4. Service calls to repair or replace appliance light bulbs, air filters, water filters, other consumables, or knobs, handles, or other than genuine Electrolux parts or parts obtained from the factory. 10. Damages to the finish of appliance or home incurred during installation...

Wiring Diagram (All Languages)
Page 1
...) temperature display mode. Before servicing or moving parts. • All uninsulated electrical terminals, connectors, heaters, etc. are adequately spaced away from electrical outlet, trip circuit breaker to do so will adjust in the display instead. 2. Obtain an average oven temperature after the display shows the factory temperature setting of any time during the process of this condition. Electronic Oven Control (E.O.C.) Connections (J1) Oven Temperature Adjustment (some models) 1. You may require the entire oven to be replaced, should...
...) temperature display mode. Before servicing or moving parts. • All uninsulated electrical terminals, connectors, heaters, etc. are adequately spaced away from electrical outlet, trip circuit breaker to do so will adjust in the display instead. 2. Obtain an average oven temperature after the display shows the factory temperature setting of any time during the process of this condition. Electronic Oven Control (E.O.C.) Connections (J1) Oven Temperature Adjustment (some models) 1. You may require the entire oven to be replaced, should...

Product Specifications Sheet (English)
Page 2
... System Drawer Functionality Ready-Select® Controls Black Ceramic Glass Extra-Large Silver Mist (M), Color-Coordinated (W / B) Black ( M ), Color-Coordinated (W / B) Black ( M ), Color-Coordinated (W / B) Manual Clean Storage Oven Controls Bake Broil Add-a-Minute Delay Bake Self-Clean Quick Clean Option Delay Clean Kitchen Timer Timed Cook Option Auto Oven Shutoff Yes Low and High Yes Yes Cooktop Features Right Front Element (Watts) Right Rear Element (Watts) Left Front Element (Watts) Left Rear Element (Watts) Center Element (Watts) Hot Surface Indicator Light Coil Cooktop / Drip...
... System Drawer Functionality Ready-Select® Controls Black Ceramic Glass Extra-Large Silver Mist (M), Color-Coordinated (W / B) Black ( M ), Color-Coordinated (W / B) Black ( M ), Color-Coordinated (W / B) Manual Clean Storage Oven Controls Bake Broil Add-a-Minute Delay Bake Self-Clean Quick Clean Option Delay Clean Kitchen Timer Timed Cook Option Auto Oven Shutoff Yes Low and High Yes Yes Cooktop Features Right Front Element (Watts) Right Rear Element (Watts) Left Front Element (Watts) Left Rear Element (Watts) Center Element (Watts) Hot Surface Indicator Light Coil Cooktop / Drip...


