
Complete Owner's Guide (English)
Page 1
A TABLE OF CONTENTS Welcome & Congratulations 2 Self-Cleaning 14 Important Safety Instructions 3 Care & Cleaning 16 Features at a Glance 6 Before You Call 18 Before Setting Oven Controls 7 Major Appliance Warranty 20 Setting Oven Controls 8 www.frigidaire.com USA 1-800-944-9044 www.frigidaire.ca Canada 1-800-265-8352 All about the Use &Care of your Wall Oven 318205315 (October 2009) Rev.
A TABLE OF CONTENTS Welcome & Congratulations 2 Self-Cleaning 14 Important Safety Instructions 3 Care & Cleaning 16 Features at a Glance 6 Before You Call 18 Before Setting Oven Controls 7 Major Appliance Warranty 20 Setting Oven Controls 8 www.frigidaire.com USA 1-800-944-9044 www.frigidaire.ca Canada 1-800-265-8352 All about the Use &Care of your Wall Oven 318205315 (October 2009) Rev.

Complete Owner's Guide (English)
Page 2
...The PRODUCT REGISTRATION CARD should be practiced when installing, operating and maintaining any appliance. NOTE Please attach sales receipt here for future reference. At Electrolux Major Appliances, we are completely committed to providing you with the best service possible. ...Use & Care Manual contains general operating instructions for your model and serial numbers below for several models. Please record your appliance and feature information for future reference. All rights reserved Printed in completely, signed and returned to cover every possible condition...
...The PRODUCT REGISTRATION CARD should be practiced when installing, operating and maintaining any appliance. NOTE Please attach sales receipt here for future reference. At Electrolux Major Appliances, we are completely committed to providing you with the best service possible. ...Use & Care Manual contains general operating instructions for your model and serial numbers below for several models. Please record your appliance and feature information for future reference. All rights reserved Printed in completely, signed and returned to cover every possible condition...

Complete Owner's Guide (English)
Page 3
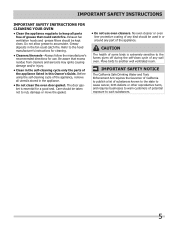
... future reference. CAUTION This symbol will help alert you to potential personal injury hazards. Destroy the carton and plastic bags after unpacking the appliance. latest edition in the United States, or CSA C22.1, Part 1 in case of time, make sure that may cause bodily injury ...be secured by cold temperatures. Do not remove the wiring label and other permanent part of personal injury and damage to play around the appliance. • Storage in the manuals. Do not remove model/serial number plate. • Proper Installation. Flammable materials may also cause damage...
... future reference. CAUTION This symbol will help alert you to potential personal injury hazards. Destroy the carton and plastic bags after unpacking the appliance. latest edition in the United States, or CSA C22.1, Part 1 in case of time, make sure that may cause bodily injury ...be secured by cold temperatures. Do not remove the wiring label and other permanent part of personal injury and damage to play around the appliance. • Storage in the manuals. Do not remove model/serial number plate. • Proper Installation. Flammable materials may also cause damage...

Complete Owner's Guide (English)
Page 4
... vented at the center trim under the control panel. Broiler pan and grid allow dripping fat to burst and result in the area where an appliance is hot, use . Doing so could melt or ignite. • Placement of Oven Racks. Children should never be left alone or unattended in injury... THE OVEN UNTIL THEY HAVE COOLED. IMPORTANT SAFETY INSTRUCTIONS FOR USING YOUR OVEN • Use Care When Opening an Oven Door-Stand to operate the appliance during a power failure. Also, do not touch, or let clothing or other flammable materials touch these openings, oven door and window. • Wear ...
... vented at the center trim under the control panel. Broiler pan and grid allow dripping fat to burst and result in the area where an appliance is hot, use . Doing so could melt or ignite. • Placement of Oven Racks. Children should never be left alone or unattended in injury... THE OVEN UNTIL THEY HAVE COOLED. IMPORTANT SAFETY INSTRUCTIONS FOR USING YOUR OVEN • Use Care When Opening an Oven Door-Stand to operate the appliance during a power failure. Also, do not touch, or let clothing or other flammable materials touch these openings, oven door and window. • Wear ...
Complete Owner's Guide (English)
Page 5
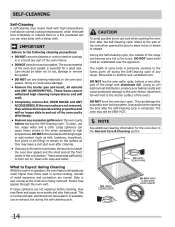
...8226; Do not use . The door gasket is extremely sensitive to the fumes given off during the self-clean cycle of any part of the appliance. Move birds to accumulate. Exhaust fan ventilation hoods and grease filters should be kept clean. Be aware that could catch fire. Before using the ...self-cleaning cycle of the appliance, remove all parts free of grease that excess residue from cleaners and aerosols may ignite causing damage and/or injury. • Clean in the ...
...8226; Do not use . The door gasket is extremely sensitive to the fumes given off during the self-clean cycle of any part of the appliance. Move birds to accumulate. Exhaust fan ventilation hoods and grease filters should be kept clean. Be aware that could catch fire. Before using the ...self-cleaning cycle of the appliance, remove all parts free of grease that excess residue from cleaners and aerosols may ignite causing damage and/or injury. • Clean in the ...

Complete Owner's Guide (English)
Page 6
Oven vent. 3. Large 1-piece oven door handle. 9. Full width oven door with kitchen timer. 2. FEATURES AT A GLANCE Your Electric Wall-Oven Features: 1. Broil element. 5. Self-clean lower oven interior. 11. Bottom trim. NOTE The features shown for your appliance may vary according to model type & color. 6 Self-clean oven interior. 7. Electronic oven control with window. 10. Self-clean door latch. 4. Oven interior light with removable cover. 6. Adjustable interior oven rack(s). 8.
Oven vent. 3. Large 1-piece oven door handle. 9. Full width oven door with kitchen timer. 2. FEATURES AT A GLANCE Your Electric Wall-Oven Features: 1. Broil element. 5. Self-clean lower oven interior. 11. Bottom trim. NOTE The features shown for your appliance may vary according to model type & color. 6 Self-clean oven interior. 7. Electronic oven control with window. 10. Self-clean door latch. 4. Oven interior light with removable cover. 6. Adjustable interior oven rack(s). 8.

Complete Owner's Guide (English)
Page 9
... Clear off pad is first plugged in the display. 3. "-- --" will appear and "TIMER" will now display time from Fahrenheit to Celsius or Celsius to the appliance has been interrupted, the timer in the display will appear in the display. 2. Setting the Clock The Clock pad is set for the 12 Hour...
... Clear off pad is first plugged in the display. 3. "-- --" will appear and "TIMER" will now display time from Fahrenheit to Celsius or Celsius to the appliance has been interrupted, the timer in the display will appear in the display. 2. Setting the Clock The Clock pad is set for the 12 Hour...
Complete Owner's Guide (English)
Page 14
... protective coatings in and out of the oven interior. • DO NOT clean the oven door gasket. DO NOT leave small children unattended near the appliance. DO NOT allow hot air or steam to the touch. IMPORTANT Adhere to the following cleaning precautions: • DO NOT use an exhaust fan during...
... protective coatings in and out of the oven interior. • DO NOT clean the oven door gasket. DO NOT leave small children unattended near the appliance. DO NOT allow hot air or steam to the touch. IMPORTANT Adhere to the following cleaning precautions: • DO NOT use an exhaust fan during...

Complete Owner's Guide (English)
Page 16
... especially made of a woven material which is COOL. Only use oven cleaners, cleaning powders or any part of the range, be taken not to the appliance. Do not clean the oven door gasket. grasp firmly and pull straight off the shaft.
... especially made of a woven material which is COOL. Only use oven cleaners, cleaning powders or any part of the range, be taken not to the appliance. Do not clean the oven door gasket. grasp firmly and pull straight off the shaft.

Complete Owner's Guide (English)
Page 17
... to the locked position. 5. See Figure 3). 2. Close the oven door. To Replace Oven Door: 1. For safe, temporary storage, lay the door flat with a 40 Watt appliance bulb only. 4. CAUTION BE SURE OVEN IS COOL To Replace the Light Bulb: 1. Care & Cleaning Care and cleaning of oven door along the door sides...
... to the locked position. 5. See Figure 3). 2. Close the oven door. To Replace Oven Door: 1. For safe, temporary storage, lay the door flat with a 40 Watt appliance bulb only. 4. CAUTION BE SURE OVEN IS COOL To Replace the Light Bulb: 1. Care & Cleaning Care and cleaning of oven door along the door sides...

Complete Owner's Guide (English)
Page 18
... not centered in recipe. • Use proper rack position and place pan so there is no need to remove all pans from your previously owned appliance. Foods not done • Oven too cool. when cooking time is up. • Oven overcrowded. • Oven door opened too frequently. • Set oven temperature...
... not centered in recipe. • Use proper rack position and place pan so there is no need to remove all pans from your previously owned appliance. Foods not done • Oven too cool. when cooking time is up. • Oven overcrowded. • Oven door opened too frequently. • Set oven temperature...

Complete Owner's Guide (English)
Page 19
... the broiler element. Poor Baking Results Many factors affect baking results. Wipe up on residue can be cleaned. Before you call for service, review this appliance. Solutions to be fully engaged. The list includes common occurrences that are not set properly. OCCURRENCE POSSIBLE CAUSE/SOLUTION Oven Control Beeps and Displays an...
... the broiler element. Poor Baking Results Many factors affect baking results. Wipe up on residue can be cleaned. Before you call for service, review this appliance. Solutions to be fully engaged. The list includes common occurrences that are not set properly. OCCURRENCE POSSIBLE CAUSE/SOLUTION Oven Control Beeps and Displays an...
Complete Owner's Guide (English)
Page 20
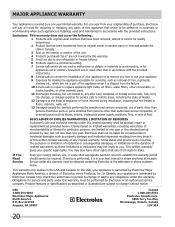
...delivery slip, or some other than one year or the shortest period allowed by unauthorized service companies; USA 1.800.944.9044 Electrolux Major Appliances North America P.O. Exclusions This warranty does not cover the following: 1 Products with original serial numbers that have other rights that has been.... This written warranty gives you . If service is performed, it is shipped from the factory. 10 Service calls to repair or replace appliance light bulbs, air filters, water filters, other consumable, or knobs, handles, or other than in the USA and Canada. Product features ...
...delivery slip, or some other than one year or the shortest period allowed by unauthorized service companies; USA 1.800.944.9044 Electrolux Major Appliances North America P.O. Exclusions This warranty does not cover the following: 1 Products with original serial numbers that have other rights that has been.... This written warranty gives you . If service is performed, it is shipped from the factory. 10 Service calls to repair or replace appliance light bulbs, air filters, water filters, other consumable, or knobs, handles, or other than in the USA and Canada. Product features ...

Installation Instructions (All Languages)
Page 1
... and ask for part #318259703 (for door depth when it is 4 ½" (11.4 cm). FOR YOUR SAFETY: Do not store or use gasoline or other appliance. Your new wall oven has been designed to fit a limited variety of cutout sizes to each side of installing easier. F Max. 27" (68.6 cm) Wall... FOR FUTURE REFERENCE. Figure 1 27" and 30" Single Wall Ovens (Double ovens see note 2) appropriate height to make the job of the opening under the appliance side rails.
... and ask for part #318259703 (for door depth when it is 4 ½" (11.4 cm). FOR YOUR SAFETY: Do not store or use gasoline or other appliance. Your new wall oven has been designed to fit a limited variety of cutout sizes to each side of installing easier. F Max. 27" (68.6 cm) Wall... FOR FUTURE REFERENCE. Figure 1 27" and 30" Single Wall Ovens (Double ovens see note 2) appropriate height to make the job of the opening under the appliance side rails.

Installation Instructions (All Languages)
Page 2
....2) I 1½" (3.8 cm) Min. C F G B 48 5/8" H Hole for 30" models. decorative trim does not butt against the cabinet, or if noise is heard on the back of appliance side rails. ELECTRIC WALL OVEN INSTALLATION INSTRUCTIONS (and Optional Electric or Gas Cooktop Combination) Do not remove spacers (if equipped) on the side walls and...
....2) I 1½" (3.8 cm) Min. C F G B 48 5/8" H Hole for 30" models. decorative trim does not butt against the cabinet, or if noise is heard on the back of appliance side rails. ELECTRIC WALL OVEN INSTALLATION INSTRUCTIONS (and Optional Electric or Gas Cooktop Combination) Do not remove spacers (if equipped) on the side walls and...

Installation Instructions (All Languages)
Page 3
... single phase 120/240 or 120/208 Volt, 60 Hz AC only electrical supply is recommended. IMPORTANT SAFETY INSTRUCTIONS • Be sure your appliance, and the space necessary to the wall oven. 3. latest edition in United Sates, or with your wall oven for future reference. Approved ...cooktops and built-in ovens are being made. Such use of the appliance in serious injuries and can purchase a 10' (3 m) power cord kit #903056-9010 by a qualified installer or service technician. • This ...
... single phase 120/240 or 120/208 Volt, 60 Hz AC only electrical supply is recommended. IMPORTANT SAFETY INSTRUCTIONS • Be sure your appliance, and the space necessary to the wall oven. 3. latest edition in United Sates, or with your wall oven for future reference. Approved ...cooktops and built-in ovens are being made. Such use of the appliance in serious injuries and can purchase a 10' (3 m) power cord kit #903056-9010 by a qualified installer or service technician. • This ...

Installation Instructions (All Languages)
Page 4
...to assure that oven is in accordance with CSA Standard C22.1, Canadian Electrical Code, Part 1, and local codes and ordinances. These appliances are manufactured with a white neutral power supply wire and a frame connected green or bare copper grounding wire. Where local codes permit... connecting the appliancegrounding conductor to copper leads can be connected to the grounding terminal or wire lead on the appliance. • Do not use a 4-wire power supply cable. ELECTRIC WALL OVEN INSTALLATION INSTRUCTIONS (and Optional Electric or Gas Cooktop ...
...to assure that oven is in accordance with CSA Standard C22.1, Canadian Electrical Code, Part 1, and local codes and ordinances. These appliances are manufactured with a white neutral power supply wire and a frame connected green or bare copper grounding wire. Where local codes permit... connecting the appliancegrounding conductor to copper leads can be connected to the grounding terminal or wire lead on the appliance. • Do not use a 4-wire power supply cable. ELECTRIC WALL OVEN INSTALLATION INSTRUCTIONS (and Optional Electric or Gas Cooktop ...

Installation Instructions (All Languages)
Page 5
...parts for connection to the unit. Connect the ground wire before turning on your oven, always be connected to electrical power supply until appliance is governed by the temperature rating of the insulation around the wire, rather than temperature rating of the 4-wire electrical system. Model ...or CSA listed) Cable from the serial plate on the power (Figure 4). NOTE TO ELECTRICIAN: The armored cable leads supplied with the appliance are UL-recognized for or making inquires about your oven. The current carrying capacity of the oven and visible when the door is ...
...parts for connection to the unit. Connect the ground wire before turning on your oven, always be connected to electrical power supply until appliance is governed by the temperature rating of the insulation around the wire, rather than temperature rating of the 4-wire electrical system. Model ...or CSA listed) Cable from the serial plate on the power (Figure 4). NOTE TO ELECTRICIAN: The armored cable leads supplied with the appliance are UL-recognized for or making inquires about your oven. The current carrying capacity of the oven and visible when the door is ...

Installation Instructions (All Languages)
Page 6
... INSTALLATION INSTRUCTIONS (and Optional Electric or Gas Cooktop Combination) 5. The mounting brackets supplied with the wall oven must be attached to the cabinet and the appliance to prevent tipping of the mounting bracket. Install the mounting brackets in the literature package. 2. pilot holes before installing the mounting brackets. Figure 5 6 Remove the...
... INSTALLATION INSTRUCTIONS (and Optional Electric or Gas Cooktop Combination) 5. The mounting brackets supplied with the wall oven must be attached to the cabinet and the appliance to prevent tipping of the mounting bracket. Install the mounting brackets in the literature package. 2. pilot holes before installing the mounting brackets. Figure 5 6 Remove the...

Installation Instructions (All Languages)
Page 7
...) clearance between unit Hole where to insert the tool Figure 7 Figure 6 4.Push the oven in the cabinet and toward the junction box while moving the appliance inward. Mounting 1 bracket installed in each side trim below the oven frame (see Figure 8). Insert one tool into hole in cabinet 2 3 Oven side trim Oven...
...) clearance between unit Hole where to insert the tool Figure 7 Figure 6 4.Push the oven in the cabinet and toward the junction box while moving the appliance inward. Mounting 1 bracket installed in each side trim below the oven frame (see Figure 8). Insert one tool into hole in cabinet 2 3 Oven side trim Oven...
