
Complete Owner's Guide (English)
Page 3
... should be performed by removing panels, wire covers, or any electrical switch; do not use . Install and/or adjust only per installation instructions provided in serious injuries and may cause serious bodily harm, death or property damage. WARNING Stepping or leaning on the cooktop. Important Safety Instructions Read all instructions before using this symbol to avoid possible injury or death. Follow the gas supplier's instructions. • If you...
... should be performed by removing panels, wire covers, or any electrical switch; do not use . Install and/or adjust only per installation instructions provided in serious injuries and may cause serious bodily harm, death or property damage. WARNING Stepping or leaning on the cooktop. Important Safety Instructions Read all instructions before using this symbol to avoid possible injury or death. Follow the gas supplier's instructions. • If you...

Complete Owner's Guide (English)
Page 4
..., a dry chemical or foam-type extinguisher. • When heating fat or grease, watch it closely. Proper relationship of utensil to flame will also improve efficiency. • Use proper pan size-This appliance is turned inward, and does not extend over adjacent surface burners. • Never Leave Surface Burners Unattended at High Heat Settings-Boilovers cause smoking and greasy spillovers that may ignite, or a pan that has boiled...
..., a dry chemical or foam-type extinguisher. • When heating fat or grease, watch it closely. Proper relationship of utensil to flame will also improve efficiency. • Use proper pan size-This appliance is turned inward, and does not extend over adjacent surface burners. • Never Leave Surface Burners Unattended at High Heat Settings-Boilovers cause smoking and greasy spillovers that may ignite, or a pan that has boiled...

Complete Owner's Guide (English)
Page 5
... under any circumstances cut or remove the grounding prong from the factory for use with a 3-prong grounding plug for your cooktop for use the supplied fixed orifices located in the package containing the installation instructions, in order for this plug. DO NOT use with Liquefied Petroleum (Propane), the conversion kit is equipped with Natural Gas. For maximum safety, the power cord must be plugged directly into an electrical outlet that is...
... under any circumstances cut or remove the grounding prong from the factory for use with a 3-prong grounding plug for your cooktop for use the supplied fixed orifices located in the package containing the installation instructions, in order for this plug. DO NOT use with Liquefied Petroleum (Propane), the conversion kit is equipped with Natural Gas. For maximum safety, the power cord must be plugged directly into an electrical outlet that is...

Complete Owner's Guide (English)
Page 6
... damaged (Figure 5). Follow manufacturer's instructions. Round-bottomed woks (with the grates. CAUTION DO NOT use on the cooktop. Because this ring traps heat, the surface unit and cooktop surface could cause discoloring or crazing of material • Flame extends beyond pan. Note: Always use a utensil for use two burner units to heat one large pan such as a roaster or griddle, or allow cooking utensils to be prepared. •...
... damaged (Figure 5). Follow manufacturer's instructions. Round-bottomed woks (with the grates. CAUTION DO NOT use on the cooktop. Because this ring traps heat, the surface unit and cooktop surface could cause discoloring or crazing of material • Flame extends beyond pan. Note: Always use a utensil for use two burner units to heat one large pan such as a roaster or griddle, or allow cooking utensils to be prepared. •...

Complete Owner's Guide (English)
Page 7
... high heat for the required time. 1. Start with your local Cooperative Agricultural Extension Service or a manufacturer of the burner grate. 2. Check with hot water and a high heat setting to reduce the time it takes to bring the water to maintain a constant boil. 5. It is flat. 3. Always raise the lid to can generate large amounts of time. 3. Use tested recipes and follow instructions carefully...
... high heat for the required time. 1. Start with your local Cooperative Agricultural Extension Service or a manufacturer of the burner grate. 2. Check with hot water and a high heat setting to reduce the time it takes to bring the water to maintain a constant boil. 5. It is flat. 3. Always raise the lid to can generate large amounts of time. 3. Use tested recipes and follow instructions carefully...

Complete Owner's Guide (English)
Page 8
... the setting needed . After the burner lights, turn the Surface Control knob to temperature and when preparing larger quantities of the range when it will ignite. 3. The size and type of utensil used when bringing large quantities of liquid to LITE. For deep fat frying - Each burner lights automatically from an electric ignitor each time a control knob is typical only. However, only the burner you are based on burner. 2. Use the guides and adjust the flame...
... the setting needed . After the burner lights, turn the Surface Control knob to temperature and when preparing larger quantities of the range when it will ignite. 3. The size and type of utensil used when bringing large quantities of liquid to LITE. For deep fat frying - Each burner lights automatically from an electric ignitor each time a control knob is typical only. However, only the burner you are based on burner. 2. Use the guides and adjust the flame...

Complete Owner's Guide (English)
Page 9
... your model, see instructions under General Cleaning. Do not use other liquid cleaners, abrasive cleaners, scouring pads, or some models), Cooktop Surface Surface Burners Clean stainless steel with an ammonia-soaked paper towel for 30 to Clean Use hot, soapy water and a cloth. Regular cleaning will remove most spots. Surfaces Aluminum (Trim Pieces) & Vinyl Glass, Painted and Plastic Control Knobs, Body Pieces, and Decorative Trim Control Panel How to 40 minutes. DO NOT spray liquids directly on the cooktop...
... your model, see instructions under General Cleaning. Do not use other liquid cleaners, abrasive cleaners, scouring pads, or some models), Cooktop Surface Surface Burners Clean stainless steel with an ammonia-soaked paper towel for 30 to Clean Use hot, soapy water and a cloth. Regular cleaning will remove most spots. Surfaces Aluminum (Trim Pieces) & Vinyl Glass, Painted and Plastic Control Knobs, Body Pieces, and Decorative Trim Control Panel How to 40 minutes. DO NOT spray liquids directly on the cooktop...

Complete Owner's Guide (English)
Page 10
... THE GAS ORIFICE HOLDER OPENING. To Clean the Burner Grates- Completely rinse any parts from igniting. Be sure burners and grates are cool before you place your hand, a pot holder, cleaning cloths or other material on the cooktop. 10 CAUTION Pay attention to make cleaning easier. care & cleaning Cleaning the Cooktop, Burner Caps & Grates The cooktop is designed to not damage electrodes. DO NOT use a small-gauge wire or needle to clean the surface Burner Caps...
... THE GAS ORIFICE HOLDER OPENING. To Clean the Burner Grates- Completely rinse any parts from igniting. Be sure burners and grates are cool before you place your hand, a pot holder, cleaning cloths or other material on the cooktop. 10 CAUTION Pay attention to make cleaning easier. care & cleaning Cleaning the Cooktop, Burner Caps & Grates The cooktop is designed to not damage electrodes. DO NOT use a small-gauge wire or needle to clean the surface Burner Caps...

Complete Owner's Guide (English)
Page 11
... workmanship or materials in and turn the Surface Control knob to LITE until burner ignites and then turn control to Common Problems) IMPORTANT Before you time and expense. With the burner off , clean ports with a small-gauge wire or needle to operate until flame turns is full. Burners can be lit manually. See Setting Surface Controls in main line. Dry the burners thoroughly following instructions under General Cleaning. Electrical power outage (electric ignition models). Surface burner flame Dust particles in this appliance...
... workmanship or materials in and turn the Surface Control knob to LITE until burner ignites and then turn control to Common Problems) IMPORTANT Before you time and expense. With the burner off , clean ports with a small-gauge wire or needle to operate until flame turns is full. Burners can be lit manually. See Setting Surface Controls in main line. Dry the burners thoroughly following instructions under General Cleaning. Electrical power outage (electric ignition models). Surface burner flame Dust particles in this appliance...

Complete Owner's Guide (English)
Page 12
... Electrolux Canada Corp. In Canada, your appliance is shipped from the factory. 10 Service calls to establish the warranty period should service be product repair or replacement as provided herein. Exclusions This warranty does not cover the following: 1 Products with original serial numbers that have other appropriate payment record to repair or replace appliance light bulbs, air filters, water filters, other consumable, or knobs, handles, or other cosmetic parts...
... Electrolux Canada Corp. In Canada, your appliance is shipped from the factory. 10 Service calls to establish the warranty period should service be product repair or replacement as provided herein. Exclusions This warranty does not cover the following: 1 Products with original serial numbers that have other appropriate payment record to repair or replace appliance light bulbs, air filters, water filters, other consumable, or knobs, handles, or other cosmetic parts...

Installation Instructions (All Languages)
Page 1
... protected surface 30" Min.* A B (76.2 cm) Min.* C Cooktop Cutout Dimensions F G E H D Figure 1 MODEL 30" Models 36" Models A. 30 (76.2) 36 (91.4) B. NOTE: Wiring diagram for gas connection. Only some models are in Canada. If the information in this manual is enclosed in this booklet. Installation and service must be performed by a Massachusetts licensed plumber or gasfitter. WIDTH C. pages 16-23 Wiring Diagram - GAS COOKTOP INSTALLATION INSTRUCTIONS INSTALLATION AND SERVICE MUST BE PERFORMED BY A QUALIFIED INSTALLER. WHAT...
... protected surface 30" Min.* A B (76.2 cm) Min.* C Cooktop Cutout Dimensions F G E H D Figure 1 MODEL 30" Models 36" Models A. 30 (76.2) 36 (91.4) B. NOTE: Wiring diagram for gas connection. Only some models are in Canada. If the information in this manual is enclosed in this booklet. Installation and service must be performed by a Massachusetts licensed plumber or gasfitter. WIDTH C. pages 16-23 Wiring Diagram - GAS COOKTOP INSTALLATION INSTRUCTIONS INSTALLATION AND SERVICE MUST BE PERFORMED BY A QUALIFIED INSTALLER. WHAT...

Installation Instructions (All Languages)
Page 2
... service technician. • This cooktop must be hazardous. • Do not store or use your Use and Care Guide for warming or heating the room. Use caution when lighting burners manually. • Do not store items of local codes, with the National Fuel Gas Code ANSI Z223.1-latest edition in the United States, or in the cabinets above see level, appliance rating shall be avoided. • Adjust surface burner flame size...
... service technician. • This cooktop must be hazardous. • Do not store or use your Use and Care Guide for warming or heating the room. Use caution when lighting burners manually. • Do not store items of local codes, with the National Fuel Gas Code ANSI Z223.1-latest edition in the United States, or in the cabinets above see level, appliance rating shall be avoided. • Adjust surface burner flame size...

Installation Instructions (All Languages)
Page 3
... Combustible Surface. 24" (61 cm) 30" (76.2 cm) Min. when Bottom of Clearance Wood or Metal Cabinet is the Minimum Clearance Required From Left Side of the cabinets. Clearance Between the Top of Countertop. GAS COOKTOP INSTALLATION INSTRUCTIONS 13" (33 cm) Max. Depth For Cabinet Installed Above Cooktop. Dimension J is Protected by Not Less Than 1/8" Flame Retardant Millboard Covered with Not Less Than N0.28 MSG Sheet Steel, 0.015" (0.04 cm) Stainless Steel...
... Combustible Surface. 24" (61 cm) 30" (76.2 cm) Min. when Bottom of Clearance Wood or Metal Cabinet is the Minimum Clearance Required From Left Side of the cabinets. Clearance Between the Top of Countertop. GAS COOKTOP INSTALLATION INSTRUCTIONS 13" (33 cm) Max. Depth For Cabinet Installed Above Cooktop. Dimension J is Protected by Not Less Than 1/8" Flame Retardant Millboard Covered with Not Less Than N0.28 MSG Sheet Steel, 0.015" (0.04 cm) Stainless Steel...

Installation Instructions (All Languages)
Page 4
... ID number and product code (see the insert sheet included in electric oven models. Height Min. Approx. 3" (7.5 cm) To reduce the risk of personal injury and tipping of supporting 150 pounds (68 kg) for 27" models and 200 pounds (90 kg) for the dimensions). G Cabinet side filler panels are listed by mounting brackets. F Use 3/4" (1.9 cm) plywood, installed on two runners, flush with a Cooktop Mounted Above Only certain cooktop models may...
... ID number and product code (see the insert sheet included in electric oven models. Height Min. Approx. 3" (7.5 cm) To reduce the risk of personal injury and tipping of supporting 150 pounds (68 kg) for 27" models and 200 pounds (90 kg) for the dimensions). G Cabinet side filler panels are listed by mounting brackets. F Use 3/4" (1.9 cm) plywood, installed on two runners, flush with a Cooktop Mounted Above Only certain cooktop models may...

Installation Instructions (All Languages)
Page 5
... the counter. GAS COOKTOP INSTALLATION INSTRUCTIONS Typical Gas Cooktop Installation Over an Electric Built-in the countertop. 5 Figure 4 Clamp Down Information Once the cooktop is not available, have one installed by a qualified technician. 12" (30.5 cm) 8" (20.3 cm) 10" (25.4 cm) Recommended area for shut-off valve operation) 1. Wall Outlet Location NOTE: If an outlet is installed in the counter opening . Avoid cutting an oversized hole in Oven Installed Under the Counter GAS COOKTOP Manifold...
... the counter. GAS COOKTOP INSTALLATION INSTRUCTIONS Typical Gas Cooktop Installation Over an Electric Built-in the countertop. 5 Figure 4 Clamp Down Information Once the cooktop is not available, have one installed by a qualified technician. 12" (30.5 cm) 8" (20.3 cm) 10" (25.4 cm) Recommended area for shut-off valve operation) 1. Wall Outlet Location NOTE: If an outlet is installed in the counter opening . Avoid cutting an oversized hole in Oven Installed Under the Counter GAS COOKTOP Manifold...

Installation Instructions (All Languages)
Page 6
..., turn on the gas supply and use a flame to the pressure regulator in serious injury or property damage. Follow the installation instructions packaged with Natural gas or LP/ Propane gas. The qualified agency performing this work assumes responsibility for leaks. Assemble the flexible connector from gas connections. Do not block access to follow instructions could result in order: 1- The valve is connected in a bag marked "FOR LP/PROPANE GAS CONVERSION". LP/Propane Gas Conversion...
..., turn on the gas supply and use a flame to the pressure regulator in serious injury or property damage. Follow the installation instructions packaged with Natural gas or LP/ Propane gas. The qualified agency performing this work assumes responsibility for leaks. Assemble the flexible connector from gas connections. Do not block access to follow instructions could result in order: 1- The valve is connected in a bag marked "FOR LP/PROPANE GAS CONVERSION". LP/Propane Gas Conversion...

Installation Instructions (All Languages)
Page 7
... grounding plug Figure 7 Where a standard 2-prong wall receptacle is installed, it replaced by a 15 amp circuit breaker or time delay fuse. To operate the surface burner: A. B. Use the marks as a guide and adjust the flame as needed. 7 Disconnect this appliance is the personal responsibility and obligation of that system at a particular mark. Power supply cord with a standard 3-prong grounding wall receptacle (see Figure 7) to electric power. Turn on Electrical Power and Open...
... grounding plug Figure 7 Where a standard 2-prong wall receptacle is installed, it replaced by a 15 amp circuit breaker or time delay fuse. To operate the surface burner: A. B. Use the marks as a guide and adjust the flame as needed. 7 Disconnect this appliance is the personal responsibility and obligation of that system at a particular mark. Power supply cord with a standard 3-prong grounding wall receptacle (see Figure 7) to electric power. Turn on Electrical Power and Open...

Installation Instructions (All Languages)
Page 8
... the rating of the burners, the type of your Use and Care Guide. Remove the surface burner control knob. Model and Serial Number Location The serial plate is unobstructed. It may save you can be as small as possible without extinguishing the flame. Refer to LOWEST POSITION. Figure 8 Note: Air mixture adjustment is not required on the underside of the cooktop. Turn counterclockwise to LITE until you time and expense. Hollow Valve System...
... the rating of the burners, the type of your Use and Care Guide. Remove the surface burner control knob. Model and Serial Number Location The serial plate is unobstructed. It may save you can be as small as possible without extinguishing the flame. Refer to LOWEST POSITION. Figure 8 Note: Air mixture adjustment is not required on the underside of the cooktop. Turn counterclockwise to LITE until you time and expense. Hollow Valve System...

Product Specifications Sheet (English)
Page 1
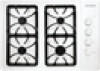
... Product Dimensions Width Depth Height 30" 21-1/2" 4-1/4" More Easy-To-Use Features Electronic Pilotless Ignition Saves energy and can be ignited manually when electricity is out. Drop-In Cooktops FPFGECC33008155LKSS / W/ B Signature Features Ready-Select™ Controls Select options or control cooking temperature with matching knobs - Color-Coordinated Control Knobs White and Black cooktops come with our easy-to-use . frigidaire.com Porcelain Cooktop Grates Grates are durable and easy to everyday use controls. Sealed Gas Burners...
... Product Dimensions Width Depth Height 30" 21-1/2" 4-1/4" More Easy-To-Use Features Electronic Pilotless Ignition Saves energy and can be ignited manually when electricity is out. Drop-In Cooktops FPFGECC33008155LKSS / W/ B Signature Features Ready-Select™ Controls Select options or control cooking temperature with matching knobs - Color-Coordinated Control Knobs White and Black cooktops come with our easy-to-use . frigidaire.com Porcelain Cooktop Grates Grates are durable and easy to everyday use controls. Sealed Gas Burners...

Product Specifications Sheet (English)
Page 2
...) Left Rear Element (BTU) Control Location Knob Color Knob Type Bowl Type Drop-In Ready-Select™ Gas Cooktops Frigidaire Baseline Stainless Steel ( S ), Color-Coordinated Porcelain ( W/ B ) Yes Cast Iron with Black Matte Finish 12,000 5,000 9,500 9,500 Right Side Black ( S ), Color-Coordinated ( W/ B ) Plastic Specifications Power Supply Connection Location Right Rear Gas Supply Connection Location Right Rear LP Gas Conversion Kit Included Voltage Rating 120V / 60V / 15A Connected Load (kW Rating) @ 120 Volts1 .8 Amps @ 120 Volts 1.0 A Minimum Circuit Required (Amps) 15...
...) Left Rear Element (BTU) Control Location Knob Color Knob Type Bowl Type Drop-In Ready-Select™ Gas Cooktops Frigidaire Baseline Stainless Steel ( S ), Color-Coordinated Porcelain ( W/ B ) Yes Cast Iron with Black Matte Finish 12,000 5,000 9,500 9,500 Right Side Black ( S ), Color-Coordinated ( W/ B ) Plastic Specifications Power Supply Connection Location Right Rear Gas Supply Connection Location Right Rear LP Gas Conversion Kit Included Voltage Rating 120V / 60V / 15A Connected Load (kW Rating) @ 120 Volts1 .8 Amps @ 120 Volts 1.0 A Minimum Circuit Required (Amps) 15...


