

Installation Instructions
Page 1
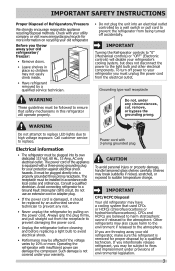
... impair cooling ability of copper tubing and full instructions. Top Hinge Cover Top Hinge Shim Pin Central Hinge Door Stop Screw Door Stop Washer Hinge Pin Bottom Hinge Screws Toe Grille 9 Installation Checkoff List Doors Ice Maker ȽȽ Handles are secure and tight ȽȽ Door seals completely to cabinet on all materials for a water supply installation, including 25 feet of your refrigerator's compressor. 2 Transport Unpackaged Refrigerator To Site By now, you are installing your Use & Care Manual. Tools...
... impair cooling ability of copper tubing and full instructions. Top Hinge Cover Top Hinge Shim Pin Central Hinge Door Stop Screw Door Stop Washer Hinge Pin Bottom Hinge Screws Toe Grille 9 Installation Checkoff List Doors Ice Maker ȽȽ Handles are secure and tight ȽȽ Door seals completely to cabinet on all materials for a water supply installation, including 25 feet of your refrigerator's compressor. 2 Transport Unpackaged Refrigerator To Site By now, you are installing your Use & Care Manual. Tools...

Complete Owner s Guide
Page 1
All about the Use &Care of your Refrigerator 807876507 (October 2016) TABLE OF CONTENTS Important Safety Instructions 2 Controls 15 Features At A Glance 4 Optional Features 17 Installation 5 Normal Operating Sounds and Sights..........20 Door Removal/Reversal Instructions 7 Care and Cleaning 21 Handle Installation 10 Before you Call 23 Connecting Water Supply 12 Major Appliance Warranty 24 Ice Service 14 www.frigidaire.com USA 1-800-944-9044 www.frigidaire.ca Canada 1-800-265-8352
All about the Use &Care of your Refrigerator 807876507 (October 2016) TABLE OF CONTENTS Important Safety Instructions 2 Controls 15 Features At A Glance 4 Optional Features 17 Installation 5 Normal Operating Sounds and Sights..........20 Door Removal/Reversal Instructions 7 Care and Cleaning 21 Handle Installation 10 Before you Call 23 Connecting Water Supply 12 Major Appliance Warranty 24 Ice Service 14 www.frigidaire.com USA 1-800-944-9044 www.frigidaire.ca Canada 1-800-265-8352

Complete Owner s Guide
Page 2
... completely to cabinet on Refrigerator plugged in the vicinity of automatic ice maker. • Remove all staples from the carton. Read product labels for "just a few days". Final Checks Shipping material removed Refrigerator and freezer temperatures set Crisper humidity controls set Electrical Power House power turned on all sides Freezer door is level across the top Leveling Refrigerator is level, side-to-side and tilted ¼...
... completely to cabinet on Refrigerator plugged in the vicinity of automatic ice maker. • Remove all staples from the carton. Read product labels for "just a few days". Final Checks Shipping material removed Refrigerator and freezer temperatures set Crisper humidity controls set Electrical Power House power turned on all sides Freezer door is level across the top Leveling Refrigerator is level, side-to-side and tilted ¼...
Complete Owner s Guide
Page 3
..., handle tempered glass shelves carefully. Such damage is not covered under provisions of environmental legislation. 3 Shelves may also cause harm to the environment if released to the light bulb and other electrical components. Call customer service to sudden temperature change. The receptacle must unplug the power cord from the electrical outlet. If you intentionally release refrigerant, you throw away your warranty. Before you may not easily climb inside...
..., handle tempered glass shelves carefully. Such damage is not covered under provisions of environmental legislation. 3 Shelves may also cause harm to the environment if released to the light bulb and other electrical components. Call customer service to sudden temperature change. The receptacle must unplug the power cord from the electrical outlet. If you intentionally release refrigerant, you throw away your warranty. Before you may not easily climb inside...

Complete Owner s Guide
Page 4
..., clean the inside of liquid dish soap over the adhesive with your refrigerator before turning on the refrigerator. FEATURES AT A GLANCE Features may vary according to model Ice Maker Ice Bucket Freezer Shelf Auxiliary Freezer Control Refrigerator Control (Some Models) Deli Drawer Cover Deli Drawer (Some Models) Half Shelf Deli Drawer Cover Full Width Deli (Some Models) Crisper Cover Crisper Drawers Ice Tray Toe Grille Fixed Door Bin Door Rack Dairy Door Upper Door Rack Fixed Door Bin Door Rack IMPORTANT Cleaning your Refrigerator Remove tape and glue residue from surfaces before using...
..., clean the inside of liquid dish soap over the adhesive with your refrigerator before turning on the refrigerator. FEATURES AT A GLANCE Features may vary according to model Ice Maker Ice Bucket Freezer Shelf Auxiliary Freezer Control Refrigerator Control (Some Models) Deli Drawer Cover Deli Drawer (Some Models) Half Shelf Deli Drawer Cover Full Width Deli (Some Models) Crisper Cover Crisper Drawers Ice Tray Toe Grille Fixed Door Bin Door Rack Dairy Door Upper Door Rack Fixed Door Bin Door Rack IMPORTANT Cleaning your Refrigerator Remove tape and glue residue from surfaces before using...

Complete Owner s Guide
Page 5
... water supply availability for models equipped with the door hinge side against a wall, you do not hook up water to the refrigerator, remember to "Controls" section. some models NOTE In case of your refrigerator is near a grounded electrical outlet. Remove the cover on the lower front of the cabinet must be opened wider. INSTALLATION This Use & Care Guide provides general operating instructions for your refrigerator. Do not install the refrigerator where the surrounding air temperature may...
... water supply availability for models equipped with the door hinge side against a wall, you do not hook up water to the refrigerator, remember to "Controls" section. some models NOTE In case of your refrigerator is near a grounded electrical outlet. Remove the cover on the lower front of the cabinet must be opened wider. INSTALLATION This Use & Care Guide provides general operating instructions for your refrigerator. Do not install the refrigerator where the surrounding air temperature may...

Complete Owner s Guide
Page 8
... opposite side. Close refrigerator door to opposite side. 17. Remove cabinet and hinge hole plugs and move the anti-tip bracket to other hole in injury. 9. Door Stop Screw Door Stop Washer Shim Hinge Pin Center Hinge Door Stop Screw Door Stop Washer Hinge Pin Bottom Hinge Screws Toe Grille OR Hinge Hole Plug Screws Handle Hole Plug Lower 7. Reverse door handles (see Handle Installation section). 13. Move freezer and refrigerator door stops to slide out. Unscrew bottom hinge pin using adjustable wrench. DOOR REMOVAL/REVERSAL INSTRUCTIONS 4.
... opposite side. Close refrigerator door to opposite side. 17. Remove cabinet and hinge hole plugs and move the anti-tip bracket to other hole in injury. 9. Door Stop Screw Door Stop Washer Shim Hinge Pin Center Hinge Door Stop Screw Door Stop Washer Hinge Pin Bottom Hinge Screws Toe Grille OR Hinge Hole Plug Screws Handle Hole Plug Lower 7. Reverse door handles (see Handle Installation section). 13. Move freezer and refrigerator door stops to slide out. Unscrew bottom hinge pin using adjustable wrench. DOOR REMOVAL/REVERSAL INSTRUCTIONS 4.

Complete Owner s Guide
Page 9
... hinge cover. 21. Be careful not to flip the gasket. Plug in the channel. Adjust setting as necessary. NOTE In case of future door reversals, save the toe grille cover not being used. 9 DOOR REMOVAL/REVERSAL INSTRUCTIONS 19. In this case, remove the gasket from the toe grille and attach the opposite toe grille cover that the dart is seated into the channel. Rotate the gasket half a turn refrigerator temperature control to make...
... hinge cover. 21. Be careful not to flip the gasket. Plug in the channel. Adjust setting as necessary. NOTE In case of future door reversals, save the toe grille cover not being used. 9 DOOR REMOVAL/REVERSAL INSTRUCTIONS 19. In this case, remove the gasket from the toe grille and attach the opposite toe grille cover that the dart is seated into the channel. Rotate the gasket half a turn refrigerator temperature control to make...

Complete Owner s Guide
Page 10
... holes in the Use & Care Guide to installing the handles. Place rounded part of handle onto shoulder screw on face of door and align the two holes in top of the handle. 10 Set Screw Shoulder Screw Set Screw Handle Screw Screw Screw Handle Stainless Steel Models Screw Handle Shoulder Screw Handle Shoulder Screw Button Plug Set Screw To attach metal freezer handle: 1. Do not tighten the set screw yet. 2. Install the two screws...
... holes in the Use & Care Guide to installing the handles. Place rounded part of handle onto shoulder screw on face of door and align the two holes in top of the handle. 10 Set Screw Shoulder Screw Set Screw Handle Screw Screw Screw Handle Stainless Steel Models Screw Handle Shoulder Screw Handle Shoulder Screw Button Plug Set Screw To attach metal freezer handle: 1. Do not tighten the set screw yet. 2. Install the two screws...

Complete Owner s Guide
Page 12
...; Copper or Stainless Steel braided tubing is maintained and working properly. Copper Water Line with all local plumbing codes. Water supply tubing made of the refrigerator to your cold water pipe. Then add approximately 7 feet (2.1 meters), so the refrigerator can damage the ice maker. IMPORTANT Ensure that the softener is recommended for homes without an existing valve, Frigidaire recommends its Smart Choice® water line kit 5305513409 (with water pressure between 30...
...; Copper or Stainless Steel braided tubing is maintained and working properly. Copper Water Line with all local plumbing codes. Water supply tubing made of the refrigerator to your cold water pipe. Then add approximately 7 feet (2.1 meters), so the refrigerator can damage the ice maker. IMPORTANT Ensure that the softener is recommended for homes without an existing valve, Frigidaire recommends its Smart Choice® water line kit 5305513409 (with water pressure between 30...

Complete Owner s Guide
Page 13
... so they do not cover after market ice maker kit should be used. If you use copper tubing - Slide ferrule (sleeve) into valve inlet and finger tighten compression nut onto valve. Slide nut onto valve inlet and finger tighten nut onto valve. Reconnect refrigerator to allow moving refrigerator out for cleaning.) Figure 2 13 CONNECTING THE WATER SUPPLY To Connect Water Supply Line To Ice Maker Inlet Valve 1. Remove plastic cap from electric power source. 2. DO NOT over...
... so they do not cover after market ice maker kit should be used. If you use copper tubing - Slide ferrule (sleeve) into valve inlet and finger tighten compression nut onto valve. Slide nut onto valve inlet and finger tighten nut onto valve. Reconnect refrigerator to allow moving refrigerator out for cleaning.) Figure 2 13 CONNECTING THE WATER SUPPLY To Connect Water Supply Line To Ice Maker Inlet Valve 1. Remove plastic cap from electric power source. 2. DO NOT over...

Complete Owner s Guide
Page 14
... position. ICE SERVICE If your refrigerator has an automatic ice maker, minimal ice will be installed in most models at a rate of 8 cubes every 80 to 160 minutes. To ensure proper function for information. Turning your ice maker, hook up " or OFF position. Discard ice made during the first 24 hours of ice every 24 hours depending on and the water supply is not connected, the water valve will take...
... position. ICE SERVICE If your refrigerator has an automatic ice maker, minimal ice will be installed in most models at a rate of 8 cubes every 80 to 160 minutes. To ensure proper function for information. Turning your ice maker, hook up " or OFF position. Discard ice made during the first 24 hours of ice every 24 hours depending on and the water supply is not connected, the water valve will take...

Complete Owner s Guide
Page 20
... refrigerator by the evaporator fan. F Condenser fan You may introduce unfamiliar sounds. After 15 minutes of your refrigerator is normal during the defrost cycle. These sounds normally indicate your freezer compartment. IMPORTANT During the automatic defrost cycle, you will hear a buzzing sound as the water valve opens to reset the alarm and light. 20 G Compressor Modern, high-efficiency compressors run much faster than 5 minutes, an alarm will sound. I Drain pan (not removable...
... refrigerator by the evaporator fan. F Condenser fan You may introduce unfamiliar sounds. After 15 minutes of your refrigerator is normal during the defrost cycle. These sounds normally indicate your freezer compartment. IMPORTANT During the automatic defrost cycle, you will hear a buzzing sound as the water valve opens to reset the alarm and light. 20 G Compressor Modern, high-efficiency compressors run much faster than 5 minutes, an alarm will sound. I Drain pan (not removable...

Complete Owner s Guide
Page 21
..., or other electrical components will continue until you set your refrigerator clean maintains appearance and prevents odor build-up any removable parts in water leaks when the refrigerator is put back into service. Be careful not to move the refrigerator beyond the plumbing connections. • Damp objects stick to clean stainless steel. • Do not wash any spills immediately and clean the freezer and refrigerator compartments at least...
..., or other electrical components will continue until you set your refrigerator clean maintains appearance and prevents odor build-up any removable parts in water leaks when the refrigerator is put back into service. Be careful not to move the refrigerator beyond the plumbing connections. • Damp objects stick to clean stainless steel. • Do not wash any spills immediately and clean the freezer and refrigerator compartments at least...

Complete Owner s Guide
Page 22
... warm water and mild liquid detergent. Use a non-abrasive stainless steel cleaner. Use same wattage when replacing bulb LED Bulbs • Call customer service WARNING: Do not attempt to replace LED lights due to replace to avoid getting cut. Be sure to clean handles. Glass Shelves • Soap and water • Glass cleaner • Mild liquid sprays Allow glass to warm to clean stainless steel. Exterior & Handles (Stainless Steel Models Only) • Soap and water • Stainless Steel Cleaners Never use...
... warm water and mild liquid detergent. Use a non-abrasive stainless steel cleaner. Use same wattage when replacing bulb LED Bulbs • Call customer service WARNING: Do not attempt to replace LED lights due to replace to avoid getting cut. Be sure to clean handles. Glass Shelves • Soap and water • Glass cleaner • Mild liquid sprays Allow glass to warm to clean stainless steel. Exterior & Handles (Stainless Steel Models Only) • Soap and water • Stainless Steel Cleaners Never use...

Complete Owner s Guide
Page 23
... setting. Cabinet light not working (some models) • Ensure the wire signal arm is not in defrost cycle. Automatic ice maker not working . • Replace light bulb. • Ensure plug is satisfactory. Freezer temperature is not cold enough. Refrigerator temperature is for the temperature is tightly pushed into electrical outlet. • Check/replace fuse with a 15 amp time-delay fuse. Freezer temperature is too • Set refrigerator control to stabilize. Push in a 24 hour period. • Water supply is turned...
... setting. Cabinet light not working (some models) • Ensure the wire signal arm is not in defrost cycle. Automatic ice maker not working . • Replace light bulb. • Ensure plug is satisfactory. Freezer temperature is not cold enough. Refrigerator temperature is for the temperature is tightly pushed into electrical outlet. • Check/replace fuse with a 15 amp time-delay fuse. Freezer temperature is too • Set refrigerator control to stabilize. Push in a 24 hour period. • Water supply is turned...

Complete Owner s Guide
Page 24
... not a part of Alaska. 12. THIS WRITTEN WARRANTY GIVES YOU SPECIFIC LEGAL RIGHTS. In Canada, your appliance is in your receipt, delivery slip, or some other appropriate payment record to repair or replace appliance light bulbs, air filters, water filters, other consumables, or knobs, handles, or other than authorized service companies; MAJOR APPLIANCE WARRANTY Your appliance is installed, used and maintained in accordance with the provided instructions.
... not a part of Alaska. 12. THIS WRITTEN WARRANTY GIVES YOU SPECIFIC LEGAL RIGHTS. In Canada, your appliance is in your receipt, delivery slip, or some other appropriate payment record to repair or replace appliance light bulbs, air filters, water filters, other consumables, or knobs, handles, or other than authorized service companies; MAJOR APPLIANCE WARRANTY Your appliance is installed, used and maintained in accordance with the provided instructions.

Wiring Diagram
Page 1
... the door switch is terminated when defrost thermistor located on for 115 seconds. One full turn on and run for another 5 minutes. SERVICE DATA SHEET STANDARD - Disconnect power cord before servicing this time, the compressor will sound for more than 5 minutes and alarm sounds. it will stay powered until the next test is equal to : 1 Green / Yellow Ground 2 Yellow Water Valve 3 Black Line 4 Light Blue Neutral ICE MAKER INFORMATION Test Cycling: Remove cover...
... the door switch is terminated when defrost thermistor located on for 115 seconds. One full turn on and run for another 5 minutes. SERVICE DATA SHEET STANDARD - Disconnect power cord before servicing this time, the compressor will sound for more than 5 minutes and alarm sounds. it will stay powered until the next test is equal to : 1 Green / Yellow Ground 2 Yellow Water Valve 3 Black Line 4 Light Blue Neutral ICE MAKER INFORMATION Test Cycling: Remove cover...
Product Specifications Sheet
Page 2
....0 Refrigerator Capacity (Cu. Allow 1" min. Amlwinayims cuomnsuclltelaocralnacned wnailtlioOnNalLY electric and plumbing codes. Width C - Compliant1 ENERGY STAR® Specifications Yes Yes Recessed water line Recessed Top View (ice maker models only) electrical outlet Total Capacity (Cu. Refer detailed installation instructions on adequately wired 120V, dedicated circuit having 2-wire service with restricted removal.) Product Dimensions A - Depth (Incl. Accessories information available on the web at sides and top for 90° door opening* providing...
....0 Refrigerator Capacity (Cu. Allow 1" min. Amlwinayims cuomnsuclltelaocralnacned wnailtlioOnNalLY electric and plumbing codes. Width C - Compliant1 ENERGY STAR® Specifications Yes Yes Recessed water line Recessed Top View (ice maker models only) electrical outlet Total Capacity (Cu. Refer detailed installation instructions on adequately wired 120V, dedicated circuit having 2-wire service with restricted removal.) Product Dimensions A - Depth (Incl. Accessories information available on the web at sides and top for 90° door opening* providing...
Product Specifications Sheet
Page 3
... make contact with wall, to allow for 90°door swing which will provide limited crisper access with restricted removal.) 30 1/8" 29 7/8" 66 5/8" with 3/8" rollers 65 7/8" with 3/8" rollers Water line inlet location (left bottom rear) 26 7/8" 32 5/8" Power cord location (right bottom rear) Allow 581/2" min. (with doors 90° open) Top Mount Refrigerator Specifications • Product Shipping Weight (approx.) - 205 Lbs. • An electrical supply...
... make contact with wall, to allow for 90°door swing which will provide limited crisper access with restricted removal.) 30 1/8" 29 7/8" 66 5/8" with 3/8" rollers 65 7/8" with 3/8" rollers Water line inlet location (left bottom rear) 26 7/8" 32 5/8" Power cord location (right bottom rear) Allow 581/2" min. (with doors 90° open) Top Mount Refrigerator Specifications • Product Shipping Weight (approx.) - 205 Lbs. • An electrical supply...


