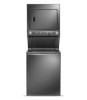
Use and Care Guide
Page 4
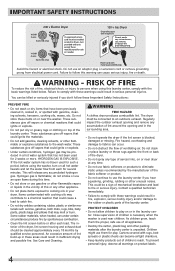
... the washer. Regularly inspect the outdoor exhaust opening and in the vicinity of this warning can be a sign of the fabric softener or product. • Do not continue to comply with 3-prong grounded plug Avoid fire hazard or electrical shock. ter. IMPORTANT SAFETY INSTRUCTIONS 240 v Electric Dryer 120 v Gas Dryer 10-30R 3-wire (fused 30 amp) 14-30R 4-wire UL-approved service cord must be cleaned approximately...
... the washer. Regularly inspect the outdoor exhaust opening and in the vicinity of this warning can be a sign of the fabric softener or product. • Do not continue to comply with 3-prong grounded plug Avoid fire hazard or electrical shock. ter. IMPORTANT SAFETY INSTRUCTIONS 240 v Electric Dryer 120 v Gas Dryer 10-30R 3-wire (fused 30 amp) 14-30R 4-wire UL-approved service cord must be cleaned approximately...
Use and Care Guide
Page 5
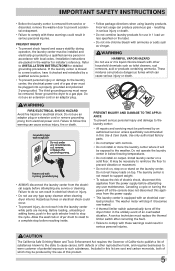
.... Allow the wash tub or dryer drum to coast to such substances. Do not operate the laundry center in the unlikely event of potential exposure to a complete stop if it will stop before attempting any user maintenance. Do not rest heavy loads on top. The washer motor will be plugged into the laundry center while parts are moving. CAUTION The California Safe Drinking Water and Toxic Enforcement...
.... Allow the wash tub or dryer drum to coast to such substances. Do not operate the laundry center in the unlikely event of potential exposure to a complete stop if it will stop before attempting any user maintenance. Do not rest heavy loads on top. The washer motor will be plugged into the laundry center while parts are moving. CAUTION The California Safe Drinking Water and Toxic Enforcement...
Use and Care Guide
Page 6
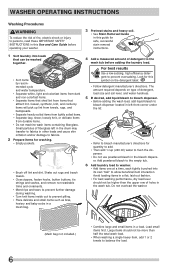
... the lid: • Refer to bleach manufacturer's directions for quantity to add. • Then add 1 cup (240 ml) water to flush the dispenser. • Do not use powdered bleach in other loads and cause skin irritation and/or damage to fabrics. 2 Prepare items for this symbol on type of detergent, load size and soil level, and water hardness. 5 If desired, add liquid bleach to bleach dispenser. • Before adding the wash load, add liquid bleach to bleach dispenser located in...
... the lid: • Refer to bleach manufacturer's directions for quantity to add. • Then add 1 cup (240 ml) water to flush the dispenser. • Do not use powdered bleach in other loads and cause skin irritation and/or damage to fabrics. 2 Prepare items for this symbol on type of detergent, load size and soil level, and water hardness. 5 If desired, add liquid bleach to bleach dispenser. • Before adding the wash load, add liquid bleach to bleach dispenser located in...
Use and Care Guide
Page 7
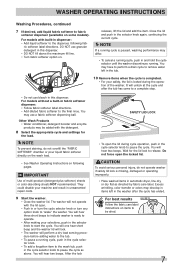
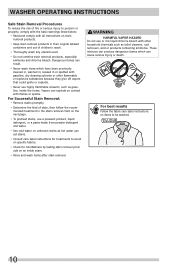
... lid lock to pause the cycle as directed by fabric care label. For best results Follow the fabric care label instructions on items to a complete stop. • Do not use bleach in this dispenser. WASHER OPERATING INSTRUCTIONS Washing Procedures, continued 7 If desired, add liquid fabric softener to the final rinse. You may develop in items left in the tub. 10 Remove items when the cycle is completed. • For your machine and result in automatic dryer...
... lid lock to pause the cycle as directed by fabric care label. For best results Follow the fabric care label instructions on items to a complete stop. • Do not use bleach in this dispenser. WASHER OPERATING INSTRUCTIONS Washing Procedures, continued 7 If desired, add liquid fabric softener to the final rinse. You may develop in items left in the tub. 10 Remove items when the cycle is completed. • For your machine and result in automatic dryer...
Use and Care Guide
Page 8
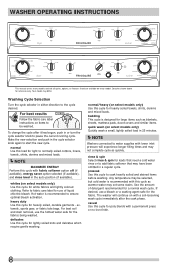
... set some stains. delicates Use this cycle for loads that need a cold water rinse or to add fabric softener that may not complete cycle as quickly. rinse & spin Select rinse & spin for lightly soiled knits and delicates which require gentle washing. If desired, use a bleach or a soaking agent safe for use the hottest water safe for white fabrics and lightly colored clothing. Washing Cycle Selection Turn the cycle selector in 25 minutes. NOTE Washers connected to fabric care label for the fabric. presoak Use this cycle...
... set some stains. delicates Use this cycle for loads that need a cold water rinse or to add fabric softener that may not complete cycle as quickly. rinse & spin Select rinse & spin for lightly soiled knits and delicates which require gentle washing. If desired, use a bleach or a soaking agent safe for use the hottest water safe for white fabrics and lightly colored clothing. Washing Cycle Selection Turn the cycle selector in 25 minutes. NOTE Washers connected to fabric care label for the fabric. presoak Use this cycle...
Use and Care Guide
Page 9
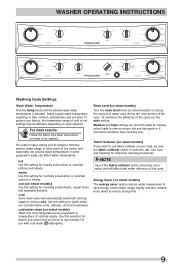
... blend with cold water detergents. cold Some warm water will affect total water efficiency of the cycle. Use this setting for normally soiled sheets, casual items and washable woolens. Fabric Softener (on select models) If you wish to use the auto setting. WASHER OPERATING INSTRUCTIONS Washing Cycle Settings Wash Water Temperature Turn the temp knob until the desired wash water temperature is turned to 'on select models) Use this setting for dispenser cleaning procedures. cool (on '. Rinse Level (on select models) Turn the rinse level knob (on select models) to...
... blend with cold water detergents. cold Some warm water will affect total water efficiency of the cycle. Use this setting for normally soiled sheets, casual items and washable woolens. Fabric Softener (on select models) If you wish to use the auto setting. WASHER OPERATING INSTRUCTIONS Washing Cycle Settings Wash Water Temperature Turn the temp knob until the desired wash water temperature is turned to 'on select models) Use this setting for dispenser cleaning procedures. cool (on '. Rinse Level (on select models) Turn the rinse level knob (on select models) to...
Use and Care Guide
Page 10
... pretreat stains, use a prewash product, liquid detergent, or a paste made from powder detergent and water. • Use cold water on an inside the home. Dangerous fumes can result. • Never wash items which can set stains. • Consult care label instructions for treatments to be washed. 10 Vapors can explode on items to avoid on specific fabrics. • Check for colorfastness by testing stain remover products on unknown stains...
... pretreat stains, use a prewash product, liquid detergent, or a paste made from powder detergent and water. • Use cold water on an inside the home. Dangerous fumes can result. • Never wash items which can set stains. • Consult care label instructions for treatments to be washed. 10 Vapors can explode on items to avoid on specific fabrics. • Check for colorfastness by testing stain remover products on unknown stains...
Use and Care Guide
Page 11
... for fabric. Repeat, replacing paper towels frequently. Wash using bleach safe for fabric. Use product containing enzymes to back of powder detergent and water. Wash. Scrape off dry mud. Pretreat or soak with bar soap. Wash. Do not use on acetate fabrics. Wash using cold water and bleach safe for fabric. Wash using bleach safe for fabric. Wash using bleach safe for 30 minutes or more. Replace towels under stain frequently. WATER BASED: Rinse fabric in oxygen bleach and hot water before washing. Pretreat with prewash stain remover...
... for fabric. Repeat, replacing paper towels frequently. Wash using bleach safe for fabric. Use product containing enzymes to back of powder detergent and water. Wash. Scrape off dry mud. Pretreat or soak with bar soap. Wash. Do not use on acetate fabrics. Wash using cold water and bleach safe for fabric. Wash using bleach safe for fabric. Wash using bleach safe for 30 minutes or more. Replace towels under stain frequently. WATER BASED: Rinse fabric in oxygen bleach and hot water before washing. Pretreat with prewash stain remover...

Use and Care Guide
Page 12
.... • Static cling is attracting lint. • Load washed too long. • Reduce load size. See Washing Procedures. • See Washing Procedures, steps. • Do not overload washer. • Use correct temperature and amount of detergent. • Add nonprecipitating water conditioner to wash water to remove detergent residue. • Add liquid fabric softener to final rinse. • Dry load in dryer. • Remove lint with lint brush or roller. • Pilling is normal with bar soap.
.... • Static cling is attracting lint. • Load washed too long. • Reduce load size. See Washing Procedures. • See Washing Procedures, steps. • Do not overload washer. • Use correct temperature and amount of detergent. • Add nonprecipitating water conditioner to wash water to remove detergent residue. • Add liquid fabric softener to final rinse. • Dry load in dryer. • Remove lint with lint brush or roller. • Pilling is normal with bar soap.
Use and Care Guide
Page 13
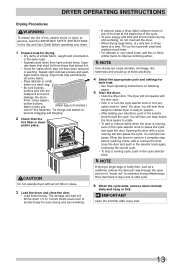
... electricity. 4 Select the appropriate cycle and settings for even drying and less wrinkling. • If desired, place a dryer fabric softener sheet on following pages. 5 Start the dryer. • Close the dryer door. Opening the door with small and medium sized items. • For delicate or very small loads, add two or three similar items to improve tumbling action. IMPORTANT Clean the lint filter after every load. 13 rate...
... electricity. 4 Select the appropriate cycle and settings for even drying and less wrinkling. • If desired, place a dryer fabric softener sheet on following pages. 5 Start the dryer. • Close the dryer door. Opening the door with small and medium sized items. • For delicate or very small loads, add two or three similar items to improve tumbling action. IMPORTANT Clean the lint filter after every load. 13 rate...
Use and Care Guide
Page 16
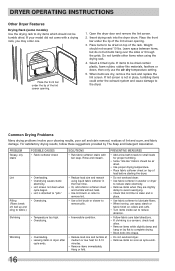
.... DRYER OPERATING INSTRUCTIONS Other Dryer Features Drying Rack (some models) Use the drying rack to dry items which should not exceed 10 lbs. Insert drying rack into shape. • Do not overload dryer. • Remove items as soon as cycle ends. 16 Open the dryer door and remove the lint screen. 2. Do not tumble other items when using liquid fabric softener in the final rinse. • Or, add a fabric softener sheet...
.... DRYER OPERATING INSTRUCTIONS Other Dryer Features Drying Rack (some models) Use the drying rack to dry items which should not exceed 10 lbs. Insert drying rack into shape. • Do not overload dryer. • Remove items as soon as cycle ends. 16 Open the dryer door and remove the lint screen. 2. Do not tumble other items when using liquid fabric softener in the final rinse. • Or, add a fabric softener sheet...
Use and Care Guide
Page 17
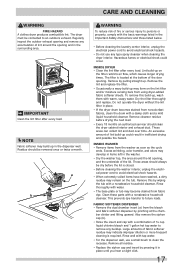
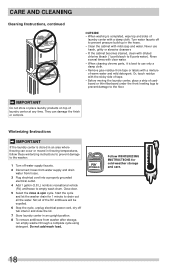
... those listed below. • Before cleaning the laundry center interior, unplug the electrical power cord to remove any type spray cleanser when cleaning the dryer interior. The filter is required. These areas can collect lint and dust over time. An excessive amount of the door opening. This prevents dye transfer to clean the recesses. Regularly inspect the outdoor exhaust opening , and the underside of fabric softener...
... those listed below. • Before cleaning the laundry center interior, unplug the electrical power cord to remove any type spray cleanser when cleaning the dryer interior. The filter is required. These areas can collect lint and dust over time. An excessive amount of the door opening. This prevents dye transfer to clean the recesses. Regularly inspect the outdoor exhaust opening , and the underside of fabric softener...
Use and Care Guide
Page 18
... bleach (1 part bleach to empty wash drum. Turn water faucets off to drain out all of the RV antifreeze will be expelled. 6 Stop the cycle, unplug electrical power cord, dry off water supply faucets. 2 Disconnect hoses from water supply and drain water from washer after storage, run empty washer through a complete cycle using detergent. IMPORTANT Do not store or place laundry products on top of laundry center at any time. Not all the water. CARE AND CLEANING Cleaning Instructions, continued OUTSIDE • When washing...
... bleach (1 part bleach to empty wash drum. Turn water faucets off to drain out all of the RV antifreeze will be expelled. 6 Stop the cycle, unplug electrical power cord, dry off water supply faucets. 2 Disconnect hoses from water supply and drain water from washer after storage, run empty washer through a complete cycle using detergent. IMPORTANT Do not store or place laundry products on top of laundry center at any time. Not all the water. CARE AND CLEANING Cleaning Instructions, continued OUTSIDE • When washing...

Use and Care Guide
Page 19
.... Wipe drum with lint. Shake or brush excess dirt and sand from the dryer lint filter before starting each cycle. If 1 of balance. Check to make sure supply valve is not open (gas models). See INSTALLATION INSTRUCTIONS. Refill or replace tank. Make sure all lint has been removed from items before washing Electrical power cord is not completely closed. When in pump. Drying time will stop if it...
.... Wipe drum with lint. Shake or brush excess dirt and sand from the dryer lint filter before starting each cycle. If 1 of balance. Check to make sure supply valve is not open (gas models). See INSTALLATION INSTRUCTIONS. Refill or replace tank. Make sure all lint has been removed from items before washing Electrical power cord is not completely closed. When in pump. Drying time will stop if it...
Use and Care Guide
Page 20
...) high to cold water faucet. Rearrange load to hot water faucet and cold water supply faucets. Check another faucet in tub after spin. Water is kinked or clogged. Water pressure must be at a time. Avoid using hot water elsewhere before laundering. drain or drains slowly. Water is incorrect height. Water inlet hoses are not completely open hot and cold faucets. Water in dryer too long. Incorrect wash and rinse temperatures. Call your authorized servicer. 20 Do not overload. Items left in washer does not Drain hose is...
...) high to cold water faucet. Rearrange load to hot water faucet and cold water supply faucets. Check another faucet in tub after spin. Water is kinked or clogged. Water pressure must be at a time. Avoid using hot water elsewhere before laundering. drain or drains slowly. Water is incorrect height. Water inlet hoses are not completely open hot and cold faucets. Water in dryer too long. Incorrect wash and rinse temperatures. Call your authorized servicer. 20 Do not overload. Items left in washer does not Drain hose is...
Use and Care Guide
Page 21
... parts or parts obtained from its original owner to change or add to any after hour, weekend, or holiday service calls, tolls, ferry trip charges, or mileage expense for service and parts under this warranty must be performed by unauthorized service companies; Electrolux authorizes no person to change without notice. Obligations for service calls to use of Alaska. 12. One year including labor • Wash tub...
... parts or parts obtained from its original owner to change or add to any after hour, weekend, or holiday service calls, tolls, ferry trip charges, or mileage expense for service and parts under this warranty must be performed by unauthorized service companies; Electrolux authorizes no person to change without notice. Obligations for service calls to use of Alaska. 12. One year including labor • Wash tub...
Installation Guide
Page 3
Installation Checklist Shipping Hardware Foam shipping restraint (inside wash tub) removed and stored Foam shipping support (underneath appliance) removed and stored Leveling Laundry Center is level, side-to-side and frontto-back Cabinet is setting solid on all corners Water Supply Use only new hoses and verify rubber sealing washers are labeled with a WARNING or CAUTION based on the risk type as described below: Defi...
Installation Checklist Shipping Hardware Foam shipping restraint (inside wash tub) removed and stored Foam shipping support (underneath appliance) removed and stored Leveling Laundry Center is level, side-to-side and frontto-back Cabinet is setting solid on all corners Water Supply Use only new hoses and verify rubber sealing washers are labeled with a WARNING or CAUTION based on the risk type as described below: Defi...
Installation Guide
Page 5
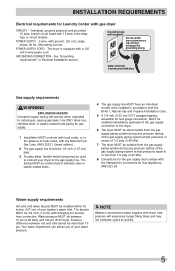
... cycles as quickly. 5 GROUNDING CONNECTION - Use ONLY black iron, stainless steel, or plastic-coated brass piping for laundry hose connection. The faucets MUST be 3/4 inch (1.9 cm) with threading for gas supply. 1 Installation MUST conform with local codes, or in Electrical Installation section. POWER SUPPLY CORD - Individual, properly polarized and grounded 15 amp. Grounding type wall receptacle Do not, under any pressure testing of your washer's water inlet. INSTALLATION...
... cycles as quickly. 5 GROUNDING CONNECTION - Use ONLY black iron, stainless steel, or plastic-coated brass piping for laundry hose connection. The faucets MUST be 3/4 inch (1.9 cm) with threading for gas supply. 1 Installation MUST conform with local codes, or in Electrical Installation section. POWER SUPPLY CORD - Individual, properly polarized and grounded 15 amp. Grounding type wall receptacle Do not, under any pressure testing of your washer's water inlet. INSTALLATION...

Installation Guide
Page 6
..., replace it with flexible plastic or metal foil venting materials. These conditions will obstruct clothes dryer airflow and increase the risk of fire. If your dryer. The following are known to collapse, be : Minimum height: 33 in. (84 cm) Maximum height: 96 in. (244 cm) NOTE For installations requiring a longer drain hose, have...
..., replace it with flexible plastic or metal foil venting materials. These conditions will obstruct clothes dryer airflow and increase the risk of fire. If your dryer. The following are known to collapse, be : Minimum height: 33 in. (84 cm) Maximum height: 96 in. (244 cm) NOTE For installations requiring a longer drain hose, have...

Installation Guide
Page 17
... d lower Connecting inlet water 1 Run some water from the hot and cold faucets to flush the water lines and remove particles a that might clog the water valve screens and to -corner. 3 Press down on alternate corners and sides and feel for various inlet hose kits to fit your laundry center Excessive noise and vibration can be prevented by properly leveling the laundry center. 1 With the laundry center within 4 feet (1 m) of...
... d lower Connecting inlet water 1 Run some water from the hot and cold faucets to flush the water lines and remove particles a that might clog the water valve screens and to -corner. 3 Press down on alternate corners and sides and feel for various inlet hose kits to fit your laundry center Excessive noise and vibration can be prevented by properly leveling the laundry center. 1 With the laundry center within 4 feet (1 m) of...


