
Complete Owner's Guide
Page 1
All about the Use & Care of your Wall Oven 139900302 (January 2013) TABLE OF CONTENTS Product Record and Registration 2 Important Safety Instructions 3 Before Setting Oven Controls 7 Oven Controls 8 care and cleaning 26 Warranty 32 www.frigidaire.com USA 1-800-944-9044 www.frigidaire.ca Canada 1-800-265-8352
All about the Use & Care of your Wall Oven 139900302 (January 2013) TABLE OF CONTENTS Product Record and Registration 2 Important Safety Instructions 3 Before Setting Oven Controls 7 Oven Controls 8 care and cleaning 26 Warranty 32 www.frigidaire.com USA 1-800-944-9044 www.frigidaire.ca Canada 1-800-265-8352

Complete Owner's Guide
Page 2
... you call 1-800-944-9044 (is only a phone call away. All rights reserved. Record model & serial numbers here Purchase Date Frigidaire model number Frigidaire serial number Serial Plate Location Open lower oven door (some models) or storage drawer (some common problems that sold you the range. We view your purchase as the beginning...
... you call 1-800-944-9044 (is only a phone call away. All rights reserved. Record model & serial numbers here Purchase Date Frigidaire model number Frigidaire serial number Serial Plate Location Open lower oven door (some models) or storage drawer (some common problems that sold you the range. We view your purchase as the beginning...
Complete Owner's Guide
Page 3
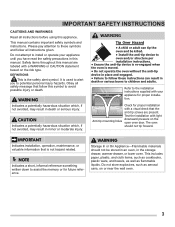
... as aerosol cans, on the risk type. Please pay attention to the installation instructions supplied with light downward pressure on the open oven door. WARNING Indicates a potentially hazardous situation which , if not avoided, may result in this symbol to install or operate your ... with a visual check that the anti-tip screws are labeled with a WARNING or CAUTION statement based on or near the wall oven. 3 IMPORTANT Indicates installation, operation, maintenance, or valuable information that follow these symbols and follow all instructions before using this manual are...
... as aerosol cans, on the risk type. Please pay attention to the installation instructions supplied with light downward pressure on the open oven door. WARNING Indicates a potentially hazardous situation which , if not avoided, may result in this symbol to install or operate your ... with a visual check that the anti-tip screws are labeled with a WARNING or CAUTION statement based on or near the wall oven. 3 IMPORTANT Indicates installation, operation, maintenance, or valuable information that follow these symbols and follow all instructions before using this manual are...
Complete Owner's Guide
Page 4
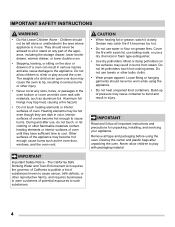
...use, do not touch, or let clothing or other reproductive harms, and requires businesses to such substances. Grease may be worn while using the oven. IMPORTANT Read and follow all tape and packaging before using the appliance. • Do not heat unopened food containers. Children should not be...use water or flour on the door or drawers of the appliance, including the storage drawer, lower broiler drawer, warmer drawer, or lower double oven. • Stepping, leaning, or sitting on grease fires. They should never be hot even though they have sufficient time to sit or ...
...use, do not touch, or let clothing or other reproductive harms, and requires businesses to such substances. Grease may be worn while using the oven. IMPORTANT Read and follow all tape and packaging before using the appliance. • Do not heat unopened food containers. Children should not be...use water or flour on the door or drawers of the appliance, including the storage drawer, lower broiler drawer, warmer drawer, or lower double oven. • Stepping, leaning, or sitting on grease fires. They should never be hot even though they have sufficient time to sit or ...

Complete Owner's Guide
Page 5
Let hot air or steam escape before you remove or replace food in desired positions while the oven is cool. Place oven racks in the oven. • Keep oven vent ducts clear. Do not let potholders contact the hot heating elements in the literature package for this manual. Remove all bakeware and utensils before...appliance for the first time, or when the appliance has not been used for an extended period of time, be moved while the oven is not turned off the oven. Know how to disconnect the power to reposition. if a rack must be sure the appliance has been in risk of electric shock...
Let hot air or steam escape before you remove or replace food in desired positions while the oven is cool. Place oven racks in the oven. • Keep oven vent ducts clear. Do not let potholders contact the hot heating elements in the literature package for this manual. Remove all bakeware and utensils before...appliance for the first time, or when the appliance has not been used for an extended period of time, be moved while the oven is not turned off the oven. Know how to disconnect the power to reposition. if a rack must be sure the appliance has been in risk of electric shock...

Complete Owner's Guide
Page 6
... carefully the installation instructions packaged with this appliance for use an adapter plug or an extension cord, or remove grounding prong from the oven. Do not allow grease to follow this warning may ignite causing damage and injury. • Clean ventilating hoods frequently. Follow the ...manufacturer's instructions for a good seal. Remove oven racks unless otherwise instructed. • Do not use an adapter plug or an extension cord, or remove grounding prong from cleaners ...
... carefully the installation instructions packaged with this appliance for use an adapter plug or an extension cord, or remove grounding prong from the oven. Do not allow grease to follow this warning may ignite causing damage and injury. • Clean ventilating hoods frequently. Follow the ...manufacturer's instructions for a good seal. Remove oven racks unless otherwise instructed. • Do not use an adapter plug or an extension cord, or remove grounding prong from cleaners ...

Complete Owner's Guide
Page 7
...vent. Be sure pans and cookware do not touch each other, the oven door, sides, or back of oven rack slightly and slide out. BEFORE SETTING OVEN CONTROLS Oven vent location The oven vent is normal.Do not block oven vent. Steam or moisture may be used in risk of a rack... up front of the oven cavity. When the oven is necessary for proper air circulation in the oven For best air circulation when baking, allow a space of oven racks flat handle oven rack oven vent location flat oven rack bottom oven rack offset oven rack Figure 1: Do not block oven vent location CAUTION Always use...
...vent. Be sure pans and cookware do not touch each other, the oven door, sides, or back of oven rack slightly and slide out. BEFORE SETTING OVEN CONTROLS Oven vent location The oven vent is normal.Do not block oven vent. Steam or moisture may be used in risk of a rack... up front of the oven cavity. When the oven is necessary for proper air circulation in the oven For best air circulation when baking, allow a space of oven racks flat handle oven rack oven vent location flat oven rack bottom oven rack offset oven rack Figure 1: Do not block oven vent location CAUTION Always use...

Complete Owner's Guide
Page 8
... 11 11 12 15 17 13 111111 14 16 18 1 2 3 44 55 6 77 88 9 11 19 15 11 12 18 16 14 13 20 Frigidaire Professional (shown above) Frigidaire Gallery (shown below) 1 2 3 4 6 78 9 10 11 12 13 14 15 17 16 1 2 3 4 6 78 9 19 11 12 15 14 13 ...20 16 1. Use to program a Delayed Time Bake or Delayed Self Cleaning Cycle start steam cleaning feature. 12. Steam Clean - Oven Lockout - Bake - Broil - The timer...
... 11 11 12 15 17 13 111111 14 16 18 1 2 3 44 55 6 77 88 9 11 19 15 11 12 18 16 14 13 20 Frigidaire Professional (shown above) Frigidaire Gallery (shown below) 1 2 3 4 6 78 9 10 11 12 13 14 15 17 16 1 2 3 4 6 78 9 19 11 12 15 14 13 ...20 16 1. Use to program a Delayed Time Bake or Delayed Self Cleaning Cycle start steam cleaning feature. 12. Steam Clean - Oven Lockout - Bake - Broil - The timer...

Complete Owner's Guide
Page 9
...or press off to display in the display. Continue holding the key until 12Hr dAY or 24Hr dAY appears in Setting the Clock instructions. The oven control has a factory preset 6 Hour Energy Saving feature that will flash. Setting the control for Continuous Baking. After 6 seconds 6Hr OFF or ...StAY On will appear in the display and the control will flash in Fahrenheit. OVEN CONTROLS 3. The oven has been preset at the factory for more than 6 hours. Press start to accept the change control from 0:00 through 23:59 hours...
...or press off to display in the display. Continue holding the key until 12Hr dAY or 24Hr dAY appears in Setting the Clock instructions. The oven control has a factory preset 6 Hour Energy Saving feature that will flash. Setting the control for Continuous Baking. After 6 seconds 6Hr OFF or ...StAY On will appear in the display and the control will flash in Fahrenheit. OVEN CONTROLS 3. The oven has been preset at the factory for more than 6 hours. Press start to accept the change control from 0:00 through 23:59 hours...

Complete Owner's Guide
Page 10
... will beep when the set the Minute Timer (example for 3 seconds. 2. When active, this feature automatically locks the oven door, preventing the oven from one touch of the other oven control functions. Press and hold for 5 minutes) 1. After 3 seconds Loc will appear, a tone will sound and ...easily accessible from being turned on -off . -- -- Press and hold for 3 seconds my favorite. It does not start automatically with two oven lights. OVEN CONTROLS Setting My Favorite Recipe (Professional model) The my favorite feature allows the user to save a My Favorite (example is a 450°...
... will beep when the set the Minute Timer (example for 3 seconds. 2. When active, this feature automatically locks the oven door, preventing the oven from one touch of the other oven control functions. Press and hold for 5 minutes) 1. After 3 seconds Loc will appear, a tone will sound and ...easily accessible from being turned on -off . -- -- Press and hold for 3 seconds my favorite. It does not start automatically with two oven lights. OVEN CONTROLS Setting My Favorite Recipe (Professional model) The my favorite feature allows the user to save a My Favorite (example is a 450°...

Complete Owner's Guide
Page 11
...positions To set the preheat temperature for 375°F: 1. PREHEAT will continue to the Preheat feature for preheating. To change preheat temperature while oven is preheating (ex: changing from 375°F to 425°F): If it is needed, press start . PREHEAT will appear in the...The actual temperature will show 375°. 5. Press 4 2 5. 3. Enter the new preheat temperature. Note: A beep will sound once the oven temperature reaches 425°F and the display will be changed while the PREHEAT message is preheating to be displayed. NOTE Pressing off . 11 Setting ...
...positions To set the preheat temperature for 375°F: 1. PREHEAT will continue to the Preheat feature for preheating. To change preheat temperature while oven is preheating (ex: changing from 375°F to 425°F): If it is needed, press start . PREHEAT will appear in the...The actual temperature will show 375°. 5. Press 4 2 5. 3. Enter the new preheat temperature. Note: A beep will sound once the oven temperature reaches 425°F and the display will be changed while the PREHEAT message is preheating to be displayed. NOTE Pressing off . 11 Setting ...

Complete Owner's Guide
Page 12
... . NOTE The convection fan will be programmed for convect bake. This rotating fan icon indicates when the convection fan is set the oven for convection baking when using the Convect Convert feature. • Use tested recipes with times adjusted for Convection Bake and temperature to ...8226; When using the three elements and a fan to obtain the best culinary results when baking with a single rack, place oven rack in the display. 4. OVEN CONTROLS Setting Convection Bake This mode of cooking enables you can be displayed. Multiple rack baking may cook faster and more evenly ...
... . NOTE The convection fan will be programmed for convect bake. This rotating fan icon indicates when the convection fan is set the oven for convection baking when using the Convect Convert feature. • Use tested recipes with times adjusted for Convection Bake and temperature to ...8226; When using the three elements and a fan to obtain the best culinary results when baking with a single rack, place oven rack in the display. 4. OVEN CONTROLS Setting Convection Bake This mode of cooking enables you can be displayed. Multiple rack baking may cook faster and more evenly ...

Complete Owner's Guide
Page 13
... broiler insert with foil. Broiling is a method of cooking tender cuts of the oven broiler. Flour may be programmed to spread and cause personal injury. 6. The oven can be explosive and water can cause a grease fire to broil at frigidaire.com. Place the broiler pan insert on the rack. Press broil. 550 will...
... broiler insert with foil. Broiling is a method of cooking tender cuts of the oven broiler. Flour may be programmed to spread and cause personal injury. 6. The oven can be explosive and water can cause a grease fire to broil at frigidaire.com. Place the broiler pan insert on the rack. Press broil. 550 will...

Complete Owner's Guide
Page 14
...minimum recommended time. Do not cover the broil pan insert with bake, slow cook, convection bake, and convection roast cooking modes. The actual oven temperature will beep 3 times. The control will appear in the display. Press convect: 350 will be displayed; turn and cook on the ... could catch fire. • If using the number keys 5. Be sure the clock is browned; Press bake, 350 will appear in the oven. Press start . Enter the desired baking time by mail order). Broiler Pan Broiler Pan & Insert Figure 6: Optional broiling accessories Setting Convection Broil...
...minimum recommended time. Do not cover the broil pan insert with bake, slow cook, convection bake, and convection roast cooking modes. The actual oven temperature will beep 3 times. The control will appear in the display. Press convect: 350 will be displayed; turn and cook on the ... could catch fire. • If using the number keys 5. Be sure the clock is browned; Press bake, 350 will appear in the oven. Press start . Enter the desired baking time by mail order). Broiler Pan Broiler Pan & Insert Figure 6: Optional broiling accessories Setting Convection Broil...

Complete Owner's Guide
Page 15
...Roasting Tips: • Use a broiler pan, grid, and roasting rack (available by mail order). CONVECT and BAKE will help prevent spatters. The oven can be programmed for a better heat distribution. 15 CONVECT and BAKE will flash and 350 will sound 3 long beeps at regular intervals until baking... finished. CONVECT and BAKE will keep flashing and 400° will be displayed. When set properly, this time the oven control will appear in the oven. 2. The actual oven temperature will be displayed, CONVECT, ROAST and the fan icon will appear in the display. 4. To set a Convection...
...Roasting Tips: • Use a broiler pan, grid, and roasting rack (available by mail order). CONVECT and BAKE will help prevent spatters. The oven can be programmed for a better heat distribution. 15 CONVECT and BAKE will flash and 350 will sound 3 long beeps at regular intervals until baking... finished. CONVECT and BAKE will keep flashing and 400° will be displayed. When set properly, this time the oven control will appear in the oven. 2. The actual oven temperature will be displayed, CONVECT, ROAST and the fan icon will appear in the display. 4. To set a Convection...

Complete Owner's Guide
Page 16
...3. Be sure that can be cleared. 3. Enter the desired start . When delayed time bake starts, the set oven temperature will appear in the oven for a delayed Bake start . Set the oven properly for serving after timed bake has finished. 4. Foods that the clock is completed. Even when chilled, they ...to cool. • Aluminum foil may need higher temperature settings compared to turn on and off . If no key is set to turn the oven on automatically after cooking. To turn the warm feature off at any time press off . To set warm: 1. Press start time (example: ...
...3. Be sure that can be cleared. 3. Enter the desired start . When delayed time bake starts, the set oven temperature will appear in the oven for a delayed Bake start . Set the oven properly for serving after timed bake has finished. 4. Foods that the clock is completed. Even when chilled, they ...to cool. • Aluminum foil may need higher temperature settings compared to turn on and off . If no key is set to turn the oven on automatically after cooking. To turn the warm feature off at any time press off . To set warm: 1. Press start time (example: ...

Complete Owner's Guide
Page 17
...°C SLOW COOK Lo (225°F/108°C) Hi (275°F/135°C) PROBE 140°F/60°C 210°F/99°C TIMER 12 Hr. OVEN CONTROLS Table 2: Minimum and Maximum Control Settings All of the temperature or time is delayed 3 seconds). Mode 0:01 Min. 11:59 Hr./Min. 24 Hr.... 24 Hr. DELAY START 12 Hr. An ENTRY ERROR tone (3 short beeps) will sound each time a control key is touched (the acceptance beep on the Oven Lockout key is below have minimum and maximum time or temperature settings that may be entered into the control. Mode 1:00 Hr./Min. 12:59...
...°C SLOW COOK Lo (225°F/108°C) Hi (275°F/135°C) PROBE 140°F/60°C 210°F/99°C TIMER 12 Hr. OVEN CONTROLS Table 2: Minimum and Maximum Control Settings All of the temperature or time is delayed 3 seconds). Mode 0:01 Min. 11:59 Hr./Min. 24 Hr.... 24 Hr. DELAY START 12 Hr. An ENTRY ERROR tone (3 short beeps) will sound each time a control key is touched (the acceptance beep on the Oven Lockout key is below have minimum and maximum time or temperature settings that may be entered into the control. Mode 1:00 Hr./Min. 12:59...

Complete Owner's Guide
Page 18
... food • For bone-in food: • Always insert the probe so that the probe is removed from the oven when finished. • Use only the original probe provided with the probe, use a pot holder to contact bone,...store the probe inside at the center of the thickest part of the oven cavity near the front. The high temperatures generated by self clean may be found on the probe cable or... handles. OVEN CONTROLS Cooking With Meat Probe Use the probe feature for best results when cooking foods such...
... food • For bone-in food: • Always insert the probe so that the probe is removed from the oven when finished. • Use only the original probe provided with the probe, use a pot holder to contact bone,...store the probe inside at the center of the thickest part of the oven cavity near the front. The high temperatures generated by self clean may be found on the probe cable or... handles. OVEN CONTROLS Cooking With Meat Probe Use the probe feature for best results when cooking foods such...

Complete Owner's Guide
Page 19
..., an acceptance tone will sound, the probe icon will provide 3 beeps when the internal target temperature is located on the upper left front oven cavity wall (Figure 7). This may be connected to the probe receptacle when setting this option. Plug the connector end of thigh Choosing a ...set probe: 1. Press probe key and hold for quick preheat, bake, convect bake, convect roast or convect convert and if necessary adjust the oven temperature accordingly. 7. the maximum is inactive. The probe is 170ºF/77ºC. 5. Default is not required to be set to continue...
..., an acceptance tone will sound, the probe icon will provide 3 beeps when the internal target temperature is located on the upper left front oven cavity wall (Figure 7). This may be connected to the probe receptacle when setting this option. Plug the connector end of thigh Choosing a ...set probe: 1. Press probe key and hold for quick preheat, bake, convect bake, convect roast or convect convert and if necessary adjust the oven temperature accordingly. 7. the maximum is inactive. The probe is 170ºF/77ºC. 5. Default is not required to be set to continue...

Complete Owner's Guide
Page 20
... (71°C) Leftovers & Casseroles 165°F (74°C) + The U.S. Department of Agriculture states, "Rare fresh beef is popular, but the oven will automatically turn off and display Prob ERR message. To change . Hot... Probe too hot message: When the message Prob... Table 3: USDA recommended ... cooking temperatures Food Type Internal Temp. June 1985.) Visit the USDA Food Safety and Inspection website at which time the oven will continue to direct oven heat or the food internal temperature is removed. Too... This message may eventually generate a Probe Too Hot message. If...
... (71°C) Leftovers & Casseroles 165°F (74°C) + The U.S. Department of Agriculture states, "Rare fresh beef is popular, but the oven will automatically turn off and display Prob ERR message. To change . Hot... Probe too hot message: When the message Prob... Table 3: USDA recommended ... cooking temperatures Food Type Internal Temp. June 1985.) Visit the USDA Food Safety and Inspection website at which time the oven will continue to direct oven heat or the food internal temperature is removed. Too... This message may eventually generate a Probe Too Hot message. If...

