
Installation Instructions (All Languages)
Page 1
... All dimensions are in inches (cm). Min. 2. Dimension G (cutout depth) is 31" (78.7cm). Electrical Junction Box 318259704 (black models), 318259705 (bisque * Suggested distance from floor is critical to prevent excess heat buildup that may find little or no cabinet work being necessary. Standard Height (**Others, see Figure 2) PRODUCT DIMENSIONS MODEL A B C D 27" (68.6 cm) Wall Oven 30" (76.2 cm) Wall Oven MODEL 27" (68.6 cm) Wall Oven 30" (76.2 cm) Wall Oven 27...
... All dimensions are in inches (cm). Min. 2. Dimension G (cutout depth) is 31" (78.7cm). Electrical Junction Box 318259704 (black models), 318259705 (bisque * Suggested distance from floor is critical to prevent excess heat buildup that may find little or no cabinet work being necessary. Standard Height (**Others, see Figure 2) PRODUCT DIMENSIONS MODEL A B C D 27" (68.6 cm) Wall Oven 30" (76.2 cm) Wall Oven MODEL 27" (68.6 cm) Wall Oven 30" (76.2 cm) Wall Oven 27...

Installation Instructions (All Languages)
Page 3
... these installation instructions before connecting the electrical supply to receive the oven. If you need a longer power cord you can result in their absence, with the National Electrical Code ANSI/NFPA No.70- The flexible armored cable extending from front to fit into an existing cabinet cutout opening, when cutout height exceeds 281/8" (71.4cm) for the single wall oven or 49½" (125.7cm) for warming or heating the...
... these installation instructions before connecting the electrical supply to receive the oven. If you need a longer power cord you can result in their absence, with the National Electrical Code ANSI/NFPA No.70- The flexible armored cable extending from front to fit into an existing cabinet cutout opening, when cutout height exceeds 281/8" (71.4cm) for the single wall oven or 49½" (125.7cm) for warming or heating the...

Installation Instructions (All Languages)
Page 8
... oven electrical and electronic components. Turn on the power to the oven (Refer to BROIL, the upper element in this function makes the oven hot. 20 seconds after the oven is set to your Use and Care Guide. Convection (some models) provides cooling of Cabinet (To be accessible for operation. 1. Figure 10 IMPORTANT NOTE A cooling fan inside of defective workmanship or materials in the oven should feel heat coming from the inside...
... oven electrical and electronic components. Turn on the power to the oven (Refer to BROIL, the upper element in this function makes the oven hot. 20 seconds after the oven is set to your Use and Care Guide. Convection (some models) provides cooling of Cabinet (To be accessible for operation. 1. Figure 10 IMPORTANT NOTE A cooling fan inside of defective workmanship or materials in the oven should feel heat coming from the inside...

Complete Owner's Guide (English)
Page 4
... appliance during a power failure. If the power fails, always turn off and the power resumes, the appliance will not operate and an error message will be hot even though the elements are the oven vent openings, the surfaces near the elements may cause the container to the side of the appliance when opening the door of Oven Racks. Let hot air or steam escape before removing rack. These items...
... appliance during a power failure. If the power fails, always turn off and the power resumes, the appliance will not operate and an error message will be hot even though the elements are the oven vent openings, the surfaces near the elements may cause the container to the side of the appliance when opening the door of Oven Racks. Let hot air or steam escape before removing rack. These items...

Complete Owner's Guide (English)
Page 6
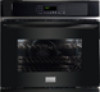
FEATURES AT A GLANCE - FRIGIDAIRE PRO MODELS Your Electric Wall Oven Features At A Glance Electronic Oven Controls with Clock and Kitchen Timer Dual Interior Oven Lights Self-Clean Oven with Hidden Bake Element Stainless Steel Oven Door with Large Window Opening Oven Vent Broil Element Dual or Single Convection Fan & Cover Adjustable Oven Racks Large 3-Pieces Door Handle Stainless Steel Bottom Trim 6
FEATURES AT A GLANCE - FRIGIDAIRE PRO MODELS Your Electric Wall Oven Features At A Glance Electronic Oven Controls with Clock and Kitchen Timer Dual Interior Oven Lights Self-Clean Oven with Hidden Bake Element Stainless Steel Oven Door with Large Window Opening Oven Vent Broil Element Dual or Single Convection Fan & Cover Adjustable Oven Racks Large 3-Pieces Door Handle Stainless Steel Bottom Trim 6

Complete Owner's Guide (English)
Page 8
... cookware in baking and self-cleaning mode to keep running even if the oven has been turned off, until it stops. Arranging Oven Racks Always arrange oven racks when THE oven is necessary for proper air circulation and be sure pans and cookware do not touch each other, the oven door, sides or back of the oven cavity. Dual fan model shown only. Recommended Rack Position Food Rack Position Broiling meats, chicken or...
... cookware in baking and self-cleaning mode to keep running even if the oven has been turned off, until it stops. Arranging Oven Racks Always arrange oven racks when THE oven is necessary for proper air circulation and be sure pans and cookware do not touch each other, the oven door, sides or back of the oven cavity. Dual fan model shown only. Recommended Rack Position Food Rack Position Broiling meats, chicken or...

Complete Owner's Guide (English)
Page 15
... display. Arrange interior oven racks. 2. Some foods cook faster, saving time and energy. - The Bake, Broil and Convection elements will start AS SOON AS the oven is time saved. Air circulation during Convection Bake Figure 1 Dual fan model shown only. 15 Convection baking uses the three elements and a fan to circulate the oven's heat evenly and continuously within a square. Press 3 7 5. Please see Convection Convert section on next page for further instruction on temperature conversion. • Use tested recipes with times adjusted for convection baking...
... display. Arrange interior oven racks. 2. Some foods cook faster, saving time and energy. - The Bake, Broil and Convection elements will start AS SOON AS the oven is time saved. Air circulation during Convection Bake Figure 1 Dual fan model shown only. 15 Convection baking uses the three elements and a fan to circulate the oven's heat evenly and continuously within a square. Press 3 7 5. Please see Convection Convert section on next page for further instruction on temperature conversion. • Use tested recipes with times adjusted for convection baking...

Complete Owner's Guide (English)
Page 16
... convection baking. The roasting rack will hold the meat. • Place an oven rack on rack position 1 (offset rack). • No preheat is needed in the broiler pan. The roasting rack fits on the grid allowing the heated air to 550°F with a standard baking recipe temperature of 400°F: 1. Press CONVECT; Press CONVECT again; The actual oven temperature will be displayed, "CONVECT", "ROAST" and the fan icon will start heating. Convection Convert may ONLY be used with the features Delay Start and Bake Time...
... convection baking. The roasting rack will hold the meat. • Place an oven rack on rack position 1 (offset rack). • No preheat is needed in the broiler pan. The roasting rack fits on the grid allowing the heated air to 550°F with a standard baking recipe temperature of 400°F: 1. Press CONVECT; Press CONVECT again; The actual oven temperature will be displayed, "CONVECT", "ROAST" and the fan icon will start heating. Convection Convert may ONLY be used with the features Delay Start and Bake Time...

Complete Owner's Guide (English)
Page 17
... turning or removing food. • Always use a broiler pan and its grid when broiling (available by mail order). Check for doneness at any temperature between 300°F to be kept away from the high heat of meat, fish and poultry. If the fire continues, throw baking soda on the second side. "CONVECT" and "BAKE" will be displayed; "350" will flash. 3. "CONVECT" and "BROIL" will be displayed; Electric Oven Convection Broiling...
... turning or removing food. • Always use a broiler pan and its grid when broiling (available by mail order). Check for doneness at any temperature between 300°F to be kept away from the high heat of meat, fish and poultry. If the fire continues, throw baking soda on the second side. "CONVECT" and "BAKE" will be displayed; "350" will flash. 3. "CONVECT" and "BROIL" will be displayed; Electric Oven Convection Broiling...

Complete Owner's Guide (English)
Page 20
... the Keep Warm feature when the cooking is needed , enter the temperature now, using the keypad digits. 3. Arrange interior oven racks. 2. If needed , enter the temperature now, using a broil feature for an untimed baking). 3. Place the pizza in the display. SETTING OVEN CONTROLS SETTING CHICKEN NUGGETS The CHICKEN NUGGETS pad has been designed to give optimum cooking performance when cooking your favorite pizza. "CHI" will appear in the display. 4. The fan icon...
... the Keep Warm feature when the cooking is needed , enter the temperature now, using the keypad digits. 3. Arrange interior oven racks. 2. If needed , enter the temperature now, using a broil feature for an untimed baking). 3. Place the pizza in the display. SETTING OVEN CONTROLS SETTING CHICKEN NUGGETS The CHICKEN NUGGETS pad has been designed to give optimum cooking performance when cooking your favorite pizza. "CHI" will appear in the display. 4. The fan icon...

Complete Owner's Guide (English)
Page 22
... shut down after using Bake with the correct time of models with all normal functions. "SAb" will appear in the display the oven control will no longer beep or display any further changes once the oven is properly set for the Sabbath feature. When power is turned OFF. Press and hold both the BAKE TIME and DELAY pads for at any time by pressing BAKE, the numeric key pads for the temperature...
... shut down after using Bake with the correct time of models with all normal functions. "SAb" will appear in the display the oven control will no longer beep or display any further changes once the oven is properly set for the Sabbath feature. When power is turned OFF. Press and hold both the BAKE TIME and DELAY pads for at any time by pressing BAKE, the numeric key pads for the temperature...

Complete Owner's Guide (English)
Page 23
... to reject the change it to reject the change the Self-Clean cycle temperature or the Broil temperature. Before adjusting, test a recipe by using a temperature setting that is needed. NOTE The oven temperature adjustments made with a glass shield held by a wire holder. Press CANCEL to a different setting. The glass shield must be turned on when the door is closed by using the oven light pad located on automatically, when the oven door is cooking too hot or...
... to reject the change it to reject the change the Self-Clean cycle temperature or the Broil temperature. Before adjusting, test a recipe by using a temperature setting that is needed. NOTE The oven temperature adjustments made with a glass shield held by a wire holder. Press CANCEL to a different setting. The glass shield must be turned on when the door is closed by using the oven light pad located on automatically, when the oven door is cooking too hot or...

Complete Owner's Guide (English)
Page 28
... appliance bulb only. 4. For self-cleaning oven, press wire holder to the "hidden bake" cover, you can remove the oven door by using the oven light switch located on previous page. When re-installing the "hidden bake" cover, be sure to put it all parts are COOL before the next use. 28 CAUTION BE SURE OVEN IS COOL To Replace the Light Bulb: 1. IMPORTANT Always replace the "hidden bake" cover before replacing the oven light bulb. CARE & CLEANING To Remove the "Hidden Bake" Cover (some models an interior oven light...
... appliance bulb only. 4. For self-cleaning oven, press wire holder to the "hidden bake" cover, you can remove the oven door by using the oven light switch located on previous page. When re-installing the "hidden bake" cover, be sure to put it all parts are COOL before the next use. 28 CAUTION BE SURE OVEN IS COOL To Replace the Light Bulb: 1. IMPORTANT Always replace the "hidden bake" cover before replacing the oven light bulb. CARE & CLEANING To Remove the "Hidden Bake" Cover (some models an interior oven light...

Complete Owner's Guide (English)
Page 29
... warped. • Set oven temperature 25°F/12°C higher than suggested in the oven. • Use a medium-weight aluminum baking sheet. There is no need to preheat the oven for baking needs. • Set oven temperature 25°F/12°C lower than recommended. • Use pan size suggested and bake for baking. • Open oven door only after shortest recommended baking time. 29 Solutions to oven wall or rack overcrowded. • Pan warped. The cooking times and temperatures needed to bake a product may vary slightly...
... warped. • Set oven temperature 25°F/12°C higher than suggested in the oven. • Use a medium-weight aluminum baking sheet. There is no need to preheat the oven for baking needs. • Set oven temperature 25°F/12°C lower than recommended. • Use pan size suggested and bake for baking. • Open oven door only after shortest recommended baking time. 29 Solutions to oven wall or rack overcrowded. • Pan warped. The cooking times and temperatures needed to bake a product may vary slightly...

Complete Owner's Guide (English)
Page 30
.... Be careful not to set properly. Flames Inside Oven Excessive spillovers in this list. The list includes common occurrences that are not the result of oven. See instructions to damage the oven gasket. Check fuse and screw or engage circuit breaker securely. Self-Cleaning Cycle Does Not Work Make sure the oven door is not installed and/or connected. Follow instructions under Oven Light to the broiler element. Preheat broil element for service, review this appliance. Grid on broiler pan wrong...
.... Be careful not to set properly. Flames Inside Oven Excessive spillovers in this list. The list includes common occurrences that are not the result of oven. See instructions to damage the oven gasket. Check fuse and screw or engage circuit breaker securely. Self-Cleaning Cycle Does Not Work Make sure the oven door is not installed and/or connected. Follow instructions under Oven Light to the broiler element. Preheat broil element for service, review this appliance. Grid on broiler pan wrong...

Product Specifications Sheet (English)
Page 2
...B 30" Electric Features Oven Control / Timing System Window Exterior Door Finish Handle Design Oven Cleaning System Single Electric Wall Ovens Express-Select® Extra-Large Frigidaire Baseline Real Stainless Steel (F), Color-Coordinated (W/B) Stainless Steel (F), Color-Coordinated (W/B) Self Clean Oven Controls Bake / Broil Convection Conversion Convection Bake / Broil / Roast Oven Preheat My Favorite Chicken Nugget Button Pizza Button Keep Warm Add-a-Minute Delay Start Self-Clean Clean Option Delay Clean Kitchen Timer Timed Cook Option Control Lock Auto Oven Shut-Off Oven Lock-Out Yes...
...B 30" Electric Features Oven Control / Timing System Window Exterior Door Finish Handle Design Oven Cleaning System Single Electric Wall Ovens Express-Select® Extra-Large Frigidaire Baseline Real Stainless Steel (F), Color-Coordinated (W/B) Stainless Steel (F), Color-Coordinated (W/B) Self Clean Oven Controls Bake / Broil Convection Conversion Convection Bake / Broil / Roast Oven Preheat My Favorite Chicken Nugget Button Pizza Button Keep Warm Add-a-Minute Delay Start Self-Clean Clean Option Delay Clean Kitchen Timer Timed Cook Option Control Lock Auto Oven Shut-Off Oven Lock-Out Yes...

Product Specifications Sheet (English)
Page 4
... excludes approved wall oven model GLEB27Z7H. Printed in right side filler panel, to route gas and electric hookups. • Allow 4-1/2" maximum height from oven base to Product Installation Guide on web. • Always consult local and national electric codes. • Minimum 21" clearance for oven door depth when open. • Minimum 23-1/2" deep cutout dimension is critical for detailed instructions. Gas Cooktop Installation Over 30"/ 27" Electric Single Wall Oven Specifications All Frigidaire® Electric Single Wall Ovens are approved to change. USA...
... excludes approved wall oven model GLEB27Z7H. Printed in right side filler panel, to route gas and electric hookups. • Allow 4-1/2" maximum height from oven base to Product Installation Guide on web. • Always consult local and national electric codes. • Minimum 21" clearance for oven door depth when open. • Minimum 23-1/2" deep cutout dimension is critical for detailed instructions. Gas Cooktop Installation Over 30"/ 27" Electric Single Wall Oven Specifications All Frigidaire® Electric Single Wall Ovens are approved to change. USA...

Product Specifications Sheet (English)
Page 5
...maximum height allowed from oven base to junction box, cut minimum 9" x 9" opening in right side filler panel. • Allow 4-1/2" maximum height from adjoining cabinets. MUST be applied **For cooktop cutout dimensions refer to model-specific product page or installation guide on the web at frigidaire.com for detailed instructions. For modelspecific installation details, refer to Electric Cooktop Installation Over 27" Electric Single Wall Oven GLEB27Z7H Specifications pages on web.) For detailed Electric Cooktop installation, refer to model-specific product page and installation guide on...
...maximum height allowed from oven base to junction box, cut minimum 9" x 9" opening in right side filler panel. • Allow 4-1/2" maximum height from adjoining cabinets. MUST be applied **For cooktop cutout dimensions refer to model-specific product page or installation guide on the web at frigidaire.com for detailed instructions. For modelspecific installation details, refer to Electric Cooktop Installation Over 27" Electric Single Wall Oven GLEB27Z7H Specifications pages on web.) For detailed Electric Cooktop installation, refer to model-specific product page and installation guide on...

Product Specifications Sheet (English)
Page 6
... box, ordered by individual part number. • Voltage Rating - 120V / 60 Hz / 15 or 20 Amps • Connected Load (kW Rating) @ 120 Volts = 1.7 kW (For use on adequately wired 120V, dedicated circuit having 2-wire service with optional 30" Trim Kit which includes Bottom Duct Assembly - High Bottom Trim available. shipped in the U.S.A. 30" Combination Installation Built-In Microwave / Single Wall Oven 30" Combination Installation Specifications • Always consult local and national electric codes. (Refer to product-specific electrical specifications...
... box, ordered by individual part number. • Voltage Rating - 120V / 60 Hz / 15 or 20 Amps • Connected Load (kW Rating) @ 120 Volts = 1.7 kW (For use on adequately wired 120V, dedicated circuit having 2-wire service with optional 30" Trim Kit which includes Bottom Duct Assembly - High Bottom Trim available. shipped in the U.S.A. 30" Combination Installation Built-In Microwave / Single Wall Oven 30" Combination Installation Specifications • Always consult local and national electric codes. (Refer to product-specific electrical specifications...

Product Specifications Sheet (English)
Page 7
... 15 Amps • Connected Load (kW Rating) @ 120 Volts = 0.5 kW (For use on adequately wired 120V, dedicated circuit having 2-wire service with ground required on separate circuit fused on both product faceplates. 30" Electric Single Wall Oven Specifications • Single phase 3- 30" Combination Installation Built-In Microwave / Single Wall Oven / Warmer Drawer 30" Combination Installation Specifications • Always consult local and national electric codes. (Refer to product-specific electrical specifications on this page.) • Minimum 23-5/8" deep cutout dimension is critical...
... 15 Amps • Connected Load (kW Rating) @ 120 Volts = 0.5 kW (For use on adequately wired 120V, dedicated circuit having 2-wire service with ground required on separate circuit fused on both product faceplates. 30" Electric Single Wall Oven Specifications • Single phase 3- 30" Combination Installation Built-In Microwave / Single Wall Oven / Warmer Drawer 30" Combination Installation Specifications • Always consult local and national electric codes. (Refer to product-specific electrical specifications on this page.) • Minimum 23-5/8" deep cutout dimension is critical...


