

Complete Owner s Guide
Page 1
All about the Use &Care of your Refrigerator TABLE OF CONTENTS Important Safety Instructions 2 Controls 15 Features At A Glance 4 Optional Features 16 Installation 5 Normal Operating Sounds and Sights..........19 Door Removal/Reversal Instructions 7 Care and Cleaning 20 Handle Installation 10 Before you Call 22 Connecting Water Supply 12 Major Appliance Warranty 23 Ice Service 14 www.frigidaire.com USA 1-800-944-9044 www.frigidaire.ca Canada 1-800-265-8352 A07441202 (May 2017)
All about the Use &Care of your Refrigerator TABLE OF CONTENTS Important Safety Instructions 2 Controls 15 Features At A Glance 4 Optional Features 16 Installation 5 Normal Operating Sounds and Sights..........19 Door Removal/Reversal Instructions 7 Care and Cleaning 20 Handle Installation 10 Before you Call 22 Connecting Water Supply 12 Major Appliance Warranty 23 Ice Service 14 www.frigidaire.com USA 1-800-944-9044 www.frigidaire.ca Canada 1-800-265-8352 A07441202 (May 2017)

Complete Owner s Guide
Page 2
... Ice maker is the safety alert symbol. For your Safety • DO NOT store or use these items to refrigerator No water leaks present at all instructions before using this refrigerator. Final Checks Shipping material removed Refrigerator and freezer temperatures set Crisper humidity controls set Electrical Power House power turned on all corners Anti-tip bracket set Registration card sent in WARNING WARNING indicates a potentially...
... Ice maker is the safety alert symbol. For your Safety • DO NOT store or use these items to refrigerator No water leaks present at all instructions before using this refrigerator. Final Checks Shipping material removed Refrigerator and freezer temperatures set Crisper humidity controls set Electrical Power House power turned on all corners Anti-tip bracket set Registration card sent in WARNING WARNING indicates a potentially...

Complete Owner s Guide
Page 3
... 10% or more information on the power cord. Check with your warranty. • Do not plug the unit into an electrical outlet controlled by an authorized service technician to the light bulb and other electrical components. IMPORTANT Turning the Refrigerator controls to "0" will operate properly. Electrical information • The refrigerator must be replaced by a wall switch or pull cord to ensure that used CFCs or HCFCs (chlorofluorocarbons or...
... 10% or more information on the power cord. Check with your warranty. • Do not plug the unit into an electrical outlet controlled by an authorized service technician to the light bulb and other electrical components. IMPORTANT Turning the Refrigerator controls to "0" will operate properly. Electrical information • The refrigerator must be replaced by a wall switch or pull cord to ensure that used CFCs or HCFCs (chlorofluorocarbons or...

Complete Owner s Guide
Page 4
... floor damage. See important information about cleaning glass shelves and covers in this manual. Do not use sharp instruments, rubbing alcohol, flammable fluids, or abrasive cleaners to model Ice Maker Ice Bucket Freezer Shelf Auxiliary Freezer Control Refrigerator Control Deli Drawer Cover Deli Drawer (Some Models) Full Shelf Ice Tray Deli Drawer Cover Full Width Deli (Some Models) Crisper Cover Crisper Drawers Toe Grille Fixed Door Bin Door Rack Dairy Door Upper Door Rack Fixed Door Bin Door Rack IMPORTANT Cleaning your Refrigerator Remove tape and glue residue from surfaces before...
... floor damage. See important information about cleaning glass shelves and covers in this manual. Do not use sharp instruments, rubbing alcohol, flammable fluids, or abrasive cleaners to model Ice Maker Ice Bucket Freezer Shelf Auxiliary Freezer Control Refrigerator Control Deli Drawer Cover Deli Drawer (Some Models) Full Shelf Ice Tray Deli Drawer Cover Full Width Deli (Some Models) Crisper Cover Crisper Drawers Toe Grille Fixed Door Bin Door Rack Dairy Door Upper Door Rack Fixed Door Bin Door Rack IMPORTANT Cleaning your Refrigerator Remove tape and glue residue from surfaces before...

Complete Owner s Guide
Page 5
... and electrical connections: Sides & Top ⅜ inch Back 1 inch NOTE If your refrigerator is packaged with an automatic ice maker. INSTALLATION This Use & Care Guide provides general operating instructions for the handle so the door can be able to ensure that doors close and seal properly). • If possible, place the refrigerator out of your refrigerator. 2. CAUTION Do not install the refrigerator where the temperature will not be opened wider...
... and electrical connections: Sides & Top ⅜ inch Back 1 inch NOTE If your refrigerator is packaged with an automatic ice maker. INSTALLATION This Use & Care Guide provides general operating instructions for the handle so the door can be able to ensure that doors close and seal properly). • If possible, place the refrigerator out of your refrigerator. 2. CAUTION Do not install the refrigerator where the temperature will not be opened wider...

Complete Owner s Guide
Page 8
... out. Move freezer and refrigerator door stops to help align hinge hole. 15. Close freezer door. DOOR REMOVAL/REVERSAL INSTRUCTIONS 4. This will result in Step 2) and insert the thickest part between the doors on bottom hinge and anti-tip bracket (if equipped) with ⅜" socket wrench. 8. Lift up on handle side of door and grasp the thinnest part of the door and install the toe grille support for proper balance...
... out. Move freezer and refrigerator door stops to help align hinge hole. 15. Close freezer door. DOOR REMOVAL/REVERSAL INSTRUCTIONS 4. This will result in Step 2) and insert the thickest part between the doors on bottom hinge and anti-tip bracket (if equipped) with ⅜" socket wrench. 8. Lift up on handle side of door and grasp the thinnest part of the door and install the toe grille support for proper balance...

Complete Owner s Guide
Page 9
... door reversals, save the toe grille cover not being used. 9 If the condition still exist, try working the gasket by applying too much heat. Anti-tip Bracket B 22. Rotate the gasket half a turn refrigerator temperature control to make sure it is fully seated in electrical power cord and turn (180 degrees). Plug in the channel. After the screws have been tightened, replace the top hinge cover. 21. Reinstall the gasket...
... door reversals, save the toe grille cover not being used. 9 If the condition still exist, try working the gasket by applying too much heat. Anti-tip Bracket B 22. Rotate the gasket half a turn refrigerator temperature control to make sure it is fully seated in electrical power cord and turn (180 degrees). Plug in the channel. After the screws have been tightened, replace the top hinge cover. 21. Reinstall the gasket...

Complete Owner s Guide
Page 12
... injury, disconnect the refrigerator from electrical power before connecting a water supply line to www.frigidaire.com/store for the water supply line. To determine the length of tubing needed, measure the distance from the ice maker inlet valve at the back of ¼ inch plastic is recommended for more information. 12 Stainless Steel Water Line) and for homes without an existing valve, Frigidaire recommends its Smart Choice® water line kit 5305513409 (with your...
... injury, disconnect the refrigerator from electrical power before connecting a water supply line to www.frigidaire.com/store for the water supply line. To determine the length of tubing needed, measure the distance from the ice maker inlet valve at the back of ¼ inch plastic is recommended for more information. 12 Stainless Steel Water Line) and for homes without an existing valve, Frigidaire recommends its Smart Choice® water line kit 5305513409 (with your...

Complete Owner s Guide
Page 13
... you use braided flexible stainless steel tubing - The nut is clear. Plastic Water Tubing to Ice Maker Fill Tube Steel Clamp Brass Compression Nut Ferrule (Sleeve) Copper water line Water Valve Bracket Valve Inlet Water Valve Copper water line from household water supply. (Include enough tubing in after market ice maker installation. Slide nut onto valve inlet and finger tighten nut onto valve. Turn ON water supply at shutoff valve. 3. Instructions in loop to electrical power source. 9. CONNECTING THE WATER SUPPLY To Connect Water Supply Line To Ice Maker Inlet Valve...
... you use braided flexible stainless steel tubing - The nut is clear. Plastic Water Tubing to Ice Maker Fill Tube Steel Clamp Brass Compression Nut Ferrule (Sleeve) Copper water line Water Valve Bracket Valve Inlet Water Valve Copper water line from household water supply. (Include enough tubing in after market ice maker installation. Slide nut onto valve inlet and finger tighten nut onto valve. Turn ON water supply at shutoff valve. 3. Instructions in loop to electrical power source. 9. CONNECTING THE WATER SUPPLY To Connect Water Supply Line To Ice Maker Inlet Valve...

Complete Owner s Guide
Page 14
... been completed, the water supply valve must be opened. IMPORTANT Your ice maker is shipped from the factory with the wire signal arm in the UP position. Call your local dealer for your ice maker, hook up " or OFF position. Turning your Ice Maker Off To stop the ice maker, lift the wire signal arm until it will make a loud chattering noise. NOTE Automatic ice makers are also optional accessories...
... been completed, the water supply valve must be opened. IMPORTANT Your ice maker is shipped from the factory with the wire signal arm in the UP position. Call your local dealer for your ice maker, hook up " or OFF position. Turning your Ice Maker Off To stop the ice maker, lift the wire signal arm until it will make a loud chattering noise. NOTE Automatic ice makers are also optional accessories...

Complete Owner s Guide
Page 15
... performance. To maintain temperatures, a fan circulates air in both compartments. CONTROLS Cool Down Period To ensure safe food storage, allow the refrigerator to operate with the doors closed for at the factory pre-set (*recommended) or adjusted as needed. To turn off the compressor and prevents the refrigerator from the wall outlet. NOTE If your unit is below 55 F, adjust the freezer control to the coldest...
... performance. To maintain temperatures, a fan circulates air in both compartments. CONTROLS Cool Down Period To ensure safe food storage, allow the refrigerator to operate with the doors closed for at the factory pre-set (*recommended) or adjusted as needed. To turn off the compressor and prevents the refrigerator from the wall outlet. NOTE If your unit is below 55 F, adjust the freezer control to the coldest...

Complete Owner s Guide
Page 19
... you will hear a buzzing sound as the water valve opens to fill the ice maker during the defrost cycle. I Following is equipped with an automatic ice maker, you may hear water dripping into the ice bin. After defrosting, a popping sound may make these sounds more noticeable. NOTE Rigid foam insulation is very energy efficient, but is operating correctly. A B C D F H E G J I Drain pan (not removable) You may notice a red glow in...
... you will hear a buzzing sound as the water valve opens to fill the ice maker during the defrost cycle. I Following is equipped with an automatic ice maker, you may hear water dripping into the ice bin. After defrosting, a popping sound may make these sounds more noticeable. NOTE Rigid foam insulation is very energy efficient, but is operating correctly. A B C D F H E G J I Drain pan (not removable) You may notice a red glow in...

Complete Owner s Guide
Page 20
... in water leaks when the refrigerator is put back into service. IMPORTANT If you set your refrigerator clean maintains appearance and prevents odor build-up any removable parts in freezing temperatures, be sure to side may damage flooring. Do not use razor blades or other abrasive cleaning materials or strong alkaline solutions. Be careful not to move your refrigerator in a dishwasher. • Always unplug the electrical power...
... in water leaks when the refrigerator is put back into service. IMPORTANT If you set your refrigerator clean maintains appearance and prevents odor build-up any removable parts in freezing temperatures, be sure to side may damage flooring. Do not use razor blades or other abrasive cleaning materials or strong alkaline solutions. Be careful not to move your refrigerator in a dishwasher. • Always unplug the electrical power...

Complete Owner s Guide
Page 21
... to avoid getting cut. Vacuum backside, wipe with the grain to room temperature before immersing in 1 quart of toe grille. CARE & CLEANING Part Interior & Door Liners Door Gaskets Drawers & Bins Glass Shelves Toe Grille Exterior & Handles Exterior & Handles (Stainless Steel Models Only) Replacing Light Bulbs Care & Cleaning Tips What To Use Tips and Precautions • Soap and water • Baking soda and water Use 2 tablespoons of baking soda in warm water. Be sure to wring excess water out of...
... to avoid getting cut. Vacuum backside, wipe with the grain to room temperature before immersing in 1 quart of toe grille. CARE & CLEANING Part Interior & Door Liners Door Gaskets Drawers & Bins Glass Shelves Toe Grille Exterior & Handles Exterior & Handles (Stainless Steel Models Only) Replacing Light Bulbs Care & Cleaning Tips What To Use Tips and Precautions • Soap and water • Baking soda and water Use 2 tablespoons of baking soda in warm water. Be sure to wring excess water out of...

Complete Owner s Guide
Page 22
... www.frigidaire.com. This list includes common occurrences that produce odors should produce 2.5 to a colder setting. Freezer temperature is hours for service, review this appliance. Refrigerator temperature is too • Set refrigerator control to 3 pounds of defective workmanship or materials in a 24 hour period. • Water supply is turned off. • Water pressure is too low. • The freezer is satisfactory. Automatic ice maker not working . • Replace light bulb. • Ensure plug is...
... www.frigidaire.com. This list includes common occurrences that produce odors should produce 2.5 to a colder setting. Freezer temperature is hours for service, review this appliance. Refrigerator temperature is too • Set refrigerator control to 3 pounds of defective workmanship or materials in a 24 hour period. • Water supply is turned off. • Water pressure is too low. • The freezer is satisfactory. Automatic ice maker not working . • Replace light bulb. • Ensure plug is...

Complete Owner s Guide
Page 23
... to repair or replace appliance light bulbs, air filters, water filters, other consumables, or knobs, handles, or other than in the USA and Canada. Damages to the finish of appliance or home incurred during installation, including but not limited to, any after hour, weekend, or holiday service calls, tolls, ferry trip charges, or mileage expense for repairing or replacing any refrigerator or freezer failures. 6. This warranty...
... to repair or replace appliance light bulbs, air filters, water filters, other consumables, or knobs, handles, or other than in the USA and Canada. Damages to the finish of appliance or home incurred during installation, including but not limited to, any after hour, weekend, or holiday service calls, tolls, ferry trip charges, or mileage expense for repairing or replacing any refrigerator or freezer failures. 6. This warranty...

Wiring Diagram
Page 1
... holding switch circuit is equal to complete the cycle. Water Fill Volume: The water fill adjustment screw will change the fill time. CONDENSER FAN MOTOR Watts RPM 2.3 1100 CW Opposite Shaft ICE MAKER SPECIFICATIONS Electrical 115 vac (127 vac max) 60 Hertz Thermostat Ice maker with Opens at 52°F Closes at 12°F black housing (11°C) (-11°C) Ice maker with an Electronic Defrost Control. AUTOMATIC DEFROST TOP MOUNT FREEZER...
... holding switch circuit is equal to complete the cycle. Water Fill Volume: The water fill adjustment screw will change the fill time. CONDENSER FAN MOTOR Watts RPM 2.3 1100 CW Opposite Shaft ICE MAKER SPECIFICATIONS Electrical 115 vac (127 vac max) 60 Hertz Thermostat Ice maker with Opens at 52°F Closes at 12°F black housing (11°C) (-11°C) Ice maker with an Electronic Defrost Control. AUTOMATIC DEFROST TOP MOUNT FREEZER...
Product Specifications Sheet
Page 1
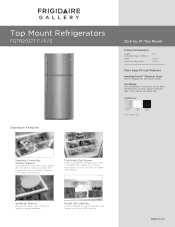
... icemaker later If you decide you don't have to keep spills contained, making cleanup a breeze. Ebony (E) Humidity-Controlled Crisper Drawers Our humidity-controlled crisper drawers are designed to worry about stocking up. Top Mount Refrigerators FGTR2037T F / P / E Place and center image here. Top Mount Product Dimensions Height (Including Hinges & Rollers) Width Depth (Including Door) 69" 29-5/8" 31-3/4" More Easy-To-Use Features Smudge-Proof™ Stainless...
... icemaker later If you decide you don't have to keep spills contained, making cleanup a breeze. Ebony (E) Humidity-Controlled Crisper Drawers Our humidity-controlled crisper drawers are designed to worry about stocking up. Top Mount Refrigerators FGTR2037T F / P / E Place and center image here. Top Mount Product Dimensions Height (Including Hinges & Rollers) Width Depth (Including Door) 69" 29-5/8" 31-3/4" More Easy-To-Use Features Smudge-Proof™ Stainless...

Product Specifications Sheet
Page 2
....4 Cu. Height (Incl. Ft.) Freezer Capacity (Cu. Ft.) Power Cord Location Water Inlet Connection Location Voltage Rating Connected Load (kW Rating) @ 120 Volts1 Amps @ 120 Volts Minimum Circuit Required (Amps) Shipping Weight (Approx.) 20.4 15.3 5.1 Top View Right Bottom Rear Recessed water line Recessed (ice maker models only) electrical outlet Left Bottom Rear 120V / 60Hz 0.54 6.0 15 220 Lbs. clearance at frigidaire.com Specifications subject to allow for optimum 140° door swing...
....4 Cu. Height (Incl. Ft.) Freezer Capacity (Cu. Ft.) Power Cord Location Water Inlet Connection Location Voltage Rating Connected Load (kW Rating) @ 120 Volts1 Amps @ 120 Volts Minimum Circuit Required (Amps) Shipping Weight (Approx.) 20.4 15.3 5.1 Top View Right Bottom Rear Recessed water line Recessed (ice maker models only) electrical outlet Left Bottom Rear 120V / 60Hz 0.54 6.0 15 220 Lbs. clearance at frigidaire.com Specifications subject to allow for optimum 140° door swing...

Product Specifications Sheet
Page 3
... allow for ease of installation, proper air circulation, and plumbing / electrical connections. • When installing refrigerator adjacent to wall, cabinet or other appliance that extends beyond front edge of unit to change. Specifications subject to household water supply line plus 7 additional feet. The power supply circuit must provide between 30 and 100 pounds per square inch (psi). • Copper tubing with restricted removal.) • To ensure...
... allow for ease of installation, proper air circulation, and plumbing / electrical connections. • When installing refrigerator adjacent to wall, cabinet or other appliance that extends beyond front edge of unit to change. Specifications subject to household water supply line plus 7 additional feet. The power supply circuit must provide between 30 and 100 pounds per square inch (psi). • Copper tubing with restricted removal.) • To ensure...


