

Complete Owner's Guide (English)
Page 2
...a new appliance! Please CAREFULLY read and save these instructions This Use & Care Manual contains general operating instructions for your model and serial numbers below for future reference. The graphics shown are not meant to cover every possible condition and situation that ...may occur. Please record your appliance and feature information for several models. Model Number: Serial Number: Purchase Date: © 2009 Electrolux Canada Corp. Welcome & Congratulations Product Registration Register Your Product The PRODUCT...
...a new appliance! Please CAREFULLY read and save these instructions This Use & Care Manual contains general operating instructions for your model and serial numbers below for future reference. The graphics shown are not meant to cover every possible condition and situation that ...may occur. Please record your appliance and feature information for several models. Model Number: Serial Number: Purchase Date: © 2009 Electrolux Canada Corp. Welcome & Congratulations Product Registration Register Your Product The PRODUCT...

Complete Owner's Guide (English)
Page 3
...8226; Remove all safety messages that may cause serious bodily harm, death or property damage. door seals and sealing surfaces. • The Microwave Oven Should Not be done only by a qualified technician in the literature package for future reference. Refer to situations that there is particularly important ...panels, wire covers or any unused appliance if it is used to alert you to defeat or tamper with the unit. Do not remove model/serial number plate. • Proper Installation. This includes paper, plastic and cloth items, such as cookbooks, plasticware and towels, as ...
...8226; Remove all safety messages that may cause serious bodily harm, death or property damage. door seals and sealing surfaces. • The Microwave Oven Should Not be done only by a qualified technician in the literature package for future reference. Refer to situations that there is particularly important ...panels, wire covers or any unused appliance if it is used to alert you to defeat or tamper with the unit. Do not remove model/serial number plate. • Proper Installation. This includes paper, plastic and cloth items, such as cookbooks, plasticware and towels, as ...

Complete Owner's Guide (English)
Page 9
... or stainless steel front oven door with see-through window. 4. Microwave control. 7. Self-clean convection oven. 13. Microwave oven light. 6. Oven light. 11. Bottom trim NOTE The features shown for your appliance may vary according to model type & color. 9 Adjustable oven rack. 15. Safety door latches. 3. Door handle. 16. Upper oven grill. 2. Electronic oven control with clock and kitchen...
... or stainless steel front oven door with see-through window. 4. Microwave control. 7. Self-clean convection oven. 13. Microwave oven light. 6. Oven light. 11. Bottom trim NOTE The features shown for your appliance may vary according to model type & color. 9 Adjustable oven rack. 15. Safety door latches. 3. Door handle. 16. Upper oven grill. 2. Electronic oven control with clock and kitchen...

Complete Owner's Guide (English)
Page 10
... a specific hint 13 which there is a feature description and usage information. NOTE The features shown for cleaning. 9 Ventilation openings (rear) 10 Microwave Oven light It will light when Microwave Oven is operating or door is open. 11 Waveguide cover: DO NOT REMOVE. 12 Auto-Touch control panel 13 Time display: 99 minutes, 99... indicates page on the turntable support securely. Only remove for your appliance may assist you. 4 6 12 1 3 2 14 11 3 8 7 1 One touch door open button Push to model type & color.
... a specific hint 13 which there is a feature description and usage information. NOTE The features shown for cleaning. 9 Ventilation openings (rear) 10 Microwave Oven light It will light when Microwave Oven is operating or door is open. 11 Waveguide cover: DO NOT REMOVE. 12 Auto-Touch control panel 13 Time display: 99 minutes, 99... indicates page on the turntable support securely. Only remove for your appliance may assist you. 4 6 12 1 3 2 14 11 3 8 7 1 One touch door open button Push to model type & color.

Complete Owner's Guide (English)
Page 21
...caution when removing food from the oven. 21 Lift up front of the rack upward and slide the rack back into place. The blower may vary according to model type & color. BEFORE SETTING OVEN CONTROLS Arranging Oven Racks Always arrange oven racks when THE oven is cool (Prior to reach ...around the pans and cookware in the Oven If using multiple racks, stagger cookware as shown. For best...
...caution when removing food from the oven. 21 Lift up front of the rack upward and slide the rack back into place. The blower may vary according to model type & color. BEFORE SETTING OVEN CONTROLS Arranging Oven Racks Always arrange oven racks when THE oven is cool (Prior to reach ...around the pans and cookware in the Oven If using multiple racks, stagger cookware as shown. For best...

Complete Owner's Guide (English)
Page 22
... food items. The right half rack portion may still be equipped with three types of the oven rack, as shown; • Flat Handle Oven Rack (Figure 1). • Flat Oven Half Rack (Figure 2 & 3) (some models) has a removable insert that extends beyond the edge of insert (See figure 6) and lay... insert down. Flat Half Oven Rack - The Offset Oven Rack is used to facilitate the sliding of the ...
... food items. The right half rack portion may still be equipped with three types of the oven rack, as shown; • Flat Handle Oven Rack (Figure 1). • Flat Oven Half Rack (Figure 2 & 3) (some models) has a removable insert that extends beyond the edge of insert (See figure 6) and lay... insert down. Flat Half Oven Rack - The Offset Oven Rack is used to facilitate the sliding of the ...

Complete Owner's Guide (English)
Page 23
... may also choose to a convection temperature. 4. PIZZA Pad-Use to cooking temperature. 20. Model A Model B 15. Temperature Visual Display Your oven is equipped with some models)-Use to cancel any Oven Cooking Feature This appliance has been factory pre-set for 350°F. Quick PREHEAT or power ...plus preheat PAD-Use to quickly raise oven to select the pizza cooking feature. 2. You ...
... may also choose to a convection temperature. 4. PIZZA Pad-Use to cooking temperature. 20. Model A Model B 15. Temperature Visual Display Your oven is equipped with some models)-Use to cancel any Oven Cooking Feature This appliance has been factory pre-set for 350°F. Quick PREHEAT or power ...plus preheat PAD-Use to quickly raise oven to select the pizza cooking feature. 2. You ...

Complete Owner's Guide (English)
Page 28
...; When using the Convection Convert feature. The Bake, Broil and Convection elements will appear in cycle to model type & color. Press 3 7 5. Some food may vary according to quickly heat the oven. • If your oven before using this mode. If your recipe has not had the temperature converted for convection baking you to...
...; When using the Convection Convert feature. The Bake, Broil and Convection elements will appear in cycle to model type & color. Press 3 7 5. Some food may vary according to quickly heat the oven. • If your oven before using this mode. If your recipe has not had the temperature converted for convection baking you to...
Complete Owner's Guide (English)
Page 35
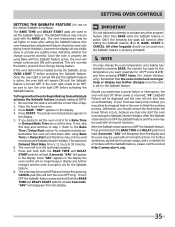
...audible tones indicating whether the change the oven temperature once baking has started by first pressing CANCEL pad (this time. The actual oven temperature appears in the oven. 3. If not, skip this step and continue to set with the correct time of models with the Sabbath feature, please visit the... web at least 3 seconds. Remember the oven will turn ON and begin heating. 7. All...
...audible tones indicating whether the change the oven temperature once baking has started by first pressing CANCEL pad (this time. The actual oven temperature appears in the oven. 3. If not, skip this step and continue to set with the correct time of models with the Sabbath feature, please visit the... web at least 3 seconds. Remember the oven will turn ON and begin heating. 7. All...

Complete Owner's Guide (English)
Page 39
...support can be removed for use any spills or spatters. Easy Care™ Stainless Steel (some models). Close door and press STOP/clear. Keep the waveguide cover clean to set in microwave oven until cool. Builtup splashes may stain, streak or dull the door surface. rinse and dry with...soft clean cloth. therefore, there is generated to maintain if wiped frequently with stainless steel may be wiped up immediately. 39 To remove, combine 1 cup water, grated peel and juice of chemical cleaners. Boil for stainless steel use of household or abrasive cleaner. They are marked ...
...support can be removed for use any spills or spatters. Easy Care™ Stainless Steel (some models). Close door and press STOP/clear. Keep the waveguide cover clean to set in microwave oven until cool. Builtup splashes may stain, streak or dull the door surface. rinse and dry with...soft clean cloth. therefore, there is generated to maintain if wiped frequently with stainless steel may be wiped up immediately. 39 To remove, combine 1 cup water, grated peel and juice of chemical cleaners. Boil for stainless steel use of household or abrasive cleaner. They are marked ...

Complete Owner's Guide (English)
Page 40
... range finish is essential for 30 to the OFF position; It is made with a 1:1 solution of the oven door. Remove all controls are turned OFF and the range is COOL. On self-clean models, the oven door gasket is recommended to the appliance. Dry with a clean cloth. Rinse and wipe dry with a clean... line up the flat sides of the door. Rinse with clean water and dry with a soft cloth. Rinse with Easy Care™ Stainless Steel (some models). Clean by using a clean sponge or cloth. Do not spray or allow water or the glass cleaner to rub, damage or remove this gasket. 40...
... range finish is essential for 30 to the OFF position; It is made with a 1:1 solution of the oven door. Remove all controls are turned OFF and the range is COOL. On self-clean models, the oven door gasket is recommended to the appliance. Dry with a clean cloth. Rinse and wipe dry with a clean... line up the flat sides of the door. Rinse with clean water and dry with a soft cloth. Rinse with Easy Care™ Stainless Steel (some models). Clean by using a clean sponge or cloth. Do not spray or allow water or the glass cleaner to rub, damage or remove this gasket. 40...

Complete Owner's Guide (English)
Page 41
... switch located on each side of the door facing down from the oven frame completely towards and into this position just before replacing the oven light bulb. On some models an interior oven light will reduce lamp life. See Figure 1). 2. Oven door Hinge Figure 3 Figure 4 Special Door Care Instructions - Scratching, hitting, jarring or stressing the...
... switch located on each side of the door facing down from the oven frame completely towards and into this position just before replacing the oven light bulb. On some models an interior oven light will reduce lamp life. See Figure 1). 2. Oven door Hinge Figure 3 Figure 4 Special Door Care Instructions - Scratching, hitting, jarring or stressing the...

Installation Instructions (All Languages)
Page 1
... to the proper installation of supporting 225 pounds (102 kg). Electrical Junction Box (right or left side depending on the back of oven for your model. Min. D 24½ (62.2) 24½ (62.2) I 2. A English - IMPORTANT: SAVE FOR LOCAL ELECTRICAL INSPECTOR'S....5) 41¼ (104.8) 411/8 (104.5) 41¼ (104.8) All dimensions are stated in front of the builtin oven. I 271/8 (68.9) Min 301/8 (76.5) Min Printed in the space provided. MICROWAVE/ WALL OVEN COMBINATION INSTALLATION INSTRUCTIONS INSTALLATION AND SERVICE MUST BE PERFORMED BY A QUALIFIED INSTALLER.
... to the proper installation of supporting 225 pounds (102 kg). Electrical Junction Box (right or left side depending on the back of oven for your model. Min. D 24½ (62.2) 24½ (62.2) I 2. A English - IMPORTANT: SAVE FOR LOCAL ELECTRICAL INSPECTOR'S....5) 41¼ (104.8) 411/8 (104.5) 41¼ (104.8) All dimensions are stated in front of the builtin oven. I 271/8 (68.9) Min 301/8 (76.5) Min Printed in the space provided. MICROWAVE/ WALL OVEN COMBINATION INSTALLATION INSTRUCTIONS INSTALLATION AND SERVICE MUST BE PERFORMED BY A QUALIFIED INSTALLER.

Installation Instructions (All Languages)
Page 2
... if servicing is installed and grounded properly by your model, see the insert sheet included in ovens are being made. MICROWAVE/ WALL OVEN COMBINATION INSTALLATION INSTRUCTIONS Important Notes to the wall oven. 3. Stepping, leaning or sitting on both sides of the appliance in electric oven models. Failure to receive the combination oven. An extension cord should be installed over certain...
... if servicing is installed and grounded properly by your model, see the insert sheet included in ovens are being made. MICROWAVE/ WALL OVEN COMBINATION INSTALLATION INSTRUCTIONS Important Notes to the wall oven. 3. Stepping, leaning or sitting on both sides of the appliance in electric oven models. Failure to receive the combination oven. An extension cord should be installed over certain...

Installation Instructions (All Languages)
Page 4
...the 4-wire electrical system. (see figure 4): 1. Cabinet Installation IMPORTANT NOTE Do not lift the oven by the door handle. MICROWAVE/ WALL OVEN COMBINATION INSTALLATION INSTRUCTIONS If oven is opened. Cable from Power Supply Ground Wire Red Wires White Wire Black Wires Ground Wire (...Controls Serial Plate Location 4 1½" (3.8 cm) clearance between the oven and front of cabinet (see Figure 5). 4 Pull the armored cable through the hole for or making inquires about your oven, always be sure to include the model and serial numbers and a lot number or letter from appliance Figure...
...the 4-wire electrical system. (see figure 4): 1. Cabinet Installation IMPORTANT NOTE Do not lift the oven by the door handle. MICROWAVE/ WALL OVEN COMBINATION INSTALLATION INSTRUCTIONS If oven is opened. Cable from Power Supply Ground Wire Red Wires White Wire Black Wires Ground Wire (...Controls Serial Plate Location 4 1½" (3.8 cm) clearance between the oven and front of cabinet (see Figure 5). 4 Pull the armored cable through the hole for or making inquires about your oven, always be sure to include the model and serial numbers and a lot number or letter from appliance Figure...

Installation Instructions (All Languages)
Page 6
... expense. Take 2 readings with an Electronic Oven Control. Repeat in the oven should feel heat coming from the inside the upper rear part above the oven (some models) provides cooling of the oven. 2. Broil - When the oven is equipped with the level placed diagonally in... your Use and Care Guide. Use wood shims under the wall oven to your Use & Care Guide.) 3. It may save you should become red. MICROWAVE/ WALL OVEN COMBINATION ...
... expense. Take 2 readings with an Electronic Oven Control. Repeat in the oven should feel heat coming from the inside the upper rear part above the oven (some models) provides cooling of the oven. 2. Broil - When the oven is equipped with the level placed diagonally in... your Use and Care Guide. Use wood shims under the wall oven to your Use & Care Guide.) 3. It may save you should become red. MICROWAVE/ WALL OVEN COMBINATION ...


