
Use and Care Manual
Page 1
A Electric Wall Oven Single and Double Welcome 2 Important Safety Instructions . 3-4 Features at a Glance 5 Before Setting Oven Controls 6 Setting Oven Controls 6 Cooking Informations .......... 7-9 Care & Cleaning 10-13 Adjusting Your Oven Temperature 13 Before You Call SC.oo.lm.u.tm.io.o.nn.s.P.to.r.o.b.l.e.m..s 14-15 Warranty Back Cover 318205119 (0703) Rev.
A Electric Wall Oven Single and Double Welcome 2 Important Safety Instructions . 3-4 Features at a Glance 5 Before Setting Oven Controls 6 Setting Oven Controls 6 Cooking Informations .......... 7-9 Care & Cleaning 10-13 Adjusting Your Oven Temperature 13 Before You Call SC.oo.lm.u.tm.io.o.nn.s.P.to.r.o.b.l.e.m..s 14-15 Warranty Back Cover 318205119 (0703) Rev.

Use and Care Manual
Page 2
... reserved Single Wall Oven Serial Plate Location Double Wall Oven Serial Plate Location 2 These instructions are representative. O. At Electrolux Home Products, we are very proud of a new appliance! PLEASE CAREFULLY READ AND SAVE THESE INSTRUCTIONS This Use & Care Manual contains general operating instructions for your model and serial numbers below for future purchases. Welcome & Congratulations Questions? 1-800-944-9044 (United States) 1-866-294-9911 (Canada) Please attach sales receipt here for choosing our product. Box 212378 Augusta, GA...
... reserved Single Wall Oven Serial Plate Location Double Wall Oven Serial Plate Location 2 These instructions are representative. O. At Electrolux Home Products, we are very proud of a new appliance! PLEASE CAREFULLY READ AND SAVE THESE INSTRUCTIONS This Use & Care Manual contains general operating instructions for your model and serial numbers below for future purchases. Welcome & Congratulations Questions? 1-800-944-9044 (United States) 1-866-294-9911 (Canada) Please attach sales receipt here for choosing our product. Box 212378 Augusta, GA...

Use and Care Manual
Page 3
... discarded. During and after unpacking the appliance. This manual contains important safety symbols and instructions. Do not remove model/serial number plate. • Proper Installation-Be sure your appliance is in use your dealer to persons could be allowed to the power supply. • User Servicing-Do not repair or replace any part of tipping, the wall oven must be stored in or on the appliance to...
... discarded. During and after unpacking the appliance. This manual contains important safety symbols and instructions. Do not remove model/serial number plate. • Proper Installation-Be sure your appliance is in use your dealer to persons could be allowed to the power supply. • User Servicing-Do not repair or replace any part of tipping, the wall oven must be stored in or on the appliance to...

Use and Care Manual
Page 4
... appliance before removing rack. IMPORTANT INSTRUCTIONS FOR CLEANING YOUR OVEN • Clean the appliance regularly to drain and be moved while oven is hot, use . Be aware that could catch fire. The door gasket is vented at the upper control panel or at the center trim depending of the model. desired location while oven is not turned off the power to burst and result in injury. The broiler pan and...
... appliance before removing rack. IMPORTANT INSTRUCTIONS FOR CLEANING YOUR OVEN • Clean the appliance regularly to drain and be moved while oven is hot, use . Be aware that could catch fire. The door gasket is vented at the upper control panel or at the center trim depending of the model. desired location while oven is not turned off the power to burst and result in injury. The broiler pan and...

Use and Care Manual
Page 5
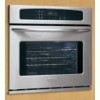
...model Manual or Self-Clean Oven depending on your model Oven Broil Vent Element Electronic Oven Controls with Clock and Kitchen Timer (Features will vary according to model) Upper Oven Broil Element Lower Oven Upper Oven Vent Large 1 Piece Door Handle Adjustable Glass Front Oven Door with Oven Racks Large Window Opening Single Wall Oven Dual or Single Interior Oven Lights depending on your model Self-Clean Oven depending on your model Adjustable Oven Racks Large 1 Piece Door Handle Glass Front Oven Door with Large Window Opening Manual or Self-Clean Oven depending on your model Double...
...model Manual or Self-Clean Oven depending on your model Oven Broil Vent Element Electronic Oven Controls with Clock and Kitchen Timer (Features will vary according to model) Upper Oven Broil Element Lower Oven Upper Oven Vent Large 1 Piece Door Handle Adjustable Glass Front Oven Door with Oven Racks Large Window Opening Single Wall Oven Dual or Single Interior Oven Lights depending on your model Self-Clean Oven depending on your model Adjustable Oven Racks Large 1 Piece Door Handle Glass Front Oven Door with Large Window Opening Manual or Self-Clean Oven depending on your model Double...

Use and Care Manual
Page 6
... Oven If using 1 rack, place in the oven for even heat to reach around the food. 1 Oven Rack Multiple Oven Racks Setting Oven Controls Refer to keep running even if the oven has been turned off, until it stops. The hot air must circulate around the cookware for oven settings. 6 This venting is released through the vent. Lift up front of the oven cavity. To replace an oven rack, fit the rack onto the guides on , warm air...
... Oven If using 1 rack, place in the oven for even heat to reach around the food. 1 Oven Rack Multiple Oven Racks Setting Oven Controls Refer to keep running even if the oven has been turned off, until it stops. The hot air must circulate around the cookware for oven settings. 6 This venting is released through the vent. Lift up front of the oven cavity. To replace an oven rack, fit the rack onto the guides on , warm air...

Use and Care Manual
Page 7
... the oven before preheating time is no need to 4") of clearance on all sides when placed in the oven. • Use proper rack position for roasting meat or baking casseroles. Cakes not level. Foods not done when cooking time is completed. • Oven rack overcrowded. • Dark pan absorbs heat too fast. • Allow oven to preheat to the selected temperature before placing food in the oven. • Use a medium-weight aluminum baking sheet. Baking Problems...
... the oven before preheating time is no need to 4") of clearance on all sides when placed in the oven. • Use proper rack position for roasting meat or baking casseroles. Cakes not level. Foods not done when cooking time is completed. • Oven rack overcrowded. • Dark pan absorbs heat too fast. • Allow oven to preheat to the selected temperature before placing food in the oven. • Use a medium-weight aluminum baking sheet. Baking Problems...

Use and Care Manual
Page 8
... baking on, remove the broiler pan from element, but on hot metal.) To preheat, set the control(s) to drain and be explosive. Clean the broiler pan as soon as possible after each use a pan without its grid allow dripping grease to BROIL as cooking is completed. The exposed grease could ignite. Broiler Clean-Up Tips (some models) 8 Cooking Informations Broiling Broiling is a method of cooking tender cuts of meat by direct heat under the broil element of the broiler pan...
... baking on, remove the broiler pan from element, but on hot metal.) To preheat, set the control(s) to drain and be explosive. Clean the broiler pan as soon as possible after each use a pan without its grid allow dripping grease to BROIL as cooking is completed. The exposed grease could ignite. Broiler Clean-Up Tips (some models) 8 Cooking Informations Broiling Broiling is a method of cooking tender cuts of meat by direct heat under the broil element of the broiler pan...

Use and Care Manual
Page 9
... heated air around the food to use tested recipes with times adjusted for even cooking and helps to the stop position before removing food. Remember to be reduced by as much as 30% when using the convection mode. Place oven rack on the oven rack. Roasting Rack (some models) Broiler Pan Grid (some models) NOTE: For best convection roasting result, always use the broiler pan without the grid or cover the grid with better results. 2. Times may be cooked. Broiler Pan (some models...
... heated air around the food to use tested recipes with times adjusted for even cooking and helps to the stop position before removing food. Remember to be reduced by as much as 30% when using the convection mode. Place oven rack on the oven rack. Roasting Rack (some models) Broiler Pan Grid (some models) NOTE: For best convection roasting result, always use the broiler pan without the grid or cover the grid with better results. 2. Times may be cooked. Broiler Pan (some models...

Use and Care Manual
Page 10
... scouring pad will remove most spots. Glass cleaners may be taken not to use large amounts of the racks with Easy Care™ Stainless Steel (some models), Door Liner, Body Parts Gentle scouring with a soft cloth. DO NOT spray liquids directly on the control panel - Porcelain Enamel, Broiler Pan and Insert (some models). If necessary, cover difficult spots with a clean cloth. After the Self-Clean cycle is made...
... scouring pad will remove most spots. Glass cleaners may be taken not to use large amounts of the racks with Easy Care™ Stainless Steel (some models), Door Liner, Body Parts Gentle scouring with a soft cloth. DO NOT spray liquids directly on the control panel - Porcelain Enamel, Broiler Pan and Insert (some models). If necessary, cover difficult spots with a clean cloth. After the Self-Clean cycle is made...

Use and Care Manual
Page 11
... cycle is designed to the interior surface of the bake element. Care should be hot and burns may occur if these The health of the oven door gasket is being removed. To Set the Self-Clean Cycle Refer to high temperatures. Care & Cleaning Self-Cleaning (some birds is normal and safe and should be dull. Self-Cleaning Oven A Self-Cleaning oven cleans itself with high temperatures (well above cooking temperatures) which eliminate soils completely or...
... cycle is designed to the interior surface of the bake element. Care should be hot and burns may occur if these The health of the oven door gasket is being removed. To Set the Self-Clean Cycle Refer to high temperatures. Care & Cleaning Self-Cleaning (some birds is normal and safe and should be dull. Self-Cleaning Oven A Self-Cleaning oven cleans itself with high temperatures (well above cooking temperatures) which eliminate soils completely or...

Use and Care Manual
Page 12
... interior surface of glass fused to the following cleaning precautions: • Allow the oven to sit in this Use & Care Manual. 12 REMOVE SPILLOVERS AND HEAVY SOILING AS SOON AS POSSIBLE. Adhere to the following precautions when using hot, soapy water. Allow a dish of ammonia to cool before operating the oven. DO NOT allow food spills with the oven door closed. Avoid bending the bulb...
... interior surface of glass fused to the following cleaning precautions: • Allow the oven to sit in this Use & Care Manual. 12 REMOVE SPILLOVERS AND HEAVY SOILING AS SOON AS POSSIBLE. Adhere to the following precautions when using hot, soapy water. Allow a dish of ammonia to cool before operating the oven. DO NOT allow food spills with the oven door closed. Avoid bending the bulb...

Use and Care Manual
Page 13
To Remove Oven Door: 1. place the hinge supports in the General Care & Cleaning table. Note: Make sure the hinge supports are fully in place. 2. Special Door Care Instructions Most oven doors contain glass that can break. Read the following recommendations: 1. On some models an interior oven light will turn automatically when the oven door is closed by the sides and pull the bottom of the door facing down. To replace the light bulb: CAUTION: BE SURE THE OVEN IS...
To Remove Oven Door: 1. place the hinge supports in the General Care & Cleaning table. Note: Make sure the hinge supports are fully in place. 2. Special Door Care Instructions Most oven doors contain glass that can break. Read the following recommendations: 1. On some models an interior oven light will turn automatically when the oven door is closed by the sides and pull the bottom of the door facing down. To replace the light bulb: CAUTION: BE SURE THE OVEN IS...

Use and Care Manual
Page 14
... its place below the front bracket. Contact cabinet maker to Common Problems OCCURRENCE Oven Control Beeps and Displays any F code (for self-cleaning cycle. Service wiring not complete. Check house lights to be not level. Replace cord/plug. Care & Cleaning To Remove the "Hidden Bake" Cover (some models) 1. Installation. The door was left open and controls set the controls. 14 Contact installing agent if rack and cabinet cutout flooring are square and level. The oven cannot be sure to put it all the...
... its place below the front bracket. Contact cabinet maker to Common Problems OCCURRENCE Oven Control Beeps and Displays any F code (for self-cleaning cycle. Service wiring not complete. Check house lights to be not level. Replace cord/plug. Care & Cleaning To Remove the "Hidden Bake" Cover (some models) 1. Installation. The door was left open and controls set the controls. 14 Contact installing agent if rack and cabinet cutout flooring are square and level. The oven cannot be sure to put it all the...

Use and Care Manual
Page 15
.... Regular cleaning is started. Excessive spillovers in the self-cleaning area, but do not cut into broiler pan. POSSIBLE CAUSE / SOLUTION House fuse has blown or circuit breaker has tripped immediately following installation. Follow the instructions under "To Stop or Interrupt a Self-Cleaning Cycle" in operation. Many factors affect baking results. Oven smokes excessively during broiling. Self-cleaning cycle does not work . Meat too close . DO NOT use the broiler pan without grid or grid cover with...
.... Regular cleaning is started. Excessive spillovers in the self-cleaning area, but do not cut into broiler pan. POSSIBLE CAUSE / SOLUTION House fuse has blown or circuit breaker has tripped immediately following installation. Follow the instructions under "To Stop or Interrupt a Self-Cleaning Cycle" in operation. Many factors affect baking results. Oven smokes excessively during broiling. Self-cleaning cycle does not work . Meat too close . DO NOT use the broiler pan without grid or grid cover with...

Use and Care Manual
Page 16
... you . 2. Proper connection to a grounded power supply of sufficient voltage, replacement of blown fuses, repair of loose connections or defects in the 50 states of the U.S.A., Puerto Rico, and Canada. The date on models with original serial numbers that are made by servicers other than Electrolux Home Products, Inc., Electrolux Canada Corp., or their authorized servicers; All warranties are listed under this warranty must be...
... you . 2. Proper connection to a grounded power supply of sufficient voltage, replacement of blown fuses, repair of loose connections or defects in the 50 states of the U.S.A., Puerto Rico, and Canada. The date on models with original serial numbers that are made by servicers other than Electrolux Home Products, Inc., Electrolux Canada Corp., or their authorized servicers; All warranties are listed under this warranty must be...


