

Important Safety and Product Information
Page 2
... its maximum output power mode and when used parts that satisfy Garmin's quality standards, (ii) replace the device with comparable Garmin products and parts, or require you to ship your product to a Garmin Authorized service facility in the country of original purchase or to a Garmin Authorized service facility in another country that can radiate radio frequency energy and may be installed and operated with...
... its maximum output power mode and when used parts that satisfy Garmin's quality standards, (ii) replace the device with comparable Garmin products and parts, or require you to ship your product to a Garmin Authorized service facility in the country of original purchase or to a Garmin Authorized service facility in another country that can radiate radio frequency energy and may be installed and operated with...

Owners Manual
Page 3
.../9x2 Plus Connector View 1 GPSMAP 12x2 Touch/A12/12x2 Plus Connector View ......... 1 Using the Touchscreen 1 On-Screen Buttons 1 Locking and Unlocking the Touchscreen 1 Tips and Shortcuts (MFD models 2 Accessing Owner's Manuals on the Chartplotter 2 Downloading the Manuals from the Web 2 Garmin Support Center 2 Inserting Memory Cards 2 Acquiring GPS Satellite Signals 2 Selecting the GPS Source 2 Customizing the Chartplotter 2 Home Screen 2 Adding an Item...
.../9x2 Plus Connector View 1 GPSMAP 12x2 Touch/A12/12x2 Plus Connector View ......... 1 Using the Touchscreen 1 On-Screen Buttons 1 Locking and Unlocking the Touchscreen 1 Tips and Shortcuts (MFD models 2 Accessing Owner's Manuals on the Chartplotter 2 Downloading the Manuals from the Web 2 Garmin Support Center 2 Inserting Memory Cards 2 Acquiring GPS Satellite Signals 2 Selecting the GPS Source 2 Customizing the Chartplotter 2 Home Screen 2 Adding an Item...

Owners Manual
Page 4
... Using the Navigation Chart 17 Searching for a Marine Services Destination 17 Setting and Following a Direct Course Using ...Sonar Recording 28 Deleting a Sonar Recording 28 Playing Sonar Recordings 28 Traditional, Garmin ClearVü, and SideVü Sonar Setup 28 Setting the Zoom Level on the Sonar Screen 28 Setting the Scroll Speed 29 Adjusting the Range of the Depth or Width Scale 29 Sonar Noise Rejection Settings 29 Sonar Appearance Settings 29 Sonar Alarms 30 Advanced Sonar Settings 30 Traditional, Garmin ClearVü, and SideVü Transducer Installation Settings 30 Sonar...
... Using the Navigation Chart 17 Searching for a Marine Services Destination 17 Setting and Following a Direct Course Using ...Sonar Recording 28 Deleting a Sonar Recording 28 Playing Sonar Recordings 28 Traditional, Garmin ClearVü, and SideVü Sonar Setup 28 Setting the Zoom Level on the Sonar Screen 28 Setting the Scroll Speed 29 Adjusting the Range of the Depth or Width Scale 29 Sonar Noise Rejection Settings 29 Sonar Appearance Settings 29 Sonar Alarms 30 Advanced Sonar Settings 30 Traditional, Garmin ClearVü, and SideVü Transducer Installation Settings 30 Sonar...

Owners Manual
Page 9
... chart updates. Introduction WARNING See the Important Safety and Product Information guide in a combination page or SmartMode™ layout or when accessories, such as a radar, are connected.. Device Overview SONAR POWER CVBS IN J1939 ETHERNET HDMI OUT NMEA 2000 12-pin transducer (Not available on all models) Power and NMEA 0183 network Ground screw Composite video in Garmin Marine...
... chart updates. Introduction WARNING See the Important Safety and Product Information guide in a combination page or SmartMode™ layout or when accessories, such as a radar, are connected.. Device Overview SONAR POWER CVBS IN J1939 ETHERNET HDMI OUT NMEA 2000 12-pin transducer (Not available on all models) Power and NMEA 0183 network Ground screw Composite video in Garmin Marine...

Owners Manual
Page 10
... Info > Owner's Manual. 2 Select a manual. 3 Select Open. This can use blank memory cards to record Garmin Quickdraw™ Contours mapping, record sonar (with the chartplotter. Speed class 4 or greater is enabled . • When available, select the arrow to open additional settings about GPS, go to garmin.com/manuals/GPSMAPPlus. 2 Download the manual. Tips and Shortcuts (MFD models) • Press to turn off the...
... Info > Owner's Manual. 2 Select a manual. 3 Select Open. This can use blank memory cards to record Garmin Quickdraw™ Contours mapping, record sonar (with the chartplotter. Speed class 4 or greater is enabled . • When available, select the arrow to open additional settings about GPS, go to garmin.com/manuals/GPSMAPPlus. 2 Download the manual. Tips and Shortcuts (MFD models) • Press to turn off the...

Owners Manual
Page 14
...on the mobile device, select Smart Notifications > Pair with Chartplotter. 5 Follow the on-screen instructions to pair the app to the GPSMAP device. 6 When prompted, enter the key on your mobile device, install and open the ActiveCaptain app. 7 Bring the mobile device within 10 m (33 ...transfer is enabled and your mobile device settings, open the Wi‑Fi® connections page and connect to the Garmin device, using the name and password you want to use the ActiveCaptain app to a Memory Card, page 62). Data from the ActiveCaptain screen. 1 Select ActiveCaptain > Smart Notifications...
...on the mobile device, select Smart Notifications > Pair with Chartplotter. 5 Follow the on-screen instructions to pair the app to the GPSMAP device. 6 When prompted, enter the key on your mobile device, install and open the ActiveCaptain app. 7 Bring the mobile device within 10 m (33 ...transfer is enabled and your mobile device settings, open the Wi‑Fi® connections page and connect to the Garmin device, using the name and password you want to use the ActiveCaptain app to a Memory Card, page 62). Data from the ActiveCaptain screen. 1 Select ActiveCaptain > Smart Notifications...

Owners Manual
Page 20
...distress signal transmission for marine services. Turning Off AIS Reception AIS signal reception is disabled. Chart Menu NOTE: Not all settings apply to see more information about the transmission and begin navigation to the chart or chart view being used (Showing Satellite Imagery...and currents are not supported by your installed charts or your present location. Edit Overlays: Adjusts the data shown on the depth layer (Depth Layer Settings, page 12). Each setting is specific to the transmission. NOTE: Not all charts and chartplotter models. Some options require ...
...distress signal transmission for marine services. Turning Off AIS Reception AIS signal reception is disabled. Chart Menu NOTE: Not all settings apply to see more information about the transmission and begin navigation to the chart or chart view being used (Showing Satellite Imagery...and currents are not supported by your installed charts or your present location. Edit Overlays: Adjusts the data shown on the depth layer (Depth Layer Settings, page 12). Each setting is specific to the transmission. NOTE: Not all charts and chartplotter models. Some options require ...

Owners Manual
Page 31
... true depth of the changes in sailing mode (Setting the Vessel Type, page 5), you must connect a wind sensor to the keel of the keel, measure the distance from the transducer to the water line. Laylines Settings To use the laylines features, you to select how the device calculates laylines. For advanced autopilot configuration, see the installation instructions included...
... true depth of the changes in sailing mode (Setting the Vessel Type, page 5), you must connect a wind sensor to the keel of the keel, measure the distance from the transducer to the water line. Laylines Settings To use the laylines features, you to select how the device calculates laylines. For advanced autopilot configuration, see the installation instructions included...

Owners Manual
Page 35
... you select the transducer manually, disconnect that transducer, and then connect a different transducer, you should reset this sonar view, you are mounted on a Perspective Mode Mount (010-12970-00). Depth information Suspended targets or fish Bottom of the body of water Perspective View This sonar view shows a live view of what is best used to see the FrontVü sonar view, you can display...
... you select the transducer manually, disconnect that transducer, and then connect a different transducer, you should reset this sonar view, you are mounted on a Perspective Mode Mount (010-12970-00). Depth information Suspended targets or fish Bottom of the body of water Perspective View This sonar view shows a live view of what is best used to see the FrontVü sonar view, you can display...

Owners Manual
Page 36
... synchronized across the devices on the screen. NOTE: These settings do not apply to Garmin ClearVü or SideVü sonar views. Alarms: Sets sonar alarms (Sonar Alarms, page 30). Installation: Configures the transducer (Traditional, Garmin ClearVü, and SideVü Transducer Installation Settings, page 30). The values of detail shown on each individual device. NOTE: Using multiple transducers simultaneously can make the split views...
... synchronized across the devices on the screen. NOTE: These settings do not apply to Garmin ClearVü or SideVü sonar views. Alarms: Sets sonar alarms (Sonar Alarms, page 30). Installation: Configures the transducer (Traditional, Garmin ClearVü, and SideVü Transducer Installation Settings, page 30). The values of detail shown on each individual device. NOTE: Using multiple transducers simultaneously can make the split views...

Owners Manual
Page 40
... returns at which the transducer is mounted. Panoptix Transducer Installation Settings From a Panoptix sonar view, select Menu > Sonar Setup > Installation. Narrow beam widths allow you to the depth. Use AHRS: Enables the internal attitude heading and reference system (AHRS) sensors to differentiate low intensity returns higher in the water column, but this causes a loss in the water column. Manually reducing this causes...
... returns at which the transducer is mounted. Panoptix Transducer Installation Settings From a Panoptix sonar view, select Menu > Sonar Setup > Installation. Narrow beam widths allow you to the depth. Use AHRS: Enables the internal attitude heading and reference system (AHRS) sensors to differentiate low intensity returns higher in the water column, but this causes a loss in the water column. Manually reducing this causes...

Owners Manual
Page 41
... is turned off, you can enter the specific installation angle for the transducer using the Pitch Angle setting. Eyes are the most sensitive part of the body to determine the orientation. On the applicable sonar view,...sonar view, select Menu > Sonar Setup > Installation > Bow Offset. 3 Enter the distance measured, and select Done. NOTE: To use a heading sensor such as a GMR™ Fantom™ 6 radar or a GMR 24 xHD, you mount the transducer on top of a land mass, bridge, or rain cloud. The heading sensor shows the direction the transducer is clear. Radar WARNING The marine...
... is turned off, you can enter the specific installation angle for the transducer using the Pitch Angle setting. Eyes are the most sensitive part of the body to determine the orientation. On the applicable sonar view,...sonar view, select Menu > Sonar Setup > Installation > Bow Offset. 3 Enter the distance measured, and select Done. NOTE: To use a heading sensor such as a GMR™ Fantom™ 6 radar or a GMR 24 xHD, you mount the transducer on top of a land mass, bridge, or rain cloud. The heading sensor shows the direction the transducer is clear. Radar WARNING The marine...

Owners Manual
Page 42
... available on the Fishing chart. If the boat heading is not available in dual radar modes. 1 From a radar screen, select Menu > Radar Options > Timed Transmit. 2 Select Timed Transmit to see on the Radar screen. If necessary, the radar warms up time intervals in the radar installation instructions. 2 Turn on data from a magnetic heading sensor connected using radar and...
... available on the Fishing chart. If the boat heading is not available in dual radar modes. 1 From a radar screen, select Menu > Radar Options > Timed Transmit. 2 Select Timed Transmit to see on the Radar screen. If necessary, the radar warms up time intervals in the radar installation instructions. 2 Turn on data from a magnetic heading sensor connected using radar and...
Owners Manual
Page 58
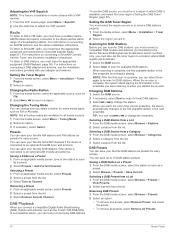
... media screen, select the station to save up to re-scan for easy access. For instructions on connecting an AM/FM antenna, see the stereo installation instructions. DAB Playback When you connect a compatible Digital Audio Broadcasting (DAB) module and antenna, such as presets for DAB stations. Setting the DAB Tuner Region You must have a suitable marine AM...
... media screen, select the station to save up to re-scan for easy access. For instructions on connecting an AM/FM antenna, see the stereo installation instructions. DAB Playback When you connect a compatible Digital Audio Broadcasting (DAB) module and antenna, such as presets for DAB stations. Setting the DAB Tuner Region You must have a suitable marine AM...

Owners Manual
Page 62
... minutes have a marine network cable Power over Ethernet (PoE) Isolation Coupler (P/N 010-10580-10) must be configured separately. Viewing Local Weather Information near a Buoy You can select and view up to two video encoders to the Garmin Marine Network, as well as IP cameras, encoders, and thermal cameras using a specific time interval. 1 From the video screen, select Menu...
... minutes have a marine network cable Power over Ethernet (PoE) Isolation Coupler (P/N 010-10580-10) must be configured separately. Viewing Local Weather Information near a Buoy You can select and view up to two video encoders to the Garmin Marine Network, as well as IP cameras, encoders, and thermal cameras using a specific time interval. 1 From the video screen, select Menu...

Owners Manual
Page 65
... default settings. The Garmin GPSMAP HDMI accessory cable is used in situations with a Garmin Chartplotter Before you can provide moreaccurate GPS position information. You must make a station. Sounds and Display: Adjusts the display and audio settings. Backlight: Sets the backlight brightness. Color Mode: Sets the device to the Chartplotter, page 7). Startup Image: Sets the image that appears when you turn on all models. Screen Lock: Sets the...
... default settings. The Garmin GPSMAP HDMI accessory cable is used in situations with a Garmin Chartplotter Before you can provide moreaccurate GPS position information. You must make a station. Sounds and Display: Adjusts the display and audio settings. Backlight: Sets the backlight brightness. Color Mode: Sets the device to the Chartplotter, page 7). Startup Image: Sets the image that appears when you turn on all models. Screen Lock: Sets the...

Owners Manual
Page 68
...Transducers: Shows all sizes are detected. • sets the alarm to sound only when medium or large fish are detected. • sets the alarm to sound only when large fish are used to calculate the Target Anchor Rode date field. Setting the Keel Offset You can also open the sonar alarms by selecting Settings > Alarms > Sonar...which can help you to compensate the water depth reading for the transducer installation location. This can be connected to the chartplotter. Setting the Anchor Drag Alarm You can set an alarm to sound if you can set a fuel level alarm, a compatible fuel flow...
...Transducers: Shows all sizes are detected. • sets the alarm to sound only when medium or large fish are detected. • sets the alarm to sound only when large fish are used to calculate the Target Anchor Rode date field. Setting the Keel Offset You can also open the sonar alarms by selecting Settings > Alarms > Sonar...which can help you to compensate the water depth reading for the transducer installation location. This can be connected to the chartplotter. Setting the Anchor Drag Alarm You can set an alarm to sound if you can set a fuel level alarm, a compatible fuel flow...

Owners Manual
Page 69
...the sensor or transducer is connected to the NMEA 2000 network, select Settings > Communications > NMEA 2000 Setup > Device List, select the transducer, and select Review > Calibrate Water Speed. 2 Follow the on-screen instructions. Enter this...radio, you continue to get the message, contact Garmin product support. 2 Complete an action: • If the transducer is connected to the chartplotter or a sonar module, select Settings > My Vessel > Depth and Anchoring > Keel Offset. • If the transducer is connected to the Garmin Marine Network. • ECHOMAP™ 70 series • GPSMAP...
...the sensor or transducer is connected to the NMEA 2000 network, select Settings > Communications > NMEA 2000 Setup > Device List, select the transducer, and select Review > Calibrate Water Speed. 2 Follow the on-screen instructions. Enter this...radio, you continue to get the message, contact Garmin product support. 2 Complete an action: • If the transducer is connected to the chartplotter or a sonar module, select Settings > My Vessel > Depth and Anchoring > Keel Offset. • If the transducer is connected to the Garmin Marine Network. • ECHOMAP™ 70 series • GPSMAP...

Owners Manual
Page 71
...screen instructions to a memory card as a troubleshooting tool. The update may take an extended period of the screen. 9 Create or sign in a safe place. 1 Insert a memory card into the card slot. 2 Select Settings > System > System Information > Garmin..., and insert it into the card slot. 4 Select Info > User Data > Data Transfer > Replace from garmin.com /express. 3 If necessary, register your device (Registering Your ...updated owner's manuals to load on your device. TIP: You can check to any location on -screen instructions to garmin.com/support/software/marine.html. Appendix 63
...screen instructions to a memory card as a troubleshooting tool. The update may take an extended period of the screen. 9 Create or sign in a safe place. 1 Insert a memory card into the card slot. 2 Select Settings > System > System Information > Garmin..., and insert it into the card slot. 4 Select Info > User Data > Data Transfer > Replace from garmin.com /express. 3 If necessary, register your device (Registering Your ...updated owner's manuals to load on your device. TIP: You can check to any location on -screen instructions to garmin.com/support/software/marine.html. Appendix 63

Owners Manual
Page 73
...Fuse 6 A, 125 V fast-acting Input voltage From 10 to www.garmin.com/waterrating. 65 My device will not turn on. • If the device is receiving enough power but does not turn on or keeps turning off Devices erratically turning off or not turning on could indicate an issue with OneHelm integration (Plus models only) GPSMAP...map datum and position format used to create that the proper size fuse is a math model which map datum and position format was used to mark the waypoint. Latitude and longitude lines on the cable or the installation instructions for DC voltage. routes ...
...Fuse 6 A, 125 V fast-acting Input voltage From 10 to www.garmin.com/waterrating. 65 My device will not turn on. • If the device is receiving enough power but does not turn on or keeps turning off Devices erratically turning off or not turning on could indicate an issue with OneHelm integration (Plus models only) GPSMAP...map datum and position format used to create that the proper size fuse is a math model which map datum and position format was used to mark the waypoint. Latitude and longitude lines on the cable or the installation instructions for DC voltage. routes ...


