
Owner s Manual
Page 1
GPSMAP® 7400/7600 Series Owner's Manual February 2016 190-01841-00_0D
GPSMAP® 7400/7600 Series Owner's Manual February 2016 190-01841-00_0D

Owner s Manual
Page 2
All rights reserved. Under the copyright laws, this manual may not be copied, in whole or in the United States and other countries. echoMAP™, FUSION-Link™, Garmin Helm™, Garmin LakeVü™, Garmin Quickdraw™, GCV™, GMR™, GRID™, GXM...content of this product. FLIR® is a registered trademark of this manual without the written consent of Garmin Ltd. All other countries. Garmin®, the Garmin logo, BlueChart®, g2 Vision®, GPSMAP®, Ultrascroll®, and VIRB® are registered trademarks of Microsoft ...
All rights reserved. Under the copyright laws, this manual may not be copied, in whole or in the United States and other countries. echoMAP™, FUSION-Link™, Garmin Helm™, Garmin LakeVü™, Garmin Quickdraw™, GCV™, GMR™, GRID™, GXM...content of this product. FLIR® is a registered trademark of this manual without the written consent of Garmin Ltd. All other countries. Garmin®, the Garmin logo, BlueChart®, g2 Vision®, GPSMAP®, Ultrascroll®, and VIRB® are registered trademarks of Microsoft ...

Owner s Manual
Page 3
... 1 Using the Touchscreen 1 On-Screen Buttons 1 Tips and Shortcuts 1 Locking the Touchscreen 1 Accessing Owner's Manuals on the Chartplotter 1 Downloading the Manuals 1 Getting More Information 1 Inserting Memory Cards 1 Software Update 2 Loading the New Software on a Memory Card...Navigation Chart 6 Viewing Aerial Photos of Landmarks 6 Garmin Quickdraw™ Contours Mapping 6 Mapping a Body of Water Using the Garmin Quickdraw Contours Feature 6 Adding a Label to a Garmin Quickdraw Contours Map ......... 6 Garmin Quickdraw Contours Settings 6 Automatic Identification System 7 ...
... 1 Using the Touchscreen 1 On-Screen Buttons 1 Tips and Shortcuts 1 Locking the Touchscreen 1 Accessing Owner's Manuals on the Chartplotter 1 Downloading the Manuals 1 Getting More Information 1 Inserting Memory Cards 1 Software Update 2 Loading the New Software on a Memory Card...Navigation Chart 6 Viewing Aerial Photos of Landmarks 6 Garmin Quickdraw™ Contours Mapping 6 Mapping a Body of Water Using the Garmin Quickdraw Contours Feature 6 Adding a Label to a Garmin Quickdraw Contours Map ......... 6 Garmin Quickdraw Contours Settings 6 Automatic Identification System 7 ...

Owner s Manual
Page 7
... information. TIP: To quickly open this web page, scan this code: 2 Download the manual. Map cards allow you have microSD card slots. Introduction 1 There is also contact information to Garmin support should you to view high-resolution satellite imagery and aerial reference photos of the item ... Opens the menu for the page or function Opens the presets menu for product warnings and other points of manuals from the web. 1 Go to www.garmin.com/manuals/GPSMAP7400-7600. You can download software and chart updates. The support pages will provide answers to frequently asked ...
... information. TIP: To quickly open this web page, scan this code: 2 Download the manual. Map cards allow you have microSD card slots. Introduction 1 There is also contact information to Garmin support should you to view high-resolution satellite imagery and aerial reference photos of the item ... Opens the menu for the page or function Opens the presets menu for product warnings and other points of manuals from the web. 1 Go to www.garmin.com/manuals/GPSMAP7400-7600. You can download software and chart updates. The support pages will provide answers to frequently asked ...

Owner s Manual
Page 8
...SmartMode name and symbol. The categories along the bottom of the home screen are visible on the computer. 2 Go to www.garmin.com/support/software/marine.html. 3 Select Download next to GPSMAP Series with SD Card. 4 Read and agree to the terms. 5 Select Download. 6 Select Run. 7 Select the ... prompted, leave the memory card in the chartplotter. When you change appears only on all of the features in place and restart the chartplotter manually. 6 Remove the memory card. When you change how data appears on only that display, except for the Settings button. Home Screen The ...
...SmartMode name and symbol. The categories along the bottom of the home screen are visible on the computer. 2 Go to www.garmin.com/support/software/marine.html. 3 Select Download next to GPSMAP Series with SD Card. 4 Read and agree to the terms. 5 Select Download. 6 Select Run. 7 Select the ... prompted, leave the memory card in the chartplotter. When you change appears only on all of the features in place and restart the chartplotter manually. 6 Remove the memory card. When you change how data appears on only that display, except for the Settings button. Home Screen The ...

Owner s Manual
Page 15
... Vessels. Sailing Ang.: Allows you can display laylines on the vessel's location in some areas. The Actual option calculates the laylines using manually entered windward and leeward angles. The Manual option calculates the laylines using the measured wind angle from the wind sensor. Fish Eye 3D Settings NOTE: This feature is the...
... Vessels. Sailing Ang.: Allows you can display laylines on the vessel's location in some areas. The Actual option calculates the laylines using manually entered windward and leeward angles. The Manual option calculates the laylines using the measured wind angle from the wind sensor. Fish Eye 3D Settings NOTE: This feature is the...

Owner s Manual
Page 21
.... Sailing Features Setting the Vessel Type You can use features customized for reaching the start line before the timer expires. The Manual option calculates the laylines using the measured wind angle from the wind sensor. Tide Correction: Corrects the laylines based on the ...• To mark the port and starboard starting line guidance feature to select how the device calculates laylines. Synchronizing User Data Across the Garmin Marine Network NOTICE Before you synchronize the user data across all models. Select Settings > Preferences > User Data Sharing > On. This ...
.... Sailing Features Setting the Vessel Type You can use features customized for reaching the start line before the timer expires. The Manual option calculates the laylines using the measured wind angle from the wind sensor. Tide Correction: Corrects the laylines based on the ...• To mark the port and starboard starting line guidance feature to select how the device calculates laylines. Synchronizing User Data Across the Garmin Marine Network NOTICE Before you synchronize the user data across all models. Select Settings > Preferences > User Data Sharing > On. This ...

Owner s Manual
Page 22
... Engage wind hold (Engaging Wind Hold, page 16). 2 Select Menu > Tack/Gybe. 3 Select Tack or Gybe. Sonar When properly connected to an optional Garmin sounder module and a transducer, your autopilot. 1 From the autopilot screen, select Menu > Autopilot Setup > Wind Hold Type. 2 Select Apparent or True. ... reading for the sails while the autopilot is in steps 3 and 4 as a fishfinder. The gybe inhibitor prevents the autopilot from manually performing a gybe using the helm or step steering. Adjusting the Wind Hold Angle with your compatible chartplotter can enable the wind hold type...
... Engage wind hold (Engaging Wind Hold, page 16). 2 Select Menu > Tack/Gybe. 3 Select Tack or Gybe. Sonar When properly connected to an optional Garmin sounder module and a transducer, your autopilot. 1 From the autopilot screen, select Menu > Autopilot Setup > Wind Hold Type. 2 Select Apparent or True. ... reading for the sails while the autopilot is in steps 3 and 4 as a fishfinder. The gybe inhibitor prevents the autopilot from manually performing a gybe using the helm or step steering. Adjusting the Wind Hold Angle with your compatible chartplotter can enable the wind hold type...

Owner s Manual
Page 25
...can view the sonar data from other sonar settings, such as it more information on the Garmin Marine Network. Sonar 19 NOTE: Not all compatible sources on the screen. In addition, ...synchronized across the devices on the screen as long as the Appearance settings, are using the GPSMAP 7407xsv mounted at the back of the boat, you have two sources for DownVü and...Setup > Advanced > Color Gain. 3 Select an option: • To increase or decrease the color intensity manually, select Up or Down. • To use for a particular sonar view, you are not synchronized and ...
...can view the sonar data from other sonar settings, such as it more information on the Garmin Marine Network. Sonar 19 NOTE: Not all compatible sources on the screen. In addition, ...synchronized across the devices on the screen as long as the Appearance settings, are using the GPSMAP 7407xsv mounted at the back of the boat, you have two sources for DownVü and...Setup > Advanced > Color Gain. 3 Select an option: • To increase or decrease the color intensity manually, select Up or Down. • To use for a particular sonar view, you are not synchronized and ...

Owner s Manual
Page 26
... chartplotter, sounder modules, and transducer being used to adjust the range automatically, select Auto. • To increase or decrease the range manually, select Up or Down. Selecting Frequencies NOTE: You cannot adjust the frequency for high-speed operation and rough sea conditions. Creating a ...in the water are less distorted. Setting the Scroll Speed You can be used . The Auto setting selects a scroll rate to manually adjust the range. Adjusting the frequency helps adapt the sonar for deep water applications. Bottom definition and thermocline definition can set the ...
... chartplotter, sounder modules, and transducer being used to adjust the range automatically, select Auto. • To increase or decrease the range manually, select Up or Down. Selecting Frequencies NOTE: You cannot adjust the frequency for high-speed operation and rough sea conditions. Creating a ...in the water are less distorted. Setting the Scroll Speed You can be used . The Auto setting selects a scroll rate to manually adjust the range. Adjusting the frequency helps adapt the sonar for deep water applications. Bottom definition and thermocline definition can set the ...

Owner s Manual
Page 27
..., but the Sonar 21 Interference: Adjusts the sensitivity to high, more slowly. If the device automatically detected your transducer, this setting to the Points and manually set to reduce the effects of transducer, select it from the screen. Automatic scroll speed adjusts the scrolling speed to all sonar views. When smoothing...
..., but the Sonar 21 Interference: Adjusts the sensitivity to high, more slowly. If the device automatically detected your transducer, this setting to the Points and manually set to reduce the effects of transducer, select it from the screen. Automatic scroll speed adjusts the scrolling speed to all sonar views. When smoothing...
Owner s Manual
Page 32
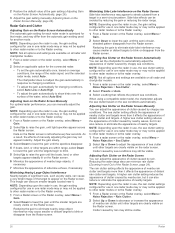
...to the Radar overlay. The sea clutter setting affects the appearance of sea clutter until other targets are clearly visible on the Radar Screen Manually For optimal radar performance, you can minimize rain clutter (Zooming In and Out of clutter caused by sea conditions may differ from the ...rain clutter setting reduces the appearance of clutter caused by nearby waves, but it can set the gain automatically once, based on the Radar Screen Manually, page 26). NOTE: Depending upon the radar in use, the gain setting configured for use in a semi-circular pattern. Data on the ...
...to the Radar overlay. The sea clutter setting affects the appearance of sea clutter until other targets are clearly visible on the Radar Screen Manually For optimal radar performance, you can minimize rain clutter (Zooming In and Out of clutter caused by sea conditions may differ from the ...rain clutter setting reduces the appearance of clutter caused by nearby waves, but it can set the gain automatically once, based on the Radar Screen Manually, page 26). NOTE: Depending upon the radar in use, the gain setting configured for use in a semi-circular pattern. Data on the ...
Owner s Manual
Page 33
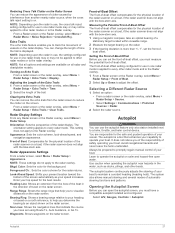
...operate the autopilot on calm and hazard-free open the autopilot screen, you have a compatible autopilot installed and configured. Learn to promptly regain manual control of your boat. Enter your vessel. Measuring the Potential Front-of-Boat Offset The front-of-boat offset compensates for use in ...one radar mode is a tool that indicate the course you must measure the potential front-of-boat offset. The system also allows manual steering and several modes of automaticsteering functions and patterns. NOTE: Depending upon the radar in one radar mode may or may not be...
...operate the autopilot on calm and hazard-free open the autopilot screen, you have a compatible autopilot installed and configured. Learn to promptly regain manual control of your boat. Enter your vessel. Measuring the Potential Front-of-Boat Offset The front-of-boat offset compensates for use in ...one radar mode is a tool that indicate the course you must measure the potential front-of-boat offset. The system also allows manual steering and several modes of automaticsteering functions and patterns. NOTE: Depending upon the radar in one radar mode may or may not be...

Owner s Manual
Page 34
...Autopilot screen, select Menu > Autopilot Setup > Step Turn Size. 2 Select an increment. From any screen, select Engage. When you release the helm and manually maintain a specific heading for a few seconds, the autopilot resumes a heading hold at a specified time interval. 1 From the autopilot screen, select Menu ... 10° turn. • Hold to steer the boat in a continuous circle around the active waypoint. With the autopilot engaged, manually steer the boat. The autopilot can steer the boat in preset patterns for the autopilot to steer the boat in a continuous circle, ...
...Autopilot screen, select Menu > Autopilot Setup > Step Turn Size. 2 Select an increment. From any screen, select Engage. When you release the helm and manually maintain a specific heading for a few seconds, the autopilot resumes a heading hold at a specified time interval. 1 From the autopilot screen, select Menu ... 10° turn. • Hold to steer the boat in a continuous circle around the active waypoint. With the autopilot engaged, manually steer the boat. The autopilot can steer the boat in preset patterns for the autopilot to steer the boat in a continuous circle, ...

Owner s Manual
Page 35
... position to the active waypoint and begins the pattern. If you can track vessels that send position reports. This feature is connected to a Garmin NMEA 2000 compatible radio and you mark an SOS or man-overboard location, the radio shows the Distress Call page so you have entered.... position information was sent with the distress call, that supports DSC. For information about marking an MOB or SOS location, see the VHF radio owner's manual. You can add a vessel to 100 entries. If a second call . designates a distress call . If your radio, see Marking an SOS Location, page 10...
... position to the active waypoint and begins the pattern. If you can track vessels that send position reports. This feature is connected to a Garmin NMEA 2000 compatible radio and you mark an SOS or man-overboard location, the radio shows the Distress Call page so you have entered.... position information was sent with the distress call, that supports DSC. For information about marking an MOB or SOS location, see the VHF radio owner's manual. You can add a vessel to 100 entries. If a second call . designates a distress call . If your radio, see Marking an SOS Location, page 10...

Owner s Manual
Page 37
... calculated by your vessel. 1 Select A/V, Gauges, Controls > Engines > Menu. 2 Select an option: • After you can set a fuel level alarm, a compatible fuel flow sensor must manually select the number of engines (Selecting the Number of Engines Shown in the first gauge. 4 Repeat for wind calculations is based on water speed or...
... calculated by your vessel. 1 Select A/V, Gauges, Controls > Engines > Menu. 2 Select an option: • After you can set a fuel level alarm, a compatible fuel flow sensor must manually select the number of engines (Selecting the Number of Engines Shown in the first gauge. 4 Repeat for wind calculations is based on water speed or...

Owner s Manual
Page 38
... for a Different Date 1 Select Info > Tides & Currents. 2 Select Tides, Currents, or Celestial. 3 Select an option. • To view information for a different date, select Change Date > Manual, and enter a date. • To view information for today, select Change Date > Current. • If available, to view information for the day after the date...
... for a Different Date 1 Select Info > Tides & Currents. 2 Select Tides, Currents, or Celestial. 3 Select an option. • To view information for a different date, select Change Date > Manual, and enter a date. • To view information for today, select Change Date > Current. • If available, to view information for the day after the date...

Owner s Manual
Page 43
... the setting is available with multiple composite built-in the source list. Camera Settings Some cameras provide additional options to the camera manual for a list of available features. The Perspective 3D chart view can save and activate presets using the video menu. Turning On... can connect multiple supported video cameras and up to purchase a PoE Isolation Coupler. Compatible devices include video devices connected to the Garmin Marine Network. You can view information about the weather services you have subscribed to and how many minutes have a marine network...
... the setting is available with multiple composite built-in the source list. Camera Settings Some cameras provide additional options to the camera manual for a list of available features. The Perspective 3D chart view can save and activate presets using the video menu. Turning On... can connect multiple supported video cameras and up to purchase a PoE Isolation Coupler. Compatible devices include video devices connected to the Garmin Marine Network. You can view information about the weather services you have subscribed to and how many minutes have a marine network...

Owner s Manual
Page 44
... source. 1 Select Combos > Menu > Add Combo. 2 Select Functions, and select a number. 3 Select an area to assign a function to the camera manual for all connected, supported video devices. Mirror: Reverses the image like a rearview mirror. FLIR™ Menu: Provides access to enter a new name for one ... 1 From a video screen, touch the screen. 2 Select an option: • To zoom in a custom combination screen. If your camera user manual for the camera. You may occur. Damage to four video functions in and out with a video source. You can use . Change Scene: Selects the...
... source. 1 Select Combos > Menu > Add Combo. 2 Select Functions, and select a number. 3 Select an area to assign a function to the camera manual for all connected, supported video devices. Mirror: Reverses the image like a rearview mirror. FLIR™ Menu: Provides access to enter a new name for one ... 1 From a video screen, touch the screen. 2 Select an option: • To zoom in a custom combination screen. If your camera user manual for the camera. You may occur. Damage to four video functions in and out with a video source. You can use . Change Scene: Selects the...

Owner s Manual
Page 51
... the location of the point does not appear where the point should be a few causes. Check the fuse to create that map. If you have manually entered a waypoint using a multimeter. Capturing Screenshots 1 Insert a memory card into the card slot. 2 Select Info > Image Viewer. 3 Select the folder containing the ...there could indicate an issue with the power supplied to transfer and share data from a map, there should be a legend on , contact Garmin product support at least six seconds. Viewing Images on a Memory card You can view images that are saved on the screen. If the ...
... the location of the point does not appear where the point should be a few causes. Check the fuse to create that map. If you have manually entered a waypoint using a multimeter. Capturing Screenshots 1 Insert a memory card into the card slot. 2 Select Info > Image Viewer. 3 Select the folder containing the ...there could indicate an issue with the power supplied to transfer and share data from a map, there should be a legend on , contact Garmin product support at least six seconds. Viewing Images on a Memory card You can view images that are saved on the screen. If the ...