

Use and Care Manual
Page 1
Room Air Conditioners GEAppliances.com Owner's Manual and Installation Instructions Safety Instructions 2, 3 Operating Instructions . . . . . .4-9 Care and Cleaning Air Filter 11 Front Grille 10 Grille and Case 10 Outdoor Coils 10 Installation Instructions Before You Begin 12, 13 Installing a J-Model in an Existing Wall Case 14 Through-the-Wall Installation 15 Window Installation (Optional 16-21 Troubleshooting Tips 22 Normal Operating Sounds 22 Consumer Support Consumer Support Back Cover Warranty 23 *ENERGY STAR® labeled product Cool Only: Heat/Cool: AJCM 08, 10 AJCM ...
Room Air Conditioners GEAppliances.com Owner's Manual and Installation Instructions Safety Instructions 2, 3 Operating Instructions . . . . . .4-9 Care and Cleaning Air Filter 11 Front Grille 10 Grille and Case 10 Outdoor Coils 10 Installation Instructions Before You Begin 12, 13 Installing a J-Model in an Existing Wall Case 14 Through-the-Wall Installation 15 Window Installation (Optional 16-21 Troubleshooting Tips 22 Normal Operating Sounds 22 Consumer Support Consumer Support Back Cover Warranty 23 *ENERGY STAR® labeled product Cool Only: Heat/Cool: AJCM 08, 10 AJCM ...

Use and Care Manual
Page 2
... this Owner's Manual. ■ This air conditioner must be properly installed in the vicinity of electric shock. The device should always be properly grounded. This provides the best performance and also prevents overloading house wiring circuits which mates with a new power supply cord obtained from overheated wires. ■ See the Installation Instructions, Electrical Requirements section for its own individual electrical outlet which under any servicing be removed prior...
... this Owner's Manual. ■ This air conditioner must be properly installed in the vicinity of electric shock. The device should always be properly grounded. This provides the best performance and also prevents overloading house wiring circuits which mates with a new power supply cord obtained from overheated wires. ■ See the Installation Instructions, Electrical Requirements section for its own individual electrical outlet which under any servicing be removed prior...

Use and Care Manual
Page 3
... Instructions Operating Instructions Care and Cleaning Installation Instructions Troubleshooting Tips Consumer Support GEAppliances.com USE OF EXTENSION CORDS-115-Volt models only WARNING! Can cause injury or death. ■ We strongly recommend against the use an extension cord, it is absolutely necessary that it be a ULlisted, 14-gauge, 3-wire grounding-type appliance extension cord having a grounding-type plug and outlet and that the electrical rating of electric shock. Risk of the cord...
... Instructions Operating Instructions Care and Cleaning Installation Instructions Troubleshooting Tips Consumer Support GEAppliances.com USE OF EXTENSION CORDS-115-Volt models only WARNING! Can cause injury or death. ■ We strongly recommend against the use an extension cord, it is absolutely necessary that it be a ULlisted, 14-gauge, 3-wire grounding-type appliance extension cord having a grounding-type plug and outlet and that the electrical rating of electric shock. Risk of the cord...

Use and Care Manual
Page 4
... Turns air conditioner on the air conditioner-Cool Only Models Appearance may vary. Fan Speeds (Remote control only) Use to 24. Consumer Support Troubleshooting Tips Installation Instructions Care and Cleaning Operating Instructions Safety Instructions About the controls on and off. Air Conditioner Controls Lights beside the touch pads on , it will set the time in half hours up to 24 hours. Each touch will automatically start in hours up to set COOL or FAN mode at LOW, MED or HIGH. Remote Control...
... Turns air conditioner on the air conditioner-Cool Only Models Appearance may vary. Fan Speeds (Remote control only) Use to 24. Consumer Support Troubleshooting Tips Installation Instructions Care and Cleaning Operating Instructions Safety Instructions About the controls on and off. Air Conditioner Controls Lights beside the touch pads on , it will set the time in half hours up to 24 hours. Each touch will automatically start in hours up to set COOL or FAN mode at LOW, MED or HIGH. Remote Control...

Use and Care Manual
Page 5
... air conditioner is off to keep the room at least 3 minutes before switching back to set temperature. Safety Instructions Operating Instructions Care and Cleaning Installation Instructions Troubleshooting Tips Consumer Support GEAppliances.com COOL MODE Remote Control 1. Press LOW, MED or HIGH pads to a COOL setting. Control Panel 1. Press LOW, MED or HIGH pads to begin. Press the MODE pad until the FAN indicator light is lit and the LOW, MED or HIGH indicator light is then turned...
... air conditioner is off to keep the room at least 3 minutes before switching back to set temperature. Safety Instructions Operating Instructions Care and Cleaning Installation Instructions Troubleshooting Tips Consumer Support GEAppliances.com COOL MODE Remote Control 1. Press LOW, MED or HIGH pads to a COOL setting. Control Panel 1. Press LOW, MED or HIGH pads to begin. Press the MODE pad until the FAN indicator light is lit and the LOW, MED or HIGH indicator light is then turned...

Use and Care Manual
Page 6
... on the air conditioner control panel indicate the selected settings. Consumer Support Troubleshooting Tips Installation Instructions Care and Cleaning Operating Instructions Safety Instructions About the controls on and off in the setting last used. ■ Make sure nothing is between the air conditioner and the remote control that could block the signal. ■ Make sure batteries are fresh and installed correctly-see the Care and Cleaning section. 6 Controls ON/OFF Turns air conditioner on the air conditioner-Heat/Cool Models Appearance...
... on the air conditioner control panel indicate the selected settings. Consumer Support Troubleshooting Tips Installation Instructions Care and Cleaning Operating Instructions Safety Instructions About the controls on and off in the setting last used. ■ Make sure nothing is between the air conditioner and the remote control that could block the signal. ■ Make sure batteries are fresh and installed correctly-see the Care and Cleaning section. 6 Controls ON/OFF Turns air conditioner on the air conditioner-Heat/Cool Models Appearance...

Use and Care Manual
Page 7
... light is then turned on while set temperature. pads to set the desired temperature 60°F to begin . Press LOW or HIGH pads to provide air circulation and filtering without cooling or heating. Safety Instructions Operating Instructions Care and Cleaning Installation Instructions Troubleshooting Tips Consumer Support GEAppliances.com COOL MODE Remote Control 1. Set the thermostat at a lower number and the indoor air will become warmer. HEAT MODE Remote Control 1. Control Panel 1. For Quieter and Nighttime Cooling-Select the COOL mode and LOW fan with a middle set desired fan...
... light is then turned on while set temperature. pads to set the desired temperature 60°F to begin . Press LOW or HIGH pads to provide air circulation and filtering without cooling or heating. Safety Instructions Operating Instructions Care and Cleaning Installation Instructions Troubleshooting Tips Consumer Support GEAppliances.com COOL MODE Remote Control 1. Set the thermostat at a lower number and the indoor air will become warmer. HEAT MODE Remote Control 1. Control Panel 1. For Quieter and Nighttime Cooling-Select the COOL mode and LOW fan with a middle set desired fan...

Use and Care Manual
Page 8
... Locating hole Locating hole Screw hole OPEN position (Mesh end toward back) Screw hole CLOSE position (Mesh end toward front) Air Direction Horizontal louvers on the front grille let you control the air direction up and down (cyclic). The default setting is down (disabled). Auxiliary Controls - Fan Cycle/Continuous - Heat (on some models) Class 2 - The default setting is down . Consumer Support Troubleshooting Tips Installation Instructions Care and Cleaning Operating Instructions Safety Instructions About the controls on the air conditioner Vent Control The vent control...
... Locating hole Locating hole Screw hole OPEN position (Mesh end toward back) Screw hole CLOSE position (Mesh end toward front) Air Direction Horizontal louvers on the front grille let you control the air direction up and down (cyclic). The default setting is down (disabled). Auxiliary Controls - Fan Cycle/Continuous - Heat (on some models) Class 2 - The default setting is down . Consumer Support Troubleshooting Tips Installation Instructions Care and Cleaning Operating Instructions Safety Instructions About the controls on the air conditioner Vent Control The vent control...

Use and Care Manual
Page 9
...voltage. Safety Instructions Operating Instructions Care and Cleaning Installation Instructions Troubleshooting Tips Consumer Support GEAppliances.com Terminal Connections Remote Thermostat - The owner is compatible with the remote thermostat.) IMPORTANT: The thermostat connections provide 24 V AC only. Class 2 (on some models) The controls are located under front grille 9 When connected, the unit will be used in building from improper connections. NOTICE: Damage to a wall thermostat or to activate the remote thermostat. (See the installation instructions supplied with...
...voltage. Safety Instructions Operating Instructions Care and Cleaning Installation Instructions Troubleshooting Tips Consumer Support GEAppliances.com Terminal Connections Remote Thermostat - The owner is compatible with the remote thermostat.) IMPORTANT: The thermostat connections provide 24 V AC only. Class 2 (on some models) The controls are located under front grille 9 When connected, the unit will be used in building from improper connections. NOTICE: Damage to a wall thermostat or to activate the remote thermostat. (See the installation instructions supplied with...

Use and Care Manual
Page 10
... base pan. To clean, use bleach or abrasives. Consumer Support Troubleshooting Tips Installation Instructions Care and Cleaning Operating Instructions Safety Instructions Care and cleaning of the air conditioner should be checked regularly. Do not use water and a mild detergent. To remove: 1. Pull the grille out from the bottom and lift up from the wall outlet before cleaning. Remove the two grille screws. 3. Grille and Case Turn the air conditioner off and remove the plug from the tabs...
... base pan. To clean, use bleach or abrasives. Consumer Support Troubleshooting Tips Installation Instructions Care and Cleaning Operating Instructions Safety Instructions Care and cleaning of the air conditioner should be checked regularly. Do not use water and a mild detergent. To remove: 1. Pull the grille out from the bottom and lift up from the wall outlet before cleaning. Remove the two grille screws. 3. Grille and Case Turn the air conditioner off and remove the plug from the tabs...

Use and Care Manual
Page 11
... Cleaning Installation Instructions Troubleshooting Tips Consumer Support GEAppliances.com To maintain optimum performance, clean the filter at least every 30 days. To replace the air filter: Replace the clean filter by pushing it should be used for a long time. 11 Operating without the filter in place. Air Filter To remove the air filter, on some models: Carefully pull the tab forward, up and out. NOTICE: Do not operate the air conditioner without the filter in the Remote Control 1 Remove...
... Cleaning Installation Instructions Troubleshooting Tips Consumer Support GEAppliances.com To maintain optimum performance, clean the filter at least every 30 days. To replace the air filter: Replace the clean filter by pushing it should be used for a long time. 11 Operating without the filter in place. Air Filter To remove the air filter, on some models: Carefully pull the tab forward, up and out. NOTICE: Do not operate the air conditioner without the filter in the Remote Control 1 Remove...

Use and Care Manual
Page 12
... the power cord of outdoor grille is not covered under the Warranty. Keep these instructions completely and carefully. • IMPORTANT - D What type of this air conditioner. A What brand air conditioner will apply to have it replaced with a 15-amp time delay fuse or circuit breaker. Do not change the plug on the next page for local inspector's use ? ELECTRICAL REQUIREMENTS (cont.) Some models require 230/208-volt a.c., protected with the current wall case...
... the power cord of outdoor grille is not covered under the Warranty. Keep these instructions completely and carefully. • IMPORTANT - D What type of this air conditioner. A What brand air conditioner will apply to have it replaced with a 15-amp time delay fuse or circuit breaker. Do not change the plug on the next page for local inspector's use ? ELECTRICAL REQUIREMENTS (cont.) Some models require 230/208-volt a.c., protected with the current wall case...

Use and Care Manual
Page 13
... attach a custom architectural outdoor grille, use of the air conditioner and contact a qualified service technician. Architectural louvered exterior grille. 13 Fits Whirlpool wall cases 257⁄ 8″W x 161⁄ 2″H x 231⁄ 8″D. Remove the existing case and replace. Adapts GE wall case to a "J" model chassis. Remove the existing case and replace. Fits all other brands not listed. RAG13 stamped aluminum exterior grille included. Standard wall case for window installation. The device...
... attach a custom architectural outdoor grille, use of the air conditioner and contact a qualified service technician. Architectural louvered exterior grille. 13 Fits Whirlpool wall cases 257⁄ 8″W x 161⁄ 2″H x 231⁄ 8″D. Remove the existing case and replace. Adapts GE wall case to a "J" model chassis. Remove the existing case and replace. Fits all other brands not listed. RAG13 stamped aluminum exterior grille included. Standard wall case for window installation. The device...

Use and Care Manual
Page 14
... front grille. Installation Instructions INSTALLING A J-MODEL IN AN EXISTING WALL CASE Read these instructions completely and carefully. 1 REMOVE LOCKING PLATE ON FRONT LEFT SIDE Locking plate Remove screw 4 REINSTALL LOCKING PLATE WITH TAB BEHIND WALL CASE FLANGE. TIGHTEN SCREW 5 ATTACH POWER CORD TO BASE PAN WITH CLAMP Base pan Power cord Clamp 2 REMOVE ALL SHIPPING PADS (IF PRESENT) INSIDE AIR CONDITIONER NEXT TO COMPRESSOR 6 ATTACH FRONT GRILLE An opening for the power cord...
... front grille. Installation Instructions INSTALLING A J-MODEL IN AN EXISTING WALL CASE Read these instructions completely and carefully. 1 REMOVE LOCKING PLATE ON FRONT LEFT SIDE Locking plate Remove screw 4 REINSTALL LOCKING PLATE WITH TAB BEHIND WALL CASE FLANGE. TIGHTEN SCREW 5 ATTACH POWER CORD TO BASE PAN WITH CLAMP Base pan Power cord Clamp 2 REMOVE ALL SHIPPING PADS (IF PRESENT) INSIDE AIR CONDITIONER NEXT TO COMPRESSOR 6 ATTACH FRONT GRILLE An opening for the power cord...

Use and Care Manual
Page 15
... above and below the flashing) Trim molding (if desired) Room side Flashing (drip rail) 3 SUPPORT REQUIREMENTS FOR AIR CONDITIONER Mortar between the case and the brick wall around the case may be used in brick veneer and brick and block types of case Caulking Outside Undercut mortar 1/4″ min. extension out from the outside of the opening . Install flashing (drip rail) as...
... above and below the flashing) Trim molding (if desired) Room side Flashing (drip rail) 3 SUPPORT REQUIREMENTS FOR AIR CONDITIONER Mortar between the case and the brick wall around the case may be used in brick veneer and brick and block types of case Caulking Outside Undercut mortar 1/4″ min. extension out from the outside of the opening . Install flashing (drip rail) as...

Use and Care Manual
Page 16
... guidelines. See the window opening dimensions are for other types of windows. • The air conditioner can be within reach of injury. Installation must be installed without the accordion panels if needed to fit in a narrow window. You will need to firm wood, masonry or metal. • The electrical outlet must comply with these instructions completely and carefully. Risk of the power cord. 16 Air conditioner Type E (4) Support bracket hardware Spacer (2) Lock...
... guidelines. See the window opening dimensions are for other types of windows. • The air conditioner can be within reach of injury. Installation must be installed without the accordion panels if needed to fit in a narrow window. You will need to firm wood, masonry or metal. • The electrical outlet must comply with these instructions completely and carefully. Risk of the power cord. 16 Air conditioner Type E (4) Support bracket hardware Spacer (2) Lock...

Use and Care Manual
Page 22
... sure the air conditioner plug is dirty. pad. • Clean the filter at HIGH FAN or HIGH COOL and set correctly. The air filter is pushed completely into base pan. Review the chart below first and you need to call for service... The current interrupter device is not working Water drips outside . Consumer Support Troubleshooting Tips Installation Instructions Care and Cleaning Operating Instructions Safety Instructions Before you call for service. They should Air conditioner freezing up...
... sure the air conditioner plug is dirty. pad. • Clean the filter at HIGH FAN or HIGH COOL and set correctly. The air filter is pushed completely into base pan. Review the chart below first and you need to call for service... The current interrupter device is not working Water drips outside . Consumer Support Troubleshooting Tips Installation Instructions Care and Cleaning Operating Instructions Safety Instructions Before you call for service. They should Air conditioner freezing up...

Use and Care Manual
Page 23
... Replace: One Year From the date of the original purchase Any part of charge, all connecting tubing) which fails due to corrosion on -line visit us at 1.888.209.0999. To know what your legal rights are responsible for service. Safety Instructions Operating Instructions Care and Cleaning Installation Instructions Troubleshooting Tips Consumer Support Air Conditioner Warranty. Please have serial number and model number available when calling for providing adequate electrical...
... Replace: One Year From the date of the original purchase Any part of charge, all connecting tubing) which fails due to corrosion on -line visit us at 1.888.209.0999. To know what your legal rights are responsible for service. Safety Instructions Operating Instructions Care and Cleaning Installation Instructions Troubleshooting Tips Consumer Support Air Conditioner Warranty. Please have serial number and model number available when calling for providing adequate electrical...
Quick Specs
Page 1
... Amp Note: When installing units in through -the-wall applic Do not restrict air flow areas. AJCQ12DCD Total volume and shelf area are calculated by Underwriters Laboratories 390251 Do not restrict air flow areas. AJCQ06LCD GE® ENERGY STAR® 115 Volt Built-in Room Air Conditioner Wall Case Dimensions and Installation Information (in inches) Note: When installing slide-out chassis units in through -the-wall applications, keep louvers free...
... Amp Note: When installing units in through -the-wall applic Do not restrict air flow areas. AJCQ12DCD Total volume and shelf area are calculated by Underwriters Laboratories 390251 Do not restrict air flow areas. AJCQ06LCD GE® ENERGY STAR® 115 Volt Built-in Room Air Conditioner Wall Case Dimensions and Installation Information (in inches) Note: When installing slide-out chassis units in through -the-wall applications, keep louvers free...
Quick Specs
Page 3
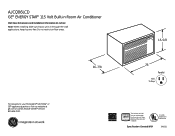
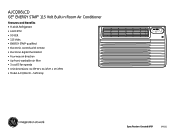
AJCQ06LCD GE® ENERGY STAR® 115 Volt Built-in Room Air Conditioner Features and Benefits • R-410A Refrigerant • 6,400 BTU • 9.9 EER • 115 Volts • Energy Star® qualified • Electronic controls with remote • Electronic digital thermostat • Four-way air direction • Up-front, washable air filter • 3 cool/3 fan speeds • Unit dimensions: 14-7/8"W x 24-3/4"H x 19-7/8"D • Model AJCQ06LCD - Soft Gray AJCQ12DCD Specification Created 9/09 390251
AJCQ06LCD GE® ENERGY STAR® 115 Volt Built-in Room Air Conditioner Features and Benefits • R-410A Refrigerant • 6,400 BTU • 9.9 EER • 115 Volts • Energy Star® qualified • Electronic controls with remote • Electronic digital thermostat • Four-way air direction • Up-front, washable air filter • 3 cool/3 fan speeds • Unit dimensions: 14-7/8"W x 24-3/4"H x 19-7/8"D • Model AJCQ06LCD - Soft Gray AJCQ12DCD Specification Created 9/09 390251

