
Owners Manual
Page 1
... Automatic Cooking 21 Other Features 29 Oven Shelf 34 Helpful Information 36 Microwave Terms 36 Care and Cleaning 37 If Something Goes Wrong 42 Before You Call For Service 42 GE Service Numbers 46 Warranty Back Cover Write the model and serial numbers here: Model Serial Find these numbers on a label inside the oven.
... Automatic Cooking 21 Other Features 29 Oven Shelf 34 Helpful Information 36 Microwave Terms 36 Care and Cleaning 37 If Something Goes Wrong 42 Before You Call For Service 42 GE Service Numbers 46 Warranty Back Cover Write the model and serial numbers here: Model Serial Find these numbers on a label inside the oven.

Owners Manual
Page 10
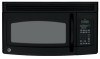
... Metal Shield. The turntable may vary from your model.) Features 4 2 5 1 3 67 9 8 1 Door Handle. NOTE: Rating plate, oven vent(s) and oven light are located on the oven floor or turntable. 5 Touch Control Panel You must be viewed while keeping microwaves confined in place when using the microwave. 6 Cooktop Light. 7 Grease Filter. 8 Removable Turntable. Screen...
... Metal Shield. The turntable may vary from your model.) Features 4 2 5 1 3 67 9 8 1 Door Handle. NOTE: Rating plate, oven vent(s) and oven light are located on the oven floor or turntable. 5 Touch Control Panel You must be viewed while keeping microwaves confined in place when using the microwave. 6 Cooktop Light. 7 Grease Filter. 8 Removable Turntable. Screen...

Owners Manual
Page 11
...) 2 Enter Amount of cooking time and power level. 11 Starts immediately! Starts immediately! Quick Start The Controls on Your Microwave Oven (Throughout this manual, features and appearance may vary from your model.) You can microwave by time, temperature, preset time and power level or with the convenience features. 1 1 Time Features Time Cooking Press...
...) 2 Enter Amount of cooking time and power level. 11 Starts immediately! Starts immediately! Quick Start The Controls on Your Microwave Oven (Throughout this manual, features and appearance may vary from your model.) You can microwave by time, temperature, preset time and power level or with the convenience features. 1 1 Time Features Time Cooking Press...

Owners Manual
Page 12
Quick Start The Controls on Your Microwave Oven (Throughout this manual, features and appearance may vary from your model.) HELP Press this pad and any feature pad for Canned Vegetables 12 Food type 1-6 Starts immediately! Starts immediately! Starts immediately! COOK (on some models) Press 1 for Chicken Press 2 for Fish Press 3 for Ground Meats ... more/less time more/less time more/less time (on the inside front of the oven when you begin, check the guide located on some models) GUIDE ON MICROWAVE Before you open the door. Starts immediately! Starts immediately!
Quick Start The Controls on Your Microwave Oven (Throughout this manual, features and appearance may vary from your model.) HELP Press this pad and any feature pad for Canned Vegetables 12 Food type 1-6 Starts immediately! Starts immediately! Starts immediately! COOK (on some models) Press 1 for Chicken Press 2 for Fish Press 3 for Ground Meats ... more/less time more/less time more/less time (on the inside front of the oven when you begin, check the guide located on some models) GUIDE ON MICROWAVE Before you open the door. Starts immediately! Starts immediately!

Owners Manual
Page 21
Convenience Features Snacks (On some models) The Snacks feature automatically sets the microwaving times and power levels to display the snack type and remaining microwaving time. Hint: You can press and hold the SNACKS pad during cooking to warm a variety of snack foods. 1 Press SNACKS. 2 Select snack type 1-6 (see the ...
Convenience Features Snacks (On some models) The Snacks feature automatically sets the microwaving times and power levels to display the snack type and remaining microwaving time. Hint: You can press and hold the SNACKS pad during cooking to warm a variety of snack foods. 1 Press SNACKS. 2 Select snack type 1-6 (see the ...

Owners Manual
Page 29
Other Features Your Model May Have Help The HELP pad displays feature information and helpful hints. To check the time of day. 3 Select AM or PM. 4 Press START or CLOCK. Press HELP, then select a feature pad. Clock Press to enter the time of day or to check the time of day while microwaving. 1 Press CLOCK. 2 Enter time of day while microwaving, press CLOCK. 29 Cooking Complete Reminder To remind you that you have food in the oven, the oven will display "FOOD IS READY" and beep once a minute until you either open the oven door or press CLEAR/OFF.
Other Features Your Model May Have Help The HELP pad displays feature information and helpful hints. To check the time of day. 3 Select AM or PM. 4 Press START or CLOCK. Press HELP, then select a feature pad. Clock Press to enter the time of day or to check the time of day while microwaving. 1 Press CLOCK. 2 Enter time of day while microwaving, press CLOCK. 29 Cooking Complete Reminder To remind you that you have food in the oven, the oven will display "FOOD IS READY" and beep once a minute until you either open the oven door or press CLEAR/OFF.

Owners Manual
Page 30
... and hold the AM/PM pad about three seconds. Delay Start Delay Start allows you to set the microwave to delay cooking up the display. Operating Instructions Other Features Your Model May Have Scroll Speed The scroll speed of the display can be displayed by pressing CLOCK. 30 The time... of Defrost Auto/Time or Time Cook I & II. 5 Press START. To redisplay the clock, repeat. The Delay Start time will automatically start . (Be sure the microwave clock shows...
... and hold the AM/PM pad about three seconds. Delay Start Delay Start allows you to set the microwave to delay cooking up the display. Operating Instructions Other Features Your Model May Have Scroll Speed The scroll speed of the display can be displayed by pressing CLOCK. 30 The time... of Defrost Auto/Time or Time Cook I & II. 5 Press START. To redisplay the clock, repeat. The Delay Start time will automatically start . (Be sure the microwave clock shows...

Owners Manual
Page 32
... too hot to turn the fan off when the internal parts are turned off. Be careful touching the turntable during and after the cooktop and microwave controls are cool. It may stay on or off. Press TURNTABLE to turn the turntable on for low fan speed or a third time to ... and other vapors from the cooktop below it. Operating Instructions Other Features Your Model May Have Child Lock-Out Turntable You may find that you cannot turn it off. Automatic Fan 32 An automatic fan feature protects the microwave from too much heat. To lock or unlock the controls, press and hold...
... too hot to turn the fan off when the internal parts are turned off. Be careful touching the turntable during and after the cooktop and microwave controls are cool. It may stay on or off. Press TURNTABLE to turn the turntable on for low fan speed or a third time to ... and other vapors from the cooktop below it. Operating Instructions Other Features Your Model May Have Child Lock-Out Turntable You may find that you cannot turn it off. Automatic Fan 32 An automatic fan feature protects the microwave from too much heat. To lock or unlock the controls, press and hold...

Owners Manual
Page 34
... one level. it may be hot. • Do not use the shelf when cooking popcorn. • Do not use the shelf when reheating on the microwave floor. Only use the shelf with the shelf on more than one dish of food at the same time. The shelf gives you the option... not use the oven with Sensor Cooking or Reheat. Operating Instructions Other Features Your Model May Have Shelf How to Use the Shelf When Microwaving • Make sure the shelf is positioned properly inside the oven cavity. Food microwaves best when placed on the turntable or on the shelf. For best results 2-level...
... one level. it may be hot. • Do not use the shelf when cooking popcorn. • Do not use the shelf when reheating on the microwave floor. Only use the shelf with the shelf on more than one dish of food at the same time. The shelf gives you the option... not use the oven with Sensor Cooking or Reheat. Operating Instructions Other Features Your Model May Have Shelf How to Use the Shelf When Microwaving • Make sure the shelf is positioned properly inside the oven cavity. Food microwaves best when placed on the turntable or on the shelf. For best results 2-level...

Owners Manual
Page 38
... door seals against using a clean, soft cloth. Door Panel Before cleaning the front door panel, make sure you know what type of the microwave with a sudsy cloth. Use only mild, non-abrasive detergents applied with a damp cloth. Do not use cleaning sprays, large amounts of the... the surrounding plastic parts. Some paper towels can damage it. Control Panel Wipe with a clean sponge or soft cloth. Use a solution of the model number. Bottom Clean off the grease and dust on the panel-they can be cleaned with Stainless Steel Magic or a similar product using cleaners with...
... door seals against using a clean, soft cloth. Door Panel Before cleaning the front door panel, make sure you know what type of the microwave with a sudsy cloth. Use only mild, non-abrasive detergents applied with a damp cloth. Do not use cleaning sprays, large amounts of the... the surrounding plastic parts. Some paper towels can damage it. Control Panel Wipe with a clean sponge or soft cloth. Use a solution of the model number. Bottom Clean off the grease and dust on the panel-they can be cleaned with Stainless Steel Magic or a similar product using cleaners with...

Owners Manual
Page 40
...filter in hot water and detergent. Helpful Information The Exhaust Feature The Vent Fan Charcoal Filter (on the left side of the microwave. Reusable Grease Filter (on all models) Reusable Grease Filter The reusable grease filter traps grease released by foods on the cooktop from damaging the inside of the opening.... and to the right to the side using the tab. The grease filter should be used . Pull it around in the frame slot on some models) The vent fan has a metal reusable grease filter. Light brushing can be cleaned once a month, or as needed. To clean the grease filter, ...
...filter in hot water and detergent. Helpful Information The Exhaust Feature The Vent Fan Charcoal Filter (on the left side of the microwave. Reusable Grease Filter (on all models) Reusable Grease Filter The reusable grease filter traps grease released by foods on the cooktop from damaging the inside of the opening.... and to the right to the side using the tab. The grease filter should be used . Pull it around in the frame slot on some models) The vent fan has a metal reusable grease filter. Light brushing can be cleaned once a month, or as needed. To clean the grease filter, ...

Owners Manual
Page 48
... Malaysia If the product is extended to the original purchaser and any part in the microwave Service Centers or by our authorized Customer oven that fails due to product caused by possible...Damage to a defect in materials or Care® servicers during warranty period or beyond, call 800.GE.CARES (800.432.2737). Please have an installation problem, contact your legal rights are responsible for ...is not available, you may be responsible for a trip charge or you have serial and model numbers available when calling for service. If you may be provided by law. Any implied warranties...
... Malaysia If the product is extended to the original purchaser and any part in the microwave Service Centers or by our authorized Customer oven that fails due to product caused by possible...Damage to a defect in materials or Care® servicers during warranty period or beyond, call 800.GE.CARES (800.432.2737). Please have an installation problem, contact your legal rights are responsible for ...is not available, you may be responsible for a trip charge or you have serial and model numbers available when calling for service. If you may be provided by law. Any implied warranties...


