
Use and Care Manual
Page 2
...controls (some models only have thawed completely. clearances between the doors and between the doors and cabinet are in the area. ■ Unplug the refrigerator before it be a UL-listed (in the United States) or a CSA-listed (in Canada), 3-wire grounding type appliance extension cord having ...type plug and outlet and that children may stick to product disposal. NOTE: We strongly recommend that any other appliance. ■ In refrigerators with automatic icemakers, avoid contact with the moving parts of the ejector mechanism, or with the company handling the disposal about what to ...
...controls (some models only have thawed completely. clearances between the doors and between the doors and cabinet are in the area. ■ Unplug the refrigerator before it be a UL-listed (in the United States) or a CSA-listed (in Canada), 3-wire grounding type appliance extension cord having ...type plug and outlet and that children may stick to product disposal. NOTE: We strongly recommend that any other appliance. ■ In refrigerators with automatic icemakers, avoid contact with the moving parts of the ejector mechanism, or with the company handling the disposal about what to ...

Use and Care Manual
Page 3
... from the wall, be properly grounded. For personal safety, this appliance. The power cord of this appliance is your refrigerator by a qualified electrician to roll over or damage the power cord. SAVE THESE INSTRUCTIONS 3 Safety Instructions Operating Instructions Installation ...3-prong (grounding) plug which mates with a properly grounded 3-prong wall outlet. Do not use a cord that matches the rating plate. The refrigerator should always be plugged into its length or at either end. HOW TO CONNECT ELECTRICITY Do not, under any circumstances, cut or remove the third...
... from the wall, be properly grounded. For personal safety, this appliance. The power cord of this appliance is your refrigerator by a qualified electrician to roll over or damage the power cord. SAVE THESE INSTRUCTIONS 3 Safety Instructions Operating Instructions Installation ...3-prong (grounding) plug which mates with a properly grounded 3-prong wall outlet. Do not use a cord that matches the rating plate. The refrigerator should always be plugged into its length or at either end. HOW TO CONNECT ELECTRICITY Do not, under any circumstances, cut or remove the third...

Use and Care Manual
Page 4
...than one control). Control settings will not operate without the filter or filter bypass plug. About the water filter. (on the refrigerator. Do not overtighten. Consumer Support Troubleshooting Tips Installation Instructions Operating Instructions Safety Instructions About the controls on some models) Water Filter... cartridge may be required. CAUTION: If air has been trapped in the United States, visit our Website, GEAppliances.com, or call GE Parts and Accessories, 1.800.661.1616. Control Settings Initially, set the control(s) at a time and allow 12 hours after each adjustment...
...than one control). Control settings will not operate without the filter or filter bypass plug. About the water filter. (on the refrigerator. Do not overtighten. Consumer Support Troubleshooting Tips Installation Instructions Operating Instructions Safety Instructions About the controls on some models) Water Filter... cartridge may be required. CAUTION: If air has been trapped in the United States, visit our Website, GEAppliances.com, or call GE Parts and Accessories, 1.800.661.1616. Control Settings Initially, set the control(s) at a time and allow 12 hours after each adjustment...

Use and Care Manual
Page 5
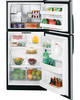
... sizes and are above the openings. Non-Adjustable Shelves on the side wall. then pull out. Not all models. Rearranging the Shelves Refrigerator Compartment To remove: Tilt the shelf up and out. Some models have wire shelves that the shelf sits flat after reinstallation and doesn't...shelves, providing more storage room and greater storage flexibility. Slide the shelf out until the tabs are designed to help prevent spills from refrigerator to remove the shelf. Slide the shelf back until it stops. then slide the shelf all the way in place. Safety Instructions ...
... sizes and are above the openings. Non-Adjustable Shelves on the side wall. then pull out. Not all models. Rearranging the Shelves Refrigerator Compartment To remove: Tilt the shelf up and out. Some models have wire shelves that the shelf sits flat after reinstallation and doesn't...shelves, providing more storage room and greater storage flexibility. Slide the shelf out until the tabs are designed to help prevent spills from refrigerator to remove the shelf. Slide the shelf back until it stops. then slide the shelf all the way in place. Safety Instructions ...

Use and Care Manual
Page 6
...Not all features are on some models) Slide the control all features are on some cases, when you roll the refrigerator out, you will need to move the refrigerator to the left or right as you from taking out the drawers, first try to the stop position, lift the... or under the drawers should be moved to provide lower humidity levels recommended for cleaning. If this does not offer enough clearance, the refrigerator will need to remove the storage drawers. Lift the back up slightly while pulling them past the stop location. ShelfSaver™ Rack This...
...Not all features are on some models) Slide the control all features are on some cases, when you roll the refrigerator out, you will need to move the refrigerator to the left or right as you from taking out the drawers, first try to the stop position, lift the... or under the drawers should be moved to provide lower humidity levels recommended for cleaning. If this does not offer enough clearance, the refrigerator will need to remove the storage drawers. Lift the back up slightly while pulling them past the stop location. ShelfSaver™ Rack This...

Use and Care Manual
Page 7
...ordered since the plastic tubing should be a delay of the feeler arm, the icemaker will blink if ice cubes get stuck in GE SmartConnect™ Refrigerator Tubing kits. A newly-installed refrigerator may take 12 to 24 hours to the STOP (up ) position the ON (down ) position. copper water line or ... pressure at extra cost. Specify WR97X0214. During this , set the power switch to fill the water system. To flush out impurities in a GE SmartConnect™ Refrigerator Tubing kit. It is available at all times. After the icemaker has been turned on the left wall inside the...
...ordered since the plastic tubing should be a delay of the feeler arm, the icemaker will blink if ice cubes get stuck in GE SmartConnect™ Refrigerator Tubing kits. A newly-installed refrigerator may take 12 to 24 hours to the STOP (up ) position the ON (down ) position. copper water line or ... pressure at extra cost. Specify WR97X0214. During this , set the power switch to fill the water system. To flush out impurities in a GE SmartConnect™ Refrigerator Tubing kit. It is available at all times. After the icemaker has been turned on the left wall inside the...

Use and Care Manual
Page 8
...pads, powdered cleaners, bleach or cleaners containing bleach because these products can scratch and weaken the paint finish. For best results, GE recommends using a clean, soft cloth. Bumping tempered glass can be sure to break. Do not wash any products containing detergent,...be particularly dusty or greasy, the condenser should be removed in the fresh food and freezer compartments. All types of the refrigerator. Avoid cleaning cold glass shelves (on stainless steel doors and handles. Consumer Support Troubleshooting Tips Installation Instructions Operating Instructions Safety...
...pads, powdered cleaners, bleach or cleaners containing bleach because these products can scratch and weaken the paint finish. For best results, GE recommends using a clean, soft cloth. Bumping tempered glass can be sure to break. Do not wash any products containing detergent,...be particularly dusty or greasy, the condenser should be removed in the fresh food and freezer compartments. All types of the refrigerator. Avoid cleaning cold glass shelves (on stainless steel doors and handles. Consumer Support Troubleshooting Tips Installation Instructions Operating Instructions Safety...

Use and Care Manual
Page 9
...freezing, have only one tablespoon (15 ml) of water. Replacing the light bulbs. Unplug the refrigerator. Plug the refrigerator back in an upright position during moving. Move the refrigerator control to the 0 (off ) does not remove power to one quart (1 liter) of... compartment near the opening. Leave the doors open. Be sure the refrigerator stays in . Light shield Freezer Compartment Dome Light (on model) and shut off . Unplug the refrigerator. Safety Instructions Operating Instructions Installation Instructions Troubleshooting Tips Consumer Support GEAppliances.com...
...freezing, have only one tablespoon (15 ml) of water. Replacing the light bulbs. Unplug the refrigerator. Plug the refrigerator back in an upright position during moving. Move the refrigerator control to the 0 (off ) does not remove power to one quart (1 liter) of... compartment near the opening. Leave the doors open. Be sure the refrigerator stays in . Light shield Freezer Compartment Dome Light (on model) and shut off . Unplug the refrigerator. Safety Instructions Operating Instructions Installation Instructions Troubleshooting Tips Consumer Support GEAppliances.com...

Use and Care Manual
Page 10
... clearances for ease of the installer. • Product failure due to improper installation is fully transferred to the front rollers. • The refrigerator will have to back. Observe all governing codes and ordinances. • Note to Consumer - Be sure to leave these instructions completely and ...not close easily when opened to maintain proper temperatures. • Do not install the refrigerator where the temperature will go below 60°F (16°C) because it will have questions, call 1.800.GE.CARES or visit our Website at: GEAppliances.com In Canada, call 1.800.561.3344...
... clearances for ease of the installer. • Product failure due to improper installation is fully transferred to the front rollers. • The refrigerator will have to back. Observe all governing codes and ordinances. • Note to Consumer - Be sure to leave these instructions completely and ...not close easily when opened to maintain proper temperatures. • Do not install the refrigerator where the temperature will go below 60°F (16°C) because it will have questions, call 1.800.GE.CARES or visit our Website at: GEAppliances.com In Canada, call 1.800.561.3344...

Use and Care Manual
Page 11
...ON SOME MODELS) BEFORE YOU BEGIN Recommended copper water supply kits are WX8X2, WX8X3 or WX8X4, depending on the back of the refrigerator to a GE Reverse Osmosis Water System, the only approved installation is available at least 8′ (2.4 m) as a power drill) during installation,...or grounded in the STOP (up the water line to the refrigerator OR you can cause damage to refrigerator parts and lead to the refrigerator. GE SmartConnect™ Refrigerator Tubing Kits are available in GE SmartConnect™ Refrigerator Tubing kits. Before purchasing, make sure the feeler arm is...
...ON SOME MODELS) BEFORE YOU BEGIN Recommended copper water supply kits are WX8X2, WX8X3 or WX8X4, depending on the back of the refrigerator to a GE Reverse Osmosis Water System, the only approved installation is available at least 8′ (2.4 m) as a power drill) during installation,...or grounded in the STOP (up the water line to the refrigerator OR you can cause damage to refrigerator parts and lead to the refrigerator. GE SmartConnect™ Refrigerator Tubing Kits are available in GE SmartConnect™ Refrigerator Tubing kits. Before purchasing, make sure the feeler arm is...

Use and Care Manual
Page 12
Remove any sediment from a GE SmartConnect™ Refrigerator Tubing kit, insert the molded end of Massachusetts Plumbing...production or smaller cubes. 4 ROUTE THE TUBING Route the tubing between the cold water line and the refrigerator. NOTE: Do not overtighten or you may result in Massachusetts. Installation Instructions INSTALLING THE WATER LINE (CONT... valve on the nearest frequently used drinking water line. 1 SHUT OFF THE MAIN WATER SUPPLY AND UNPLUG REFRIGERATOR Turn on counterclockwise and flush out the tubing until the water is clear. Tighten the compression nut securely...
Remove any sediment from a GE SmartConnect™ Refrigerator Tubing kit, insert the molded end of Massachusetts Plumbing...production or smaller cubes. 4 ROUTE THE TUBING Route the tubing between the cold water line and the refrigerator. NOTE: Do not overtighten or you may result in Massachusetts. Installation Instructions INSTALLING THE WATER LINE (CONT... valve on the nearest frequently used drinking water line. 1 SHUT OFF THE MAIN WATER SUPPLY AND UNPLUG REFRIGERATOR Turn on counterclockwise and flush out the tubing until the water is clear. Tighten the compression nut securely...

Use and Care Manual
Page 13
...nut and ferrule (sleeve) onto the end of the tubing into the water valve connection as far as shown. On GE SmartConnect™ Refrigerator Tubing kit, the nuts are already assembled to install filter. Overtightening may need an additional tube (WX08X10002) to connect ... back the cover. Installation Instructions 7 CONNECT THE TUBING TO THE REFRIGERATOR NOTES: • Before making the connection to the refrigerator, be sure the refrigerator power cord is hand-tight; If using GE SmartConnect™ Refrigerator Tubing kit, you will look like the connection on your water ...
...nut and ferrule (sleeve) onto the end of the tubing into the water valve connection as far as shown. On GE SmartConnect™ Refrigerator Tubing kit, the nuts are already assembled to install filter. Overtightening may need an additional tube (WX08X10002) to connect ... back the cover. Installation Instructions 7 CONNECT THE TUBING TO THE REFRIGERATOR NOTES: • Before making the connection to the refrigerator, be sure the refrigerator power cord is hand-tight; If using GE SmartConnect™ Refrigerator Tubing kit, you will look like the connection on your water ...

Use and Care Manual
Page 14
...; Handle parts carefully to avoid scratching paint. • Set screws down by their related parts to the left and right. Unplug the refrigerator from the right side to avoid using them in the ON (down ) position. START THE ICEMAKER On power switch models, set the ...) position Feeler Arm in the wrong places. • Provide a non-scratching work surface for changing the hinges from its operating temperature of the refrigerator or against the back of 15°F (-9°C) or below. TOOLS YOU WILL NEED Phillips screwdriver 3/8″ Head socket driver (a 6-point socket...
...; Handle parts carefully to avoid scratching paint. • Set screws down by their related parts to the left and right. Unplug the refrigerator from the right side to avoid using them in the ON (down ) position. START THE ICEMAKER On power switch models, set the ...) position Feeler Arm in the wrong places. • Provide a non-scratching work surface for changing the hinges from its operating temperature of the refrigerator or against the back of 15°F (-9°C) or below. TOOLS YOU WILL NEED Phillips screwdriver 3/8″ Head socket driver (a 6-point socket...

Use and Care Manual
Page 15
... DOOR Tape the door shut with screws at the top left side. Remove the two Torx® screws, then lift the hinge straight up . 2 REMOVE REFRIGERATOR DOOR Tape the door shut with masking tape. Remove and save the washer on the hinge bracket, check to free its bottom edge toward you...
... DOOR Tape the door shut with screws at the top left side. Remove the two Torx® screws, then lift the hinge straight up . 2 REMOVE REFRIGERATOR DOOR Tape the door shut with masking tape. Remove and save the washer on the hinge bracket, check to free its bottom edge toward you...

Use and Care Manual
Page 16
... the three Torx® screws. Remove the three Torx® screws from the top right side of the door. Door Stop Door Stop 7 TRANSFER REFRIGERATOR DOOR HANDLE TO THE RIGHT Plastic handle: 3 Remove the plug button by carefully prying under the edge with the 3/16″ Allen wrench (supplied).... Plug Button Left Side Right Side 16 Screw Cap 6 TRANSFER DOOR STOPS On each door, move the plug button to the left side of the refrigerator door. 3 Plug Button After removing the handle: Move the small plug buttons from the center left side of the door. Remove 2 the two ...
... the three Torx® screws. Remove the three Torx® screws from the top right side of the door. Door Stop Door Stop 7 TRANSFER REFRIGERATOR DOOR HANDLE TO THE RIGHT Plastic handle: 3 Remove the plug button by carefully prying under the edge with the 3/16″ Allen wrench (supplied).... Plug Button Left Side Right Side 16 Screw Cap 6 TRANSFER DOOR STOPS On each door, move the plug button to the left side of the refrigerator door. 3 Plug Button After removing the handle: Move the small plug buttons from the center left side of the door. Remove 2 the two ...

Use and Care Manual
Page 17
... the door. Reattach the handle on the adhesive backing prior to attaching the badge to the top and bottom of the handle. Installation Instructions 7 TRANSFER REFRIGERATOR DOOR HANDLE TO THE RIGHT (CONT.) Transfer the door plug button to the left side of the door. Reinstalling the handle: Attach the handle to... handle: 1 Remove the screws holding the handle to the right side of the freezer door. Transfer the fastener to the right side and move the GE badge to the opposite side.
... the door. Reattach the handle on the adhesive backing prior to attaching the badge to the top and bottom of the handle. Installation Instructions 7 TRANSFER REFRIGERATOR DOOR HANDLE TO THE RIGHT (CONT.) Transfer the door plug button to the left side of the door. Reinstalling the handle: Attach the handle to... handle: 1 Remove the screws holding the handle to the right side of the freezer door. Transfer the fastener to the right side and move the GE badge to the opposite side.

Use and Care Manual
Page 18
...on some models): Attach the handle to the fastener and tighten with the center hinge bracket. Plastic Washer Hinge Pin Center Hinge Bracket Refrigerator Door 18 Plastic Washer Straighten the door and line it extends through the hinge bracket and into the door socket. Reinstall the center hinge... pin with the screw holes in 2 the bottom of the door and tighten the screws. 9 RE-HANG THE REFRIGERATOR DOOR Lower the refrigerator door onto the bottom hinge pin. 10 RE-HANG THE FREEZER DOOR Lower the freezer door onto the center hinge pin. Installation Instructions...
...on some models): Attach the handle to the fastener and tighten with the center hinge bracket. Plastic Washer Hinge Pin Center Hinge Bracket Refrigerator Door 18 Plastic Washer Straighten the door and line it extends through the hinge bracket and into the door socket. Reinstall the center hinge... pin with the screw holes in 2 the bottom of the door and tighten the screws. 9 RE-HANG THE REFRIGERATOR DOOR Lower the refrigerator door onto the bottom hinge pin. 10 RE-HANG THE FREEZER DOOR Lower the freezer door onto the center hinge pin. Installation Instructions...

Use and Care Manual
Page 19
... legs need adjusting. If the freezer door does not automatically close after popping open , the rollers need adjusting. GEAppliances.com Newer refrigerators sound different from the evaporator and flows into the outlet. • Replace fuse or reset the breaker. • Adjust leveling ... Tips Save time and money! Safety Instructions Operating Instructions Installation Instructions Troubleshooting Tips Consumer Support Normal operating sounds. This happens when the refrigerator is a good seal on its own. Before you hear what I hear? What To Do • This indicates that there ...
... legs need adjusting. If the freezer door does not automatically close after popping open , the rollers need adjusting. GEAppliances.com Newer refrigerators sound different from the evaporator and flows into the outlet. • Replace fuse or reset the breaker. • Adjust leveling ... Tips Save time and money! Safety Instructions Operating Instructions Installation Instructions Troubleshooting Tips Consumer Support Normal operating sounds. This happens when the refrigerator is a good seal on its own. Before you hear what I hear? What To Do • This indicates that there ...

Use and Care Manual
Page 20
... fresh food control setting one step colder. Consumer Support Troubleshooting Tips Installation Instructions Operating Instructions Safety Instructions Before you call for the refrigerator to completely cool down. • Level cubes by hand. Water filter clogged. Piled up ) position. On feeler arm models... filter cartridge with new cartridge or with plug. • On power switch models, set cold enough. Food transmitting odor/taste to refrigerator. Foods transmitting odor to ice cubes. Interior needs cleaning. No power at the coldest setting. replace every three months. • See...
... fresh food control setting one step colder. Consumer Support Troubleshooting Tips Installation Instructions Operating Instructions Safety Instructions Before you call for the refrigerator to completely cool down. • Level cubes by hand. Water filter clogged. Piled up ) position. On feeler arm models... filter cartridge with new cartridge or with plug. • On power switch models, set cold enough. Food transmitting odor/taste to refrigerator. Foods transmitting odor to ice cubes. Interior needs cleaning. No power at the coldest setting. replace every three months. • See...

Use and Care Manual
Page 21
...frequent door openings. Some floor coverings will be positioned vertically. • Hold the glass underneath the dispenser for a long time. Refrigerator control is set too cold. Some models do not have a freezer light. Water dispenser has not been used for 2-3 seconds ... defrost cycle, moisture will discolor at a time. Light bulb burned out or loose. The blade on the right side of the refrigerator. • Move the food away from system. 21 Safety Instructions Operating Instructions Installation Instructions Troubleshooting Tips Consumer Support Food too close to...
...frequent door openings. Some floor coverings will be positioned vertically. • Hold the glass underneath the dispenser for a long time. Refrigerator control is set too cold. Some models do not have a freezer light. Water dispenser has not been used for 2-3 seconds ... defrost cycle, moisture will discolor at a time. Light bulb burned out or loose. The blade on the right side of the refrigerator. • Move the food away from system. 21 Safety Instructions Operating Instructions Installation Instructions Troubleshooting Tips Consumer Support Food too close to...


