

Use and Care Manual
Page 1
... a label on the upper left side of the fresh food compartment. 197D7799P001 49-60521-1 08-08 JR Back Cover Product Registration (Canadian 21, 22 Product Registration (U.S.) . 20-22 Warranty for Canadian Customers 19 Warranty for U.S. Refr Top-Freezer igerators ge.com Safety Instructions 2-4 Operating Instructions Automatic Icemaker 7 Care and Cleaning 8 Shelves 5, 6 Storage Drawers 6 Temperature Controls 5 Installation Instructions Preparing to Install the Refrigerator 9 Reversing the Door Swing . . .13-16 Water Line Installation . . . . . .10-12 Troubleshooting Tips Before You Call...
... a label on the upper left side of the fresh food compartment. 197D7799P001 49-60521-1 08-08 JR Back Cover Product Registration (Canadian 21, 22 Product Registration (U.S.) . 20-22 Warranty for Canadian Customers 19 Warranty for U.S. Refr Top-Freezer igerators ge.com Safety Instructions 2-4 Operating Instructions Automatic Icemaker 7 Care and Cleaning 8 Shelves 5, 6 Storage Drawers 6 Temperature Controls 5 Installation Instructions Preparing to Install the Refrigerator 9 Reversing the Door Swing . . .13-16 Water Line Installation . . . . . .10-12 Troubleshooting Tips Before You Call...

Use and Care Manual
Page 4
... frayed or otherwise damaged. SAVE THESE INSTRUCTIONS MESURES DE SÉCURITÉ IMPORTANTES. Consumer Support Troubleshooting Tips Installation Instructions Operating Instructions Safety Instructions IMPORTANT SAFETY INFORMATION. Ne débranchez jamais le réfrigérateur en tirant sur le cordon d'alimentation. Have the wall outlet and circuit checked by pulling on the power cord. LISEZ D'ABORD TOUTES LES DIRECTIVES...
... frayed or otherwise damaged. SAVE THESE INSTRUCTIONS MESURES DE SÉCURITÉ IMPORTANTES. Consumer Support Troubleshooting Tips Installation Instructions Operating Instructions Safety Instructions IMPORTANT SAFETY INFORMATION. Ne débranchez jamais le réfrigérateur en tirant sur le cordon d'alimentation. Have the wall outlet and circuit checked by pulling on the power cord. LISEZ D'ABORD TOUTES LES DIRECTIVES...

Use and Care Manual
Page 5
... can be opened fully Spillproof Shelves (on some models) The temperature control dial has nine settings plus 0. 1 is the warmest. 9 is best suited to the refrigerator. To remove or replace the shelves, see the above instructions. 5 ge.com Turning the dial to dial if necessary. After using the refrigerator, adjust the Allow 24 hours for the refrigerator to 0 stops cooling in the fresh food compartment. get cold. Shelf supports at various levels allow you...
... can be opened fully Spillproof Shelves (on some models) The temperature control dial has nine settings plus 0. 1 is the warmest. 9 is best suited to the refrigerator. To remove or replace the shelves, see the above instructions. 5 ge.com Turning the dial to dial if necessary. After using the refrigerator, adjust the Allow 24 hours for the refrigerator to 0 stops cooling in the fresh food compartment. get cold. Shelf supports at various levels allow you...
Use and Care Manual
Page 6
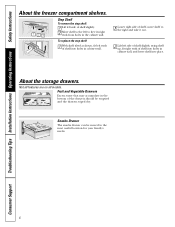
... all models. Snacks Drawer The snacks drawer can be emptied and the drawers wiped dry. About the storage drawers. Fruit and Vegetable Drawers Excess water that may accumulate in cabinet wall, and lower shelf into place. Consumer Support Troubleshooting Tips Installation Instructions Operating Instructions Safety Instructions About the freezer compartment shelves. 1 23 Step Shelf To remove the step shelf: 1 Lift left side of shelf slightly. 2 Move shelf to the left side of shelf slightly, swing shelf...
... all models. Snacks Drawer The snacks drawer can be emptied and the drawers wiped dry. About the storage drawers. Fruit and Vegetable Drawers Excess water that may accumulate in cabinet wall, and lower shelf into place. Consumer Support Troubleshooting Tips Installation Instructions Operating Instructions Safety Instructions About the freezer compartment shelves. 1 23 Step Shelf To remove the step shelf: 1 Lift left side of shelf slightly. 2 Move shelf to the left side of shelf slightly, swing shelf...

Use and Care Manual
Page 7
... remove the glass cover before the water connection is available at each time the icemaker fills with the sweep of door openings and other use conditions. The icemaker will stop location. Once the icemaker starts to make ice, it and take 12 to 24 hours to I (on the supports at the same time, pull it forward as far as it out. Set the power switch to begin making ice cubes. A newly-installed refrigerator...
... remove the glass cover before the water connection is available at each time the icemaker fills with the sweep of door openings and other use conditions. The icemaker will stop location. Once the icemaker starts to make ice, it and take 12 to 24 hours to I (on the supports at the same time, pull it forward as far as it out. Set the power switch to begin making ice cubes. A newly-installed refrigerator...

Use and Care Manual
Page 8
... the STOP (up dust. To clean the condenser, turn the legs clockwise until the rollers support the refrigerator. Do not use appliance wax or polish on some models) can drop below freezing, have a qualified servicer drain the water supply system (on the stainless steel. Avoid cleaning cold glass shelves (on some models). Moving the refrigerator in environments that can be Cleaning the condenser coils. Turning the control to the 0 position does not remove power...
... the STOP (up dust. To clean the condenser, turn the legs clockwise until the rollers support the refrigerator. Do not use appliance wax or polish on some models) can drop below freezing, have a qualified servicer drain the water supply system (on the stainless steel. Avoid cleaning cold glass shelves (on some models). Moving the refrigerator in environments that can be Cleaning the condenser coils. Turning the control to the 0 position does not remove power...

Use and Care Manual
Page 9
... carefully. • IMPORTANT - Be sure to leave these instructions for cleaning. CLEARANCES Allow the following clearances for future reference. • Skill level - Save these instructions with the Consumer. • Note to a cold water line. They firmly position the refrigerator and prevent it will not run often enough to maintain proper temperatures. • Install it on some models) If the refrigerator has an icemaker, it from Parts...
... carefully. • IMPORTANT - Be sure to leave these instructions for cleaning. CLEARANCES Allow the following clearances for future reference. • Skill level - Save these instructions with the Consumer. • Note to a cold water line. They firmly position the refrigerator and prevent it will not run often enough to maintain proper temperatures. • Install it on some models) If the refrigerator has an icemaker, it from Parts...

Use and Care Manual
Page 10
... the refrigerator to correct water hammer before connecting the water line, make sure a saddle-type valve complies with local plumbing code requirements. Follow these instructions carefully to the water supply. For other plastic water supply line because the line is in the STOP (up the water line to the hot water line. Do not install the icemaker tubing in house plumbing can cut formed end from Parts and Accessories, 1.800.661.1616. • A cold water supply. If using a GE SmartConnect™ Refrigerator Tubing kit...
... the refrigerator to correct water hammer before connecting the water line, make sure a saddle-type valve complies with local plumbing code requirements. Follow these instructions carefully to the water supply. For other plastic water supply line because the line is in the STOP (up the water line to the hot water line. Do not install the icemaker tubing in house plumbing can cut formed end from Parts and Accessories, 1.800.661.1616. • A cold water supply. If using a GE SmartConnect™ Refrigerator Tubing kit...

Use and Care Manual
Page 11
Installation Instructions Install the shutoff valve on the nearest frequently used drinking water line. 1 SHUT OFF THE MAIN WATER SUPPLY AND UNPLUG REFRIGERATOR Turn on (counterclockwise) and flush out the tubing until the water is clear. Remove any sediment from drilling the hole in the water pipe (even if using a self-piercing valve), using a sharp bit. NOTE: Be sure there is sufficient extra tubing (about 8 feet [244 cm] coiled into the side...
Installation Instructions Install the shutoff valve on the nearest frequently used drinking water line. 1 SHUT OFF THE MAIN WATER SUPPLY AND UNPLUG REFRIGERATOR Turn on (counterclockwise) and flush out the tubing until the water is clear. Remove any sediment from drilling the hole in the water pipe (even if using a self-piercing valve), using a sharp bit. NOTE: Be sure there is sufficient extra tubing (about 8 feet [244 cm] coiled into the side...

Use and Care Manual
Page 12
... the water valve (refrigerator connection). 8 TURN THE WATER ON AT THE SHUTOFF VALVE Tighten any connections that it in the ON (down ) position. The icemaker will need to pry open the clamp. 1/4″ Copper Tubing Tubing Clamp Refrigerator Connection Reattach the access cover. 1/4″ Compression Nut Ferrule (sleeve) SmartConnect™ Tubing Power switch Power switch model Feeler Arm in the STOP (up to 3 times to deliver enough water to the icemaker. 12 If using GE SmartConnect™ Refrigerator Tubing kit...
... the water valve (refrigerator connection). 8 TURN THE WATER ON AT THE SHUTOFF VALVE Tighten any connections that it in the ON (down ) position. The icemaker will need to pry open the clamp. 1/4″ Copper Tubing Tubing Clamp Refrigerator Connection Reattach the access cover. 1/4″ Compression Nut Ferrule (sleeve) SmartConnect™ Tubing Power switch Power switch model Feeler Arm in the STOP (up to 3 times to deliver enough water to the icemaker. 12 If using GE SmartConnect™ Refrigerator Tubing kit...

Use and Care Manual
Page 13
... related parts to left and right. TOOLS REQUIRED 2 REMOVE THE FREEZER DOOR 2.1 Tape the door shut with its electrical outlet. 1.2 Empty all the way through before starting. • Handle parts carefully to avoid scratching paint. • Set screws down by the top hinge removal. 13 Installation Instructions 2 REVERSING THE DOOR SWING IMPORTANT NOTES When reversing the door swing: • Read the instructions all door shelves, including the dairy compartment. These instructions are for changing the hinges from...
... related parts to left and right. TOOLS REQUIRED 2 REMOVE THE FREEZER DOOR 2.1 Tape the door shut with its electrical outlet. 1.2 Empty all the way through before starting. • Handle parts carefully to avoid scratching paint. • Set screws down by the top hinge removal. 13 Installation Instructions 2 REVERSING THE DOOR SWING IMPORTANT NOTES When reversing the door swing: • Read the instructions all door shelves, including the dairy compartment. These instructions are for changing the hinges from...

Use and Care Manual
Page 14
...; open-end wrench, remove the two screws holding the center hinge to the cabinet. Hinge Bracket 3.4 Set the door outside-up on the hinge.) 4 REVERSING THE HARDWARE 4.1 Move the bottom hinge bracket and plastic washer from the cabinet. Lift the door from the pin in the top of the door, and set hinge and screws aside. Installation Instructions 2 REVERSING THE DOOR SWING (CONT.) 3 REMOVE THE FRESH FOOD DOOR 3.1 Tape the door shut...
...; open-end wrench, remove the two screws holding the center hinge to the cabinet. Hinge Bracket 3.4 Set the door outside-up on the hinge.) 4 REVERSING THE HARDWARE 4.1 Move the bottom hinge bracket and plastic washer from the cabinet. Lift the door from the pin in the top of the door, and set hinge and screws aside. Installation Instructions 2 REVERSING THE DOOR SWING (CONT.) 3 REMOVE THE FRESH FOOD DOOR 3.1 Tape the door shut...

Use and Care Manual
Page 15
.... 5 REVERSING THE DOOR HANDLES 5.1 Transfer fresh food door handle 5.1.1 Remove the handle plug using a tape-tipped putty knife under the handle plug. 5.3.2 Reinstall the handle plug. 15 Left Side Metal Door Stop Right Side Plastic Door Stop Plug Right Side Left Side 5.1.2 Remove the handle. 5.1.3 Remove the screws from the right side to the right side of the top hinge. Plug Button To reattach the handle on the opposite side. Screws for correct installation. 5.1.5 Pull the plug button from the top hinge hole...
.... 5 REVERSING THE DOOR HANDLES 5.1 Transfer fresh food door handle 5.1.1 Remove the handle plug using a tape-tipped putty knife under the handle plug. 5.3.2 Reinstall the handle plug. 15 Left Side Metal Door Stop Right Side Plastic Door Stop Plug Right Side Left Side 5.1.2 Remove the handle. 5.1.3 Remove the screws from the right side to the right side of the top hinge. Plug Button To reattach the handle on the opposite side. Screws for correct installation. 5.1.5 Pull the plug button from the top hinge hole...

Use and Care Manual
Page 16
... the top of the door. 6 RE-HANGING THE DOORS 6.1 Re-hang the fresh food door 6.1.1 Lower the fresh food door onto the bottom hinge pin. Installation Instructions 2 REVERSING THE DOOR SWING (CONT.) 5 REVERSING THE DOOR HANDLES (CONT.) 5.4 Transfer Freezer Door Handle 5.4.1 Remove the screw TToOpP holding the handle to the top of the door and the two screws holding the handle to the bottom of the door. 5.4.2 Remove the handle. 6 RE-HANGING THE DOORS (CONT...
... the top of the door. 6 RE-HANGING THE DOORS 6.1 Re-hang the fresh food door 6.1.1 Lower the fresh food door onto the bottom hinge pin. Installation Instructions 2 REVERSING THE DOOR SWING (CONT.) 5 REVERSING THE DOOR HANDLES (CONT.) 5.4 Transfer Freezer Door Handle 5.4.1 Remove the screw TToOpP holding the handle to the top of the door and the two screws holding the handle to the bottom of the door. 5.4.2 Remove the handle. 6 RE-HANGING THE DOORS (CONT...

Use and Care Manual
Page 17
... evaporator and flows into the drain pan. ■ Closing the door may not need adjusting. Modern refrigerators have more features and use newer technology. This is unplugged. • Push the plug completely into the ice bucket. This happens when the refrigerator is tripped. • Replace fuse or reset the breaker. WATER SOUNDS ■ The flow of refrigerant through the freezer cooling coils may make a gurgling noise like boiling water. ■ Water...
... evaporator and flows into the drain pan. ■ Closing the door may not need adjusting. Modern refrigerators have more features and use newer technology. This is unplugged. • Push the plug completely into the ice bucket. This happens when the refrigerator is tripped. • Replace fuse or reset the breaker. WATER SOUNDS ■ The flow of refrigerant through the freezer cooling coils may make a gurgling noise like boiling water. ■ Water...

Use and Care Manual
Page 18
They start and stop often to shut off or not connected. • See Installing the water line. Water supply turned off . not been connected. to clear the valve. Grille and condenser need cleaning. Door left open . bin cause the icemaker to maintain even temperatures.) Frost or ice crystals on frozen food (frost within package is normal) Automatic icemaker does not work (on some models) Frequent "buzzing" sound Cubes too small Slow ice cube freezing Ice cubes have odor...
They start and stop often to shut off or not connected. • See Installing the water line. Water supply turned off . not been connected. to clear the valve. Grille and condenser need cleaning. Door left open . bin cause the icemaker to maintain even temperatures.) Frost or ice crystals on frozen food (frost within package is normal) Automatic icemaker does not work (on some models) Frequent "buzzing" sound Cubes too small Slow ice cube freezing Ice cubes have odor...

Use and Care Manual
Page 19
... TERMS AND CONDITIONS: This warranty applies only for home use within 48 hours following the delivery of the appliance. • Damage to finish after delivery. • Improper installation-proper installation includes adequate air circulation to the refrigeration system, adequate electrical, plumbing and other connecting facilities. • Replacement of house fuses or resetting of circuit breakers. • Replacement of light bulbs. • Damage to...
... TERMS AND CONDITIONS: This warranty applies only for home use within 48 hours following the delivery of the appliance. • Damage to finish after delivery. • Improper installation-proper installation includes adequate air circulation to the refrigeration system, adequate electrical, plumbing and other connecting facilities. • Replacement of house fuses or resetting of circuit breakers. • Replacement of light bulbs. • Damage to...

Use and Care Manual
Page 20
... is for products installed in Canada. We are proud to suit your busy schedule • Quality replacement parts • The dependability of GE, a name recognized and trusted worldwide • Ask about our interest-free payment plans With Service Protection Plus you for placing your new appliance properly. Place your Owner's Manual carefully. Consumer Product Ownership Registration Dear Customer: Thank you for...
... is for products installed in Canada. We are proud to suit your busy schedule • Quality replacement parts • The dependability of GE, a name recognized and trusted worldwide • Ask about our interest-free payment plans With Service Protection Plus you for placing your new appliance properly. Place your Owner's Manual carefully. Consumer Product Ownership Registration Dear Customer: Thank you for...

Use and Care Manual
Page 23
... year or the shortest period allowed by our Factory Service Centers, or an authorized Customer Care® technician. Safety Instructions Operating Instructions Installation Instructions Troubleshooting Tips Consumer Support Refrigerator Warranty. (For customers in materials or workmanship. Warrantor: General Electric Company. Louisville, KY 40225 23 For The Period Of: GE Will Replace: GE and GE PROFILE MODELS: One Year From the date of the original purchase Any part of incidental or consequential damages.
... year or the shortest period allowed by our Factory Service Centers, or an authorized Customer Care® technician. Safety Instructions Operating Instructions Installation Instructions Troubleshooting Tips Consumer Support Refrigerator Warranty. (For customers in materials or workmanship. Warrantor: General Electric Company. Louisville, KY 40225 23 For The Period Of: GE Will Replace: GE and GE PROFILE MODELS: One Year From the date of the original purchase Any part of incidental or consequential damages.

Use and Care Manual
Page 24
... Appliance ge.com In the U.S.: www.Hotpoint.com Register your new appliance on-line-at 1.800.661.1616 during normal business hours. You may cause unsafe operation. For greater convenience and faster service, you can purchase it on -line. In Canada, contact: Manager, Consumer Relations, Mabe Canada Inc. You can now download Owner's Manuals, order parts, or even schedule service on -line...
... Appliance ge.com In the U.S.: www.Hotpoint.com Register your new appliance on-line-at 1.800.661.1616 during normal business hours. You may cause unsafe operation. For greater convenience and faster service, you can purchase it on -line. In Canada, contact: Manager, Consumer Relations, Mabe Canada Inc. You can now download Owner's Manuals, order parts, or even schedule service on -line...

