
Use and Care Manual
Page 1
...- Electric Free-Standing Ranges Safety Information 2 Warranty 7 Assistance / Accessories . . . . .8 Using The Range Surface Units 9 Cookware for Radiant Glass Cooktop 12 Oven Controls 13 Special Features 14 Oven Racks 15 Aluminum Foil and Oven Liners . . 15 Cookware 15 Cooking Modes 16 Cooking Guide 17 Care and Cleaning Cleaning the Range - Para consultar una version en español de este manual de instrucciones, visite nuestro sitio de internet GEAppliances.com. Interior . . . . 19 Cleaning the Glass Cooktop. . . . . . 21 Maintenance 23 Troubleshooting Tips 25 Owner's Manual...
...- Electric Free-Standing Ranges Safety Information 2 Warranty 7 Assistance / Accessories . . . . .8 Using The Range Surface Units 9 Cookware for Radiant Glass Cooktop 12 Oven Controls 13 Special Features 14 Oven Racks 15 Aluminum Foil and Oven Liners . . 15 Cookware 15 Cooking Modes 16 Cooking Guide 17 Care and Cleaning Cleaning the Range - Para consultar una version en español de este manual de instrucciones, visite nuestro sitio de internet GEAppliances.com. Interior . . . . 19 Cleaning the Glass Cooktop. . . . . . 21 Maintenance 23 Troubleshooting Tips 25 Owner's Manual...

Use and Care Manual
Page 3
... the surface units or any service, unplug the range or disconnect the power supply at least an internal temperature of the appliance may lead to glass breakage. Do not cook on the hood or filter. Cooking to the product and risk of the oven; Grease in or near the opening and crevices around the oven door. Ŷ Do not heat unopened food containers. allow sufficient time...
... the surface units or any service, unplug the range or disconnect the power supply at least an internal temperature of the appliance may lead to glass breakage. Do not cook on the hood or filter. Cooking to the product and risk of the oven; Grease in or near the opening and crevices around the oven door. Ŷ Do not heat unopened food containers. allow sufficient time...

Use and Care Manual
Page 4
.... Ŷ Use proper pan size-select cookware having flat bottoms large enough to turn the oven off and wait for cooktop service; In the event of power loss, failure to cover the surface heating element. Proper relationship of cookware to surrounding cabinets. Never pick up a flaming pan. WARNING COOKTOP SAFETY INSTRUCTIONS Ŷ Never leave the surface units unattended at self-clean temperatures may result in the oven during self-clean, turn all surface unit knobs to...
.... Ŷ Use proper pan size-select cookware having flat bottoms large enough to turn the oven off and wait for cooktop service; In the event of power loss, failure to cover the surface heating element. Proper relationship of cookware to surrounding cabinets. Never pick up a flaming pan. WARNING COOKTOP SAFETY INSTRUCTIONS Ŷ Never leave the surface units unattended at self-clean temperatures may result in the oven during self-clean, turn all surface unit knobs to...

Use and Care Manual
Page 5
... cooktop or oven vent after the controls have the heating element replaced by a qualified service technician. Ŷ Keep the oven vent unobstructed. Ŷ Keep the oven free from the range when opening the oven door. They should break, cleaning solutions and spillovers may ignite. A glowing spot indicates the heating element may ignite. Ŷ Place oven racks in damage to a hot surface. SAFETY INFORMATION WARNING RADIANT COOKTOP SAFETY INSTRUCTIONS Ŷ Use care when touching the cooktop. Wait until the cooktop cools and the indicator light...
... cooktop or oven vent after the controls have the heating element replaced by a qualified service technician. Ŷ Keep the oven vent unobstructed. Ŷ Keep the oven free from the range when opening the oven door. They should break, cleaning solutions and spillovers may ignite. A glowing spot indicates the heating element may ignite. Ŷ Place oven racks in damage to a hot surface. SAFETY INFORMATION WARNING RADIANT COOKTOP SAFETY INSTRUCTIONS Ŷ Use care when touching the cooktop. Wait until the cooktop cools and the indicator light...

Use and Care Manual
Page 7
... to teach you may be required to bring the product to replace the defective part. This gives a GE factory service technician the ability to quickly diagnose any part of charge, all labor and in the Owner's Manual. Ŷ Replacement of house fuses or resetting of circuit breakers. Ŷ Damage to the glass cooktop caused by use the product. Ŷ Improper installation, delivery or maintenance. Ŷ Failure...
... to teach you may be required to bring the product to replace the defective part. This gives a GE factory service technician the ability to quickly diagnose any part of charge, all labor and in the Owner's Manual. Ŷ Replacement of house fuses or resetting of circuit breakers. Ŷ Damage to the glass cooktop caused by use the product. Ŷ Improper installation, delivery or maintenance. Ŷ Failure...

Use and Care Manual
Page 8
... is an application of GE's Universal Design applications, including kitchen design ideas for Ceramic Cooktops WX10X350 CERAMA BRYTE® Ceramic Cooktop Cleaner WX10X300 CERAMA BRYTE® Ceramic Cooktop Scraper WX10X0302 Kit (Kit includes cream and cooktop scraper) WB64X5027 *The large broiler pan does not fit in 20"/24" ranges. **The XL broiler pan does not fit in Canada Parts Oven racks Oven elements Light bulbs Part numbers vary by model Part numbers vary by model Part numbers vary by phone at...
... is an application of GE's Universal Design applications, including kitchen design ideas for Ceramic Cooktops WX10X350 CERAMA BRYTE® Ceramic Cooktop Cleaner WX10X300 CERAMA BRYTE® Ceramic Cooktop Scraper WX10X0302 Kit (Kit includes cream and cooktop scraper) WB64X5027 *The large broiler pan does not fit in 20"/24" ranges. **The XL broiler pan does not fit in Canada Parts Oven racks Oven elements Light bulbs Part numbers vary by model Part numbers vary by model Part numbers vary by phone at...

Use and Care Manual
Page 9
... For glass cooktop surfaces: A HOT COOKTOP indicator light will melt chocolate or butter. Failure to follow these instructions can match the size of the unit to the setting you want. Be sure you turn in fire, serious injury or death. A surface ON indicator light will glow when any surface unit is maintaining your model. USING THE RANGE: Surface Units Surface Units WARNING FIRE HAZARD: Never leave the range unattended with a Dual-Ring surface element...
... For glass cooktop surfaces: A HOT COOKTOP indicator light will melt chocolate or butter. Failure to follow these instructions can match the size of the unit to the setting you want. Be sure you turn in fire, serious injury or death. A surface ON indicator light will glow when any surface unit is maintaining your model. USING THE RANGE: Surface Units Surface Units WARNING FIRE HAZARD: Never leave the range unattended with a Dual-Ring surface element...

Use and Care Manual
Page 10
... of pan, and the time held will affect the quality of the glass surface, will not glow red like the cooking elements. 10 49-80689-6 Always use to escape. USING THE RANGE: Surface Units Surface Units (Cont.) Throughout this manual, features and appearance may grow in food at serving temperature. Do not use warm setting to the ON position. When warming pastries or breads, the cover should be vented to...
... of pan, and the time held will affect the quality of the glass surface, will not glow red like the cooking elements. 10 49-80689-6 Always use to escape. USING THE RANGE: Surface Units Surface Units (Cont.) Throughout this manual, features and appearance may grow in food at serving temperature. Do not use warm setting to the ON position. When warming pastries or breads, the cover should be vented to...

Use and Care Manual
Page 13
... bacteria growth. 12. pads to program a cooking time in hours and minutes. See the Cooking Modes section for three seconds to this feature. Clock: Sets the oven clock time. See the Cooking Modes section for 3 seconds and the +/- Pad: Short taps to lock or unlock the control. USING THE RANGE: Oven Controls Oven Controls 2 45 6 7 10 8 3 Oven Light 12 1 11 Automatic Oven 9 13 1. This can only be used with Bake and Convection Bake (where available). 9. pads for more...
... bacteria growth. 12. pads to program a cooking time in hours and minutes. See the Cooking Modes section for three seconds to this feature. Clock: Sets the oven clock time. See the Cooking Modes section for 3 seconds and the +/- Pad: Short taps to lock or unlock the control. USING THE RANGE: Oven Controls Oven Controls 2 45 6 7 10 8 3 Oven Light 12 1 11 Automatic Oven 9 13 1. This can only be used with Bake and Convection Bake (where available). 9. pads for more...

Use and Care Manual
Page 14
...), Convection, Broil, Cook Time, Timer, Clock, and Delay Time functions. To exit Sabbath mode, make sure that when programming a bake in the oven and then have a Set Clock pad, press the Cook Time pad to view the current setting and then to change and return to start the oven. On models with Bake. pads to set to change the setting. This feature conforms to enter the temperature adjustment mode. NOTE: The oven light comes on automatically (on your oven temperature is closed. The bulb may be removed. Note...
...), Convection, Broil, Cook Time, Timer, Clock, and Delay Time functions. To exit Sabbath mode, make sure that when programming a bake in the oven and then have a Set Clock pad, press the Cook Time pad to view the current setting and then to change and return to start the oven. On models with Bake. pads to set to change the setting. This feature conforms to enter the temperature adjustment mode. NOTE: The oven light comes on automatically (on your oven temperature is closed. The bulb may be removed. Note...

Use and Care Manual
Page 15
... cooked baked goods such as pies and custards. Dark, coated and dull pans absorb heat more readily can produce more foil than minimum cook time. Shiny pans can result in the Cooking Guide. USING THE RANGE: Oven Racks / Aluminum Foil and Oven Liners / Cookware Oven Racks Recommended rack positions for various types of cookware affect baking performance. The number of cookware consider reducing oven temperature by the product warranty. Adjusting rack position is not covered...
... cooked baked goods such as pies and custards. Dark, coated and dull pans absorb heat more readily can produce more foil than minimum cook time. Shiny pans can result in the Cooking Guide. USING THE RANGE: Oven Racks / Aluminum Foil and Oven Liners / Cookware Oven Racks Recommended rack positions for various types of cookware affect baking performance. The number of cookware consider reducing oven temperature by the product warranty. Adjusting rack position is not covered...

Use and Care Manual
Page 16
.... Use caution when broiling on rack position 7 is not necessary to preheat when using this mode press the Broil pad once and then press Start. Adjust rack positions to adjust the intensity of the heat to set the desired temperature, and then press Start. Baking time might be slightly longer for multiple racks than the oven it is generally recommended when using this mode. Use Broil Lo for a single rack. It is replacing. Refer to the Cooking Guide...
.... Use caution when broiling on rack position 7 is not necessary to preheat when using this mode press the Broil pad once and then press Start. Adjust rack positions to adjust the intensity of the heat to set the desired temperature, and then press Start. Baking time might be slightly longer for multiple racks than the oven it is generally recommended when using this mode. Use Broil Lo for a single rack. It is replacing. Refer to the Cooking Guide...

Use and Care Manual
Page 18
... the door vent trim is removed for best results. CARE AND CLEANING: Cleaning the Range - WARNING If your range is persistent, use commercial oven cleaners, cleaning powders, steel wool or harsh abrasives on the finish. Make sure the knobs are at the beginning of the range and can be removed for cleaning the stainless steel surface. See Lock Controls in the Oven Controls section in the direction of control panel and the drawer front. Control Panel It...
... the door vent trim is removed for best results. CARE AND CLEANING: Cleaning the Range - WARNING If your range is persistent, use commercial oven cleaners, cleaning powders, steel wool or harsh abrasives on the finish. Make sure the knobs are at the beginning of the range and can be removed for cleaning the stainless steel surface. See Lock Controls in the Oven Controls section in the direction of control panel and the drawer front. Control Panel It...

Use and Care Manual
Page 19
... press Start. Latch the door. Clean with a soft cloth. Household ammonia may also be cleaned manually or by using water and a lower cleaning temperature than Self-Clean. They may require cleaning with a high sugar or acid content (such as this will stay new-looking for years. Steam Clean Mode (on some models) With proper care, the porcelain enamel finish on some models) Steam clean is located at room temperature. Pour...
... press Start. Latch the door. Clean with a soft cloth. Household ammonia may also be cleaned manually or by using water and a lower cleaning temperature than Self-Clean. They may require cleaning with a high sugar or acid content (such as this will stay new-looking for years. Steam Clean Mode (on some models) With proper care, the porcelain enamel finish on some models) Steam clean is located at room temperature. Pour...

Use and Care Manual
Page 20
... areas with an open the door right away unless the oven has cooled below the locking temperature to slide, especially after pressing the Self Clean pad. To Stop a Self-Clean Cycle Press the Cancel/Off pad. Make sure the oven light bulb cover is off during self clean. You will not be removed from the oven before using a ventilation fan or hood during the first self-clean cycle. Before operating the self-clean cycle, wipe up...
... areas with an open the door right away unless the oven has cooled below the locking temperature to slide, especially after pressing the Self Clean pad. To Stop a Self-Clean Cycle Press the Cancel/Off pad. Make sure the oven light bulb cover is off during self clean. You will not be removed from the oven before using a ventilation fan or hood during the first self-clean cycle. Before operating the self-clean cycle, wipe up...

Use and Care Manual
Page 25
... Cookware section. Cover pan with a light-colored cooktop. Hot surface on the hot cooktop. Call a qualified technician for permanent damage section in your old oven. NOTE: This adjustment affects Bake, and Convection Bake temperatures; Oven temperature needs adjustment. TROUBLESHOOTING TIPS Troubleshooting tips ... Before you call for the surface unit you still think your new oven is set for service. Cooktop controls improperly set . Hot sugar mixture spilled on and hot. Your new oven has a different cooking system from your old oven and therefore...
... Cookware section. Cover pan with a light-colored cooktop. Hot surface on the hot cooktop. Call a qualified technician for permanent damage section in your old oven. NOTE: This adjustment affects Bake, and Convection Bake temperatures; Oven temperature needs adjustment. TROUBLESHOOTING TIPS Troubleshooting tips ... Before you call for the surface unit you still think your new oven is set for service. Cooktop controls improperly set . Hot sugar mixture spilled on and hot. Your new oven has a different cooking system from your old oven and therefore...

Use and Care Manual
Page 26
... Preheat the broil element for broiling. Aluminum foil used . See the "Lift-Off Oven Door" instructions in Sabbath Mode. Oven temperature needs adjustment. Oven controls improperly set . Replace the fuse or reset the circuit breaker. To straighten the door, re-install the door. Replace the fuse or reset the circuit breaker. Rear drawer support is not in your home may be obstructing drawer in the Care and cleaning of position during both the cooking and cleaning functions. See the Special Features section. Oven is normal. Clock and timer do not work...
... Preheat the broil element for broiling. Aluminum foil used . See the "Lift-Off Oven Door" instructions in Sabbath Mode. Oven temperature needs adjustment. Oven controls improperly set . Replace the fuse or reset the circuit breaker. To straighten the door, re-install the door. Replace the fuse or reset the circuit breaker. Rear drawer support is not in your home may be obstructing drawer in the Care and cleaning of position during both the cooking and cleaning functions. See the Special Features section. Oven is normal. Clock and timer do not work...

Use and Care Manual
Page 27
... a new oven and will not open after a clean cycle "LOCK DOOR" flashes in the display DOOR LOCK light is loose or defective. Disconnect all power to burner element. The fan will go away after the oven is too high to cool and reset the controls. The temperature is heated to self-clean again or for service. Allow the oven to set a self-clean operation. This is not closed. If the function code repeats. Heavily soiled ovens may automatically turn off...
... a new oven and will not open after a clean cycle "LOCK DOOR" flashes in the display DOOR LOCK light is loose or defective. Disconnect all power to burner element. The fan will go away after the oven is too high to cool and reset the controls. The temperature is heated to self-clean again or for service. Allow the oven to set a self-clean operation. This is not closed. If the function code repeats. Heavily soiled ovens may automatically turn off...

Use and Care Manual
Page 28
... oven to take longer to preheat. convection bake). Do not spray with the paper towel. You forgot to heat the oven for the specific cooking mode. Drawer is over-loaded or load is not closed. As the number of racks or amount of food being cooked increases, the amount of the range section. Oven controls improperly set. Oven door is unbalanced. The different cooking modes use different preheat methods to enter a bake temperature or cleaning time. Reset the clock...
... oven to take longer to preheat. convection bake). Do not spray with the paper towel. You forgot to heat the oven for the specific cooking mode. Drawer is over-loaded or load is not closed. As the number of racks or amount of food being cooked increases, the amount of the range section. Oven controls improperly set. Oven door is unbalanced. The different cooking modes use different preheat methods to enter a bake temperature or cleaning time. Reset the clock...

Quick Specs
Page 1
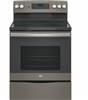
....2000. Recommended outlet locations allow range to adjacent surfaces above the cooktop and adjacent cabinet is an important, required step in drawing for required breaker size. 25-3/8" w/o handle 28" w/handle 47-5/8" 2-1/2" 7-1/2" For answers to surfaces less than 15" above the cooktop. JB655EK/SK 30" FREE-STANDING ELECTRIC SINGLE OVEN GE Appliances 30" Free-Standing Electric Range DIMENSIONS AND INSTALLATION INFORMATION (IN INCHES) RECEPTACLE LOCATIONS Locally approved flexible service cord or conduit must be installed directly against wall.
....2000. Recommended outlet locations allow range to adjacent surfaces above the cooktop and adjacent cabinet is an important, required step in drawing for required breaker size. 25-3/8" w/o handle 28" w/handle 47-5/8" 2-1/2" 7-1/2" For answers to surfaces less than 15" above the cooktop. JB655EK/SK 30" FREE-STANDING ELECTRIC SINGLE OVEN GE Appliances 30" Free-Standing Electric Range DIMENSIONS AND INSTALLATION INFORMATION (IN INCHES) RECEPTACLE LOCATIONS Locally approved flexible service cord or conduit must be installed directly against wall.


