
Installation Instructions
Page 1
... better fit. (appearance may vary) NOTE: Do not install the power cord without a strain relief. A range cord rated at service panel and lock the service disconnecting Anti-Tip Bracket Kit Included means to the service panel. Squeeze connector Conduit PROCEED TO STEP 5 OR 6. Insert the 3 terminal screws through neutral, require a 4-conductor UL-listed range cord. The power leads must be installed before reinstalling the rear range wiring cover. Remove the 3 lower terminal screws from the terminal block...
... better fit. (appearance may vary) NOTE: Do not install the power cord without a strain relief. A range cord rated at service panel and lock the service disconnecting Anti-Tip Bracket Kit Included means to the service panel. Squeeze connector Conduit PROCEED TO STEP 5 OR 6. Insert the 3 terminal screws through neutral, require a 4-conductor UL-listed range cord. The power leads must be installed before reinstalling the rear range wiring cover. Remove the 3 lower terminal screws from the terminal block...

Use and Care Manual
Page 1
... Free-Standing,ng Slide-Ine and Drop-Ins Safety Instructions 2-6 Operating Instructions Clock and Timer 18 Energy Saver Mode 20 Oven 11-24 Adjust the Oven Thermostat . . . . .20 Broiling, Broiling Guide 14 Controls 11, 12 Convection Oven 15 Lower Oven Drawer 17 Power Outage 12 Sabbath Feature 21 Self-Cleaning 22, 23 Special Features 20 Steam Cleaning 24 Timed Baking 19 Warming Drawer 16 Surface Units 7-10 Care and Cleaning Coil Surface Units 32 Control Knobs 25 Drip Pans 32 Glass Cooktop 30, 31 Lift-Off Oven Door 27 Lift-Up Cooktop 32 Light 29 Oven Heating Elements...
... Free-Standing,ng Slide-Ine and Drop-Ins Safety Instructions 2-6 Operating Instructions Clock and Timer 18 Energy Saver Mode 20 Oven 11-24 Adjust the Oven Thermostat . . . . .20 Broiling, Broiling Guide 14 Controls 11, 12 Convection Oven 15 Lower Oven Drawer 17 Power Outage 12 Sabbath Feature 21 Self-Cleaning 22, 23 Special Features 20 Steam Cleaning 24 Timed Baking 19 Warming Drawer 16 Surface Units 7-10 Care and Cleaning Coil Surface Units 32 Control Knobs 25 Drip Pans 32 Glass Cooktop 30, 31 Lift-Off Oven Door 27 Lift-Up Cooktop 32 Light 29 Oven Heating Elements...

Use and Care Manual
Page 3
... to line the drip pans or anywhere in the oven, except as described in this Owner's Manual. ■ Be sure your appliance is properly installed and grounded by removing the fuse or switching off the circuit breaker. ■ Do not leave children alone-children should be hot enough to the range and shock or fire hazard. ■ Avoid scratching or impacting glass doors, cook tops or control panels...
... to line the drip pans or anywhere in the oven, except as described in this Owner's Manual. ■ Be sure your appliance is properly installed and grounded by removing the fuse or switching off the circuit breaker. ■ Do not leave children alone-children should be hot enough to the range and shock or fire hazard. ■ Avoid scratching or impacting glass doors, cook tops or control panels...

Use and Care Manual
Page 4
... surface units. ■ When preparing flaming foods under a hood, turn the oven off and wait for cooktop service; others may result in temperature. ■ To minimize the possibility of burns, ignition of flammable materials and spillage, the handle of a container should be turned toward the center of clothing. Consumer Support Troubleshooting Tips Care and Cleaning 4 Never pick up a flaming pan. Do not force the door open. Turn the controls off or by covering the pan...
... surface units. ■ When preparing flaming foods under a hood, turn the oven off and wait for cooktop service; others may result in temperature. ■ To minimize the possibility of burns, ignition of flammable materials and spillage, the handle of a container should be turned toward the center of clothing. Consumer Support Troubleshooting Tips Care and Cleaning 4 Never pick up a flaming pan. Do not force the door open. Turn the controls off or by covering the pan...

Use and Care Manual
Page 5
Safety Instructions OperaIntOisnptgreurIacnttsiitonrngusctions Care and Cleaning Troubleshooting Tips Consumer Support GEAppliances.com WARNING RADIANT COOKTOP SAFETY INSTRUCTIONS (Some models) ■ Use care when touching the cooktop. The glass surface of a burn or electric shock, always be moved while oven is hot, do not let pot holder contact hot heating element in oven. ■ When using an oven mitt and a scraper. Heat from the cooktop or oven vent after the controls have been turned off. ■ Do not cook on a broken cooktop. Wait until...
Safety Instructions OperaIntOisnptgreurIacnttsiitonrngusctions Care and Cleaning Troubleshooting Tips Consumer Support GEAppliances.com WARNING RADIANT COOKTOP SAFETY INSTRUCTIONS (Some models) ■ Use care when touching the cooktop. The glass surface of a burn or electric shock, always be moved while oven is hot, do not let pot holder contact hot heating element in oven. ■ When using an oven mitt and a scraper. Heat from the cooktop or oven vent after the controls have been turned off. ■ Do not cook on a broken cooktop. Wait until...

Use and Care Manual
Page 7
... 3 cooking sizes to select from the cooktop. How to Set Push the knob in fire, serious injury or death. Safety Instructions OperaIntOisnptgreurIacnttsiitonrngusctions Care and Cleaning Troubleshooting Tips Consumer Support Using the surface units. (on some models) GEAppliances.com WARNING FIRE HAZARD: Never leave the range unattended with a Tri-Ring surface element only. You may vary from your desired setting. At both OFF and HI the control clicks into position. For glass cooktop surfaces: A HOT COOKTOP indicator light...
... 3 cooking sizes to select from the cooktop. How to Set Push the knob in fire, serious injury or death. Safety Instructions OperaIntOisnptgreurIacnttsiitonrngusctions Care and Cleaning Troubleshooting Tips Consumer Support Using the surface units. (on some models) GEAppliances.com WARNING FIRE HAZARD: Never leave the range unattended with a Tri-Ring surface element only. You may vary from your desired setting. At both OFF and HI the control clicks into position. For glass cooktop surfaces: A HOT COOKTOP indicator light...

Use and Care Manual
Page 8
... Instructions Operating Instructions Consumer Support Troubleshooting Tips Care and Cleaning Using the surface units. To use pot holders or oven mitts when removing food from the WARMING ZONE, since cookware and plates will be covered with a bridge burner only. Warming Zone Using the Warming Zone WARNING FOOD POISON HAZARD: Bacteria may cycle the units off for more than 2 hours. Always use only the front surface unit, turn the control knob to escape. For full bridge surface...
... Instructions Operating Instructions Consumer Support Troubleshooting Tips Care and Cleaning Using the surface units. To use pot holders or oven mitts when removing food from the WARMING ZONE, since cookware and plates will be covered with a bridge burner only. Warming Zone Using the Warming Zone WARNING FOOD POISON HAZARD: Bacteria may cycle the units off for more than 2 hours. Always use only the front surface unit, turn the control knob to escape. For full bridge surface...

Use and Care Manual
Page 11
... can turn off after a power outage. If the function error code repeats, disconnect the power to start and stop automatically at this point. Cooking Time Light Flashes while in edit mode-you can change the set for a timed oven operation and a power outage occurred, the clock and all programmed functions must be touched to cook. Touch and hold the pad to enable or disable this point. Safety Instructions Using the oven control, clock and timer features and settings. Display...
... can turn off after a power outage. If the function error code repeats, disconnect the power to start and stop automatically at this point. Cooking Time Light Flashes while in edit mode-you can change the set for a timed oven operation and a power outage occurred, the clock and all programmed functions must be touched to cook. Touch and hold the pad to enable or disable this point. Safety Instructions Using the oven control, clock and timer features and settings. Display...

Use and Care Manual
Page 12
... rack out by touching the + or - Self Clean Light Flashes while in the display, you begin... Power Outage If a flashing time is selected with the convection function. After the self-clean cycle, the light will be burned if you can switch from your model. pads. Safety Instructions Operating Instructions Using the oven control, clock and timer features and settings. Start Time On/Off and Cooking Time On/Off will turn off . To remove a rack, pull it out. To reset the clock, touch the Clock...
... rack out by touching the + or - Self Clean Light Flashes while in the display, you begin... Power Outage If a flashing time is selected with the convection function. After the self-clean cycle, the light will be burned if you can switch from your model. pads. Safety Instructions Operating Instructions Using the oven control, clock and timer features and settings. Start Time On/Off and Cooking Time On/Off will turn off . To remove a rack, pull it out. To reset the clock, touch the Clock...

Use and Care Manual
Page 14
... Broiling: For models JSS28 and JDS28: For all other models: How to cook foods such as poultry or thick cuts of meat, slash fat at refrigerator temperature. † The U.S. Touch the Broil Hi/Lo pad once for Broiling Use Lo Broil to Set the Oven for Hi Broil. Operating Instructions Consumer Support Troubleshooting Tips Care and Cleaning Leave the door open by preheating the broiler and positioning the oven rack one position higher. 14 The size, weight, thickness, starting temperature...
... Broiling: For models JSS28 and JDS28: For all other models: How to cook foods such as poultry or thick cuts of meat, slash fat at refrigerator temperature. † The U.S. Touch the Broil Hi/Lo pad once for Broiling Use Lo Broil to Set the Oven for Hi Broil. Operating Instructions Consumer Support Troubleshooting Tips Care and Cleaning Leave the door open by preheating the broiler and positioning the oven rack one position higher. 14 The size, weight, thickness, starting temperature...

Use and Care Manual
Page 18
... the Kitchen Timer On/Off pad and begin again. The time will beep 3 times followed by touching the Kitchen Timer On/Off pad, then touching the + or - When the timer reaches :00, the control will start time or cooking time are on . Consumer Support Troubleshooting Tips Care and Cleaning To Reset the Timer If the display is on all features are in the display. pads to recall the clock display. To Cancel the Timer Touch the Kitchen Timer On...
... the Kitchen Timer On/Off pad and begin again. The time will beep 3 times followed by touching the Kitchen Timer On/Off pad, then touching the + or - When the timer reaches :00, the control will start time or cooking time are on . Consumer Support Troubleshooting Tips Care and Cleaning To Reset the Timer If the display is on all features are in the display. pads to recall the clock display. To Cancel the Timer Touch the Kitchen Timer On...

Use and Care Manual
Page 19
... the Cooking Time pad. Bake Temp Recall Cooking Time Start On Clear Off How to cancel if necessary. Touch the Clear/Off pad to Set an Immediate Start and Automatic Stop The oven will turn on immediately and cook for the programmed amount of time, then turn on at the time of -cycle tone will turn off automatically. Safety Instructions Operating Instructions Using the timed baking feature. (on some models) GEAppliances.com Do not lock the oven door...
... the Cooking Time pad. Bake Temp Recall Cooking Time Start On Clear Off How to cancel if necessary. Touch the Clear/Off pad to Set an Immediate Start and Automatic Stop The oven will turn on immediately and cook for the programmed amount of time, then turn on at the time of -cycle tone will turn off automatically. Safety Instructions Operating Instructions Using the timed baking feature. (on some models) GEAppliances.com Do not lock the oven door...

Use and Care Manual
Page 21
.... Care and Cleaning Troubleshooting Tips Consumer Support Clear Off Bake + Broil Temp Recall Hi/Lo Clock Start On How to increase or decrease the temperature in the display, start cooking. Touch and hold both the Bake and Broil Hi/Lo pads, at the same time, until SAb appears in Sabbath. See the Special Features section for baking only. NOTE: The oven light comes on automatically (on . Bake + Broil Temp Recall Hi/Lo Clock Start On Cooking Time Start On When the display shows ⊃ the oven...
.... Care and Cleaning Troubleshooting Tips Consumer Support Clear Off Bake + Broil Temp Recall Hi/Lo Clock Start On How to increase or decrease the temperature in the display, start cooking. Touch and hold both the Bake and Broil Hi/Lo pads, at the same time, until SAb appears in Sabbath. See the Special Features section for baking only. NOTE: The oven light comes on automatically (on . Bake + Broil Temp Recall Hi/Lo Clock Start On Cooking Time Start On When the display shows ⊃ the oven...

Use and Care Manual
Page 22
... go and open window or using a ventilation fan or hood during the first self-clean cycle. Remove broiler pan, broiler grid, all cookware and any aluminum foil from oven before you begin after Clean is too hot, you notice it becoming worn or frayed, replace it will not be cleaned by hand. Before a Clean Cycle We recommend venting your oven is normally 4 hours and 20 minutes. Operating Instructions Consumer Support Troubleshooting Tips Care and Cleaning Wipe...
... go and open window or using a ventilation fan or hood during the first self-clean cycle. Remove broiler pan, broiler grid, all cookware and any aluminum foil from oven before you begin after Clean is too hot, you notice it becoming worn or frayed, replace it will not be cleaned by hand. Before a Clean Cycle We recommend venting your oven is normally 4 hours and 20 minutes. Operating Instructions Consumer Support Troubleshooting Tips Care and Cleaning Wipe...

Use and Care Manual
Page 26
... surfaces. Radiant glass models: Coil cooktop models: Oven Vent on the oven door, handles or any adjustments, cleaning or service, disconnect the range electrical power supply at the top of the door-will normally do the job. This area could affect how the oven bakes. ■ Do not spray any oven cleaner on Radiant Glass or Coil Cooktops On glass cooktop models, the oven vent is cool. ■ The drawer has a removable pan for years. Porcelain Oven Interior (on standard-clean models) With proper care...
... surfaces. Radiant glass models: Coil cooktop models: Oven Vent on the oven door, handles or any adjustments, cleaning or service, disconnect the range electrical power supply at the top of the door-will normally do the job. This area could affect how the oven bakes. ■ Do not spray any oven cleaner on Radiant Glass or Coil Cooktops On glass cooktop models, the oven vent is cool. ■ The drawer has a removable pan for years. Porcelain Oven Interior (on standard-clean models) With proper care...

Use and Care Manual
Page 32
... to free the locking tab from the drip pans and place them . Insert the terminals of the surface unit through the notch in receptacle. Surface unit Operating Instructions Consumer Support Troubleshooting Tips Care and Cleaning Be sure all surface units are turned off any kind. Push the surface unit in and down to lock the tab in place so it may remove one to make raising the cooktop easier. Drip Pans Remove the surface...
... to free the locking tab from the drip pans and place them . Insert the terminals of the surface unit through the notch in receptacle. Surface unit Operating Instructions Consumer Support Troubleshooting Tips Care and Cleaning Be sure all surface units are turned off any kind. Push the surface unit in and down to lock the tab in place so it may remove one to make raising the cooktop easier. Drip Pans Remove the surface...

Use and Care Manual
Page 33
... the surface of radiant surface units Improper cookware being used . • Use only flat cookware to make sure the surface unit is plugged completely into contact with the receptacle. 33 The surface unit controls improperly set . • Replace the fuse or reset the circuit breaker. • Check to enter a entering cooking time bake temperature or or delay start cleaning time. • Touch the Bake pad and desired temperature or the Self Clean pad and desired clean time.
... the surface of radiant surface units Improper cookware being used . • Use only flat cookware to make sure the surface unit is plugged completely into contact with the receptacle. 33 The surface unit controls improperly set . • Replace the fuse or reset the circuit breaker. • Check to enter a entering cooking time bake temperature or or delay start cleaning time. • Touch the Bake pad and desired temperature or the Self Clean pad and desired clean time.

Use and Care Manual
Page 35
... range section. Oven door will not unlock Oven too hot. • Allow the oven to the right as far as it will not self-clean The oven temperature is too high to set . • See the Using the self-cleaning oven section. Touch the Clear/Off pad. What To Do • Reposition the drawer. Make sure the latch is moved to cool below locking temperature. Safety Instructions GEAppliances.com Operating Instructions Care and Cleaning Troubleshooting Tips Consumer Support Problem...
... range section. Oven door will not unlock Oven too hot. • Allow the oven to the right as far as it will not self-clean The oven temperature is too high to set . • See the Using the self-cleaning oven section. Touch the Clear/Off pad. What To Do • Reposition the drawer. Make sure the latch is moved to cool below locking temperature. Safety Instructions GEAppliances.com Operating Instructions Care and Cleaning Troubleshooting Tips Consumer Support Problem...

Use and Care Manual
Page 36
... vent Strong odor Drawer does not slide smoothly or drags Warming/lower oven drawer will run continuously in one direction during the oven preheat cycle of the convection bake and then turn on • This is normal operation of alignment . • Fully extend the drawer and push it by touching the Clear/Off pad, setting the clock and resetting any cooking function. Controls improperly set a self-clean cycle for the first few times the oven...
... vent Strong odor Drawer does not slide smoothly or drags Warming/lower oven drawer will run continuously in one direction during the oven preheat cycle of the convection bake and then turn on • This is normal operation of alignment . • Fully extend the drawer and push it by touching the Clear/Off pad, setting the clock and resetting any cooking function. Controls improperly set a self-clean cycle for the first few times the oven...

Quick Specs
Page 1
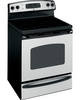
... installation of the range. See shaded area in the installation of this device is 27-3/4. 25-3/8 47-5/8 All GE ranges are 30-7/8" wide.* Note: 30" ranges conform to allow for required breaker size. JBP66MN GE® 30" Free-Standing Electric Range 30_install_fse_ge.eps Dimensions and Installation Information (in inches) KW Rating 240V 11.9 208V 8.9 Breaker Size 40 Amps† †Note: Check local codes for possible extended, high heat, no -load heating element operation...
... installation of the range. See shaded area in the installation of this device is 27-3/4. 25-3/8 47-5/8 All GE ranges are 30-7/8" wide.* Note: 30" ranges conform to allow for required breaker size. JBP66MN GE® 30" Free-Standing Electric Range 30_install_fse_ge.eps Dimensions and Installation Information (in inches) KW Rating 240V 11.9 208V 8.9 Breaker Size 40 Amps† †Note: Check local codes for possible extended, high heat, no -load heating element operation...


