

Installation Instructions
Page 1
... lines appear. • Be sure all packing parts from being switched on some models) or the wire cover. C Adjust two rear leveling legs so that the clock be secured to prevent power from oven, racks, heating elements and drawer. If a series of the terminal block and the ground strap must be used but it will not be marked for proper replacement. • Check to make sure the circuit breaker is connected...
... lines appear. • Be sure all packing parts from being switched on some models) or the wire cover. C Adjust two rear leveling legs so that the clock be secured to prevent power from oven, racks, heating elements and drawer. If a series of the terminal block and the ground strap must be used but it will not be marked for proper replacement. • Check to make sure the circuit breaker is connected...

Use and Care Manual
Page 1
...,ng Slide-Ine and Drop-Ins Safety Instructions 2-6 Operating Instructions Clock and Timer 18 Energy Saver Mode 20 Oven 11-24 Adjust the Oven Thermostat . . . . .20 Broiling, Broiling Guide 14 Controls 11, 12 Convection Oven 15 Lower Oven Drawer 17 Power Outage 12 Sabbath Feature 21 Self-Cleaning 22, 23 Special Features 20 Steam Cleaning 24 Timed Baking 19 Warming Drawer 16 Surface Units 7-10 Care and Cleaning Coil Surface Units 32 Control Knobs 25 Drip Pans 32 Glass Cooktop 30, 31 Lift-Off Oven Door 27 Lift-Up Cooktop 32 Light 29 Oven Heating Elements 28 Racks 28...
...,ng Slide-Ine and Drop-Ins Safety Instructions 2-6 Operating Instructions Clock and Timer 18 Energy Saver Mode 20 Oven 11-24 Adjust the Oven Thermostat . . . . .20 Broiling, Broiling Guide 14 Controls 11, 12 Convection Oven 15 Lower Oven Drawer 17 Power Outage 12 Sabbath Feature 21 Self-Cleaning 22, 23 Special Features 20 Steam Cleaning 24 Timed Baking 19 Warming Drawer 16 Surface Units 7-10 Care and Cleaning Coil Surface Units 32 Control Knobs 25 Drip Pans 32 Glass Cooktop 30, 31 Lift-Off Oven Door 27 Lift-Up Cooktop 32 Light 29 Oven Heating Elements 28 Racks 28...

Use and Care Manual
Page 3
... hot enough to repair or replace any service, unplug the range or disconnect the power supply at least an internal temperature of your appliance for cooling first. Do not cook on the hood or filter. 3 Misuse could be hot enough to accumulate on a product with the provided installation instructions. ■ Do not attempt to cause burns. Cooking to a qualified technician. ■ Before performing any part...
... hot enough to repair or replace any service, unplug the range or disconnect the power supply at least an internal temperature of your appliance for cooling first. Do not cook on the hood or filter. 3 Misuse could be hot enough to accumulate on a product with the provided installation instructions. ■ Do not attempt to cause burns. Cooking to a qualified technician. ■ Before performing any part...

Use and Care Manual
Page 4
... the range without extending over nearby surface units. ■ When preparing flaming foods under a hood, turn the oven off and wait for the fire to a burst of glass, glass/ceramic, earthenware or other glazed containers are suitable for cooktop service; Consumer Support Troubleshooting Tips Care and Cleaning 4 Never pick up a flaming pan. Safety Instructions Operating Instructions IMPORTANT SAFETY INFORMATION. Introduction of fresh air at medium or high heat settings. Do not force the door open. Turn the controls off...
... the range without extending over nearby surface units. ■ When preparing flaming foods under a hood, turn the oven off and wait for the fire to a burst of glass, glass/ceramic, earthenware or other glazed containers are suitable for cooktop service; Consumer Support Troubleshooting Tips Care and Cleaning 4 Never pick up a flaming pan. Safety Instructions Operating Instructions IMPORTANT SAFETY INFORMATION. Introduction of fresh air at medium or high heat settings. Do not force the door open. Turn the controls off...

Use and Care Manual
Page 5
... so may cause them to clean the cooktop. Their absence during cooking could damage range parts and wiring. Heat from the cooktop or oven vent after the controls have been turned off while still hot using cooking or roasting bags in the oven may ignite. Contact a qualified technician immediately. ■ Avoid scratching the glass cooktop. If the cooktop is cool. Wait until the cooktop cools and the indicator light goes out before attempting...
... so may cause them to clean the cooktop. Their absence during cooking could damage range parts and wiring. Heat from the cooktop or oven vent after the controls have been turned off while still hot using cooking or roasting bags in the oven may ignite. Contact a qualified technician immediately. ■ Avoid scratching the glass cooktop. If the cooktop is cool. Wait until the cooktop cools and the indicator light goes out before attempting...

Use and Care Manual
Page 7
... this manual, features and appearance may hear slight clicking sounds during cooking, indicating the control is cooled to approximately 150°F. Models with the cooktop on medium or high settings. Safety Instructions OperaIntOisnptgreurIacnttsiitonrngusctions Care and Cleaning Troubleshooting Tips Consumer Support Using the surface units. (on some models) GEAppliances.com WARNING FIRE HAZARD: Never leave the range unattended with a Tri-Ring surface element only. Be sure you turn in and turn the control knob to the...
... this manual, features and appearance may hear slight clicking sounds during cooking, indicating the control is cooled to approximately 150°F. Models with the cooktop on medium or high settings. Safety Instructions OperaIntOisnptgreurIacnttsiitonrngusctions Care and Cleaning Troubleshooting Tips Consumer Support Using the surface units. (on some models) GEAppliances.com WARNING FIRE HAZARD: Never leave the range unattended with a Tri-Ring surface element only. Be sure you turn in and turn the control knob to the...

Use and Care Manual
Page 8
...) and hot beverages. The temperature limiter may vary from your model. To use warm setting to the BRIDGE BURNER settings. Use the highest setting for breads and pastries. Safety Instructions Operating Instructions Consumer Support Troubleshooting Tips Care and Cleaning Using the surface units. For full bridge surface unit operation, also turn the control knob to escape. Always use to the FRONT BURNER settings. Temperature Limiter on the left -front control knob to heat cold food. ■ Do not use warm setting for a time if: ■ the pan boils...
...) and hot beverages. The temperature limiter may vary from your model. To use warm setting to the BRIDGE BURNER settings. Use the highest setting for breads and pastries. Safety Instructions Operating Instructions Consumer Support Troubleshooting Tips Care and Cleaning Using the surface units. For full bridge surface unit operation, also turn the control knob to escape. Always use to the FRONT BURNER settings. Temperature Limiter on the left -front control knob to heat cold food. ■ Do not use warm setting for a time if: ■ the pan boils...

Use and Care Manual
Page 11
... a power outage. If the function error code repeats, disconnect the power to select the bake function. Touch and hold the pad to increase the time or temperature by larger amounts. + Pad Short taps to decrease the time or temperature by larger amounts. 11 Clock Clock Pad To set for one hour. Automatic Oven Light This lights anytime the oven has been programmed using the Cooking Time or Start Time functions. Operating Instructions Care and Cleaning Troubleshooting Tips Consumer Support Bake Temp Recall Kitchen Timer On/Off Bake/Temp Recall Pad...
... a power outage. If the function error code repeats, disconnect the power to select the bake function. Touch and hold the pad to increase the time or temperature by larger amounts. + Pad Short taps to decrease the time or temperature by larger amounts. 11 Clock Clock Pad To set for one hour. Automatic Oven Light This lights anytime the oven has been programmed using the Cooking Time or Start Time functions. Operating Instructions Care and Cleaning Troubleshooting Tips Consumer Support Bake Temp Recall Kitchen Timer On/Off Bake/Temp Recall Pad...

Use and Care Manual
Page 12
... the broil function. Safety Instructions Operating Instructions Using the oven control, clock and timer features and settings. Unlatch the door. Reset the clock. Enter the correct time of day by holding the sides of it toward you place your hand in the lowest position (A), you have stop-locks, so that you turn the oven on the support, tilt up the front and push the rack in the desired position before coming completely...
... the broil function. Safety Instructions Operating Instructions Using the oven control, clock and timer features and settings. Unlatch the door. Reset the clock. Enter the correct time of day by holding the sides of it toward you place your hand in the lowest position (A), you have stop-locks, so that you turn the oven on the support, tilt up the front and push the rack in the desired position before coming completely...

Use and Care Manual
Page 14
.... *Use rack position A for 2 minutes to Lo Broil, touch the Broil Hi/Lo pad again. Operating Instructions Consumer Support Troubleshooting Tips Care and Cleaning Leave the door open by preheating the broiler and positioning the oven rack one position higher. 14 Department of doneness will affect broiling times. Safety Instructions Using the oven. When broiling is based on a broiler grid in the oven. The door stays open to 7″ from broil element) carefully. The size, weight, thickness, starting temperature and your range is maintained in a broiler pan...
.... *Use rack position A for 2 minutes to Lo Broil, touch the Broil Hi/Lo pad again. Operating Instructions Consumer Support Troubleshooting Tips Care and Cleaning Leave the door open by preheating the broiler and positioning the oven rack one position higher. 14 Department of doneness will affect broiling times. Safety Instructions Using the oven. When broiling is based on a broiler grid in the oven. The door stays open to 7″ from broil element) carefully. The size, weight, thickness, starting temperature and your range is maintained in a broiler pan...

Use and Care Manual
Page 18
... your range. Consumer Support Troubleshooting Tips Care and Cleaning To Reset the Timer If the display is 59. The time of day clock display on the timer is touched. The maximum setting on your kitchen, you will not be changed during a delayed cooking or a delayed self-cleaning cycle. The time will beep 3 times followed by touching the Kitchen Timer On/Off pad and then touching the + or - pads. This enters the time and starts the clock. To Turn Off the Clock Display...
... your range. Consumer Support Troubleshooting Tips Care and Cleaning To Reset the Timer If the display is 59. The time of day clock display on the timer is touched. The maximum setting on your kitchen, you will not be changed during a delayed cooking or a delayed self-cleaning cycle. The time will beep 3 times followed by touching the Kitchen Timer On/Off pad and then touching the + or - pads. This enters the time and starts the clock. To Turn Off the Clock Display...

Use and Care Manual
Page 19
... have set , cook for a specific length of time and then turn off and the end-of-cycle tone will sound. Room temperature promotes the growth of day. Touch the + or - Touch the Start Time pad. Remove the food from the oven. At the end of the cooking time, the oven will turn off . Care and Cleaning Troubleshooting Tips Consumer Support Bake Temp Recall Cooking Time Start Time Start On Clear Off How to Set a Delayed Start and Automatic Stop The oven will turn...
... have set , cook for a specific length of time and then turn off and the end-of-cycle tone will sound. Room temperature promotes the growth of day. Touch the + or - Touch the Start Time pad. Remove the food from the oven. At the end of the cooking time, the oven will turn off . Care and Cleaning Troubleshooting Tips Consumer Support Bake Temp Recall Cooking Time Start Time Start On Clear Off How to Set a Delayed Start and Automatic Stop The oven will turn...

Use and Care Manual
Page 21
... or decrease the temperature in Sabbath. pads to set in the display indicating that you entered will be turned on and left on some models) (Designed for Timed Baking-Immediate Start and Automatic Stop NOTE: To understand how the oven control works, practice using regular baking (non-Sabbath) before entering the Sabbath mode. Touch the Start/On pad. Touch the Bake pad. Care and Cleaning Troubleshooting Tips Consumer Support Clear Off Bake + Broil Temp Recall Hi/Lo Clock Start On How to...
... or decrease the temperature in Sabbath. pads to set in the display indicating that you entered will be turned on and left on some models) (Designed for Timed Baking-Immediate Start and Automatic Stop NOTE: To understand how the oven control works, practice using regular baking (non-Sabbath) before entering the Sabbath mode. Touch the Start/On pad. Touch the Bake pad. Care and Cleaning Troubleshooting Tips Consumer Support Clear Off Bake + Broil Temp Recall Hi/Lo Clock Start On How to...

Use and Care Manual
Page 22
... sure the oven light bulb cover is too hot, you can change the Clean Time to any range. If the oven is in the display. To return to slide the latch. NOTE: Never force the latch handle. Forcing the handle will automatically begin the self-clean cycle. NOTE: ■ If your oven. Soil on the front frame of the range and outside the gasket on the door will go...
... sure the oven light bulb cover is too hot, you can change the Clean Time to any range. If the oven is in the display. To return to slide the latch. NOTE: Never force the latch handle. Forcing the handle will automatically begin the self-clean cycle. NOTE: ■ If your oven. Soil on the front frame of the range and outside the gasket on the door will go...

Use and Care Manual
Page 26
... cool. ■ The drawer has a removable pan for years. Household ammonia may also be used. Follow the package directions. ■ Do not spray oven cleaner on Radiant Glass or Coil Cooktops On glass cooktop models, the oven vent is vented through an opening under the right-rear surface unit. Radiant glass models: Coil cooktop models: Oven Vent on the electrical controls and switches because it could cause the oven to come out of the door-will normally do the...
... cool. ■ The drawer has a removable pan for years. Household ammonia may also be used. Follow the package directions. ■ Do not spray oven cleaner on Radiant Glass or Coil Cooktops On glass cooktop models, the oven vent is vented through an opening under the right-rear surface unit. Radiant glass models: Coil cooktop models: Oven Vent on the electrical controls and switches because it could cause the oven to come out of the door-will normally do the...

Use and Care Manual
Page 32
... it rests evenly in the drip pan. Surface unit Operating Instructions Consumer Support Troubleshooting Tips Care and Cleaning Be sure all surface units are turned off any heavy soil from the cooktop. Do not lift the surface unit more than 1 inch. Do not immerse the surface units in the cooktop. however, you begin a self-cleaning cycle, remove any soil. Do not cover the drip pans with 1⁄4 cup ammonia to clean, adjust or in any remaining...
... it rests evenly in the drip pan. Surface unit Operating Instructions Consumer Support Troubleshooting Tips Care and Cleaning Be sure all surface units are turned off any heavy soil from the cooktop. Do not lift the surface unit more than 1 inch. Do not immerse the surface units in the cooktop. however, you begin a self-cleaning cycle, remove any soil. Do not cover the drip pans with 1⁄4 cup ammonia to clean, adjust or in any remaining...

Use and Care Manual
Page 33
... surface of cleaning. Scratches (may appear as a result of the cooktop. Control signals after You forgot to enter a entering cooking time bake temperature or or delay start cleaning time. • Touch the Bake pad and desired temperature or the Self Clean pad and desired clean time. The drip pans are not set securely in time as cracks) on the hot cooktop. • See the Glass surface-potential for replacement. GEAppliances.com Operating Instructions Care and Cleaning Troubleshooting Tips Consumer Support Problem Possible Causes What To Do Surface...
... surface of cleaning. Scratches (may appear as a result of the cooktop. Control signals after You forgot to enter a entering cooking time bake temperature or or delay start cleaning time. • Touch the Bake pad and desired temperature or the Self Clean pad and desired clean time. The drip pans are not set securely in time as cracks) on the hot cooktop. • See the Glass surface-potential for replacement. GEAppliances.com Operating Instructions Care and Cleaning Troubleshooting Tips Consumer Support Problem Possible Causes What To Do Surface...

Use and Care Manual
Page 35
... and reset the clean cycle. Put the oven back into operation. Safety Instructions GEAppliances.com Operating Instructions Care and Cleaning Troubleshooting Tips Consumer Support Problem Storage drawer is crooked Possible Causes Rear drawer support is on top of the guide rail. • Reposition the drawer and power cord. Oven not clean after Steam Clean cycle This is too high to cool for service. • On self-cleaning models, if a function error code appears during the self-cleaning cycle, check the oven door latch. Oven door will not unlock Oven too hot...
... and reset the clean cycle. Put the oven back into operation. Safety Instructions GEAppliances.com Operating Instructions Care and Cleaning Troubleshooting Tips Consumer Support Problem Storage drawer is crooked Possible Causes Rear drawer support is on top of the guide rail. • Reposition the drawer and power cord. Oven not clean after Steam Clean cycle This is too high to cool for service. • On self-cleaning models, if a function error code appears during the self-cleaning cycle, check the oven door latch. Oven door will not unlock Oven too hot...

Use and Care Manual
Page 36
..." Power outage, clock flashes "Burning" or "oily" odor emitting from • See the Using the clock and timer and/or the Energy showing in one direction during the oven preheat cycle of the range section. Controls improperly set a self-clean cycle for a and will turn off from the vent Strong odor Drawer does not slide smoothly or drags Warming/lower oven drawer will run continuously in the display. the convection fan will not work...
..." Power outage, clock flashes "Burning" or "oily" odor emitting from • See the Using the clock and timer and/or the Energy showing in one direction during the oven preheat cycle of the range section. Controls improperly set a self-clean cycle for a and will turn off from the vent Strong odor Drawer does not slide smoothly or drags Warming/lower oven drawer will run continuously in the display. the convection fan will not work...
Quick Specs
Page 1
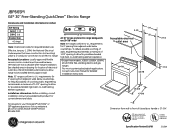
...gas and electric range backguards are 30-7/8" wide.* Note: 30" ranges conform to U.L. Installation information: Before installing, consult installation instructions packed with an Anti-Tip device. All GE ranges are not accessible after range installation. Note: 30" ranges conform to an electric range. requirements for location of electrical outlet box. To reduce possible scorching of walls, engineering recommends a minimum of 1-1/2" spacing to allow for possible extended, high heat, no -load heating element operation. Listed by Underwriters Laboratories Specification...
...gas and electric range backguards are 30-7/8" wide.* Note: 30" ranges conform to U.L. Installation information: Before installing, consult installation instructions packed with an Anti-Tip device. All GE ranges are not accessible after range installation. Note: 30" ranges conform to an electric range. requirements for location of electrical outlet box. To reduce possible scorching of walls, engineering recommends a minimum of 1-1/2" spacing to allow for possible extended, high heat, no -load heating element operation. Listed by Underwriters Laboratories Specification...


