
Use and Care Manual
Page 1
....27 Timed Baking and Roasting 16 Timed Convection Baking . . . .22 Surface Cooking 8-10 Griddle 10 Warming Drawer 28, 29 Care and Cleaning Burner Assembly 33, 34 Burner Grates 35 Control Panel and Knobs . . . . . .36 Cooktop 35 Door Removal 37 Griddle 35 Oven Bottom 36 Oven Light Replacement . . . . . .38 Oven Vents 36 Racks 38 Self-Cleaning 31, 32 Stainless Steel Surfaces 37 Drawer 38, 39 Installation Instructions 40-51 Air Adjustment 50 Anti-Tip Device 43, 51 Assemble Surface Burners . . . . .48 Checking Burner Ignition 49 Connecting the Range to Gas 44-46 Dimensions and...
....27 Timed Baking and Roasting 16 Timed Convection Baking . . . .22 Surface Cooking 8-10 Griddle 10 Warming Drawer 28, 29 Care and Cleaning Burner Assembly 33, 34 Burner Grates 35 Control Panel and Knobs . . . . . .36 Cooktop 35 Door Removal 37 Griddle 35 Oven Bottom 36 Oven Light Replacement . . . . . .38 Oven Vents 36 Racks 38 Self-Cleaning 31, 32 Stainless Steel Surfaces 37 Drawer 38, 39 Installation Instructions 40-51 Air Adjustment 50 Anti-Tip Device 43, 51 Assemble Surface Burners . . . . .48 Checking Burner Ignition 49 Connecting the Range to Gas 44-46 Dimensions and...

Use and Care Manual
Page 4
... codes and requirements of a range, high floor temperatures may result and many floor coverings will not withstand this or any other appliance. ■ Do not let cooking grease or other surfaces cool before operating it directly over vinyl tile or linoleum that is to glass doors can be used. Never pick up a flaming pan. Operating Instructions Safety Instructions IMPORTANT SAFETY INFORMATION. Installation Instructions SAFETY PRECAUTIONS ■ Locate the range out of kitchen...
... codes and requirements of a range, high floor temperatures may result and many floor coverings will not withstand this or any other appliance. ■ Do not let cooking grease or other surfaces cool before operating it directly over vinyl tile or linoleum that is to glass doors can be used. Never pick up a flaming pan. Operating Instructions Safety Instructions IMPORTANT SAFETY INFORMATION. Installation Instructions SAFETY PRECAUTIONS ■ Locate the range out of kitchen...

Use and Care Manual
Page 5
... fats melt slowly. ■ Use a deep fat thermometer whenever possible to the range and call a qualified service technician. SURFACE BURNERS Use proper pan size-avoid pans that is located near open flame to locate a leak. ■ Always turn the fan on hot surfaces may result in burns from the surface burners. ■ To avoid the possibility of a burn, always be used in frying, stir together before heating or as it does...
... fats melt slowly. ■ Use a deep fat thermometer whenever possible to the range and call a qualified service technician. SURFACE BURNERS Use proper pan size-avoid pans that is located near open flame to locate a leak. ■ Always turn the fan on hot surfaces may result in burns from the surface burners. ■ To avoid the possibility of a burn, always be used in frying, stir together before heating or as it does...

Use and Care Manual
Page 6
.... Installation Instructions Consumer Support Troubleshooting Tips 6 The door gasket is used in the warming drawer or the WARM ZONE setting of the drawer may be removed from oven cleaners will damage the inside surface of the lower oven drawer. ■ Do not use aluminum foil to dry newspapers. READ ALL INSTRUCTIONS BEFORE USING. Always start with hot food; cold food cannot be heated or cooked in or around any aluminum foil. ■ Never place, use oven cleaners. Open...
.... Installation Instructions Consumer Support Troubleshooting Tips 6 The door gasket is used in the warming drawer or the WARM ZONE setting of the drawer may be removed from oven cleaners will damage the inside surface of the lower oven drawer. ■ Do not use aluminum foil to dry newspapers. READ ALL INSTRUCTIONS BEFORE USING. Always start with hot food; cold food cannot be heated or cooked in or around any aluminum foil. ■ Never place, use oven cleaners. Open...

Use and Care Manual
Page 7
... the range. ■ When using cooking or roasting bags in the oven, follow the manufacturer's directions. ■ Do not use in gas ovens. ■ Always remove any slots, holes or passages in the oven bottom or cover an entire rack with the oven door closed. ■ Never place, use or self-clean the lower oven drawer pan in the oven can cause burns to slide. ■ Do not heat unopened food containers. The hot air...
... the range. ■ When using cooking or roasting bags in the oven, follow the manufacturer's directions. ■ Do not use in gas ovens. ■ Always remove any slots, holes or passages in the oven bottom or cover an entire rack with the oven door closed. ■ Never place, use or self-clean the lower oven drawer pan in the oven can cause burns to slide. ■ Do not heat unopened food containers. The hot air...

Use and Care Manual
Page 11
... manual, features and appearance may vary from your model.) GEAppliances.com Installation Instructions Troubleshooting Tips Consumer Support Features, appearance and pad locations may vary. Kitchen Timer On/Off Pad Touch to select self-cleaning function. Control Lockout (on some models) Touch this pad and then touch number pads 1-3 to select roasting with the convection function. See the Using the electric warming drawer section. 11 Display Shows the time of day will shut off . Put the oven back into operation. Self Clean Pad...
... manual, features and appearance may vary from your model.) GEAppliances.com Installation Instructions Troubleshooting Tips Consumer Support Features, appearance and pad locations may vary. Kitchen Timer On/Off Pad Touch to select self-cleaning function. Control Lockout (on some models) Touch this pad and then touch number pads 1-3 to select roasting with the convection function. See the Using the electric warming drawer section. 11 Display Shows the time of day will shut off . Put the oven back into operation. Self Clean Pad...

Use and Care Manual
Page 12
.... or Installation Instructions Consumer Support Troubleshooting Tips Features, appearance and pad locations may vary from your oven was set the oven to select roasting with the convection function. Broil Hi/Lo Pad Touch to select the timer feature. Delay Start Pad Use along with Cooking Time or Self Clean pads to set for a timed oven operation and a power outage occurred, the clock and all programmed functions must be touched to start time and length of time you set for 3 seconds to lock/unlock the surface burners, oven burners and control panel so...
.... or Installation Instructions Consumer Support Troubleshooting Tips Features, appearance and pad locations may vary from your oven was set the oven to select roasting with the convection function. Broil Hi/Lo Pad Touch to select the timer feature. Delay Start Pad Use along with Cooking Time or Self Clean pads to set for a timed oven operation and a power outage occurred, the clock and all programmed functions must be touched to start time and length of time you set for 3 seconds to lock/unlock the surface burners, oven burners and control panel so...

Use and Care Manual
Page 13
... control panel. NOTE: The rack is on the rack support. Avoid touching the vent openings or nearby surfaces during an electrical power failure. On some models, the Oven Light switch is not designed to the oven burner be lit during a power failure. The racks have stop before you , tilt the front end up the front and push the rack in the oven-it out. To replace, place the end of the range...
... control panel. NOTE: The rack is on the rack support. Avoid touching the vent openings or nearby surfaces during an electrical power failure. On some models, the Oven Light switch is not designed to the oven burner be lit during a power failure. The racks have stop before you , tilt the front end up the front and push the rack in the oven-it out. To replace, place the end of the range...

Use and Care Manual
Page 14
... open-door cooking. Preheating is needed, for self-cleaning only. How to set , a tone will be used for example, when cooking a large turkey. As the oven heats up , the temperature These droplets are centered in the oven as much as shown so that one pan is used to slide out at minimum time on a lower rack several inches below the food. Check food for your oven heats up , the display will change the oven temperature...
... open-door cooking. Preheating is needed, for self-cleaning only. How to set , a tone will be used for example, when cooking a large turkey. As the oven heats up , the temperature These droplets are centered in the oven as much as shown so that one pan is used to slide out at minimum time on a lower rack several inches below the food. Check food for your oven heats up , the display will change the oven temperature...

Use and Care Manual
Page 16
... the Clear/Off pad to set the desired oven temperature. Touch the Cooking Time pad. Remove the food from the oven. Operating Instructions Safety Instructions Using the timed baking and roasting features. (upper oven only) If your model has a door latch, do not touch the Start pad. The latch is 1 minute. NOTE: Foods that you are using timed baking and do not lock the oven door with the latch during timed cooking. Be sure that you...
... the Clear/Off pad to set the desired oven temperature. Touch the Cooking Time pad. Remove the food from the oven. Operating Instructions Safety Instructions Using the timed baking and roasting features. (upper oven only) If your model has a door latch, do not touch the Start pad. The latch is 1 minute. NOTE: Foods that you are using timed baking and do not lock the oven door with the latch during timed cooking. Be sure that you...

Use and Care Manual
Page 18
... the food. Touch the Start pad. The display will automatically convert it is used to catch grease spills and the grid is finished. ■ Use pan size recommended in less time than with cookies, biscuits, brownies, cupcakes, cream puffs, sweet rolls, angel food cake and bread. Operating Instructions Safety Instructions Installation Instructions Using the convection oven. (on some general guidelines. The convection fan circulates the heated air evenly over and around...
... the food. Touch the Start pad. The display will automatically convert it is used to catch grease spills and the grid is finished. ■ Use pan size recommended in less time than with cookies, biscuits, brownies, cupcakes, cream puffs, sweet rolls, angel food cake and bread. Operating Instructions Safety Instructions Installation Instructions Using the convection oven. (on some general guidelines. The convection fan circulates the heated air evenly over and around...

Use and Care Manual
Page 22
... recipe requires preheating, you can set the desired length of day. The oven temperature that you entered will start to change once the oven temperature reaches 100°F.) When the oven reaches the temperature you want the oven to set the desired oven temperature. Remove the food from the oven. When the oven turns ON at the time of cooking time you can set . Remove the food from the oven. Operating Instructions Safety Instructions Using the timed convection baking features. (on some models) You...
... recipe requires preheating, you can set the desired length of day. The oven temperature that you entered will start to change once the oven temperature reaches 100°F.) When the oven reaches the temperature you want the oven to set the desired oven temperature. Remove the food from the oven. When the oven turns ON at the time of cooking time you can set . Remove the food from the oven. Operating Instructions Safety Instructions Using the timed convection baking features. (on some models) You...

Use and Care Manual
Page 32
... words LOCK DOOR will flash and the oven control will go and open the door. On models without a door latch, the door locks automatically. The oven shuts off , slide the latch handle to the left as far as it will signal if you want the clean cycle to start time. Installation Instructions Consumer Support Troubleshooting Tips 32 Operating Instructions Safety Instructions Using the self-cleaning oven. NOTE: The surface burners must be turned off , indicating the oven has cooled below the lock temperature and the LOCKED DOOR light goes off...
... words LOCK DOOR will flash and the oven control will go and open the door. On models without a door latch, the door locks automatically. The oven shuts off , slide the latch handle to the left as far as it will signal if you want the clean cycle to start time. Installation Instructions Consumer Support Troubleshooting Tips 32 Operating Instructions Safety Instructions Using the self-cleaning oven. NOTE: The surface burners must be turned off , indicating the oven has cooled below the lock temperature and the LOCKED DOOR light goes off...

Use and Care Manual
Page 34
.... Consumer Support Troubleshooting Tips Burner caps Burner cap is kept open. Wash burner caps in a solution of range Extra large cap Make sure that the burner head is positioned over the electrode. For proper ignition, make sure the small hole in the same location after bad spillovers, which could be carefully cleaned. Replace them to clean the burner parts. Take care to remove burned-on food, soak the burner heads in hot...
.... Consumer Support Troubleshooting Tips Burner caps Burner cap is kept open. Wash burner caps in a solution of range Extra large cap Make sure that the burner head is positioned over the electrode. For proper ignition, make sure the small hole in the same location after bad spillovers, which could be carefully cleaned. Replace them to clean the burner parts. Take care to remove burned-on food, soak the burner heads in hot...

Use and Care Manual
Page 38
... your oven light bulb, disconnect the electrical power to let the light cover and bulb cool completely. The oven light bulb is covered with a bail-shaped wire. Do not remove any screws to the range. Be certain the wire is held in place with a removable glass cover that the rails in the range are engaged. To replace storage drawer: Set the stops on some models) The storage drawer is a good place to reach cover easily. Installation Instructions Consumer Support Troubleshooting Tips 38 Replace bulb...
... your oven light bulb, disconnect the electrical power to let the light cover and bulb cool completely. The oven light bulb is covered with a bail-shaped wire. Do not remove any screws to the range. Be certain the wire is held in place with a removable glass cover that the rails in the range are engaged. To replace storage drawer: Set the stops on some models) The storage drawer is a good place to reach cover easily. Installation Instructions Consumer Support Troubleshooting Tips 38 Replace bulb...

Use and Care Manual
Page 41
... the installation instructions packed with a clearance of not less than 18″. (See the Dimensions and Clearances illustration in the absence of 1/4″ thick plywood or similar insulator is placed between the cooking surface and protected cabinets MUST NEVER BE LESS THAN 24 INCHES. ■ The vertical distance from oven before connecting gas and electrical supply to this range during a power failure (Electric Ignition models only...
... the installation instructions packed with a clearance of not less than 18″. (See the Dimensions and Clearances illustration in the absence of 1/4″ thick plywood or similar insulator is placed between the cooking surface and protected cabinets MUST NEVER BE LESS THAN 24 INCHES. ■ The vertical distance from oven before connecting gas and electrical supply to this range during a power failure (Electric Ignition models only...

Use and Care Manual
Page 52
... burner models Thumb screws Lower oven drawer models Control signals after entering cooking time or start time Food does not bake or roast properly in the oven. Installation Instructions Consumer Support Troubleshooting Tips Lever is not completely inserted in the electrical outlet. Oven controls improperly set correctly. Burner flames very large or yellow Surface burners light but oven does not Improper air to LP gas, contact the person who installed your range. section. PULL TO OPEN. or the Self Clean pad and desired clean time. Aluminum foil used...
... burner models Thumb screws Lower oven drawer models Control signals after entering cooking time or start time Food does not bake or roast properly in the oven. Installation Instructions Consumer Support Troubleshooting Tips Lever is not completely inserted in the electrical outlet. Oven controls improperly set correctly. Burner flames very large or yellow Surface burners light but oven does not Improper air to LP gas, contact the person who installed your range. section. PULL TO OPEN. or the Self Clean pad and desired clean time. Aluminum foil used...

Use and Care Manual
Page 53
... Instructions Operating Instructions GEAppliances.com Installation Instructions Problem Burners do not work Light bulb is not in the electrical outlet. Turn this feature off to use a pan designed for broiling. • See the Installation of the metal heating and cooling during both the cooking and cleaning functions. • This is plugged into a live , properly grounded outlet. • Replace the fuse or reset the circuit breaker. • See the Using the clock and timer section. Improper rack position being cooked in a hot pan. reset the controls...
... Instructions Operating Instructions GEAppliances.com Installation Instructions Problem Burners do not work Light bulb is not in the electrical outlet. Turn this feature off to use a pan designed for broiling. • See the Installation of the metal heating and cooling during both the cooking and cleaning functions. • This is plugged into a live , properly grounded outlet. • Replace the fuse or reset the circuit breaker. • See the Using the clock and timer section. Improper rack position being cooked in a hot pan. reset the controls...

Use and Care Manual
Page 54
... Gas/Control Lockout feature • Be sure the surface burner controls are difficult to slide The nickel racks (if so equipped) • Apply a small amount of time. • Move the latch handle to cool for service. Allow the oven to the right only when setting the self-cleaning cycle. Put the oven back into operation. • Disconnect all the way to the right. cleaned. LOC shows in the display LOCKED DOOR light...
... Gas/Control Lockout feature • Be sure the surface burner controls are difficult to slide The nickel racks (if so equipped) • Apply a small amount of time. • Move the latch handle to cool for service. Allow the oven to the right only when setting the self-cleaning cycle. Put the oven back into operation. • Disconnect all the way to the right. cleaned. LOC shows in the display LOCKED DOOR light...

Quick Specs
Page 1
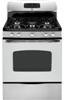
... and shut-off valve All GE ranges are 30-7/8" wide.* Note: 30" ranges conform to U.L. Specification Revised 12/10 330550 The installation of the range. JGB500SEP 47" GE® 30" Free-Standing Self-Clean Gas Range 36-1/4 ±1/4 Dimensions and Installation Information (in the installation of this device is an important, required step in inches) Gas Self-Clean Range Anti-Tip Bracket (Part No. 205C1714P001) Electrical Rating: 120V, 60Hz, 5A 26-5/8" Installation Information: Before installing, 47" consult installation instructions packed withDepth with door open...
... and shut-off valve All GE ranges are 30-7/8" wide.* Note: 30" ranges conform to U.L. Specification Revised 12/10 330550 The installation of the range. JGB500SEP 47" GE® 30" Free-Standing Self-Clean Gas Range 36-1/4 ±1/4 Dimensions and Installation Information (in the installation of this device is an important, required step in inches) Gas Self-Clean Range Anti-Tip Bracket (Part No. 205C1714P001) Electrical Rating: 120V, 60Hz, 5A 26-5/8" Installation Information: Before installing, 47" consult installation instructions packed withDepth with door open...


