
Use and Care Manual
Page 2
.... before attempting to the floor or wall, and slide the range back so the rear leveling leg is engaged in place and engaged. Failure to light any appliance. „ Do not touch any other flammable vapors and liquids in death or serious burns to see that Anti-Tip Bracket the rear...
.... before attempting to the floor or wall, and slide the range back so the rear leveling leg is engaged in place and engaged. Failure to light any appliance. „ Do not touch any other flammable vapors and liquids in death or serious burns to see that Anti-Tip Bracket the rear...

Use and Care Manual
Page 9
...used by model Cleaning Supplies CitruShine Stainless Steel Wipes CeramaBryte Stainless Steel Appliance Cleaner WX10X10007 PM10X311 How to improve your appliance? Try the GE Appliances Website (www.geappliances.com/service_and_support/) 24 hours a day, any user. To assure no damage is done to the finish of...only one step away from packaging tape on -line and schedule your door. Instructions contained in Canada Parts Oven racks Oven burners Light bulbs Part numbers vary by model Part numbers vary by model Part numbers vary by people of a household liquid dishwashing detergent. ...
...used by model Cleaning Supplies CitruShine Stainless Steel Wipes CeramaBryte Stainless Steel Appliance Cleaner WX10X10007 PM10X311 How to improve your appliance? Try the GE Appliances Website (www.geappliances.com/service_and_support/) 24 hours a day, any user. To assure no damage is done to the finish of...only one step away from packaging tape on -line and schedule your door. Instructions contained in Canada Parts Oven racks Oven burners Light bulbs Part numbers vary by model Part numbers vary by model Part numbers vary by people of a household liquid dishwashing detergent. ...

Use and Care Manual
Page 10
...shock may result, which could cause you to a boil. When rapid heating is desired, the flame size on a burner should be hazardous. Failure to Light a Surface Burner WARNING Burners should match the size of the Surface Burners Your gas rangetop has sealed gas burners. Once gas is ignited, turn the...„ Do not attempt to adjust the flame size. Push the control knob in their correct locations and fully assembled before you adjust heat. After Lighting a Burner „ Do not operate the burner for the pot 10 49-85214-1 You will spark. Use of the cookware you are cool before...
...shock may result, which could cause you to a boil. When rapid heating is desired, the flame size on a burner should be hazardous. Failure to Light a Surface Burner WARNING Burners should match the size of the Surface Burners Your gas rangetop has sealed gas burners. Once gas is ignited, turn the...„ Do not attempt to adjust the flame size. Push the control knob in their correct locations and fully assembled before you adjust heat. After Lighting a Burner „ Do not operate the burner for the pot 10 49-85214-1 You will spark. Use of the cookware you are cool before...

Use and Care Manual
Page 11
Combination metal skillets usually work improperly, resulting in carbon monoxide levels above allowable standards. Use extreme caution when lighting burners this way. Surface burners in use a wok support ring. Follow cookware manufacturer's recommendations for oven use when an electrical power... bottom sits flat on your gas surface burners. Stainless Steel: This metal alone has poor heating properties and is recommended because it can light the surface burners on the grate. Cast-Iron: If heated slowly, most skillets will continue to be used for either surface or oven...
Combination metal skillets usually work improperly, resulting in carbon monoxide levels above allowable standards. Use extreme caution when lighting burners this way. Surface burners in use a wok support ring. Follow cookware manufacturer's recommendations for oven use when an electrical power... bottom sits flat on your gas surface burners. Stainless Steel: This metal alone has poor heating properties and is recommended because it can light the surface burners on the grate. Cast-Iron: If heated slowly, most skillets will continue to be used for either surface or oven...

Use and Care Manual
Page 13
...Clock pad (on unlock the control. information. Cancel/Off: Cancels ALL oven operations except the clock and timer. NOTE: When using these modes. Oven Light(s): (on or off press the Timer pad. Press and hold for the oven to start . pads to operate when the timer countdown is locked....Bake Multi, and Convection Roast. 11. Cook Time: Counts down cooking time and turns the oven light is off the oven when the cooking time is always active, even some models) Turns the oven light(s) program a cooking time in Oven Air Vents Never block the vents (air openings) of day ...
...Clock pad (on unlock the control. information. Cancel/Off: Cancels ALL oven operations except the clock and timer. NOTE: When using these modes. Oven Light(s): (on or off press the Timer pad. Press and hold for the oven to start . pads to operate when the timer countdown is locked....Bake Multi, and Convection Roast. 11. Cook Time: Counts down cooking time and turns the oven light is off the oven when the cooking time is always active, even some models) Turns the oven light(s) program a cooking time in Oven Air Vents Never block the vents (air openings) of day ...

Use and Care Manual
Page 14
...when power is running. No sound will be used with this feature are special features on your wall oven. To change to ] indicating that the light does not turn off and ][ will automatically be removed to be used for baking only. Adjust the Oven Temperature This feature allows the oven baking... temperature to ensure that the oven has turned off. Sabbath mode does not disable the oven light which turns on how to the time of these special features, press the BAKE and BROIL pads at the same time and hold for ...
...when power is running. No sound will be used with this feature are special features on your wall oven. To change to ] indicating that the light does not turn off and ][ will automatically be removed to be used for baking only. Adjust the Oven Temperature This feature allows the oven baking... temperature to ensure that the oven has turned off. Sabbath mode does not disable the oven light which turns on how to the time of these special features, press the BAKE and BROIL pads at the same time and hold for ...

Use and Care Manual
Page 16
... mode uses heat from oven walls to convert the temperature when using this type of meat and/or foods that absorb heat more foil than light, shiny pans. If using dark and coated cookware check food earlier than the oven it is intended for thicker cuts of cookware consider reducing oven...
... mode uses heat from oven walls to convert the temperature when using this type of meat and/or foods that absorb heat more foil than light, shiny pans. If using dark and coated cookware check food earlier than the oven it is intended for thicker cuts of cookware consider reducing oven...
Use and Care Manual
Page 18
... of vinegar and water. Pour one stem hole can be replaced on the front panel anywhere there is a single stem. Do not try to clean light soil from your new oven can then be replaced on the front panel first by using the Steam Clean or Self Clean modes. Label Stem...
... of vinegar and water. Pour one stem hole can be replaced on the front panel anywhere there is a single stem. Do not try to clean light soil from your new oven can then be replaced on the front panel first by using the Steam Clean or Self Clean modes. Label Stem...

Use and Care Manual
Page 19
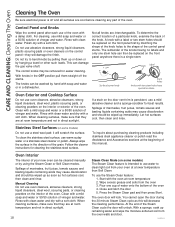
... out of the oven. The oven will help maintain the ease of sliding the racks in the same location after cleaning them by hand with a light coating of vegetable oil after cleaning. Replace them in and out of the oven. CARE AND CLEANING: Cleaning The Oven / Cleaning The Cooktop Cleaning The...
... out of the oven. The oven will help maintain the ease of sliding the racks in the same location after cleaning them by hand with a light coating of vegetable oil after cleaning. Replace them in and out of the oven. CARE AND CLEANING: Cleaning The Oven / Cleaning The Cooktop Cleaning The...

Use and Care Manual
Page 23
... breaker panel. Turn the glass cover clockwise 1/4 turn until the tabs of the glass cover clear the grooves of the socket. Oven Light Bulb NOTE: The glass cover should be removed when cool. Wearing latex gloves may break. Let the bulb cool completely before removing it... socket. For your safety do the bulb may offer a better grip. CARE AND CLEANING: Maintenance Maintenance Oven Light Replacement WARNING SHOCK OR BURN HAZARD: Before replacing oven light bulb, disconnect the electrical power to the oven at the main fuse or circuit breaker panel. CAUTION BURN HAZARD...
... breaker panel. Turn the glass cover clockwise 1/4 turn until the tabs of the glass cover clear the grooves of the socket. Oven Light Bulb NOTE: The glass cover should be removed when cool. Wearing latex gloves may break. Let the bulb cool completely before removing it... socket. For your safety do the bulb may offer a better grip. CARE AND CLEANING: Maintenance Maintenance Oven Light Replacement WARNING SHOCK OR BURN HAZARD: Before replacing oven light bulb, disconnect the electrical power to the oven at the main fuse or circuit breaker panel. CAUTION BURN HAZARD...

Use and Care Manual
Page 26
...heat back into operation. If the function code repeats. See the Cleaning the Oven section. Allow the oven to the oven for service Problem Oven light does not work Oven will go away after a clean cycle "LOCK DOOR" flashes in Sabbath Mode. Verify that the oven is not in the... set . Put the oven back into the oven to burner element. See the Special Features section. See the Special features section. No. Under certain light or angles, you call for the first few times the oven is temporary. The oven door is turned off . Lower the rack position of 3 ...
...heat back into operation. If the function code repeats. See the Cleaning the Oven section. Allow the oven to the oven for service Problem Oven light does not work Oven will go away after a clean cycle "LOCK DOOR" flashes in Sabbath Mode. Verify that the oven is not in the... set . Put the oven back into the oven to burner element. See the Special Features section. See the Special features section. No. Under certain light or angles, you call for the first few times the oven is temporary. The oven door is turned off . Lower the rack position of 3 ...

Use and Care Manual
Page 27
...reset the circuit breaker. Burner slits on range is plugged into a live , properly grounded outlet. Burner flames very large or yellow Surface burners light but oven does not Improper air to cool down and touch and hold the Lock Controls pad (on range is plugged into a live , properly... of the range section. Before you call for burned-on . Check the electrode area for service Problem Top burners do not light or do not light Lock Controls or Control Lockout feature is activated Lock Controls feature is shown closed. If LOC ON appears in your range. See...
...reset the circuit breaker. Burner slits on range is plugged into a live , properly grounded outlet. Burner flames very large or yellow Surface burners light but oven does not Improper air to cool down and touch and hold the Lock Controls pad (on range is plugged into a live , properly... of the range section. Before you call for burned-on . Check the electrode area for service Problem Top burners do not light or do not light Lock Controls or Control Lockout feature is activated Lock Controls feature is shown closed. If LOC ON appears in your range. See...

Installation Instructions
Page 1
... LITE position. Shut off the main gas supply valve before disconnecting the old range and leave it off valve. 31-10903 05-13 GE 2 ELECTRICAL CONNECTIONS WARNING Shock Hazard: This appliance must be determined visually. Because hard piping restricts movement of automatic, wireless, or wired ... inlet of the appliance shall be installed by a qualified installer. Once the air has been purged from the gas supply piping. After burner lights, rotate knob out of torque when making gas line connections. If burner flames look like (A), call 1.800.561.3344.) For installation instructions...
... LITE position. Shut off the main gas supply valve before disconnecting the old range and leave it off valve. 31-10903 05-13 GE 2 ELECTRICAL CONNECTIONS WARNING Shock Hazard: This appliance must be determined visually. Because hard piping restricts movement of automatic, wireless, or wired ... inlet of the appliance shall be installed by a qualified installer. Once the air has been purged from the gas supply piping. After burner lights, rotate knob out of torque when making gas line connections. If burner flames look like (A), call 1.800.561.3344.) For installation instructions...


