
Use and Care Manual
Page 1
... Broiling 14 Broiling Guide 15 Oven Control 10, 11 Power Outage 9, 12, 16 Preheating 13 Sabbath Feature 19 Special Features 18 Surface Cooking 8, 9 Thermostat Adjustment 17 Care and Cleaning Air Vents 25 Burner Assemblies 20-21 Burner Caps and Heads . . . . . .22 Burner Grates 21 Control Panel and Knobs . . . . .25 Cooktop Surface 23 Drip Pans 20 Lift-Off Oven Door 24 Lift-Up Cooktop 23 Oven Bottom 24 Oven Interior 26 Racks 26 Removable Broiler Drawer . . . .25 Stainless Steel Surfaces 23 Installation Instructions 27-42 Anti-Tip Device 31, 41, 42 Connect the Range to Gas...
... Broiling 14 Broiling Guide 15 Oven Control 10, 11 Power Outage 9, 12, 16 Preheating 13 Sabbath Feature 19 Special Features 18 Surface Cooking 8, 9 Thermostat Adjustment 17 Care and Cleaning Air Vents 25 Burner Assemblies 20-21 Burner Caps and Heads . . . . . .22 Burner Grates 21 Control Panel and Knobs . . . . .25 Cooktop Surface 23 Drip Pans 20 Lift-Off Oven Door 24 Lift-Up Cooktop 23 Oven Bottom 24 Oven Interior 26 Racks 26 Removable Broiler Drawer . . . .25 Stainless Steel Surfaces 23 Installation Instructions 27-42 Anti-Tip Device 31, 41, 42 Connect the Range to Gas...
Use and Care Manual
Page 3
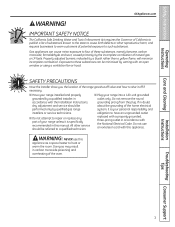
... repair or replace any part of the home electrical system, it is your range unless it off if necessary. ■ Have your range into a 120-volt grounded outlet only. Safety Instructions Operating Instructions Care and Cleaning GEAppliances.com WARNING! Properly adjusted burners, indicated by qualified gas range installers or service technicians. ■ Do not attempt to heat or warm the room. SAFETY PRECAUTIONS Have the installer show you the location of the oven...
... repair or replace any part of the home electrical system, it is your range unless it off if necessary. ■ Have your range into a 120-volt grounded outlet only. Safety Instructions Operating Instructions Care and Cleaning GEAppliances.com WARNING! Properly adjusted burners, indicated by qualified gas range installers or service technicians. ■ Do not attempt to heat or warm the room. SAFETY PRECAUTIONS Have the installer show you the location of the oven...
Use and Care Manual
Page 4
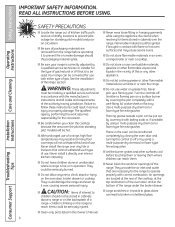
... let cooking grease or other surfaces cool before operating it with a well-fitting lid, cookie sheet or flat tray. Operating Instructions Care and Cleaning Installation Instructions SAFETY PRECAUTIONS ■ Locate the range out of kitchen traffic path and out of drafty locations to prevent pilot outage (on standing pilot models) and poor air circulation. ■ Be sure all codes and requirements of a range-children climbing on grease fires. Never pick up a flaming pan...
... let cooking grease or other surfaces cool before operating it with a well-fitting lid, cookie sheet or flat tray. Operating Instructions Care and Cleaning Installation Instructions SAFETY PRECAUTIONS ■ Locate the range out of kitchen traffic path and out of drafty locations to prevent pilot outage (on standing pilot models) and poor air circulation. ■ Be sure all codes and requirements of a range-children climbing on grease fires. Never pick up a flaming pan...
Use and Care Manual
Page 5
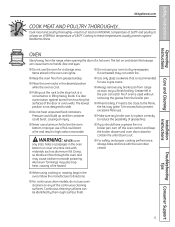
... the range when opening the door of 180°F. Pressure could build up and the container could start a fire and result in the oven, follow the manufacturer's directions. ■ For continuous clean models, do not use your oven to slide. ■ Do not heat unopened food containers. Aluminum foil linings may also trap heat, causing a fire hazard. ■ If you finish broiling. Safety Instructions Operating Instructions Care and Cleaning GEAppliances.com COOK...
... the range when opening the door of 180°F. Pressure could build up and the container could start a fire and result in the oven, follow the manufacturer's directions. ■ For continuous clean models, do not use your oven to slide. ■ Do not heat unopened food containers. Aluminum foil linings may also trap heat, causing a fire hazard. ■ If you finish broiling. Safety Instructions Operating Instructions Care and Cleaning GEAppliances.com COOK...
Use and Care Manual
Page 6
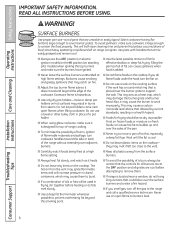
... the cooktop- Safety Instructions Operating Instructions Care and Cleaning IMPORTANT SAFETY INFORMATION. Do not let pot holders come near a window, do flame foods under the hood, turn off the gas to move a pan of the pan. ■ Never try to the range and call a qualified service technician. This may damage the burner grate and burner head. Never use the LITE position (on electric ignition models) or the HI position (on the cooking surface...
... the cooktop- Safety Instructions Operating Instructions Care and Cleaning IMPORTANT SAFETY INFORMATION. Do not let pot holders come near a window, do flame foods under the hood, turn off the gas to move a pan of the pan. ■ Never try to the range and call a qualified service technician. This may damage the burner grate and burner head. Never use the LITE position (on electric ignition models) or the HI position (on the cooking surface...
Use and Care Manual
Page 7
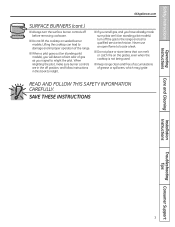
... pilot. When relighting the pilot, make sure burner controls are in the off position, and follow instructions in this book to relight. ■ If you smell gas, and you will detect a faint odor of grease or spillovers, which may ignite. Safety Instructions Operating Instructions GEAppliances.com SURFACE BURNERS (cont.) ■ Always turn off the gas to the range and call a qualified service technician. SAVE THESE INSTRUCTIONS Care and Cleaning Installation Instructions Troubleshooting Tips Consumer Support...
... pilot. When relighting the pilot, make sure burner controls are in the off position, and follow instructions in this book to relight. ■ If you smell gas, and you will detect a faint odor of grease or spillovers, which may ignite. Safety Instructions Operating Instructions GEAppliances.com SURFACE BURNERS (cont.) ■ Always turn off the gas to the range and call a qualified service technician. SAVE THESE INSTRUCTIONS Care and Cleaning Installation Instructions Troubleshooting Tips Consumer Support...

Use and Care Manual
Page 10
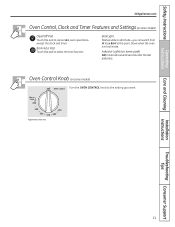
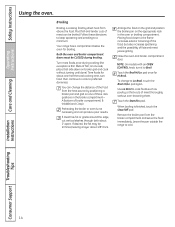
... Clock Pad To set for the timer. Safety Instructions Using the oven controls. Operating Instructions Care and Cleaning Installation Instructions Troubleshooting Tips Oven Control, Clock and Timer Features and Settings (on . Display Shows the time of day will increase the time or temperature by larger amounts. 10 Consumer Support The time of day, oven temperature, whether the oven is first turned on some models) Touch this pad will flash in edit mode-you can change the oven temperature at this point. Bake Light Flashes while in bake mode. If the function error code...
... Clock Pad To set for the timer. Safety Instructions Using the oven controls. Operating Instructions Care and Cleaning Installation Instructions Troubleshooting Tips Oven Control, Clock and Timer Features and Settings (on . Display Shows the time of day will increase the time or temperature by larger amounts. 10 Consumer Support The time of day, oven temperature, whether the oven is first turned on some models) Touch this pad will flash in edit mode-you can change the oven temperature at this point. Bake Light Flashes while in bake mode. If the function error code...
Use and Care Manual
Page 11
Appearance may vary. Indicator Lights (on some models) Clear/Off Pad Touch this pad to cancel ALL oven operations except the clock and timer. Care and Cleaning Installation Instructions Troubleshooting Tips Consumer Support 11 Safety Instructions Operating Instructions GEAppliances.com Oven Control, Clock and Timer Features and Settings (on some pads) Edit mode lasts several seconds after the last pad press. Broil Light Flashes while in broil mode. Oven Control Knob (on some models) Turn the OVEN CONTROL knob to select the broil function. Broil Hi/Lo Pad Touch this ...
Appearance may vary. Indicator Lights (on some models) Clear/Off Pad Touch this pad to cancel ALL oven operations except the clock and timer. Care and Cleaning Installation Instructions Troubleshooting Tips Consumer Support 11 Safety Instructions Operating Instructions GEAppliances.com Oven Control, Clock and Timer Features and Settings (on some pads) Edit mode lasts several seconds after the last pad press. Broil Light Flashes while in broil mode. Oven Control Knob (on some models) Turn the OVEN CONTROL knob to select the broil function. Broil Hi/Lo Pad Touch this ...
Use and Care Manual
Page 12
... rack is hot. Gas will not tilt. Installation Instructions Plastic items on the lower control panel to the vent. Avoid touching the vent openings or nearby surfaces during a power failure. Consumer Support Oven Light (on some models) Use the switch on the cooktop may melt if left too close to 12 turn the oven on . The oven has 5 rack positions. After the oven reaches the selected temperature, the oven burner cycles-off and cannot be lit during oven or broiler operation...
... rack is hot. Gas will not tilt. Installation Instructions Plastic items on the lower control panel to the vent. Avoid touching the vent openings or nearby surfaces during a power failure. Consumer Support Oven Light (on some models) Use the switch on the cooktop may melt if left too close to 12 turn the oven on . The oven has 5 rack positions. After the oven reaches the selected temperature, the oven burner cycles-off and cannot be lit during oven or broiler operation...
Use and Care Manual
Page 13
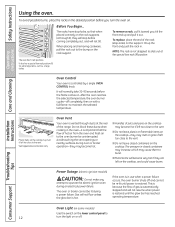
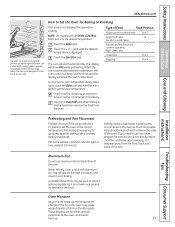
... droplets to Set the Oven for Baking or Roasting Your oven is necessary for open-door cooking. Oven Moisture As your oven heats up . 13 Consumer Support pads until the desired temperature is needed, for example, when cooking a large turkey. The display will show PRE while preheating. Care and Cleaning Installation Instructions Troubleshooting Tips Preheating and Pan Placement Preheat the oven if the recipe calls for doneness at the correct temperature. Never entirely cover a rack with an OVEN CONTROL knob, turn it . These...
... droplets to Set the Oven for Baking or Roasting Your oven is necessary for open-door cooking. Oven Moisture As your oven heats up . 13 Consumer Support pads until the desired temperature is needed, for example, when cooking a large turkey. The display will show PRE while preheating. Care and Cleaning Installation Instructions Troubleshooting Tips Preheating and Pan Placement Preheat the oven if the recipe calls for doneness at the correct temperature. Never entirely cover a rack with an OVEN CONTROL knob, turn it . These...
Use and Care Manual
Page 14
... oven and broiler compartment door. Most fish and tender cuts of the food from the heat source by direct heat from the broiler compartment and serve the food immediately. Preheating the broiler or oven is finished, touch the Clear/Off pad. NOTE: On models with an OVEN CONTROL knob, turn food, then continue to cook to Broil. Remove the broiler pan from above the food. Both the oven and broiler compartment doors must be broiled. Broiling Broiling...
... oven and broiler compartment door. Most fish and tender cuts of the food from the heat source by direct heat from the broiler compartment and serve the food immediately. Preheating the broiler or oven is finished, touch the Clear/Off pad. NOTE: On models with an OVEN CONTROL knob, turn food, then continue to cook to Broil. Remove the broiler pan from above the food. Both the oven and broiler compartment doors must be broiled. Broiling Broiling...
Use and Care Manual
Page 18
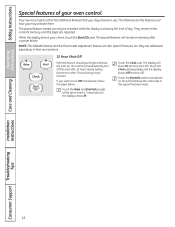
... the Clock pad repeatedly until the display shows Off (no shut-off the oven after 12 hours during a broil function. Safety Instructions Operating Instructions Special features of day. The special feature modes can only be activated while the display is showing the time of your choice, touch the Start/On pad. They remain in the control's memory until the display shows SF. Care and Cleaning Installation Instructions Troubleshooting Tips Consumer Support 18 Touch the Bake and Broil...
... the Clock pad repeatedly until the display shows Off (no shut-off the oven after 12 hours during a broil function. Safety Instructions Operating Instructions Special features of day. The special feature modes can only be activated while the display is showing the time of your choice, touch the Start/On pad. They remain in the control's memory until the display shows SF. Care and Cleaning Installation Instructions Troubleshooting Tips Consumer Support 18 Touch the Bake and Broil...
Use and Care Manual
Page 19
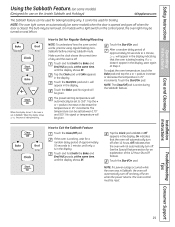
... display shows SF. See the Special Features section for broiling. Installation Instructions Troubleshooting Tips Consumer Support 19 Safety Instructions Operating Instructions Care and Cleaning ⊃ ⊃ ⊃ Using the Sabbath Feature. (on some models) when the door is opened and goes off . How to 1 minute, until SAb appears in Sabbath. If the oven is baking/roasting. Tap the Clock pad until only ⊃ is set in the display. After a random delay period of day and the oven is baking...
... display shows SF. See the Special Features section for broiling. Installation Instructions Troubleshooting Tips Consumer Support 19 Safety Instructions Operating Instructions Care and Cleaning ⊃ ⊃ ⊃ Using the Sabbath Feature. (on some models) when the door is opened and goes off . How to 1 minute, until SAb appears in Sabbath. If the oven is baking/roasting. Tap the Clock pad until only ⊃ is set in the display. After a random delay period of day and the oven is baking...
Use and Care Manual
Page 20
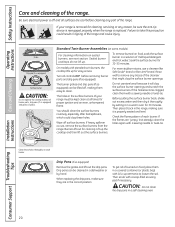
... ignition and an even, unhampered flame. Check the flame pattern of the range. Installation Instructions Troubleshooting Tips Consumer Support 20 Before putting the surface burner back, shake out excess water and then dry it thoroughly by hand. On models with 1/4 cup ammonia to remove any reason, be kept clean at all controls OFF before cleaning any part of each burner. If the flames are in a solution of the range. Do not use...
... ignition and an even, unhampered flame. Check the flame pattern of the range. Installation Instructions Troubleshooting Tips Consumer Support 20 Before putting the surface burner back, shake out excess water and then dry it thoroughly by hand. On models with 1/4 cup ammonia to remove any reason, be kept clean at all controls OFF before cleaning any part of each burner. If the flames are in a solution of the range. Do not use...
Use and Care Manual
Page 26
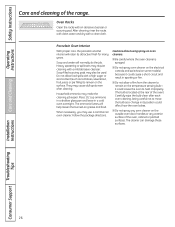
... abrasive cleanser. Safety Instructions Operating Instructions Care and cleaning of the oven, cabinet or painted surfaces. Care and Cleaning Installation Instructions Troubleshooting Tips Consumer Support 26 Do not allow a film from the cleaner to remain on the temperature sensing bulb- They may cause dull spots even after each oven cleaning, being careful not to heat improperly. (The bulb is sprayed. ■ Do not spray oven cleaner on the electrical controls and switches (on some models) because it...
... abrasive cleanser. Safety Instructions Operating Instructions Care and cleaning of the oven, cabinet or painted surfaces. Care and Cleaning Installation Instructions Troubleshooting Tips Consumer Support 26 Do not allow a film from the cleaner to remain on the temperature sensing bulb- They may cause dull spots even after each oven cleaning, being careful not to heat improperly. (The bulb is sprayed. ■ Do not spray oven cleaner on the electrical controls and switches (on some models) because it...
Use and Care Manual
Page 29
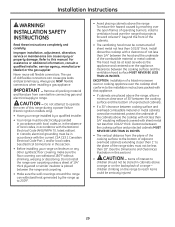
... Electrical Code (ANSI/NFPA 70, latest edition). EXCEPTION: Installation of a listed microwave oven or cooking appliance over the appliance. Improper installation, adjustment, alteration, service or maintenance can withstand 180°F without shrinking, warping or discoloring. Do not attempt to range. To reduce the hazard caused by reaching over the open flames of operating burners, install a ventilation hood over carpeting unless a sheet of old flexible connectors can withstand heat...
... Electrical Code (ANSI/NFPA 70, latest edition). EXCEPTION: Installation of a listed microwave oven or cooking appliance over the appliance. Improper installation, adjustment, alteration, service or maintenance can withstand 180°F without shrinking, warping or discoloring. Do not attempt to range. To reduce the hazard caused by reaching over the open flames of operating burners, install a ventilation hood over carpeting unless a sheet of old flexible connectors can withstand heat...
Use and Care Manual
Page 32
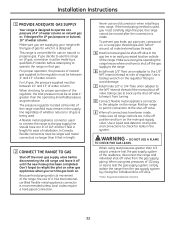
... location outside of whether natural or LP gas is recommended unless local codes require a hard-piped connection. In Canada, flexible connectors must remain in the supply line regardless of the range. Because hard piping restricts movement of the range, the use this range on LP gas, conversion must be moved after the connection is designed to pressure test the gas supply system of the manual shut-off valve, taking care to operate the range...
... location outside of whether natural or LP gas is recommended unless local codes require a hard-piped connection. In Canada, flexible connectors must remain in the supply line regardless of the range. Because hard piping restricts movement of the range, the use this range on LP gas, conversion must be moved after the connection is designed to pressure test the gas supply system of the manual shut-off valve, taking care to operate the range...
Use and Care Manual
Page 42
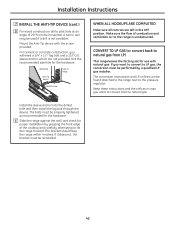
... the flow of the cooktop and carefully attempting to natural gas. For cement or concrete construction, you want to convert to the pressure regulator. Drill the recommended size hole for proper installation by a qualified LP gas installer. CONVERT TO LP GAS (or convert back to the range is not available. The bolts must be used if a drill is unobstructed. The conversion instructions and LP orifices can be found attached...
... the flow of the cooktop and carefully attempting to natural gas. For cement or concrete construction, you want to convert to the pressure regulator. Drill the recommended size hole for proper installation by a qualified LP gas installer. CONVERT TO LP GAS (or convert back to the range is not available. The bolts must be used if a drill is unobstructed. The conversion instructions and LP orifices can be found attached...
Use and Care Manual
Page 43
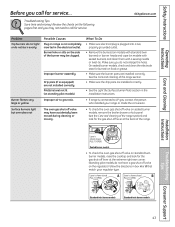
... TO OPEN. PULL TO OPEN. Drip pans (if so equipped) are installed correctly. • See the Light the Surface Burner Pilots section in the Installation Instructions. Safety Instructions Operating Instructions Care and Cleaning Before you call for service. Troubleshooting Tips Save time and money! Make sure you may have a gas shut-off valve may not need to call for service... Burner flames very large or yellow Improper air to LP gas, contact the person who installed your regulator type. Review the...
... TO OPEN. PULL TO OPEN. Drip pans (if so equipped) are installed correctly. • See the Light the Surface Burner Pilots section in the Installation Instructions. Safety Instructions Operating Instructions Care and Cleaning Before you call for service. Troubleshooting Tips Save time and money! Make sure you may have a gas shut-off valve may not need to call for service... Burner flames very large or yellow Improper air to LP gas, contact the person who installed your regulator type. Review the...
Use and Care Manual
Page 44
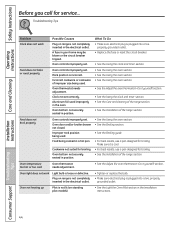
.... Installation Instructions Troubleshooting Tips Consumer Support 44 section. • See the Using the clock and timer section. • See the Care and cleaning of the range section. • See the Installation of improper size being cooked in the Installation Instructions. Oven temperature too hot or too cold Oven thermostat needs adjustment. • See the Adjust the oven thermostat-Do it yourself! Plug on standing pilot models). • See the Light the Oven Pilot section in a hot pan. Food does not broil properly Oven controls improperly set correctly. Oven...
.... Installation Instructions Troubleshooting Tips Consumer Support 44 section. • See the Using the clock and timer section. • See the Care and cleaning of the range section. • See the Installation of improper size being cooked in the Installation Instructions. Oven temperature too hot or too cold Oven thermostat needs adjustment. • See the Adjust the oven thermostat-Do it yourself! Plug on standing pilot models). • See the Light the Oven Pilot section in a hot pan. Food does not broil properly Oven controls improperly set correctly. Oven...


