
Use and Care Manual
Page 1
... Broiling 14 Broiling Guide 15 Oven Control 10, 11 Power Outage 12 Preheating 13 Sabbath Feature 19 Special Features 18 Surface Cooking 8, 9 Thermostat Adjustment 17 Care and Cleaning Air Vents 25 Burner Assemblies 20-21 Burner Caps and Heads . . . . . .22 Burner Grates 21 Control Panel and Knobs . . . . .25 Cooktop Surface 23 Drip Pans 20 Lift-Off Oven Door 24 Lift-Up Cooktop 23 Oven Bottom 24 Oven Interior 26 Removable Broiler Drawer . . . .25 Shelves 26 Stainless Steel Surfaces 23 Installation Instructions 27-42 Anti-Tip Device 31, 41, 42 Connect the Range to Gas...
... Broiling 14 Broiling Guide 15 Oven Control 10, 11 Power Outage 12 Preheating 13 Sabbath Feature 19 Special Features 18 Surface Cooking 8, 9 Thermostat Adjustment 17 Care and Cleaning Air Vents 25 Burner Assemblies 20-21 Burner Caps and Heads . . . . . .22 Burner Grates 21 Control Panel and Knobs . . . . .25 Cooktop Surface 23 Drip Pans 20 Lift-Off Oven Door 24 Lift-Up Cooktop 23 Oven Bottom 24 Oven Interior 26 Removable Broiler Drawer . . . .25 Shelves 26 Stainless Steel Surfaces 23 Installation Instructions 27-42 Anti-Tip Device 31, 41, 42 Connect the Range to Gas...
Use and Care Manual
Page 3
... shut it off valve and how to such substances. Any adjustment and service should be performed only by venting with an open window or using a ventilation fan or hood. Installation Instructions Troubleshooting Tips Consumer Support 3 SAFETY PRECAUTIONS Have the installer show you the location of natural gas or LP fuels. Do not remove the round grounding prong from the plug. WARNING: NEVER use an extension cord with the National Electrical Code. Do not use this appliance. Properly adjusted burners, indicated...
... shut it off valve and how to such substances. Any adjustment and service should be performed only by venting with an open window or using a ventilation fan or hood. Installation Instructions Troubleshooting Tips Consumer Support 3 SAFETY PRECAUTIONS Have the installer show you the location of natural gas or LP fuels. Do not remove the round grounding prong from the plug. WARNING: NEVER use an extension cord with the National Electrical Code. Do not use this appliance. Properly adjusted burners, indicated...
Use and Care Manual
Page 4
... correctly adjusted by closing the oven door and turning the control to off . They could damage the range and even tip it with the manufacturer's instructions and all packaging materials are removed from the range before touching them or leaving them . ■ Never block the vents (air openings) of gas (natural or LP) that cannot withstand such type of gas. Smother a flaming pan on standing pilot models) and poor air circulation...
... correctly adjusted by closing the oven door and turning the control to off . They could damage the range and even tip it with the manufacturer's instructions and all packaging materials are removed from the range before touching them or leaving them . ■ Never block the vents (air openings) of gas (natural or LP) that cannot withstand such type of gas. Smother a flaming pan on standing pilot models) and poor air circulation...
Use and Care Manual
Page 5
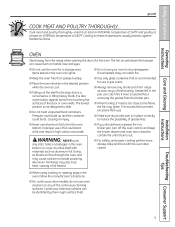
... safety and proper cooking performance, always bake and broil with the oven door closed. ■ When using cooking or roasting bags in the oven can catch fire. ■ Keep the oven free from the range when opening the door of 180°F. Safety Instructions Operating Instructions Care and Cleaning ge.com COOK MEAT AND POULTRY THOROUGHLY... If overheated, they can ignite. ■ Do not use of the continuous cleaning surfaces. Pressure could build up and...
... safety and proper cooking performance, always bake and broil with the oven door closed. ■ When using cooking or roasting bags in the oven can catch fire. ■ Keep the oven free from the range when opening the door of 180°F. Safety Instructions Operating Instructions Care and Cleaning ge.com COOK MEAT AND POULTRY THOROUGHLY... If overheated, they can ignite. ■ Do not use of the continuous cleaning surfaces. Pressure could build up and...

Use and Care Manual
Page 6
... left too close to move a pan of fat can cause hot fat to bubble up and over the burner grate to the range and call a qualified service technician. Select cookware having flat bottoms large enough to work improperly. Installation Instructions Troubleshooting Tips Consumer Support 6 Wait until the fat is added. ■ Never leave the surface burners unattended at a high flame setting. ■ Keep all plastics away...
... left too close to move a pan of fat can cause hot fat to bubble up and over the burner grate to the range and call a qualified service technician. Select cookware having flat bottoms large enough to work improperly. Installation Instructions Troubleshooting Tips Consumer Support 6 Wait until the fat is added. ■ Never leave the surface burners unattended at a high flame setting. ■ Keep all plastics away...
Use and Care Manual
Page 7
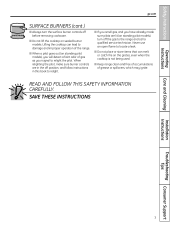
... spillovers, which may ignite. SAVE THESE INSTRUCTIONS Care and Cleaning Installation Instructions Troubleshooting Tips Consumer Support 7 Lifting the cooktop can melt or catch fire on standing pilot models), you have already made sure pilots are lit (on standing pilot models), turn the surface burner controls off the gas to locate a leak. ■ Do not place or store items that can lead to damage and improper operation of the range. ■ When a pilot goes out (on...
... spillovers, which may ignite. SAVE THESE INSTRUCTIONS Care and Cleaning Installation Instructions Troubleshooting Tips Consumer Support 7 Lifting the cooktop can melt or catch fire on standing pilot models), you have already made sure pilots are lit (on standing pilot models), turn the surface burner controls off the gas to locate a leak. ■ Do not place or store items that can lead to damage and improper operation of the range. ■ When a pilot goes out (on...
Use and Care Manual
Page 10
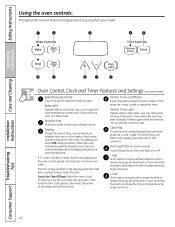
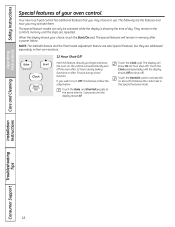
... manual, features and appearance may vary from your model. The time of day, oven temperature, whether the oven is reset. If "F- The display will show PRE while preheating. Put the oven back into operation. If the function error code repeats, disconnect the power to increase the time or temperature by larger amounts. + Pad Short taps to turn the oven light on some models) Bake/Temp Recall Pad Touch this point. Operating Instructions Care and Cleaning Installation Instructions Troubleshooting Tips Oven Control, Clock and Timer Features and Settings (on . Start/On...
... manual, features and appearance may vary from your model. The time of day, oven temperature, whether the oven is reset. If "F- The display will show PRE while preheating. Put the oven back into operation. If the function error code repeats, disconnect the power to increase the time or temperature by larger amounts. + Pad Short taps to turn the oven light on some models) Bake/Temp Recall Pad Touch this point. Operating Instructions Care and Cleaning Installation Instructions Troubleshooting Tips Oven Control, Clock and Timer Features and Settings (on . Start/On...

Use and Care Manual
Page 11
.../Lo Pad Touch this pad to cancel ALL oven operations except the clock and timer. Indicator Lights (on some pads) Edit mode lasts several seconds after the last pad press. Oven Control Knob (on some models) Turn the OVEN CONTROL knob to Lo Broil at this point. Glows when the oven is in edit mode-you can switch from Hi to the setting you want. Care and Cleaning Installation Instructions Troubleshooting Tips Consumer Support 11 Broil Light Flashes while in broil mode.
.../Lo Pad Touch this pad to cancel ALL oven operations except the clock and timer. Indicator Lights (on some pads) Edit mode lasts several seconds after the last pad press. Oven Control Knob (on some models) Turn the OVEN CONTROL knob to Lo Broil at this point. Glows when the oven is in edit mode-you can switch from Hi to the setting you want. Care and Cleaning Installation Instructions Troubleshooting Tips Consumer Support 11 Broil Light Flashes while in broil mode.
Use and Care Manual
Page 12
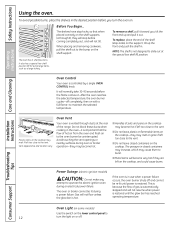
.... Before You Begin... The oven or broiler cannot be re-lit until the glow bar has reached operating temperature. Consumer Support Oven Light (on some models) Use the switch on the lower control panel to 12 turn the oven on the cooktop-they may melt or ignite if left on the cooktop. Installation Instructions Plastic items on the cooktop may cause them to slide out at the rear of gas is important that when...
.... Before You Begin... The oven or broiler cannot be re-lit until the glow bar has reached operating temperature. Consumer Support Oven Light (on some models) Use the switch on the lower control panel to 12 turn the oven on the cooktop-they may melt or ignite if left on the cooktop. Installation Instructions Plastic items on the cooktop may cause them to slide out at the rear of gas is important that when...
Use and Care Manual
Page 13
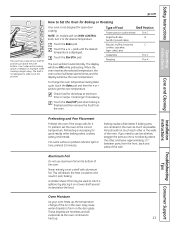
... breads. Care and Cleaning Installation Instructions Troubleshooting Tips Preheating and Pan Placement Preheat the oven if the recipe calls for it on the door glass. pads to the desired temperature. Aluminum Foil Do not use two shelves, stagger the pans so one is needed, for open-door cooking. Oven Moisture As your oven heats up . 13 Consumer Support Touch the Start/On pad. If you need to Set the Oven for Baking or Roasting Your oven is necessary...
... breads. Care and Cleaning Installation Instructions Troubleshooting Tips Preheating and Pan Placement Preheat the oven if the recipe calls for it on the door glass. pads to the desired temperature. Aluminum Foil Do not use two shelves, stagger the pans so one is needed, for open-door cooking. Oven Moisture As your oven heats up . 13 Consumer Support Touch the Start/On pad. If you need to Set the Oven for Baking or Roasting Your oven is necessary...
Use and Care Manual
Page 14
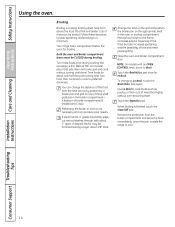
... the oven and broiler compartment door. NOTE: On models with an OVEN CONTROL knob, turn food, then continue to cook to Lo Broil, touch the Broil Hi/Lo pad again. Use Lo Broil to cook foods such as poultry or thick cuts of meat thoroughly without turning until done). Remove the broiler pan from above the food. Both the oven and broiler compartment doors must be trimmed, leaving a layer about 1/8″ thick. Time foods...
... the oven and broiler compartment door. NOTE: On models with an OVEN CONTROL knob, turn food, then continue to cook to Lo Broil, touch the Broil Hi/Lo pad again. Use Lo Broil to cook foods such as poultry or thick cuts of meat thoroughly without turning until done). Remove the broiler pan from above the food. Both the oven and broiler compartment doors must be trimmed, leaving a layer about 1/8″ thick. Time foods...
Use and Care Manual
Page 18
... may activate them. Touch the Start/On pad to use. When the display shows your oven control. Touch the Clock pad repeatedly until the display shows SF. NOTE: The Sabbath feature and the Thermostat Adjustment feature are also Special Features, but they are addressed separately in memory after 3 hours during a broil function. The following are repeated. Touch the Clock pad. Care and Cleaning Installation Instructions Troubleshooting Tips Consumer Support 18 Your new touch pad...
... may activate them. Touch the Start/On pad to use. When the display shows your oven control. Touch the Clock pad repeatedly until the display shows SF. NOTE: The Sabbath feature and the Thermostat Adjustment feature are also Special Features, but they are addressed separately in memory after 3 hours during a broil function. The following are repeated. Touch the Clock pad. Care and Cleaning Installation Instructions Troubleshooting Tips Consumer Support 18 Your new touch pad...
Use and Care Manual
Page 19
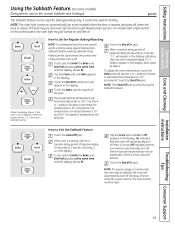
... Sabbath and Holidays) ge.com The Sabbath feature can be given. How to increase or decrease the temperature in the display. Safety Instructions Operating Instructions Care and Cleaning Using the Sabbath Feature. (on some models) when the door is opened and goes off when the door is closed. NOTE: The oven light comes on automatically (on some models) (Designed for broiling. When the display shows ⊃ the oven is cooking, wait for baking/roasting only. Tap the Clock...
... Sabbath and Holidays) ge.com The Sabbath feature can be given. How to increase or decrease the temperature in the display. Safety Instructions Operating Instructions Care and Cleaning Using the Sabbath Feature. (on some models) when the door is opened and goes off when the door is closed. NOTE: The oven light comes on automatically (on some models) (Designed for broiling. When the display shows ⊃ the oven is cooking, wait for baking/roasting only. Tap the Clock...
Use and Care Manual
Page 20
... clog the surface burner openings and scratch the surface burners. Lift up . Do not use a cleanser like Soft Scrub® brand or Bon Ami® brand. Safety Instructions Operating Instructions Care and Cleaning Care and cleaning of mild liquid detergent and hot water. Be sure electrical power is properly seated and level. If your range must be sure the anti-tip device is re-engaged properly when the range is removed for...
... clog the surface burner openings and scratch the surface burners. Lift up . Do not use a cleanser like Soft Scrub® brand or Bon Ami® brand. Safety Instructions Operating Instructions Care and Cleaning Care and cleaning of mild liquid detergent and hot water. Be sure electrical power is properly seated and level. If your range must be sure the anti-tip device is re-engaged properly when the range is removed for...
Use and Care Manual
Page 21
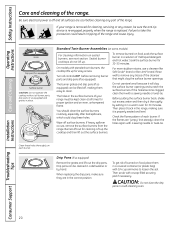
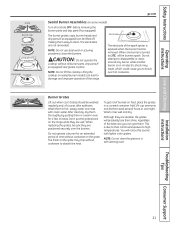
... this sooner with clean water. Installation Instructions Troubleshooting Tips Consumer Support 21 Safety Instructions Operating Instructions Care and Cleaning Grate Burner cap Burner head Drip pan (if so equipped) Electrode Cooktop ge.com Sealed Burner Assemblies (on some models) Turn all burner parts, drip pans (if so equipped) and grates in place. When one burner is turned to disassemble or clean around any burner while another burner is on. Do not attempt to LITE, all the burners spark. An electric shock may...
... this sooner with clean water. Installation Instructions Troubleshooting Tips Consumer Support 21 Safety Instructions Operating Instructions Care and Cleaning Grate Burner cap Burner head Drip pan (if so equipped) Electrode Cooktop ge.com Sealed Burner Assemblies (on some models) Turn all burner parts, drip pans (if so equipped) and grates in place. When one burner is turned to disassemble or clean around any burner while another burner is on. Do not attempt to LITE, all the burners spark. An electric shock may...
Use and Care Manual
Page 26
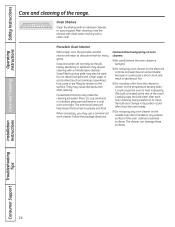
... electrical controls and switches (on some models) because it could cause the oven to heat improperly. (The bulb is located at the rear of the oven.) Carefully wipe the bulb clean after cleaning. The ammonia fumes will normally do the job. it could affect how the oven bakes. ■ Do not spray any oven cleaner on the surface. Oven Shelves Clean the shelves with a clean cloth. Heavy spattering or spillovers may require cleaning...
... electrical controls and switches (on some models) because it could cause the oven to heat improperly. (The bulb is located at the rear of the oven.) Carefully wipe the bulb clean after cleaning. The ammonia fumes will normally do the job. it could affect how the oven bakes. ■ Do not spray any oven cleaner on the surface. Oven Shelves Clean the shelves with a clean cloth. Heavy spattering or spillovers may require cleaning...
Use and Care Manual
Page 29
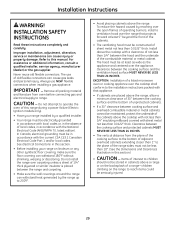
... these instructions completely and carefully. Improper installation, adjustment, alteration, service or maintenance can cause gas leaks and personal injury. To reduce the hazard caused by a qualified installer. • Your range must not be electrically grounded in accordance with local codes or, in accordance with sheet metal not less than 1/4″ between the cooking surface and the ventilation hood surface MUST NEVER BE LESS THAN 24 INCHES. Installation Instructions...
... these instructions completely and carefully. Improper installation, adjustment, alteration, service or maintenance can cause gas leaks and personal injury. To reduce the hazard caused by a qualified installer. • Your range must not be electrically grounded in accordance with local codes or, in accordance with sheet metal not less than 1/4″ between the cooking surface and the ventilation hood surface MUST NEVER BE LESS THAN 24 INCHES. Installation Instructions...
Use and Care Manual
Page 32
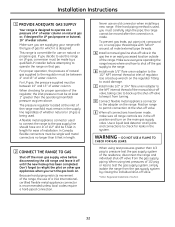
... pressure of natural gas supplied to the regulator must be between 10″ and 13″ of water column. Never use on the main gas supply valve. If the hard piping method is made. A Install a manual gas line shut-off the gas supply to the range. Make sure everyone operating the range knows where and how to shut off valve in the gas line in an easily accessed location outside of the manual shut-off valve, taking care...
... pressure of natural gas supplied to the regulator must be between 10″ and 13″ of water column. Never use on the main gas supply valve. If the hard piping method is made. A Install a manual gas line shut-off the gas supply to the range. Make sure everyone operating the range knows where and how to shut off valve in the gas line in an easily accessed location outside of the manual shut-off valve, taking care...

Use and Care Manual
Page 43
... regulator type. PULL TO OPEN. A Lever is (are not installed correctly. Installation Instructions Troubleshooting Tips Consumer Support Standard twin burner models Standard twin burner models 43 Review the charts on the following pages first and you do not burn evenly Burner flames very large or yellow Surface burners light but oven does not Possible Causes Plug on sealed burner models, remove the broiler drawer or kick panel (see the Care and cleaning of the range section) and look for the gas shut...
... regulator type. PULL TO OPEN. A Lever is (are not installed correctly. Installation Instructions Troubleshooting Tips Consumer Support Standard twin burner models Standard twin burner models 43 Review the charts on the following pages first and you do not burn evenly Burner flames very large or yellow Surface burners light but oven does not Possible Causes Plug on sealed burner models, remove the broiler drawer or kick panel (see the Care and cleaning of the range section) and look for the gas shut...
Use and Care Manual
Page 44
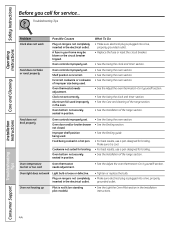
... the Installation Instructions. section. • See the Using the clock and timer section. • See the Care and cleaning of the range section. • See the Installation of the range section. Oven door and/or broiler drawer not closed. Oven temperature too hot or too cold Oven thermostat needs adjustment. • See the Adjust the oven thermostat-Do it yourself! Oven not heating up Pilot is not lit (on range is loose or defective. Installation Instructions Troubleshooting Tips Consumer Support 44 Troubleshooting Tips Problem Clock does not work Light bulb...
... the Installation Instructions. section. • See the Using the clock and timer section. • See the Care and cleaning of the range section. • See the Installation of the range section. Oven door and/or broiler drawer not closed. Oven temperature too hot or too cold Oven thermostat needs adjustment. • See the Adjust the oven thermostat-Do it yourself! Oven not heating up Pilot is not lit (on range is loose or defective. Installation Instructions Troubleshooting Tips Consumer Support 44 Troubleshooting Tips Problem Clock does not work Light bulb...


