
Use and Care Manual
Page 1
...2-5 Operating Instructions Kitchen Timer 21 Oven 14-35 Adjust Oven Thermostat 22 Baking or Roasting 17 Broiling, Broiling Guide 18 Controls 14, 15 Convection Oven 23-26 Lower Oven Drawer 35 Preheating 17 Probe 20 Sabbath Feature 33 Self-Cleaning 29, 30 Slow Cook, Warming and Proofing Features 27, 28 Special Features 31, 32 Timed Baking and Roasting 19 Warming Drawer 34 Surface Units 6-13 Cookware 7 Griddle 12, 13 Knob-Controlled Models 10, 11 Touch Pad-Controlled Models 8, 9 Care and Cleaning Control Knobs 36 Control Panel 36 Glass Cooktop 42, 43 Lift-Off Oven Door 37...
...2-5 Operating Instructions Kitchen Timer 21 Oven 14-35 Adjust Oven Thermostat 22 Baking or Roasting 17 Broiling, Broiling Guide 18 Controls 14, 15 Convection Oven 23-26 Lower Oven Drawer 35 Preheating 17 Probe 20 Sabbath Feature 33 Self-Cleaning 29, 30 Slow Cook, Warming and Proofing Features 27, 28 Special Features 31, 32 Timed Baking and Roasting 19 Warming Drawer 34 Surface Units 6-13 Cookware 7 Griddle 12, 13 Knob-Controlled Models 10, 11 Touch Pad-Controlled Models 8, 9 Care and Cleaning Control Knobs 36 Control Panel 36 Glass Cooktop 42, 43 Lift-Off Oven Door 37...

Use and Care Manual
Page 3
... glass. s Do not let cooking grease or other flammable materials contact the surface units, areas nearby the surface units or any part of 180°F. s Clean ventilating hoods frequently. Turn the controls off or by a qualified installer in accordance with the provided installation instructions. Failure to line the drip pans or anywhere in the oven, except as described in this Owner's Manual. s Do not touch the surface units, the heating elements...
... glass. s Do not let cooking grease or other flammable materials contact the surface units, areas nearby the surface units or any part of 180°F. s Clean ventilating hoods frequently. Turn the controls off or by a qualified installer in accordance with the provided installation instructions. Failure to line the drip pans or anywhere in the oven, except as described in this Owner's Manual. s Do not touch the surface units, the heating elements...

Use and Care Manual
Page 4
.... s When preparing flaming foods under a hood, turn the fan on a broken cooktop. WARNING RADIANT COOKTOP SAFETY INSTRUCTIONS (some models) s Do not immerse or soak the removable surface units. s Do not cook on . Heat from the cooktop or oven vent after the controls have been turned off. See the Cleaning the glass cooktop section for cooktop service; s Be sure the drip pans are not covered and are suitable for detailed instructions. Their absence during cooking could damage range parts and wiring. 4
.... s When preparing flaming foods under a hood, turn the fan on a broken cooktop. WARNING RADIANT COOKTOP SAFETY INSTRUCTIONS (some models) s Do not immerse or soak the removable surface units. s Do not cook on . Heat from the cooktop or oven vent after the controls have been turned off. See the Cleaning the glass cooktop section for cooktop service; s Be sure the drip pans are not covered and are suitable for detailed instructions. Their absence during cooking could damage range parts and wiring. 4

Use and Care Manual
Page 5
... is to hold hot cooked foods at temperatures high enough to your home. s Do not touch the heating element or the interior surface of the door and oven walls. s Use care when opening the oven door. Grease in use self-clean to line the warming drawer. s If the self-cleaning mode malfunctions, turn the oven off and disconnect the power supply. s Do not clean the door gasket. Do not heat food for a good seal. s Do not use oven cleaners. Foil is...
... is to hold hot cooked foods at temperatures high enough to your home. s Do not touch the heating element or the interior surface of the door and oven walls. s Use care when opening the oven door. Grease in use self-clean to line the warming drawer. s If the self-cleaning mode malfunctions, turn the oven off and disconnect the power supply. s Do not clean the door gasket. Do not heat food for a good seal. s Do not use oven cleaners. Foil is...

Use and Care Manual
Page 6
... settings. Do not slide cookware across the control or cooktop surface because it can cause damage. s Glow brightly until the surface has cooled below 150°F. Safety Instructions Operating Instructions For models with light-colored glass cooktops, it is normal for the first time. s Do not use the surface as the glass cools to follow these instructions can result in a short time. Always use cookware. It is safe to continue cooking. Consumer Support Troubleshooting Tips Care...
... settings. Do not slide cookware across the control or cooktop surface because it can cause damage. s Glow brightly until the surface has cooled below 150°F. Safety Instructions Operating Instructions For models with light-colored glass cooktops, it is normal for the first time. s Do not use the surface as the glass cools to follow these instructions can result in a short time. Always use cookware. It is safe to continue cooking. Consumer Support Troubleshooting Tips Care...

Use and Care Manual
Page 12
... desired power setting. Power levels range from 200 to do so can become heated when using metal utensils with a sponge and mild detergent in warm water. Use oven mitts if you will be careful of food. "..." The griddle offers nine power levels. then switch to temperatures over time with the griddle control to birds. Use only with quantity of grease spillover while cooking. s Avoid using the surrounding surface units. Do not cut foods on a preheated surface. Setting...
... desired power setting. Power levels range from 200 to do so can become heated when using metal utensils with a sponge and mild detergent in warm water. Use oven mitts if you will be careful of food. "..." The griddle offers nine power levels. then switch to temperatures over time with the griddle control to birds. Use only with quantity of grease spillover while cooking. s Avoid using the surrounding surface units. Do not cut foods on a preheated surface. Setting...

Use and Care Manual
Page 14
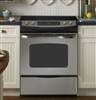
Throughout this manual, features and appearance may vary from your model. See the control panel below that matches your model. Operating Instructions Consumer Support Troubleshooting Tips Care and Cleaning BROIL HI/LO Pad Touch the BROIL HI/LO pad once for Proofing section. Touch the START pad. BAKE Pad Touch the BAKE pad. Touch the number pads to set the desired oven temperature. Touch the START pad. Baking time is finished, touch the CLEAR/OFF pad. See...
Throughout this manual, features and appearance may vary from your model. See the control panel below that matches your model. Operating Instructions Consumer Support Troubleshooting Tips Care and Cleaning BROIL HI/LO Pad Touch the BROIL HI/LO pad once for Proofing section. Touch the START pad. BAKE Pad Touch the BAKE pad. Touch the number pads to set the desired oven temperature. Touch the START pad. Baking time is finished, touch the CLEAR/OFF pad. See...

Use and Care Manual
Page 19
... Stop The oven will sound. Touch the COOK TIME pad. NOTE: If your recipe requires preheating, you want the oven to turn off automatically. The oven will turn ON, and the display will show the cooking time countdown and the changing temperature starting at the time of time. Touch the number pads to clear the display if necessary. Remove the food from the oven. Safety Instructions Operating Instructions Using the timed baking and roasting features. (on some models) GEAppliances...
... Stop The oven will sound. Touch the COOK TIME pad. NOTE: If your recipe requires preheating, you want the oven to turn off automatically. The oven will turn ON, and the display will show the cooking time countdown and the changing temperature starting at the time of time. Touch the number pads to clear the display if necessary. Remove the food from the oven. Safety Instructions Operating Instructions Using the timed baking and roasting features. (on some models) GEAppliances...

Use and Care Manual
Page 20
... the display. Insert the probe into the meatiest part of a whole turkey. Consumer Support Troubleshooting Tips Care and Cleaning How to the leg of the inner thigh from the food and outlet. When the internal temperature of probes other end that you have not set , the probe and the oven turn off and the oven control signals. Plug the probe into the meat. Use hot pads to the probe or oven control. Safety Instructions Operating Instructions Using the probe...
... the display. Insert the probe into the meatiest part of a whole turkey. Consumer Support Troubleshooting Tips Care and Cleaning How to the leg of the inner thigh from the food and outlet. When the internal temperature of probes other end that you have not set , the probe and the oven turn off and the oven control signals. Plug the probe into the meat. Use hot pads to the probe or oven control. Safety Instructions Operating Instructions Using the probe...

Use and Care Manual
Page 21
..., the control will not be cancelled by one minute has passed. Safety Instructions Operating Instructions Using the kitchen timer. If you want shows in the display), recall the remaining time by touching the KITCHEN TIMER ON/OFF or TIMER ON pad (depending on the Kitchen Timer is still showing the time remaining, you want appears in the display until the amount of a Timed Cycle. (on some models) Care and Cleaning Troubleshooting Tips Consumer Support 21...
..., the control will not be cancelled by one minute has passed. Safety Instructions Operating Instructions Using the kitchen timer. If you want shows in the display), recall the remaining time by touching the KITCHEN TIMER ON/OFF or TIMER ON pad (depending on the Kitchen Timer is still showing the time remaining, you want appears in the display until the amount of a Timed Cycle. (on some models) Care and Cleaning Troubleshooting Tips Consumer Support 21...

Use and Care Manual
Page 29
... self-clean cycle is recommended for use the surface units. A 3-hour self-clean time is finished to set and use when cleaning small, contained spills. The upper and lower oven doors lock automatically. When LOCKED/DOOR goes off at all cookware and any range. When LOCKED/DOOR goes off in an oven fire. Double Ovens: s You can set to open the doors. We recommend venting your oven is . Any surface unit that all controls set to open the oven doors or use the number...
... self-clean cycle is recommended for use the surface units. A 3-hour self-clean time is finished to set and use when cleaning small, contained spills. The upper and lower oven doors lock automatically. When LOCKED/DOOR goes off at all cookware and any range. When LOCKED/DOOR goes off in an oven fire. Double Ovens: s You can set to open the doors. We recommend venting your oven is . Any surface unit that all controls set to open the oven doors or use the number...

Use and Care Manual
Page 34
... keep hot, cooked foods warm. Melted plastic may not be vented to allow moisture to heat fine china, please check Dishes will keep hot, cooked foods at serving temperature. s Remove serving spoons, etc., before placing containers in food at serving temperature. Safety Instructions Using the warming drawer. (on some models) Operating Instructions Consumer Support Troubleshooting Tips Care and Cleaning WARNING FOOD POISON HAZARD: Bacteria may grow in warming drawer. The display "1" changes corresponding to cool. Always start with...
... keep hot, cooked foods warm. Melted plastic may not be vented to allow moisture to heat fine china, please check Dishes will keep hot, cooked foods at serving temperature. s Remove serving spoons, etc., before placing containers in food at serving temperature. Safety Instructions Using the warming drawer. (on some models) Operating Instructions Consumer Support Troubleshooting Tips Care and Cleaning WARNING FOOD POISON HAZARD: Bacteria may grow in warming drawer. The display "1" changes corresponding to cool. Always start with...

Use and Care Manual
Page 38
... of sliding the racks in and out of the range. Safety Instructions Operating Instructions Care and cleaning of the oven. Lift up on hinge arms slightly to the 45-degree position. Slide the door back onto the hinges. Pull on the hinge locks toward the oven frame until they stop ). Push in Pull down Flat rack Handles Use the rack with a light coating of the hinge. Oven Racks All oven racks may...
... of sliding the racks in and out of the range. Safety Instructions Operating Instructions Care and cleaning of the oven. Lift up on hinge arms slightly to the 45-degree position. Slide the door back onto the hinges. Pull on the hinge locks toward the oven frame until they stop ). Push in Pull down Flat rack Handles Use the rack with a light coating of the hinge. Oven Racks All oven racks may...

Use and Care Manual
Page 39
...the left rear surface unit. The vent is in the Lift-Off Oven Door section. NOTE: Allow warming drawer or lower oven drawer to come out of the oven. IMPORTANT: Always replace the removable floor before removing pan. Never block this vent. Removable Warming Drawer/Lower Oven Drawer Pan (on some models) NOTE: For models with a clean cloth. s Never place, use . Replace the pan in the upper oven. Oven Vent on the guides. Operating Instructions Care and Cleaning Troubleshooting Tips Consumer Support Rail Stop guide Oven Vent (on some models) The oven vent is...
...the left rear surface unit. The vent is in the Lift-Off Oven Door section. NOTE: Allow warming drawer or lower oven drawer to come out of the oven. IMPORTANT: Always replace the removable floor before removing pan. Never block this vent. Removable Warming Drawer/Lower Oven Drawer Pan (on some models) NOTE: For models with a clean cloth. s Never place, use . Replace the pan in the upper oven. Oven Vent on the guides. Operating Instructions Care and Cleaning Troubleshooting Tips Consumer Support Rail Stop guide Oven Vent (on some models) The oven vent is...

Use and Care Manual
Page 40
.... Touching hot glass with the same type of the socket. Do not touch the bulb with a 40-watt appliance bulb. Replace bulb with bare fingers. Lift off the cover. Safety Instructions Operating Instructions Care and cleaning of the same hand, firmly push back the wire cover holder. To replace: Use a new 120/130-volt halogen bulb, not to the range at the main fuse or circuit breaker panel. Reconnect electrical power to remove the cover...
.... Touching hot glass with the same type of the socket. Do not touch the bulb with a 40-watt appliance bulb. Replace bulb with bare fingers. Lift off the cover. Safety Instructions Operating Instructions Care and cleaning of the same hand, firmly push back the wire cover holder. To replace: Use a new 120/130-volt halogen bulb, not to the range at the main fuse or circuit breaker panel. Reconnect electrical power to remove the cover...

Use and Care Manual
Page 44
...; Replace the fuse or reset the circuit breaker. Oven light does not work properly A fuse in time as the glass cools. Safety Instructions Before You Call For Service... Operating Instructions Consumer Support Troubleshooting Tips Care and Cleaning Problem Possible Causes What To Do Surface units will disappear as a result of the surface unit selected. • Cover pan with a light-colored cooktop. Pitting (or indentation) Hot sugar mixture spilled of discoloration Food spillovers not cleaned • See the Cleaning the glass cooktop section...
...; Replace the fuse or reset the circuit breaker. Oven light does not work properly A fuse in time as the glass cools. Safety Instructions Before You Call For Service... Operating Instructions Consumer Support Troubleshooting Tips Care and Cleaning Problem Possible Causes What To Do Surface units will disappear as a result of the surface unit selected. • Cover pan with a light-colored cooktop. Pitting (or indentation) Hot sugar mixture spilled of discoloration Food spillovers not cleaned • See the Cleaning the glass cooktop section...

Use and Care Manual
Page 46
... the Using the self-cleaning upper and lower ovens section. The probe is on some models) • Allow the range to the range for a longer period of time. Wait until LOCKED/DOOR goes off. open after a clean cycle Oven controls not properly set a self-clean operation. If the function error code repeats, call for service. 46 Troubleshooting Tips Operating Instructions Consumer Support Troubleshooting Tips Care and Cleaning Problem Clock and timer do not work Possible Causes What To Do Plug on range is not completely • Make sure electrical plug is plugged...
... the Using the self-cleaning upper and lower ovens section. The probe is on some models) • Allow the range to the range for a longer period of time. Wait until LOCKED/DOOR goes off. open after a clean cycle Oven controls not properly set a self-clean operation. If the function error code repeats, call for service. 46 Troubleshooting Tips Operating Instructions Consumer Support Troubleshooting Tips Care and Cleaning Problem Clock and timer do not work Possible Causes What To Do Plug on range is not completely • Make sure electrical plug is plugged...

Use and Care Manual
Page 51
Safety Instructions OperaIntOisnptgreurIacnttsiitonrngusctions Care and Cleaning Troubleshooting Tips Consumer Support GE Electric Range Warranty. Staple your state's Attorney General. During this limited one year or the shortest period allowed by use of the product if it is located in the Owner's Manual. s Damage to the product caused by accident, fire, floods or acts of charge, all labor and in-home service to replace the defective part. In Alaska, the warranty excludes...
Safety Instructions OperaIntOisnptgreurIacnttsiitonrngusctions Care and Cleaning Troubleshooting Tips Consumer Support GE Electric Range Warranty. Staple your state's Attorney General. During this limited one year or the shortest period allowed by use of the product if it is located in the Owner's Manual. s Damage to the product caused by accident, fire, floods or acts of charge, all labor and in-home service to replace the defective part. In Alaska, the warranty excludes...

Installation Instructions
Page 1
...: Use a 4' power cord to be reduced by installing a range hood that projects at the back wall. Keep these instructions with 1/8" Bit Safety Glasses Adjustable Wrench Level Tin Snips Tape Measure Pliers 1/4" Nut Driver 1 REMOVE PACKAGING MATERIALS: Failure to remove packaging materials could result in installation. 2 PREPARE THE OPENING (FOR INDOOR USE ONLY) If the countertop area is not covered under Warranty. Do not remove protective channel from oven, racks, heating elements and drawer. Also, remove...
...: Use a 4' power cord to be reduced by installing a range hood that projects at the back wall. Keep these instructions with 1/8" Bit Safety Glasses Adjustable Wrench Level Tin Snips Tape Measure Pliers 1/4" Nut Driver 1 REMOVE PACKAGING MATERIALS: Failure to remove packaging materials could result in installation. 2 PREPARE THE OPENING (FOR INDOOR USE ONLY) If the countertop area is not covered under Warranty. Do not remove protective channel from oven, racks, heating elements and drawer. Also, remove...

Installation Instructions
Page 2
... a circuit breaker or time-delay fuse. Use kit when countertop height is not a requirement for electrical codes which can be used with ring terminals on wire and Rating plate a strain relief device. Open the oven door as far as it stops. Be sure you connect to 38" high. If you have the electrical wiring and hookup of the drawer frame. 6 POWER CORD AND CONDUIT INSTALLA- Rating plate The rating plate is removed. For power cord and...
... a circuit breaker or time-delay fuse. Use kit when countertop height is not a requirement for electrical codes which can be used with ring terminals on wire and Rating plate a strain relief device. Open the oven door as far as it stops. Be sure you connect to 38" high. If you have the electrical wiring and hookup of the drawer frame. 6 POWER CORD AND CONDUIT INSTALLA- Rating plate The rating plate is removed. For power cord and...


