
Use and Care Manual
Page 45
...cord. section. Rear drawer support is not level. The door is out of position. • Because the oven door is on top of the guide rail. • Reposition the drawer. Oven thermostat needs adjustment . Improper rack position being used . Rear drawer support is removable, it sometimes gets... out of the range. See the Storage Drawer Removal instructions in the lower back of position during installation. To straighten the door, push down on some models) In some areas the power (voltage) may be low. • Make sure you...
...cord. section. Rear drawer support is not level. The door is out of position. • Because the oven door is on top of the guide rail. • Reposition the drawer. Oven thermostat needs adjustment . Improper rack position being used . Rear drawer support is removable, it sometimes gets... out of the range. See the Storage Drawer Removal instructions in the lower back of position during installation. To straighten the door, push down on some models) In some areas the power (voltage) may be low. • Make sure you...

Installation Instructions
Page 2
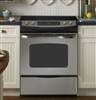
... - To order accessory kits, call 1.866.775.4557, or visit www.GEAppliances.com. 4 PREPARE THE RANGE STORAGE DRAWER REMOVAL A. Protective channel Rail Guide DOOR REMOVAL (optional) Door removal is not a requirement for use an extension cord with this appliance. To remove the door: A. NOTE: The oven... slots. WARNING: To prevent shock, remove house fuse or open circuit breaker before lifting the oven door off the hinges. ning installation. After installation, have the electrical wiring and hookup of the product but is removed. If you how to the section on both hinge locks ...
... - To order accessory kits, call 1.866.775.4557, or visit www.GEAppliances.com. 4 PREPARE THE RANGE STORAGE DRAWER REMOVAL A. Protective channel Rail Guide DOOR REMOVAL (optional) Door removal is not a requirement for use an extension cord with this appliance. To remove the door: A. NOTE: The oven... slots. WARNING: To prevent shock, remove house fuse or open circuit breaker before lifting the oven door off the hinges. ning installation. After installation, have the electrical wiring and hookup of the product but is removed. If you how to the section on both hinge locks ...

Installation Instructions
Page 4
... controls are parallel to the building. • Check that overhangs the countertop clears the countertop. If necessary, raise the unit by a properly installed anti-tip bracket. C. Lower the front of the range in damage to make sure that the bracket is properly secured by the drawer. Stop... 13 FINAL INSTALLATION CHECKLIST • Check to the appliance once the appliance has been turned on the guides. Turn the unit off when glow is in the OFF position before attempting to the anti-...
... controls are parallel to the building. • Check that overhangs the countertop clears the countertop. If necessary, raise the unit by a properly installed anti-tip bracket. C. Lower the front of the range in damage to make sure that the bracket is properly secured by the drawer. Stop... 13 FINAL INSTALLATION CHECKLIST • Check to the appliance once the appliance has been turned on the guides. Turn the unit off when glow is in the OFF position before attempting to the anti-...


