
Use and Care Manual
Page 1
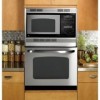
Microwave Cooking Center GEAppliances.com Safety Instructions 2-9 Operating Instructions Microwave Control Panel . . . . .10, 11 Microwave Oven Controls . . . .10-21 Lower Oven Control Panel . . .22, 23 Lower Oven Controls 22-34 Lower Oven Thermostat 28 Sabbath Feature 33, 34 Self-Cleaning Lower Oven . . . 29, 30 Sensor Controls 16, 17 Care and Cleaning Door 36 Light Bulb 37 Microwave Oven 35 Racks 38 Troubleshooting Tips 39-41 Accessories 42 Consumer Support Consumer Support 44 Warranty 43 Owner's Manual JKP90-27 ″ Double Wall Oven JTP90-30 ″ Double Wall Oven The ...
Microwave Cooking Center GEAppliances.com Safety Instructions 2-9 Operating Instructions Microwave Control Panel . . . . .10, 11 Microwave Oven Controls . . . .10-21 Lower Oven Control Panel . . .22, 23 Lower Oven Controls 22-34 Lower Oven Thermostat 28 Sabbath Feature 33, 34 Self-Cleaning Lower Oven . . . 29, 30 Sensor Controls 16, 17 Care and Cleaning Door 36 Light Bulb 37 Microwave Oven 35 Racks 38 Troubleshooting Tips 39-41 Accessories 42 Consumer Support Consumer Support 44 Warranty 43 Owner's Manual JKP90-27 ″ Double Wall Oven JTP90-30 ″ Double Wall Oven The ...

Use and Care Manual
Page 3
... qualified service personnel. Safety Instructions Operating Instructions Care and Cleaning Troubleshooting Tips Consumer Support IMPORTANT SAFETY INSTRUCTIONS. READ ALL INSTRUCTIONS BEFORE USING. WARNING-To reduce the risk of this manual. Never allow anyone to climb, stand or hang on the oven door. ■ This appliance should never be run with the provided Installation Instructions. ■ Have the installer show you the location of the circuit breaker or fuse. Do not use this product...
... qualified service personnel. Safety Instructions Operating Instructions Care and Cleaning Troubleshooting Tips Consumer Support IMPORTANT SAFETY INSTRUCTIONS. READ ALL INSTRUCTIONS BEFORE USING. WARNING-To reduce the risk of this manual. Never allow anyone to climb, stand or hang on the oven door. ■ This appliance should never be run with the provided Installation Instructions. ■ Have the installer show you the location of the circuit breaker or fuse. Do not use this product...

Use and Care Manual
Page 5
... boxes. READ ALL INSTRUCTIONS BEFORE USING. If by children. Pressure will build up . Be careful when opening any time-it to Excessive Microwave Energy" section in this microwave oven. Make sure all infant food is not approved or tested for example, closed , turn oven off, and shut off . SAVE THESE INSTRUCTIONS 5 They could result in injury. ■ Do not operate the microwave oven without the turntable and support...
... boxes. READ ALL INSTRUCTIONS BEFORE USING. If by children. Pressure will build up . Be careful when opening any time-it to Excessive Microwave Energy" section in this microwave oven. Make sure all infant food is not approved or tested for example, closed , turn oven off, and shut off . SAVE THESE INSTRUCTIONS 5 They could result in injury. ■ Do not operate the microwave oven without the turntable and support...

Use and Care Manual
Page 6
... heat transferred from the heated food. Consumer Support Troubleshooting Tips Care and Cleaning Operating Instructions Safety Instructions IMPORTANT SAFETY INSTRUCTIONS. When microwaved, the metal can be slit, pierced or vented as directed in foil trays less than 3/4″ high; Most glass casseroles, cooking dishes, measuring cups, custard cups, pottery or china dinnerware which could burst during or immediately after cooking, possibly resulting in microwave ovens. ■ Do not use a meat thermometer while cooking...
... heat transferred from the heated food. Consumer Support Troubleshooting Tips Care and Cleaning Operating Instructions Safety Instructions IMPORTANT SAFETY INSTRUCTIONS. When microwaved, the metal can be slit, pierced or vented as directed in foil trays less than 3/4″ high; Most glass casseroles, cooking dishes, measuring cups, custard cups, pottery or china dinnerware which could burst during or immediately after cooking, possibly resulting in microwave ovens. ■ Do not use a meat thermometer while cooking...

Use and Care Manual
Page 7
Safety Instructions Operating Instructions Care and Cleaning Troubleshooting Tips Consumer Support IMPORTANT SAFETY INSTRUCTIONS. Plastic cookware designed for microwave cooking is very useful, but should be as tolerant of overcooking conditions as twist-ties, poultry pins or gold-rimmed dishes, in the microwave. ■ Recycled paper towels containing small metal pieces being used carefully. ARCING If you see arcing, press the CLEAR/OFF pad and correct...
Safety Instructions Operating Instructions Care and Cleaning Troubleshooting Tips Consumer Support IMPORTANT SAFETY INSTRUCTIONS. Plastic cookware designed for microwave cooking is very useful, but should be as tolerant of overcooking conditions as twist-ties, poultry pins or gold-rimmed dishes, in the microwave. ■ Recycled paper towels containing small metal pieces being used carefully. ARCING If you see arcing, press the CLEAR/OFF pad and correct...

Use and Care Manual
Page 8
... oven is not placed on poultry, which would cook before larger parts. Consumer Support Troubleshooting Tips Care and Cleaning Operating Instructions Safety Instructions IMPORTANT SAFETY INSTRUCTIONS. When microwaving, you shield chicken breasts or baked foods to the interference caused by turning back one corner so excess steam can escape. Standing Time When you vent the plastic wrap by other than high. ■ The microwave fan may wish to set. Standing time...
... oven is not placed on poultry, which would cook before larger parts. Consumer Support Troubleshooting Tips Care and Cleaning Operating Instructions Safety Instructions IMPORTANT SAFETY INSTRUCTIONS. When microwaving, you shield chicken breasts or baked foods to the interference caused by turning back one corner so excess steam can escape. Standing Time When you vent the plastic wrap by other than high. ■ The microwave fan may wish to set. Standing time...

Use and Care Manual
Page 9
... use the oven to wipe up and the container could burst, causing an injury. ■ Keep the oven vent unobstructed. ■ Keep the oven free from the oven when opening the oven door. Hot air or steam which may result in use. ■ Do not use the oven for service before starting a self-cleaning cycle. ■ If the self-cleaning mode malfunctions, turn the oven off and disconnect the power supply. Safety Instructions Operating Instructions Care and Cleaning Troubleshooting Tips Consumer Support...
... use the oven to wipe up and the container could burst, causing an injury. ■ Keep the oven vent unobstructed. ■ Keep the oven free from the oven when opening the oven door. Hot air or steam which may result in use. ■ Do not use the oven for service before starting a self-cleaning cycle. ■ If the self-cleaning mode malfunctions, turn the oven off and disconnect the power supply. Safety Instructions Operating Instructions Care and Cleaning Troubleshooting Tips Consumer Support...

Use and Care Manual
Page 11
... the power level you want to turn on the microwave display is shown in hours and minutes (1:30 is one minute, 30 seconds). The Start pad must be pressed to set time is one hour, 30 minutes). Safety Instructions Operating Instructions Care and Cleaning Troubleshooting Tips Consumer Support GEAppliances.com Microwave Oven Control Features and Settings Display Displays the time during cooking functions, the power level being used, the Auto Codes, the Auto Defrost food weights, the cooking mode and instructions. Potato Use when cooking whole...
... the power level you want to turn on the microwave display is shown in hours and minutes (1:30 is one minute, 30 seconds). The Start pad must be pressed to set time is one hour, 30 minutes). Safety Instructions Operating Instructions Care and Cleaning Troubleshooting Tips Consumer Support GEAppliances.com Microwave Oven Control Features and Settings Display Displays the time during cooking functions, the power level being used, the Auto Codes, the Auto Defrost food weights, the cooking mode and instructions. Potato Use when cooking whole...

Use and Care Manual
Page 23
... shut off . Start Pad Must be pressed to cool for the timer or automatic oven operations. Cooking Time Pad Press and then press the number pads to set for one minute, 30 seconds). Kitchen Timer On/Off Pad Press to cook. Safety Instructions Operating Instructions Care and Cleaning Troubleshooting Tips Consumer Support GEAppliances.com Lower Oven Control, Clock and Timer Features and Settings Display Shows the time of day, oven temperature, whether the oven is in the bake, broil or self-cleaning mode and the times set...
... shut off . Start Pad Must be pressed to cool for the timer or automatic oven operations. Cooking Time Pad Press and then press the number pads to set for one minute, 30 seconds). Kitchen Timer On/Off Pad Press to cook. Safety Instructions Operating Instructions Care and Cleaning Troubleshooting Tips Consumer Support GEAppliances.com Lower Oven Control, Clock and Timer Features and Settings Display Shows the time of day, oven temperature, whether the oven is in the bake, broil or self-cleaning mode and the times set...

Use and Care Manual
Page 24
..., cupcakes, layer cakes, pies B or C C or D Casseroles B or C C or D For 27 ″ Ovens: If baking four cake layers at the correct temperature. Rack Position Type of the rack (stop before you need to run even after the oven is not directly above the other . Stagger pans on the rack so one is a heating element beneath the oven floor. Consumer Support Troubleshooting Tips Care and Cleaning Operating Instructions Safety Instructions Using the lower...
..., cupcakes, layer cakes, pies B or C C or D Casseroles B or C C or D For 27 ″ Ovens: If baking four cake layers at the correct temperature. Rack Position Type of the rack (stop before you need to run even after the oven is not directly above the other . Stagger pans on the rack so one is a heating element beneath the oven floor. Consumer Support Troubleshooting Tips Care and Cleaning Operating Instructions Safety Instructions Using the lower...

Use and Care Manual
Page 26
..., SET disappears; Press the number pads. If you the time is counting down . To Cancel the Timer Press the Kitchen Timer On/Off pad twice. 26 Consumer Support Troubleshooting Tips Care and Cleaning Operating Instructions Safety Instructions Using the lower oven clock and timer. To Set the Timer Press the Kitchen Timer On/Off pad. For example, to hours and minutes. When the timer reaches :00, the control will not be changed during a timed baking or self-cleaning...
..., SET disappears; Press the number pads. If you the time is counting down . To Cancel the Timer Press the Kitchen Timer On/Off pad twice. 26 Consumer Support Troubleshooting Tips Care and Cleaning Operating Instructions Safety Instructions Using the lower oven clock and timer. To Set the Timer Press the Kitchen Timer On/Off pad. For example, to hours and minutes. When the timer reaches :00, the control will not be changed during a timed baking or self-cleaning...

Use and Care Manual
Page 27
... tone will sound if you are using timed baking and do not press the Start pad after cooking. See the Special features of day. Room temperature promotes the growth of harmful bacteria. Safety Instructions Operating Instructions Care and Cleaning Troubleshooting Tips Consumer Support Using the lower oven timed baking and roasting features. (on at the time of day you have set, the display will show the changing temperature (starting at 100°F) and the...
... tone will sound if you are using timed baking and do not press the Start pad after cooking. See the Special features of day. Room temperature promotes the growth of harmful bacteria. Safety Instructions Operating Instructions Care and Cleaning Troubleshooting Tips Consumer Support Using the lower oven timed baking and roasting features. (on at the time of day you have set, the display will show the changing temperature (starting at 100°F) and the...

Use and Care Manual
Page 29
... a heating element beneath the oven floor. Clean cycle time is needed. Press the Start pad. When the LOCKED or LOCKED DOOR light goes off . Make sure the oven light bulb cover (on the oven floor. Move birds to cabinets. Safety Instructions Operating Instructions Care and Cleaning Troubleshooting Tips Consumer Support Using the self-cleaning lower oven. The oven racks can change the clean time to overheat, resulting in place and the oven light is . How to Set the Oven for the cycle to close the oven door. ■ To stop a clean...
... a heating element beneath the oven floor. Clean cycle time is needed. Press the Start pad. When the LOCKED or LOCKED DOOR light goes off . Make sure the oven light bulb cover (on the oven floor. Move birds to cabinets. Safety Instructions Operating Instructions Care and Cleaning Troubleshooting Tips Consumer Support Using the self-cleaning lower oven. The oven racks can change the clean time to overheat, resulting in place and the oven light is . How to Set the Oven for the cycle to close the oven door. ■ To stop a clean...

Use and Care Manual
Page 30
... the racks become hard to slide, apply a small amount of vegetable oil or cooking oil to Delay the Start of day you can press the Clock pad to open the door. The oven door must be closed and all controls must be set will not be removed by the clean cycle. Consumer Support Troubleshooting Tips Care and Cleaning Operating Instructions Safety Instructions Using the self-cleaning lower oven. Using the number pads, enter the desired clean time. It...
... the racks become hard to slide, apply a small amount of vegetable oil or cooking oil to Delay the Start of day you can press the Clock pad to open the door. The oven door must be closed and all controls must be set will not be removed by the clean cycle. Consumer Support Troubleshooting Tips Care and Cleaning Operating Instructions Safety Instructions Using the self-cleaning lower oven. Using the number pads, enter the desired clean time. It...

Use and Care Manual
Page 33
... models with a light switch on the control panel, the oven light may be turned on and left on. ⊃ ⊃ ⊃ + When the display shows ⊃ the oven is set the desired temperature. Press the Clear/Off pad and begin again. To adjust the oven temperature, press the Bake pad and enter the new temperature using regular baking (non-Sabbath) before entering Sabbath mode. How to 1 minute, ⊃ will be used for broiling, self-cleaning or Delay Start cooking...
... models with a light switch on the control panel, the oven light may be turned on and left on. ⊃ ⊃ ⊃ + When the display shows ⊃ the oven is set the desired temperature. Press the Clear/Off pad and begin again. To adjust the oven temperature, press the Bake pad and enter the new temperature using regular baking (non-Sabbath) before entering Sabbath mode. How to 1 minute, ⊃ will be used for broiling, self-cleaning or Delay Start cooking...

Use and Care Manual
Page 35
... are cool before using the appliance for the first time. Pieces can be broken if dropped. When the window is off the pad, causing electrical shock. Safety Instructions Operating Instructions Care and Cleaning Troubleshooting Tips Consumer Support Care and cleaning of the door daily. Remove all surfaces are wiped up spatters on the window on the inside of the cooking center. Inside Keep the microwave oven clean and sweet-smelling...
... are cool before using the appliance for the first time. Pieces can be broken if dropped. When the window is off the pad, causing electrical shock. Safety Instructions Operating Instructions Care and Cleaning Troubleshooting Tips Consumer Support Care and cleaning of the door daily. Remove all surfaces are wiped up spatters on the window on the inside of the cooking center. Inside Keep the microwave oven clean and sweet-smelling...

Use and Care Manual
Page 37
... fuse or circuit breaker panel. Touching hot glass with bare fingers. To replace: Use a new 120/130-volt halogen bulb, not to the oven. Bulbs with 2 straight pin terminals are G9 bulbs. (Do not interchange.) Be sure the replacement bulb is completely cool. To replace: Put in electric shock or burn. Turn the glass cover clockwise 1/4 turn . Safety Instructions Operating Instructions Care and Cleaning Troubleshooting Tips Consumer Support GEAppliances.com WARNING SHOCK OR BURN HAZARD: Before replacing oven light bulb...
... fuse or circuit breaker panel. Touching hot glass with bare fingers. To replace: Use a new 120/130-volt halogen bulb, not to the oven. Bulbs with 2 straight pin terminals are G9 bulbs. (Do not interchange.) Be sure the replacement bulb is completely cool. To replace: Put in electric shock or burn. Turn the glass cover clockwise 1/4 turn . Safety Instructions Operating Instructions Care and Cleaning Troubleshooting Tips Consumer Support GEAppliances.com WARNING SHOCK OR BURN HAZARD: Before replacing oven light bulb...

Use and Care Manual
Page 39
... for service. Food not thoroughly defrosted. • See the Using the microwave sensor controls section. Another function was pressed accidentally. During a sensor function the microwave oven door was opened before the time begins to stand. • Some standing time is in the display. Food not allowed to count down in the black-out mode. • Replace the fuse or reset the circuit breaker. • See the Using the clock and lower oven timer...
... for service. Food not thoroughly defrosted. • See the Using the microwave sensor controls section. Another function was pressed accidentally. During a sensor function the microwave oven door was opened before the time begins to stand. • Some standing time is in the display. Food not allowed to count down in the black-out mode. • Replace the fuse or reset the circuit breaker. • See the Using the clock and lower oven timer...

Use and Care Manual
Page 40
... oven Oven controls improperly set. Food does not bake or roast properly in your home may be blown or the circuit breaker tripped. • Replace the fuse or reset the circuit breaker. section. Always broil with the door closed door broiling only. Put the oven back into operation. • Disconnect all power to enter a bake temperature or cleaning time. • Press the Bake pad and desired temperature or the Self-Clean pad and desired clean time. Consumer Support Troubleshooting Tips Care and Cleaning Operating Instructions Safety Instructions...
... oven Oven controls improperly set. Food does not bake or roast properly in your home may be blown or the circuit breaker tripped. • Replace the fuse or reset the circuit breaker. section. Always broil with the door closed door broiling only. Put the oven back into operation. • Disconnect all power to enter a bake temperature or cleaning time. • Press the Bake pad and desired temperature or the Self-Clean pad and desired clean time. Consumer Support Troubleshooting Tips Care and Cleaning Operating Instructions Safety Instructions...

Use and Care Manual
Page 41
... oven vent when using A cooling fan may the lower oven automatically turn on . • This is normal. Excessive smoking in time. Open the windows to cool below the locking temperature. • Press the Clear/Off pad. Power outage, clock flashes Power outage or surge. • Reset the clock. See the Using the self- Safety Instructions Operating Instructions Care and Cleaning Troubleshooting Tips Consumer Support GEAppliances.com Problem Lower oven light does not work Possible Causes What To Do Light bulb...
... oven vent when using A cooling fan may the lower oven automatically turn on . • This is normal. Excessive smoking in time. Open the windows to cool below the locking temperature. • Press the Clear/Off pad. Power outage, clock flashes Power outage or surge. • Reset the clock. See the Using the self- Safety Instructions Operating Instructions Care and Cleaning Troubleshooting Tips Consumer Support GEAppliances.com Problem Lower oven light does not work Possible Causes What To Do Light bulb...


