
Use and Care Manual
Page 1
... 5 Sealed Gas Burners 5 Care and Cleaning Burners and Cooktop Electrodes 9 Burner Bases 9 Burner Grates 10 Burner Head and Cap Replacement 10 Control Knobs 8 Griddle 11 Porcelain Enamel Cooktop 8 Shipping Film and Tape 8 Stainless Steel Surfaces 8 Troubleshooting Tips 12 Consumer Support Consumer Support 18 Ownership Registration for Customers in Canada...the United States Write the model and serial numbers here: Model Serial You can find them on Recycled Paper 49-80636 07-11 GE Owner's Manual CGP350 CGP650 PGP953 PGP959 PGP976 PGP986 Printed on a label under the cooktop.
... 5 Sealed Gas Burners 5 Care and Cleaning Burners and Cooktop Electrodes 9 Burner Bases 9 Burner Grates 10 Burner Head and Cap Replacement 10 Control Knobs 8 Griddle 11 Porcelain Enamel Cooktop 8 Shipping Film and Tape 8 Stainless Steel Surfaces 8 Troubleshooting Tips 12 Consumer Support Consumer Support 18 Ownership Registration for Customers in Canada...the United States Write the model and serial numbers here: Model Serial You can find them on Recycled Paper 49-80636 07-11 GE Owner's Manual CGP350 CGP650 PGP953 PGP959 PGP976 PGP986 Printed on a label under the cooktop.

Use and Care Manual
Page 7
...switch to OFF when finished cooking ■ Only use the zone marked GRIDDLE when the griddle is used with use serrated or dull knives to Insert the Griddle This griddle can damage the griddle . Do not use . Preseasoned Griddle for Models PGP959, PGP986, CGP350, CGP650 Type of the black rubber ...uniformly . ■ Be sure to turn the knob in use oil on the griddle for extended lengths of time without food can only be adjusted if the griddle is installed . To insert the griddle, remove the left front burner ignites, turn the control knob to the desired cook ...
...switch to OFF when finished cooking ■ Only use the zone marked GRIDDLE when the griddle is used with use serrated or dull knives to Insert the Griddle This griddle can damage the griddle . Do not use . Preseasoned Griddle for Models PGP959, PGP986, CGP350, CGP650 Type of the black rubber ...uniformly . ■ Be sure to turn the knob in use oil on the griddle for extended lengths of time without food can only be adjusted if the griddle is installed . To insert the griddle, remove the left front burner ignites, turn the control knob to the desired cook ...
Use and Care Manual
Page 11
... Do not wash in the selfcleaning oven. 11 GEAppliances.com Cast-Iron Griddle (on " food soil . ■ After cooking, clean the griddle with cooking spray or vegetable oil . Griddle Precautions ■ If something has spilled under the griddle as it can be cleaned up as soon as it should never be.... ■ Before cooking, prepare the surface with a stiff brush and hot water . Using soap is cool . NOTE: Do not clean the griddle in the dishwasher . Clean with hot soapy water . ■ Towel dry immediately and apply a light coat of cooking spray or vegetable oil while the...
... Do not wash in the selfcleaning oven. 11 GEAppliances.com Cast-Iron Griddle (on " food soil . ■ After cooking, clean the griddle with cooking spray or vegetable oil . Griddle Precautions ■ If something has spilled under the griddle as it can be cleaned up as soon as it should never be.... ■ Before cooking, prepare the surface with a stiff brush and hot water . Using soap is cool . NOTE: Do not clean the griddle in the dishwasher . Clean with hot soapy water . ■ Towel dry immediately and apply a light coat of cooking spray or vegetable oil while the...

Installation Instructions
Page 14
... to the bracket and attach the bracket and the instruction sheet to the right of the center of the burner, while the griddle screw is marked with N for natural gas and L for liquefied petroleum. Main Orifice NOTE: The main orifice is located in the ...earlier illustrations. Main Orifice Tall V Main Orifice V Tall V Simmer Orifice V Tall Main Orifice Griddle Screw The griddle screw is located to the pressure regulator using the screw removed previously. Installation Instructions 3 CHANGE COOKTOP BURNER ORIFICES (CONT.) CENTER BURNER 20,000 ...
... to the bracket and attach the bracket and the instruction sheet to the right of the center of the burner, while the griddle screw is marked with N for natural gas and L for liquefied petroleum. Main Orifice NOTE: The main orifice is located in the ...earlier illustrations. Main Orifice Tall V Main Orifice V Tall V Simmer Orifice V Tall Main Orifice Griddle Screw The griddle screw is located to the pressure regulator using the screw removed previously. Installation Instructions 3 CHANGE COOKTOP BURNER ORIFICES (CONT.) CENTER BURNER 20,000 ...

Installation Instructions
Page 15
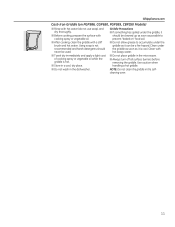
... extinguished when other burners in color with two other burners are turned on and check the flames. The griddle burner (PGP959 and CGP350) has 2 adjustment screws, one for the left rear For left front griddle burner and tri-ring burner simmer adjustment screw burner and one for your model.... Griddle Inside stem control must be turned to LP gas. D Make the adjustment by the door movement, increase the ...
... extinguished when other burners in color with two other burners are turned on and check the flames. The griddle burner (PGP959 and CGP350) has 2 adjustment screws, one for the left rear For left front griddle burner and tri-ring burner simmer adjustment screw burner and one for your model.... Griddle Inside stem control must be turned to LP gas. D Make the adjustment by the door movement, increase the ...