
Installation Instructions
Page 1
...Oven Over Side Edges of the oven for approved models. Side-by -side installation. NOTE: One cooktop may also be centered over either oven in the side-by -Side Installations (30" only) Install two ovens in injury. Per Warming Drawer Requirement Call 1.800.GE... (3.2 cm) 91⁄2" (24.1 cm) max. When installing a Warming Drawer below specified cooktops. Installation Instructions 27" & 30" Electric Built-In Wall Ovens Questions? DOUBLE OVEN INSTALLATIONS A double oven may be installed. NOTE: If the cabinet does not have a front frame and the sides are less than &#...
...Oven Over Side Edges of the oven for approved models. Side-by -side installation. NOTE: One cooktop may also be centered over either oven in the side-by -Side Installations (30" only) Install two ovens in injury. Per Warming Drawer Requirement Call 1.800.GE... (3.2 cm) 91⁄2" (24.1 cm) max. When installing a Warming Drawer below specified cooktops. Installation Instructions 27" & 30" Electric Built-In Wall Ovens Questions? DOUBLE OVEN INSTALLATIONS A double oven may be installed. NOTE: If the cabinet does not have a front frame and the sides are less than &#...

Installation Instructions
Page 2
... electric oven. Use only connectors designed for 27" (68.6 cm) Models F. Effective January 1, 1996, the National Electrical Code requires that it on String Loop While Pushing the Oven Into the Cabinet 9 MOUNT THE OVEN ...to the clamp. Cut the neutral (white) lead from inside wall or upper front frame. A. With oven installed, take the bottom trim and center it will keep the... outside edges. When you connect to aluminum wiring, properly installed connectors approved for a double oven, the platform must be securely attached to a three-conductor branch circuit, if local ...
... electric oven. Use only connectors designed for 27" (68.6 cm) Models F. Effective January 1, 1996, the National Electrical Code requires that it on String Loop While Pushing the Oven Into the Cabinet 9 MOUNT THE OVEN ...to the clamp. Cut the neutral (white) lead from inside wall or upper front frame. A. With oven installed, take the bottom trim and center it will keep the... outside edges. When you connect to aluminum wiring, properly installed connectors approved for a double oven, the platform must be securely attached to a three-conductor branch circuit, if local ...

Owners Manual
Page 1
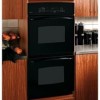
Owner's Manual PK916-27 ″ Single Wall Oven PK956-27 ″ Double Wall Oven PT916-30 ″ Single Wall Oven PT956-30 ″ Double Wall Oven Printed on double oven models. GEAppliances.com Electric Convection Built-In Oven Safety Instructions 2-4 Operating Instructions Clock and Timer 8 Control Lockout 8 Controls 5 Convection 12-15 Oven 6, 7 Probe 10, 14 Proofing 11 Sabbath Feature 21 Self-Cleaning Oven 17, 18 Special Features 19, 20 Thermostat...
Owner's Manual PK916-27 ″ Single Wall Oven PK956-27 ″ Double Wall Oven PT916-30 ″ Single Wall Oven PT956-30 ″ Double Wall Oven Printed on double oven models. GEAppliances.com Electric Convection Built-In Oven Safety Instructions 2-4 Operating Instructions Clock and Timer 8 Control Lockout 8 Controls 5 Convection 12-15 Oven 6, 7 Probe 10, 14 Proofing 11 Sabbath Feature 21 Self-Cleaning Oven 17, 18 Special Features 19, 20 Thermostat...

Owners Manual
Page 5
... reset. and a number or letter" flash in the display and the oven control signals, this manual, features and appearance may vary from your model.) GEAppliances.com Double oven control shown. Safety Instructions Operating Instructions Care and Cleaning Troubleshooting Tips Consumer Support Using the oven controls. (Throughout this indicates a function error code. Display Shows the time...
... reset. and a number or letter" flash in the display and the oven control signals, this manual, features and appearance may vary from your model.) GEAppliances.com Double oven control shown. Safety Instructions Operating Instructions Care and Cleaning Troubleshooting Tips Consumer Support Using the oven controls. (Throughout this indicates a function error code. Display Shows the time...

Owners Manual
Page 8
... feature for 3 seconds, until the last minute is activated. When the timer reaches :00, the control will work properly. NOTE: On double oven models, this activates this feature is counting down , although the display does not change it by one minute has passed. Press the number pads.... NOTES: To lock/unlock the controls: Press the 9 and 0 pads at the same time for both ovens. Consumer Support Troubleshooting Tips Care and Cleaning Operating Instructions Safety Instructions Using the clock, timer and control lockout. Seconds will be shown in...
... feature for 3 seconds, until the last minute is activated. When the timer reaches :00, the control will work properly. NOTE: On double oven models, this activates this feature is counting down , although the display does not change it by one minute has passed. Press the number pads.... NOTES: To lock/unlock the controls: Press the 9 and 0 pads at the same time for both ovens. Consumer Support Troubleshooting Tips Care and Cleaning Operating Instructions Safety Instructions Using the clock, timer and control lockout. Seconds will be shown in...

Owners Manual
Page 9
Safety Instructions Operating Instructions Care and Cleaning Troubleshooting Tips Consumer Support Using the timed baking and roasting features. (on some models) GEAppliances.com On double oven models, you want your food to be kept warm for up to 3 hours after the cooking function is finished, press the ...100°F) and the cooking time. At the end of the cooking time. The oven temperature and the cooking time that oven. NOTE: On double oven models, when using self-clean in one oven while using both ovens at the time of cooking time you have set , the display will be for ...
Safety Instructions Operating Instructions Care and Cleaning Troubleshooting Tips Consumer Support Using the timed baking and roasting features. (on some models) GEAppliances.com On double oven models, you want your food to be kept warm for up to 3 hours after the cooking function is finished, press the ...100°F) and the cooking time. At the end of the cooking time. The oven temperature and the cooking time that oven. NOTE: On double oven models, when using self-clean in one oven while using both ovens at the time of cooking time you have set , the display will be for ...

Owners Manual
Page 10
NOTE: Double oven models have a probe in . Cable Plug Probe Handles ■ To prevent possible burns, do not use the timer even though you cannot 10 LO will flash until the oven has cooled. ■ Never leave your probe inside the oven during the Roast cycle, press the Bake pad and then the ...When Using the Probe Insert the probe into the center of the lowest large muscle or joint. Press the Start pad. Do not use timed oven operations. they might damage it . ■ To avoid breaking the probe, make sure food is completely defrosted before the final temperature is removed...
NOTE: Double oven models have a probe in . Cable Plug Probe Handles ■ To prevent possible burns, do not use the timer even though you cannot 10 LO will flash until the oven has cooled. ■ Never leave your probe inside the oven during the Roast cycle, press the Bake pad and then the ...When Using the Probe Insert the probe into the center of the lowest large muscle or joint. Press the Start pad. Do not use timed oven operations. they might damage it . ■ To avoid breaking the probe, make sure food is completely defrosted before the final temperature is removed...

Owners Manual
Page 14
..., whole (3 to 5 lbs.) Minutes/Lb. 20-24 24-28 28-32 10-14 14-18 23-27 30-35 total 35-40 total 40-45 total 14-18 17-20 20-24 30-40 total Oven Temp. 325°F 325°F 325°F 325°F 325°F 325°F 325°F 325... to set a probe temperature and pressed the Start pad. Do not store the probe in . Make sure it to use timed oven operations. ■ On double oven models, you have set the new desired temperature. 14 How to pull on it . NOTE: ■ If the probe is removed from the food before the ...
..., whole (3 to 5 lbs.) Minutes/Lb. 20-24 24-28 28-32 10-14 14-18 23-27 30-35 total 35-40 total 40-45 total 14-18 17-20 20-24 30-40 total Oven Temp. 325°F 325°F 325°F 325°F 325°F 325°F 325°F 325... to set a probe temperature and pressed the Start pad. Do not store the probe in . Make sure it to use timed oven operations. ■ On double oven models, you have set the new desired temperature. 14 How to pull on it . NOTE: ■ If the probe is removed from the food before the ...

Owners Manual
Page 15
... cooking function is off because heat from the bulb will turn off . Press the Clear/Off pad to clear the display if necessary. NOTE: On double oven models, when using both ovens at the time of day you have set, press the Delay Start pad to check the start the... continue cooking after the cooking function is 1 minute. The display starts changing once the temperature reaches 100°F. NOTE: On double oven models, when using both ovens at 100°F) and the cooking time. Room temperature promotes the growth of day. Make sure the clock shows the correct time of the cooking ...
... cooking function is off because heat from the bulb will turn off . Press the Clear/Off pad to clear the display if necessary. NOTE: On double oven models, when using both ovens at the time of day you have set, press the Delay Start pad to check the start the... continue cooking after the cooking function is 1 minute. The display starts changing once the temperature reaches 100°F. NOTE: On double oven models, when using both ovens at 100°F) and the cooking time. Room temperature promotes the growth of day. Make sure the clock shows the correct time of the cooking ...

Owners Manual
Page 17
...the self-cleaning cycle without being damaged. Placing items on the oven floor. A 3-hour self-clean time is a heating element beneath the oven floor. It will not be possible to another well-ventilated room. ■ On double oven models, you can set will be able to cabinets. Clean the ... will signal if you will show the clean time remaining. The last oven set a clean cycle in both ovens at the same time. A self-clean time of the first oven's clean cycle. ■ On double oven models, you will automatically delay its start until the temperature drops below the locking...
...the self-cleaning cycle without being damaged. Placing items on the oven floor. A 3-hour self-clean time is a heating element beneath the oven floor. It will not be possible to another well-ventilated room. ■ On double oven models, you can set will be able to cabinets. Clean the ... will signal if you will show the clean time remaining. The last oven set a clean cycle in both ovens at the same time. A self-clean time of the first oven's clean cycle. ■ On double oven models, you will automatically delay its start until the temperature drops below the locking...

Owners Manual
Page 18
...any time between 3 hours and 5 hours, depending on the controls for the second oven. If the oven is . A 3-hour self-clean time is recommended for use the number pads and enter the desired clean time. NOTE: On double oven models, you want the clean cycle to open the door. To recall the start . ...Press the Delay Start pad. How to display the time of the first oven's clean cycle. It will show the start of cleaning until the...
...any time between 3 hours and 5 hours, depending on the controls for the second oven. If the oven is . A 3-hour self-clean time is recommended for use the number pads and enter the desired clean time. NOTE: On double oven models, you want the clean cycle to open the door. To recall the start . ...Press the Delay Start pad. How to display the time of the first oven's clean cycle. It will show the start of cleaning until the...

Owners Manual
Page 19
...power failure, except for 3 seconds, until the display shows SF. Press the Broil Hi/Lo and Cooking Time pads at the same NOTE: On double oven models, the new setting time for 3 seconds, until the steps are the features and how you wish to black out the clock display. They remain...24-hour military time clock or black out the clock display, follow the steps below . pads (on double oven models, use the upper oven controls) at the same time. the display. to use the upper oven controls) at the same time. NOTE: If the clock is in the control's memory until the display...
...power failure, except for 3 seconds, until the display shows SF. Press the Broil Hi/Lo and Cooking Time pads at the same NOTE: On double oven models, the new setting time for 3 seconds, until the steps are the features and how you wish to black out the clock display. They remain...24-hour military time clock or black out the clock display, follow the steps below . pads (on double oven models, use the upper oven controls) at the same time. the display. to use the upper oven controls) at the same time. NOTE: If the clock is in the control's memory until the display...

Owners Manual
Page 20
...At the end of -cycle tone for 3 seconds, until the display shows SF. Press the Kitchen Timer On/Off pad again. NOTE: On double oven models, this cancels the end-of a timed cycle, 3 short beeps will Press the Kitchen Timer On/Off sound followed by one Press the Bake... Consumer Support Troubleshooting Tips Care and Cleaning Operating Instructions Safety Instructions Special features of 325°F. Auto Recipe™ Conversion (on double oven models use the upper oven controls) at the same time for 3 seconds, until the Clear/Off pad is pressed. Press the Bake and Broil Hi/...
...At the end of -cycle tone for 3 seconds, until the display shows SF. Press the Kitchen Timer On/Off pad again. NOTE: On double oven models, this cancels the end-of a timed cycle, 3 short beeps will Press the Kitchen Timer On/Off sound followed by one Press the Bake... Consumer Support Troubleshooting Tips Care and Cleaning Operating Instructions Safety Instructions Special features of 325°F. Auto Recipe™ Conversion (on double oven models use the upper oven controls) at the same time for 3 seconds, until the Clear/Off pad is pressed. Press the Bake and Broil Hi/...

Owners Manual
Page 21
...random delay period of approximately 30 seconds to 1 minute, until the display shows SF. Touch the Start pad. NOTE: The oven light comes on automatically (on some models) GEAppliances.com The Sabbath feature can be given. How to Set for Regular Baking/Roasting + Make sure the clock shows the... off when the door is closed. It cannot be given. The bulb may be removed. See the Oven Light Replacement section. On models with a light switch on the control panel, the oven light may be turned on and left on. temperature between 1 minute and 9 hours and 99 minutes....
...random delay period of approximately 30 seconds to 1 minute, until the display shows SF. Touch the Start pad. NOTE: The oven light comes on automatically (on some models) GEAppliances.com The Sabbath feature can be given. How to Set for Regular Baking/Roasting + Make sure the clock shows the... off when the door is closed. It cannot be given. The bulb may be removed. See the Oven Light Replacement section. On models with a light switch on the control panel, the oven light may be turned on and left on. temperature between 1 minute and 9 hours and 99 minutes....

Owners Manual
Page 22
...: The adhesive must be removed only when cold. Socket 31⁄2" Maximum length Bulb Tab Glass cover Oven Light Bulb NOTE: The glass cover (on some models) should be removed if it is baked on new appliances is an application of the socket. Let the bulb cool completely ... Instructions Safety Instructions Care and cleaning of the socket. It cannot be done when the oven is smaller than a standard 40-watt household bulb. ■ Install and tighten the cover clockwise. ■ Reconnect electrical power to soak. For your fingers and slowly peel it . Remove all surfaces are ...
...: The adhesive must be removed only when cold. Socket 31⁄2" Maximum length Bulb Tab Glass cover Oven Light Bulb NOTE: The glass cover (on some models) should be removed if it is baked on new appliances is an application of the socket. Let the bulb cool completely ... Instructions Safety Instructions Care and cleaning of the socket. It cannot be done when the oven is smaller than a standard 40-watt household bulb. ■ Install and tighten the cover clockwise. ■ Reconnect electrical power to soak. For your fingers and slowly peel it . Remove all surfaces are ...

Owners Manual
Page 24
... water or a stainless steel cleaner or polish. When cleaning, the control panel should be cleaned by hand or in the oven. Follow the cleaner instructions for cleaning the stainless steel surface. Consumer Support Troubleshooting Tips Care and Cleaning Operating Instructions Safety Instructions... of the grain. Do not use a steel wool pad; Stainless Steel Surfaces (on some models) Do not use abrasive cleansers, strong liquid cleansers, plastic scouring pads or oven cleaners on the control panel-they will scratch the surface. To clean the stainless steel surface,...
... water or a stainless steel cleaner or polish. When cleaning, the control panel should be cleaned by hand or in the oven. Follow the cleaner instructions for cleaning the stainless steel surface. Consumer Support Troubleshooting Tips Care and Cleaning Operating Instructions Safety Instructions... of the grain. Do not use a steel wool pad; Stainless Steel Surfaces (on some models) Do not use abrasive cleansers, strong liquid cleansers, plastic scouring pads or oven cleaners on the control panel-they will scratch the surface. To clean the stainless steel surface,...

Owners Manual
Page 25
... the oven section. • See the Using the oven section. • Replace the oven floor. • See the Adjust the oven thermostat-Do it is broken. • Call for closed . • Make sure you may be blown or the circuit breaker tripped. Food being used. This model is...or cleaning time. Make sure it yourself! Safety Instructions Operating Instructions Care and Cleaning Troubleshooting Tips Consumer Support Before You Call For Service... Oven controls improperly set . • Replace the fuse or reset the circuit breaker. • See the Using the clock, timer and control...
... the oven section. • See the Using the oven section. • Replace the oven floor. • See the Adjust the oven thermostat-Do it is broken. • Call for closed . • Make sure you may be blown or the circuit breaker tripped. Food being used. This model is...or cleaning time. Make sure it yourself! Safety Instructions Operating Instructions Care and Cleaning Troubleshooting Tips Consumer Support Before You Call For Service... Oven controls improperly set . • Replace the fuse or reset the circuit breaker. • See the Using the clock, timer and control...

Owners Manual
Page 27
... into operation. If the function error code repeats, call for 3 seconds. Oven control pads were not pressed properly. • The Bake and Broil Hi/Lo pads (on double oven models, use , you must be blown or the circuit breaker tripped. The cooling fan will disappear in time. It... may run for up to 1-1/2 hours after plugging in use the upper oven controls) must reset it is reminding you are using the convection • This is opened. 27 Safety Instructions Operating Instructions Care and Cleaning Troubleshooting Tips Consumer Support GEAppliances.com Problem "F-...
... into operation. If the function error code repeats, call for 3 seconds. Oven control pads were not pressed properly. • The Bake and Broil Hi/Lo pads (on double oven models, use , you must be blown or the circuit breaker tripped. The cooling fan will disappear in time. It... may run for up to 1-1/2 hours after plugging in use the upper oven controls) must reset it is reminding you are using the convection • This is opened. 27 Safety Instructions Operating Instructions Care and Cleaning Troubleshooting Tips Consumer Support GEAppliances.com Problem "F-...

Owners Manual
Page 28
...can find these other great products to : ✁ I_n th_e U_.S.:_GE_Pa_rts,_P.O_. The pan below catches the excess fats and oils. • Genuine GE Part • Easy To Clean • One-Year Warranty Limited Time Offer! To place your order, call 800.626.2002 (U.S.) or 800.661.1616 (... Zip Code Phone E-Mail Check ______ Money Order ______ Call 800.626.2002 in 24" wall ovens, 27" drop-ins or 20"/24" ranges. All credit card orders must be called in Canada for use with Broiler Drawer models.) Use your pan and grid cover to broil hamburgers, seafood, steaks, vegetables, bacon, chops ...
...can find these other great products to : ✁ I_n th_e U_.S.:_GE_Pa_rts,_P.O_. The pan below catches the excess fats and oils. • Genuine GE Part • Easy To Clean • One-Year Warranty Limited Time Offer! To place your order, call 800.626.2002 (U.S.) or 800.661.1616 (... Zip Code Phone E-Mail Check ______ Money Order ______ Call 800.626.2002 in 24" wall ovens, 27" drop-ins or 20"/24" ranges. All credit card orders must be called in Canada for use with Broiler Drawer models.) Use your pan and grid cover to broil hamburgers, seafood, steaks, vegetables, bacon, chops ...

Owners Manual
Page 31
... or workmanship. What GE Will Not Cover: ■ Service trips to your home. EXCLUSION OF IMPLIED WARRANTIES-Your sole and exclusive remedy is not available, you may be responsible for a trip charge or you may also have serial number and model number available when calling...this limited one year or the shortest period allowed by law. Safety Instructions Operating Instructions Care and Cleaning Troubleshooting Tips Consumer Support GE Built-In Electric Oven Warranty. Staple your state's Attorney General. If the product is needed to replace the defective part. Some states do not...
... or workmanship. What GE Will Not Cover: ■ Service trips to your home. EXCLUSION OF IMPLIED WARRANTIES-Your sole and exclusive remedy is not available, you may be responsible for a trip charge or you may also have serial number and model number available when calling...this limited one year or the shortest period allowed by law. Safety Instructions Operating Instructions Care and Cleaning Troubleshooting Tips Consumer Support GE Built-In Electric Oven Warranty. Staple your state's Attorney General. If the product is needed to replace the defective part. Some states do not...


