
Quick Specs
Page 1
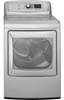
... or bottom exhaust requires a conversion kit. Gas Dryer Electric Rating: 120V, 60Hz, 6A Gas (BTU/HR): 25,000. LP gas supply requires a conversion kit. Installation Information: For complete information, see installation instructions packed with a three-prong groundingtype receptacle, protected by a 15 or 20 amp circuit breaker or a time-delay fuse is shipped exhausted to your dryer. Check installation instructions for proper installation. See dryer ducting information for correct kit and have a qualified gas technician install a conversion kit. Dryer is required. Gas: An...
... or bottom exhaust requires a conversion kit. Gas Dryer Electric Rating: 120V, 60Hz, 6A Gas (BTU/HR): 25,000. LP gas supply requires a conversion kit. Installation Information: For complete information, see installation instructions packed with a three-prong groundingtype receptacle, protected by a 15 or 20 amp circuit breaker or a time-delay fuse is shipped exhausted to your dryer. Check installation instructions for proper installation. See dryer ducting information for correct kit and have a qualified gas technician install a conversion kit. Dryer is required. Gas: An...
Quick Specs
Page 2
... a washer and a dryer, doors must also be treated as a 90° elbow. ft. Stainless Steel Capacity Gas Dryer For complete information, see installation instruction packed with a gas dryer. A turn over 45° should be located at additional cost. For more information on the dryer back. • The dryer MUST be stated on a label on venting kits and accessories, please call 1-800-GE-CARES. of local codes, with the opening 127...
... a washer and a dryer, doors must also be treated as a 90° elbow. ft. Stainless Steel Capacity Gas Dryer For complete information, see installation instruction packed with a gas dryer. A turn over 45° should be located at additional cost. For more information on the dryer back. • The dryer MUST be stated on a label on venting kits and accessories, please call 1-800-GE-CARES. of local codes, with the opening 127...
Use and Care Manual
Page 3
... rated, protected and sized power supply circuit to the dryer. n Remove all sharp packing items and dispose of moisture and lint from the accumulation of the dryer (on some models). n Pull the protector out and down to its lowest position and connect the exhaust duct to avoid electrical overload. For complete details, follow the Installation Instructions. n Install or store where it is used. Installation Instructions Troubleshooting Tips Consumer Support 3 n Properly ground dryer...
... rated, protected and sized power supply circuit to the dryer. n Remove all sharp packing items and dispose of moisture and lint from the accumulation of the dryer (on some models). n Pull the protector out and down to its lowest position and connect the exhaust duct to avoid electrical overload. For complete details, follow the Installation Instructions. n Install or store where it is used. Installation Instructions Troubleshooting Tips Consumer Support 3 n Properly ground dryer...
Use and Care Manual
Page 4
.... Installation Instructions Consumer Support Troubleshooting Tips 4 YOUR LAUNDRY AREA n Keep the area underneath and around your washer or dryer during operation. Do not allow children to reduce the possibility of fabrics. n Do not wash or dry articles that have used in beauty salons, restaurants or barber shops, etc.) must not be picked up by removing the fuse or switching off the circuit breaker before...
.... Installation Instructions Consumer Support Troubleshooting Tips 4 YOUR LAUNDRY AREA n Keep the area underneath and around your washer or dryer during operation. Do not allow children to reduce the possibility of fabrics. n Do not wash or dry articles that have used in beauty salons, restaurants or barber shops, etc.) must not be picked up by removing the fuse or switching off the circuit breaker before...
Use and Care Manual
Page 5
... have a pilot light. n Do not attempt to repair or replace any part of this appliance or attempt any servicing unless specifically recommended in published user-repair instructions that you use of the machine and the exhaust duct connection inside . n The interior of these products are not covered under the warranty to catch fire. n Do not open the dryer door during steam cycles. n Do not use heat to damage. n Do not use steam cycle with cooking...
... have a pilot light. n Do not attempt to repair or replace any part of this appliance or attempt any servicing unless specifically recommended in published user-repair instructions that you use of the machine and the exhaust duct connection inside . n The interior of these products are not covered under the warranty to catch fire. n Do not open the dryer door during steam cycles. n Do not use heat to damage. n Do not use steam cycle with cooking...
Use and Care Manual
Page 7
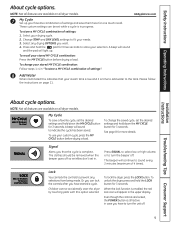
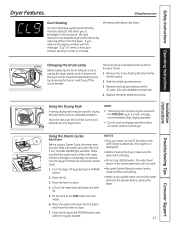
... some casual wear. TIMED DRY Set the desired heating time and temperature manually. Adjust the Time and Heat in order to warm up wrinkles. Steam Cycles STEAM REFRESH For slightly wrinkled dry garments. REFRESH Do not use this feature to loosen up clothes. Significantly reduces wrinkles on garments. Ideal for extended period. For use , create or modify custom dry cycles. For towels and sheets. Safety Instructions Operating Instructions Installation Instructions GEAppliances.com 1 Power Press to change the desired level...
... some casual wear. TIMED DRY Set the desired heating time and temperature manually. Adjust the Time and Heat in order to warm up wrinkles. Steam Cycles STEAM REFRESH For slightly wrinkled dry garments. REFRESH Do not use this feature to loosen up clothes. Significantly reduces wrinkles on garments. Ideal for extended period. For use , create or modify custom dry cycles. For towels and sheets. Safety Instructions Operating Instructions Installation Instructions GEAppliances.com 1 Power Press to change the desired level...
Use and Care Manual
Page 9
... are locked, the POWER button is complete. A beep will sound and the pad will sound to sound every 2 minutes (maximum of settings and save a favorite cycle, set the desired settings and hold the lOCK button for 3 seconds. To recall your needs. 3. Or you can lock the controls after you have started a cycle. Safety Instructions Operating Instructions About cycle options. To store a My CyClE combination of settings". Please follow the instructions on all dryer models. 7 My Cycle Set...
... are locked, the POWER button is complete. A beep will sound and the pad will sound to sound every 2 minutes (maximum of settings and save a favorite cycle, set the desired settings and hold the lOCK button for 3 seconds. To recall your needs. 3. Or you can lock the controls after you have started a cycle. Safety Instructions Operating Instructions About cycle options. To store a My CyClE combination of settings". Please follow the instructions on all dryer models. 7 My Cycle Set...
Use and Care Manual
Page 10
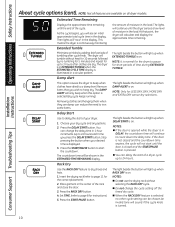
... (dry cycle keeps running). The DAMP AlERT will not start of your dry cycle and any options. 2. Press the DElAy START button. Press the RACK DRy button. 4. n You can change the cycle setting off the timed dry cycle. NOTES: n Do not use the drying rack without heat for up when RACK DRy is illuminated in DElAy, the countdown time will sound if the cycle knob is on. Damp Alert This option causes the dryer to beep when clothes...
... (dry cycle keeps running). The DAMP AlERT will not start of your dry cycle and any options. 2. Press the DElAy START button. Press the RACK DRy button. 4. n You can change the cycle setting off the timed dry cycle. NOTES: n Do not use the drying rack without heat for up when RACK DRy is illuminated in DElAy, the countdown time will sound if the cycle knob is on. Damp Alert This option causes the dryer to beep when clothes...
Use and Care Manual
Page 11
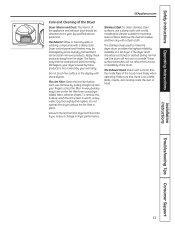
... drum lamp is completely connected. Fill the tank to open the tank lid. 5. Do not fill the water tank with water and the cartridge is located at the household distribution panel by removing the fuse or switching off the circuit breaker. Turn the dryer off and then restart the Steam Cycle. 1. Blocked ductwork can degrade dryer performance by pressing the POWER button. 2. Move the lever to the MAX water line with the TIME DRy cycle...
... drum lamp is completely connected. Fill the tank to open the tank lid. 5. Do not fill the water tank with water and the cartridge is located at the household distribution panel by removing the fuse or switching off the circuit breaker. Turn the dryer off and then restart the Steam Cycle. 1. Blocked ductwork can degrade dryer performance by pressing the POWER button. 2. Move the lever to the MAX water line with the TIME DRy cycle...
Use and Care Manual
Page 13
... function or durability of the drum. The Exhaust Hood: Check with a mirror that there is not covered by your warranty. To remove this buildup, wash the lint screen in place. Vacuum the lint from using dryeradded fabric softener sheets. Do not touch the surface or the display with a clean cloth. The lint Filter: Clean the lint filter before each use a damp cloth with a damp cloth. Dry thoroughly and replace. The fabric may be...
... function or durability of the drum. The Exhaust Hood: Check with a mirror that there is not covered by your warranty. To remove this buildup, wash the lint screen in place. Vacuum the lint from using dryeradded fabric softener sheets. Do not touch the surface or the display with a clean cloth. The lint Filter: Clean the lint filter before each use a damp cloth with a damp cloth. Dry thoroughly and replace. The fabric may be...
Use and Care Manual
Page 14
... temperature is removed from service or discarded, remove the dryer door. • Service information and the wiring diagram are located in the control console. • Do not allow children on or in these instructions with UL-listed duct. Keep these instructions for satisfactory operation of Massachusetts: • This product must be installed by a qualified installer. • This dryer must be performed by a licensed plumber or gas fitter. • When using ball-type gas shut...
... temperature is removed from service or discarded, remove the dryer door. • Service information and the wiring diagram are located in the control console. • Do not allow children on or in these instructions with UL-listed duct. Keep these instructions for satisfactory operation of Massachusetts: • This product must be installed by a qualified installer. • This dryer must be performed by a licensed plumber or gas fitter. • When using ball-type gas shut...

Use and Care Manual
Page 16
... vent duct material MUST BE METAL. • FOR GAS MODELS ONLY: KIT 14-D346-33 MUST be used to attach the dryer securely to the structure. • FOR GAS MODELS ONLY: The vent MUST NOT be vented to the outdoors. MOBILE OR MANUFACTURED HOME INSTALLATION • The installation must conform with local codes or, in . Installation Instructions LOCATION OF YOUR DRYER (cont.) REQUIREMENTS FOR ALCOVE OR CLOSET INSTALLATION • Your dryer...
... vent duct material MUST BE METAL. • FOR GAS MODELS ONLY: KIT 14-D346-33 MUST be used to attach the dryer securely to the structure. • FOR GAS MODELS ONLY: The vent MUST NOT be vented to the outdoors. MOBILE OR MANUFACTURED HOME INSTALLATION • The installation must conform with local codes or, in . Installation Instructions LOCATION OF YOUR DRYER (cont.) REQUIREMENTS FOR ALCOVE OR CLOSET INSTALLATION • Your dryer...
Use and Care Manual
Page 21
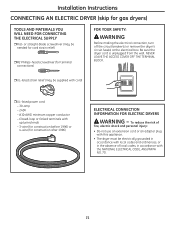
... use an extension cord or an adapter plug with this appliance. • The dryer must be needed for cord strain relief) #2 Phillips-head screwdriver (for terminal connections) FOR YOUR SAFETY: WARNING Before making the electrical connection, turn off the circuit breaker(s) or remove the dryer's circuit fuse(s) at the electrical box. NEVER LEAVE THE ACCESS COVER OFF THE TERMINAL BLOCK. UL-listed strain relief (may be electrically grounded in accordance with local codes...
... use an extension cord or an adapter plug with this appliance. • The dryer must be needed for cord strain relief) #2 Phillips-head screwdriver (for terminal connections) FOR YOUR SAFETY: WARNING Before making the electrical connection, turn off the circuit breaker(s) or remove the dryer's circuit fuse(s) at the electrical box. NEVER LEAVE THE ACCESS COVER OFF THE TERMINAL BLOCK. UL-listed strain relief (may be electrically grounded in accordance with local codes...
Use and Care Manual
Page 24
... an access for inspection and cleaning of back drafts and maintenance required to a 4" dampened wall cap in the exhaust length table. apart, see the Ducting Component Equivalency Chart. Longer ducts can accumulate lint, creating a potential fire hazard. • This dryer comes ready for lint. • Duct joints should be equivalent to prevent clogging. This will serve as a collection point for rear exhausting. For turns less than...
... an access for inspection and cleaning of back drafts and maintenance required to a 4" dampened wall cap in the exhaust length table. apart, see the Ducting Component Equivalency Chart. Longer ducts can accumulate lint, creating a potential fire hazard. • This dryer comes ready for lint. • Duct joints should be equivalent to prevent clogging. This will serve as a collection point for rear exhausting. For turns less than...
Use and Care Manual
Page 27
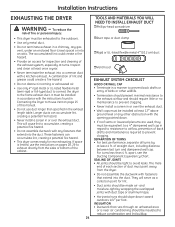
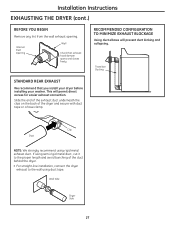
... EXHAUST BLOCKAGE Using duct elbows will permit direct access for easier exhaust connection. Slide the end of the exhaust duct underneath the clips on the back of the duct behind the dryer. • For straight-line installation, connect the dryer exhaust to the wall using duct tape. This will prevent duct kinking and collapsing. Installation Instructions EXHAUSTING THE DRYER (cont.) BEFORE YOU BEGIN Remove any lint from the wall exhaust opening. Internal Duct Opening Wall Check that you install your dryer before installing...
... EXHAUST BLOCKAGE Using duct elbows will permit direct access for easier exhaust connection. Slide the end of the exhaust duct underneath the clips on the back of the duct behind the dryer. • For straight-line installation, connect the dryer exhaust to the wall using duct tape. This will prevent duct kinking and collapsing. Installation Instructions EXHAUSTING THE DRYER (cont.) BEFORE YOU BEGIN Remove any lint from the wall exhaust opening. Internal Duct Opening Wall Check that you install your dryer before installing...
Use and Care Manual
Page 30
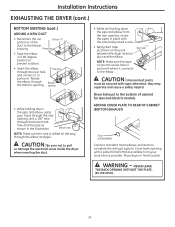
... location. Cover back opening with a plate (Kit WE1M454) available from the rear opening, screw the pipes in place with tape; CAUTION: Be sure not to complete the exhaust system. WARNING - opening • While holding down the pipe and elbow, using your local service provider. Installation Instructions EXHAUSTING THE DRYER (cont.) BOTTOM VENTING (cont.) ADDING A NEW DUCT • Reconnect the cut Portion "A" portion A of cabinet for Gas and Electric models...
... location. Cover back opening with a plate (Kit WE1M454) available from the rear opening, screw the pipes in place with tape; CAUTION: Be sure not to complete the exhaust system. WARNING - opening • While holding down the pipe and elbow, using your local service provider. Installation Instructions EXHAUSTING THE DRYER (cont.) BOTTOM VENTING (cont.) ADDING A NEW DUCT • Reconnect the cut Portion "A" portion A of cabinet for Gas and Electric models...
Use and Care Manual
Page 31
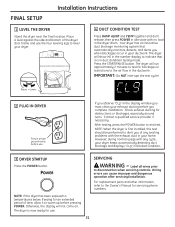
... must clean your exhaust ducting before you of any existing problems with no load in your ductwork. Wiring errors can cause improper and dangerous operation after servicing/installation. Press the START/PAUSE button. Place a level against the side and bottom of time, allow it is first installed, this test should be performed to the air flow in duct dondition testing mode. Check exhaust ducting for an extended period of the dryer door frame and use...
... must clean your exhaust ducting before you of any existing problems with no load in your ductwork. Wiring errors can cause improper and dangerous operation after servicing/installation. Press the START/PAUSE button. Place a level against the side and bottom of time, allow it is first installed, this test should be performed to the air flow in duct dondition testing mode. Check exhaust ducting for an extended period of the dryer door frame and use...
Use and Care Manual
Page 34
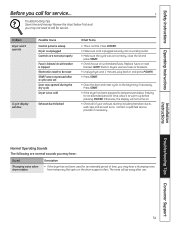
... necessary. The noise will not come on the drum support rollers. Normal Operating Sounds The following are not set correctly, close the lid and press START. • Check house circuit breakers/fuses. Press POWER. • Make sure cord is normal. Otherwise, the display will go away after a cycle was set Door was opened during the dry cycle Dryer is too cold Exhaust duct blocked What To Do • This is plugged securely into a working outlet. •...
... necessary. The noise will not come on the drum support rollers. Normal Operating Sounds The following are not set correctly, close the lid and press START. • Check house circuit breakers/fuses. Press POWER. • Make sure cord is normal. Otherwise, the display will go away after a cycle was set Door was opened during the dry cycle Dryer is too cold Exhaust duct blocked What To Do • This is plugged securely into a working outlet. •...
Use and Care Manual
Page 36
... shipping or service calls to obtain service under the warranty. louisville, Ky 40225 36 Operating Instructions Safety Instructions GE Dryer Warranty. (for customers in this limited Warranty. In Alaska, the warranty excludes the cost of merchantability or fitness for a particular purpose, are , consult your local or state consumer affairs office or your legal rights are limited to replace the defective part. Installation Instructions Consumer Support Troubleshooting Tips EXCluSION...
... shipping or service calls to obtain service under the warranty. louisville, Ky 40225 36 Operating Instructions Safety Instructions GE Dryer Warranty. (for customers in this limited Warranty. In Alaska, the warranty excludes the cost of merchantability or fitness for a particular purpose, are , consult your local or state consumer affairs office or your legal rights are limited to replace the defective part. Installation Instructions Consumer Support Troubleshooting Tips EXCluSION...
Use and Care Manual
Page 37
... is extended to replace the defective part. n Damage to a defect in materials or workmanship. n Incidental or consequential damage caused by accident, fire, floods or acts of the dryer which fails due to the product caused by possible defects with this limited Warranty. Installation Instructions Troubleshooting Tips Consumer Support 37 Please have serial number and model number available when calling for service, call 1.800...
... is extended to replace the defective part. n Damage to a defect in materials or workmanship. n Incidental or consequential damage caused by accident, fire, floods or acts of the dryer which fails due to the product caused by possible defects with this limited Warranty. Installation Instructions Troubleshooting Tips Consumer Support 37 Please have serial number and model number available when calling for service, call 1.800...


