Manual
Page 1
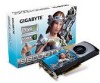
... a commitment to rapid change in any labels on this manual. GV-N98XP-512H-B GeForceTM 9800 GTX+ Graphics Accelerator User's Manual Rev. 101 12MM-N98XP5-101R Copyright © 2008 GIGABYTE TECHNOLOGY CO., LTD Copyright by Macrovision. No part of this this graphics card. Due to update the information contained herein. Reverse engineering or disassembly is protected by U.S. Notice Please do not remove any form without the expressed, written permission...
... a commitment to rapid change in any labels on this manual. GV-N98XP-512H-B GeForceTM 9800 GTX+ Graphics Accelerator User's Manual Rev. 101 12MM-N98XP5-101R Copyright © 2008 GIGABYTE TECHNOLOGY CO., LTD Copyright by Macrovision. No part of this this graphics card. Due to update the information contained herein. Reverse engineering or disassembly is protected by U.S. Notice Please do not remove any form without the expressed, written permission...

Manual
Page 4
...Graphics cards working in an SLI configuration must be with Service Pack 2 (SP2) - GV-N98XP-512H-B Graphics Accelerator - 4 - Features • Powered by adapter) • Supports HDCP (High-Bandwidth Digital Content Protection) technology 1.2. Windows® Vista - An SLI certified motherboard with 512 MB GDDR3 memory • Supports DirectX 10 • Supports NVIDIA® SLI TM (Scalable Link Interface) technology (Note 1) • Supports 2 DVI-I connectors • Supports HDMI connector (by adapter) • Supports 2 D-Sub connectors (by NVIDIA® GeForceTM 9800 GTX+ Graphics...
...Graphics cards working in an SLI configuration must be with Service Pack 2 (SP2) - GV-N98XP-512H-B Graphics Accelerator - 4 - Features • Powered by adapter) • Supports HDCP (High-Bandwidth Digital Content Protection) technology 1.2. Windows® Vista - An SLI certified motherboard with 512 MB GDDR3 memory • Supports DirectX 10 • Supports NVIDIA® SLI TM (Scalable Link Interface) technology (Note 1) • Supports 2 DVI-I connectors • Supports HDMI connector (by adapter) • Supports 2 D-Sub connectors (by NVIDIA® GeForceTM 9800 GTX+ Graphics...

Manual
Page 6
... well as the two 6-pin PCI Express power connectors. graphics card will turn red. Failure to do so may jeopardize the stability of the graphics card. 6-pin Power Adapter Requires at least 12V current rating of 15A Incorrect Connection (The two 4-pin power connectors on the adapter are connected to the same system power supply cable.) Correct Connection (The two 4-pin power connectors on the adapter are connected to the GV-N98XP-512H-B graphics card, an LED on the adapters. The GV-N98XP-512H-B graphics card is red- In addition...
... well as the two 6-pin PCI Express power connectors. graphics card will turn red. Failure to do so may jeopardize the stability of the graphics card. 6-pin Power Adapter Requires at least 12V current rating of 15A Incorrect Connection (The two 4-pin power connectors on the adapter are connected to the same system power supply cable.) Correct Connection (The two 4-pin power connectors on the adapter are connected to the GV-N98XP-512H-B graphics card, an LED on the adapters. The GV-N98XP-512H-B graphics card is red- In addition...

Manual
Page 8
... the display cable from the back of the graphics card is fully seated. * Please make sure that you have prepared your computer, you are ready to install your graphics card. Remove any existing graphics card from this slot; If necessary, remove the metal cover from your computer. Locate the PCI Express x16 slot. Hardware Installation Now that the gold edge connector of your computer. Step 3. GV-N98XP-512H-B Graphics Accelerator...
... the display cable from the back of the graphics card is fully seated. * Please make sure that you have prepared your computer, you are ready to install your graphics card. Remove any existing graphics card from this slot; If necessary, remove the metal cover from your computer. Locate the PCI Express x16 slot. Hardware Installation Now that the gold edge connector of your computer. Step 3. GV-N98XP-512H-B Graphics Accelerator...

Manual
Page 9
... HDMI adapter to your graphics card, use the DVI-I connector. Step 2. To connect a flat panel directly to connect an HDMI monitor. Hardware Installation Do not touch the card when it's operating to fasten the card in place, and replace the computer cover. Replace the screws to prevent system instability. After installation, remember to connect the power cable to see the details). Connect a flat panel To TV / VCR To Flat Panel Display Connect a D-Sub monitor via DVI-I to D-Sub adapter Connect a HDMI monitor via DVI-I connector...
... HDMI adapter to your graphics card, use the DVI-I connector. Step 2. To connect a flat panel directly to connect an HDMI monitor. Hardware Installation Do not touch the card when it's operating to fasten the card in place, and replace the computer cover. Replace the screws to prevent system instability. After installation, remember to connect the power cable to see the details). Connect a flat panel To TV / VCR To Flat Panel Display Connect a D-Sub monitor via DVI-I to D-Sub adapter Connect a HDMI monitor via DVI-I connector...

Manual
Page 10
Connect the GIGABYTE video adapter to the TVOut port on the graphics card B-2.Connect the SPDIF coaxial cable (optional) to the video adapter and motherboard You are now ready to proceed with the installation of the SPDIF coaxial cable (optional) into the S/PDIF in function for detailed instructions. It is recommended Method A be used on your motheboard. Method A (via the coaxial S/PDIF out jack): Connect the GIGABYTE video adapter to the motherboard. Connect the S/PDIF cable to...
Connect the GIGABYTE video adapter to the TVOut port on the graphics card B-2.Connect the SPDIF coaxial cable (optional) to the video adapter and motherboard You are now ready to proceed with the installation of the SPDIF coaxial cable (optional) into the S/PDIF in function for detailed instructions. It is recommended Method A be used on your motheboard. Method A (via the coaxial S/PDIF out jack): Connect the GIGABYTE video adapter to the motherboard. Connect the S/PDIF cable to...

Manual
Page 12
The picture below shows that two graphics cards are connected together via SLI bridge connector in an SLI configuration. How NVIDIA® SLITM (Scalable Link Interface) technology works: In an SLI configuration, two SLI-ready graphics cards of the same type. (Example: GV-NX88X768H-RH) GV-N98XP-512H-B Graphics Accelerator - 12 - SLI bridge connector (provided by motherboard manufacturer) Two SLI-ready graphics cards of the same model and the same manufacturers are linked in parallel in a system that provides two x16 PCI Express slots to scale graphics performance.
The picture below shows that two graphics cards are connected together via SLI bridge connector in an SLI configuration. How NVIDIA® SLITM (Scalable Link Interface) technology works: In an SLI configuration, two SLI-ready graphics cards of the same type. (Example: GV-NX88X768H-RH) GV-N98XP-512H-B Graphics Accelerator - 12 - SLI bridge connector (provided by motherboard manufacturer) Two SLI-ready graphics cards of the same model and the same manufacturers are linked in parallel in a system that provides two x16 PCI Express slots to scale graphics performance.

Manual
Page 13
... can follow the instructions to setup your graphics card driver. (Please follow the subsection "3.1.3 Driver Installation" to be Drive D: The installation of drivers is very simple. Operating System Requirements Notice the following guidelines before installing the drivers: 1. When you can see the autorun window (if it does not show up, run "D:\setup.exe"). Windows® XP Driver and Utilities Installation 3.1.1. 3. Make sure your system has installed DirectX 9.0c or later version. 2. Software Installation First make...
... can follow the instructions to setup your graphics card driver. (Please follow the subsection "3.1.3 Driver Installation" to be Drive D: The installation of drivers is very simple. Operating System Requirements Notice the following guidelines before installing the drivers: 1. When you can see the autorun window (if it does not show up, run "D:\setup.exe"). Windows® XP Driver and Utilities Installation 3.1.1. 3. Make sure your system has installed DirectX 9.0c or later version. 2. Software Installation First make...

Manual
Page 14
3.1.2. Then the DirectX 9 installation is installing the components. Click the Next button. For software MPEG support in Windows XP, you must install DirectX first. When the autorun window shows up, click the Install DirectX 9 item. Step 3. The system is completed. Users who run Windows XP with Service Pack 2 or above do not need to achieve better 3D performance. DirectX Installation Install Microsoft DirectX to enable 3D hardware acceleration support for Windows XP to install DirectX separately. GV-N98XP-512H-B Graphics Accelerator - 14 - Click...
3.1.2. Then the DirectX 9 installation is installing the components. Click the Next button. For software MPEG support in Windows XP, you must install DirectX first. When the autorun window shows up, click the Install DirectX 9 item. Step 3. The system is completed. Users who run Windows XP with Service Pack 2 or above do not need to achieve better 3D performance. DirectX Installation Install Microsoft DirectX to enable 3D hardware acceleration support for Windows XP to install DirectX separately. GV-N98XP-512H-B Graphics Accelerator - 14 - Click...

Manual
Page 15
Software Installation Step 1: Found New Hardware Wizard: Video Controller (VGA Compatible) Click the Next button to install the driver. (Insert the driver CD-ROM that came with your computer for the first time, the operating system will search for the driver and install it automatically. New Hardware Found When the graphics card is inserted into your graphics card.) Or click the Cancel button to finish the installation. - 15 - Step 3: Found New Hardware Wizard...
Software Installation Step 1: Found New Hardware Wizard: Video Controller (VGA Compatible) Click the Next button to install the driver. (Insert the driver CD-ROM that came with your computer for the first time, the operating system will search for the driver and install it automatically. New Hardware Found When the graphics card is inserted into your graphics card.) Or click the Cancel button to finish the installation. - 15 - Step 3: Found New Hardware Wizard...

Manual
Page 18
.... Click the Advanced button for Windows) You may adjust the screen resolution and color quality settings in Settings, you'll see the Plug and Play Monitor and NVIDIA GF 9800 GTX+ Properties dialog box. You can also click the NVIDIA icon in your system tray and select NVIDIA Control Panel.) Access the GeForce 9800 GTX+ tab page to change the color quality. GV-N98XP-512H-B Graphics Accelerator - 18 - You can click...
.... Click the Advanced button for Windows) You may adjust the screen resolution and color quality settings in Settings, you'll see the Plug and Play Monitor and NVIDIA GF 9800 GTX+ Properties dialog box. You can also click the NVIDIA icon in your system tray and select NVIDIA Control Panel.) Access the GeForce 9800 GTX+ tab page to change the color quality. GV-N98XP-512H-B Graphics Accelerator - 18 - You can click...

Manual
Page 20
... results in significant improvements in Advanced view mode. GV-N98XP-512H-B Graphics Accelerator - 20 - „ Adjust Image Settings with Preview If you are unfamiliar with 3D technology or not an advanced graphics user, use the Adjust Image Settings with Preview page to preview any changes you make for all your Direct3D or OpenGL applications and to establish a unique set to Multi-GPU mode to use for improved image quality and rendering...
... results in significant improvements in Advanced view mode. GV-N98XP-512H-B Graphics Accelerator - 20 - „ Adjust Image Settings with Preview If you are unfamiliar with 3D technology or not an advanced graphics user, use the Adjust Image Settings with Preview page to preview any changes you make for all your Direct3D or OpenGL applications and to establish a unique set to Multi-GPU mode to use for improved image quality and rendering...

Manual
Page 21
... resolutions (Note 1) • Run multiple display wizard (Note 2) • Set up multiple displays „ Run Display Optimization Wizard This wizard helps you adjust your displays for optimal viewing and repersentation of colors. (Note 1) This item is present only in Advanced view mode. (Note 2) This item will show up when you to further manipulate and configure your display settings to optimize the use of your displays. Software Installation „ Monitor Temperature Levels To monitor the current temperature...
... resolutions (Note 1) • Run multiple display wizard (Note 2) • Set up multiple displays „ Run Display Optimization Wizard This wizard helps you adjust your displays for optimal viewing and repersentation of colors. (Note 1) This item is present only in Advanced view mode. (Note 2) This item will show up when you to further manipulate and configure your display settings to optimize the use of your displays. Software Installation „ Monitor Temperature Levels To monitor the current temperature...

Manual
Page 23
... can use the advanced Change Resolution Attributes page to view custom display modes you have saved in the Create Custom Timings page. „ Run Multiple Display Wizard (Note 2) This wizard will help you enable and customize your multi-display setup. (Note 1) This item is present only in order to support a variety of your graphics card in Advanced view mode. (Note 2) This item will show up when you connect two monitors...
... can use the advanced Change Resolution Attributes page to view custom display modes you have saved in the Create Custom Timings page. „ Run Multiple Display Wizard (Note 2) This wizard will help you enable and customize your multi-display setup. (Note 1) This item is present only in order to support a variety of your graphics card in Advanced view mode. (Note 2) This item will show up when you connect two monitors...

Manual
Page 24
... large horizontal desktop (Horizontal span) • As one large vertical desktop (Vertical span) • Configured independently from two monitors on both displays in one wide virtual desktop. Clone Mode Horizontal Span Mode GV-N98XP-512H-B Graphics Accelerator - 24 - Select your computer. „ Set up Multiple Displays NVIDIA nView technology enables you to view your desktop in the display pair function as one of several multi-display modes to make the best use one display (Single) • The same on the Change Display Configuration page.
... large horizontal desktop (Horizontal span) • As one large vertical desktop (Vertical span) • Configured independently from two monitors on both displays in one wide virtual desktop. Clone Mode Horizontal Span Mode GV-N98XP-512H-B Graphics Accelerator - 24 - Select your computer. „ Set up Multiple Displays NVIDIA nView technology enables you to view your desktop in the display pair function as one of several multi-display modes to make the best use one display (Single) • The same on the Change Display Configuration page.

Manual
Page 26
... show up when you make adjustment to view the changes as change country- specific signal or the HDTV format. • Enable full screen video mirroring. „ Adjust Video Color Settings Use the controls on your display. GV-N98XP-512H-B Graphics Accelerator - 26 - Video & Television Video and television features are similar to those for analog and digital displays and include features specific to television and HDTV (high definition television) technology for optimal viewing.Tasks in the Video & Television pages allow you...
... show up when you make adjustment to view the changes as change country- specific signal or the HDTV format. • Enable full screen video mirroring. „ Adjust Video Color Settings Use the controls on your display. GV-N98XP-512H-B Graphics Accelerator - 26 - Video & Television Video and television features are similar to those for analog and digital displays and include features specific to television and HDTV (high definition television) technology for optimal viewing.Tasks in the Video & Television pages allow you...

Manual
Page 28
Step 7: Click Finish to preview the selected settings. GV-N98XP-512H-B Graphics Accelerator - 28 - Then click Next. Step 6: Click the Preview button to apply the new television settings.
Step 7: Click Finish to preview the selected settings. GV-N98XP-512H-B Graphics Accelerator - 28 - Then click Next. Step 6: Click the Preview button to apply the new television settings.

Manual
Page 30
The Setup Wizard can also be accessed from this tab. nView Profiles properties „ This tab contains a record of all nView display settings for easy software setup. GV-N98XP-512H-B Graphics Accelerator - 30 - nView Desktop Management properties „ This tab contains information about the nView Desktop Manager. nView Windows properties „ This tab allows you to control window and dialog box placement when using multiple monitors.
The Setup Wizard can also be accessed from this tab. nView Profiles properties „ This tab contains a record of all nView display settings for easy software setup. GV-N98XP-512H-B Graphics Accelerator - 30 - nView Desktop Management properties „ This tab contains information about the nView Desktop Manager. nView Windows properties „ This tab allows you to control window and dialog box placement when using multiple monitors.

Manual
Page 32
nView Effects properties „ This tab provides special windows effects that you perform various actions with shortcut keys or key combinations. nView Zoom properties „ This tab provides dynamic zoom functionality on the desktop. GV-N98XP-512H-B Graphics Accelerator - 32 - nView Hot Keys properties „ This tab lets you can apply to your applications. Also enable full screen video playback via the video mirroring control button.
nView Effects properties „ This tab provides special windows effects that you perform various actions with shortcut keys or key combinations. nView Zoom properties „ This tab provides dynamic zoom functionality on the desktop. GV-N98XP-512H-B Graphics Accelerator - 32 - nView Hot Keys properties „ This tab lets you can apply to your applications. Also enable full screen video playback via the video mirroring control button.

Manual
Page 34
... GIGABYTE for the graphics card is securely fastened to the card's display connector. „ Make sure that the display cable is correct. „ For more assistance, use the Troubleshooting Guide located in graphics to be disabled or to the monitor's manual.) GV-N98XP-512H-B Graphics Accelerator - 34 - When the Windows Advanced Options Menu appears, select Safe Mode and press . For more advanced troubleshooting information. „ Check that the card is seated properly in the PCI Express...
... GIGABYTE for the graphics card is securely fastened to the card's display connector. „ Make sure that the display cable is correct. „ For more assistance, use the Troubleshooting Guide located in graphics to be disabled or to the monitor's manual.) GV-N98XP-512H-B Graphics Accelerator - 34 - When the Windows Advanced Options Menu appears, select Safe Mode and press . For more advanced troubleshooting information. „ Check that the card is seated properly in the PCI Express...


