
Assembly Instructions
Page 1
... all parts and hardware, and 3. Non-grooved Rails 2 C. Foam Pad 1 Model shown is example only. HARDWARE AND TOOLS DIAGRAM G 1-3/4" Bolt H 3/4" Bolt I . PARTS LIST REF. Nuts 2 K. Restraint Harness 1 O. You will scratch the surface and could damage the protective coating. ASSEMBLY INSTRUCTIONS Dressing Table Adult assembly required. Before you begin we recommend that you quickly...
... all parts and hardware, and 3. Non-grooved Rails 2 C. Foam Pad 1 Model shown is example only. HARDWARE AND TOOLS DIAGRAM G 1-3/4" Bolt H 3/4" Bolt I . PARTS LIST REF. Nuts 2 K. Restraint Harness 1 O. You will scratch the surface and could damage the protective coating. ASSEMBLY INSTRUCTIONS Dressing Table Adult assembly required. Before you begin we recommend that you quickly...

Assembly Instructions
Page 6
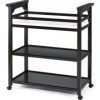
....Make sure that the thick shelf(E) is example only. F F PRINTED IN CHINA Figure 2 Model shown is inserted into the top wide grooved E rails.Slide the shelf through the grooves A ...Model shown is example only. G A C Attach the two wide grooved L rails(C) to the middle left and right K positions on one of the headboards(A) using 1-3/4″ D Bolts(G).Attach the four grooved D rails(D) to the top left and right G G positions on one of the headboards(A) using wood dowels & 1-3/4″ Bolts(G). A S S E M B L Y I N S T R U C T I O N S (continued) Dressing Table...
....Make sure that the thick shelf(E) is example only. F F PRINTED IN CHINA Figure 2 Model shown is inserted into the top wide grooved E rails.Slide the shelf through the grooves A ...Model shown is example only. G A C Attach the two wide grooved L rails(C) to the middle left and right K positions on one of the headboards(A) using 1-3/4″ D Bolts(G).Attach the four grooved D rails(D) to the top left and right G G positions on one of the headboards(A) using wood dowels & 1-3/4″ Bolts(G). A S S E M B L Y I N S T R U C T I O N S (continued) Dressing Table...

Assembly Instructions
Page 8
... Harness over the middle of the infant's torso and insert the buckled ends into each other side of the shelf, as shown in Figure 5. Figure 6 Model shown is example only. Styles may vary. Styles may vary. Gently pull the loose end of the attached strap from Step 5 ,as shown in Figure... the Harness Strap end to the hole on the thick shelf (E).Attach the Strap to the shelf by inserting an Allen Head bolt (H) through a washer (I H J N Model shown is example only. Place the infant on the Dressing/Changing Table Foam Pad. .
... Harness over the middle of the infant's torso and insert the buckled ends into each other side of the shelf, as shown in Figure 5. Figure 6 Model shown is example only. Styles may vary. Styles may vary. Gently pull the loose end of the attached strap from Step 5 ,as shown in Figure... the Harness Strap end to the hole on the thick shelf (E).Attach the Strap to the shelf by inserting an Allen Head bolt (H) through a washer (I H J N Model shown is example only. Place the infant on the Dressing/Changing Table Foam Pad. .