User Manual
Page 3
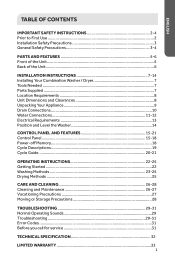
...3 General Safety Precautions 3-4 PARTS AND FEATURES 5-6 Front of the Unit...5 Back of the Unit...6 INSTALLATION INSTRUCTIONS 7-14 Installing Your Combination Washer / Dryer 7 Tools Needed ...7 Parts Supplied ...7 Location Requirements 8 Unit Dimensions and Clearances 8 Unpacking Your Appliance 9 Drain Connections 10 Water ...Connections 11-12 Electrical Requirements 13 Position and Level the Washer 14 CONTROL PANEL AND FEATURES 15-21 Control Panel 15-18 Power-off Memory 18 Cycle Descriptions 19 Cycle Guide...
...3 General Safety Precautions 3-4 PARTS AND FEATURES 5-6 Front of the Unit...5 Back of the Unit...6 INSTALLATION INSTRUCTIONS 7-14 Installing Your Combination Washer / Dryer 7 Tools Needed ...7 Parts Supplied ...7 Location Requirements 8 Unit Dimensions and Clearances 8 Unpacking Your Appliance 9 Drain Connections 10 Water ...Connections 11-12 Electrical Requirements 13 Position and Level the Washer 14 CONTROL PANEL AND FEATURES 15-21 Control Panel 15-18 Power-off Memory 18 Cycle Descriptions 19 Cycle Guide...

User Manual
Page 9
...transportation bolts) 7 ENGLISH ENGLISH INSTALLATION INSTRUCTIONS INSTALLING YOUR COMBINATION WASHER / DRYER We recommend that your washer was just delivered and the outside temperature was below freezing, do not operate until the washer warms up to reduce the risk of fire....8226; Pliers • Level • Wrench PARTS SUPPLIED Water Hoses (2) (Flat washers are unsure that you are preinstalled) Drain Hose (Support Bracket) Wrench (Used to install the washer/dryer, please read the installation instructions carefully before installing. WARNING If, after completing these...
...transportation bolts) 7 ENGLISH ENGLISH INSTALLATION INSTRUCTIONS INSTALLING YOUR COMBINATION WASHER / DRYER We recommend that your washer was just delivered and the outside temperature was below freezing, do not operate until the washer warms up to reduce the risk of fire....8226; Pliers • Level • Wrench PARTS SUPPLIED Water Hoses (2) (Flat washers are unsure that you are preinstalled) Drain Hose (Support Bracket) Wrench (Used to install the washer/dryer, please read the installation instructions carefully before installing. WARNING If, after completing these...

User Manual
Page 12
... hose shakes as water is secured to work properly. 10 ENGLISH DRAIN CONNECTIONS • The height of the standpipe drain or sink rim for the combination washer / dryer to the drain or sink. Wall Standpipe Laundry tub 30" - 39" (76 - 99 cm) 30" - 39" (76 - 99 cm) • The... standpipe drain requires a minimum diameter standpipe of the washer. The minimum carry-away capacity can be between 2'6" and 3'3" from the bottom of the washer. • Use the supplied Drain Hose Support Bracket to ensure all hose connections are tight.
... hose shakes as water is secured to work properly. 10 ENGLISH DRAIN CONNECTIONS • The height of the standpipe drain or sink rim for the combination washer / dryer to the drain or sink. Wall Standpipe Laundry tub 30" - 39" (76 - 99 cm) 30" - 39" (76 - 99 cm) • The... standpipe drain requires a minimum diameter standpipe of the washer. The minimum carry-away capacity can be between 2'6" and 3'3" from the bottom of the washer. • Use the supplied Drain Hose Support Bracket to ensure all hose connections are tight.


