Use & Care
Page 1
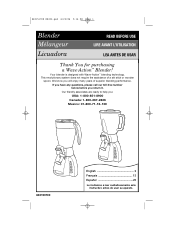
Our friendly associates are ready to help you return it. Your blender is designed with Wave ˜ Action™ blending technology. If you have any questions, please call our toll-free number below before you : USA: 1-800-851-8900 Canada: 1-800-267-2826 Mexico: 01-800-71-16-100 ....qxd 6/22/06 5:16 PM Page 1 Blender Mélangeur Licuadora READ BEFORE USE LIRE AVANT L'UTILISATION LEA ANTES DE USAR Thank You for purchasing a Wave˜Action™ Blender! This revolutionary system does not require the assistance of superior blending performance. We know you will enjoy many years...
Our friendly associates are ready to help you return it. Your blender is designed with Wave ˜ Action™ blending technology. If you have any questions, please call our toll-free number below before you : USA: 1-800-851-8900 Canada: 1-800-267-2826 Mexico: 01-800-71-16-100 ....qxd 6/22/06 5:16 PM Page 1 Blender Mélangeur Licuadora READ BEFORE USE LIRE AVANT L'UTILISATION LEA ANTES DE USAR Thank You for purchasing a Wave˜Action™ Blender! This revolutionary system does not require the assistance of superior blending performance. We know you will enjoy many years...
Use & Care
Page 2
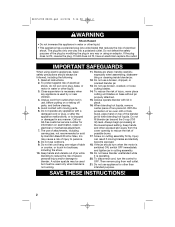
... burns. 17. handle carefully- especially when assembling, disassembling or cleaning inside blender jar. 12. Injury can result if moving parts. 6. Unplug cord from the cover opening to OFF. Do not use a broken, chipped, or cracked blender jar. 13. Blades are sharp; To reduce the risk of the blender jar lid while blending hot liquids. Do not fill blender jar beyond the 3-cup (750 ml) level. Keep hands and other liquid. 3. SAVE THESE INSTRUCTIONS! 2 Close supervision...
... burns. 17. handle carefully- especially when assembling, disassembling or cleaning inside blender jar. 12. Injury can result if moving parts. 6. Unplug cord from the cover opening to OFF. Do not use a broken, chipped, or cracked blender jar. 13. Blades are sharp; To reduce the risk of the blender jar lid while blending hot liquids. Do not fill blender jar beyond the 3-cup (750 ml) level. Keep hands and other liquid. 3. SAVE THESE INSTRUCTIONS! 2 Close supervision...
Use & Care
Page 3
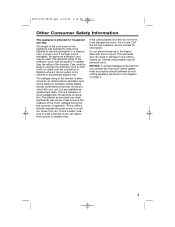
Care must be taken to arrange the extension cord so that may not be used on this appliance was selected to the cutting blades, jar, blender and possibly result in , or tripping over . The blender as replacement parts. Call the toll-free customer service number for household use . The electrical rating of the extension cord must be properly placed between jar and cutting assembly as shown in the freezer filled...
Care must be taken to arrange the extension cord so that may not be used on this appliance was selected to the cutting blades, jar, blender and possibly result in , or tripping over . The blender as replacement parts. Call the toll-free customer service number for household use . The electrical rating of the extension cord must be properly placed between jar and cutting assembly as shown in the freezer filled...
Use & Care
Page 4
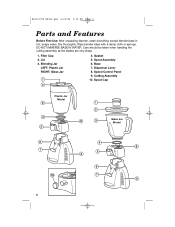
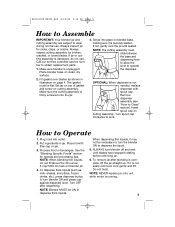
DO NOT IMMERSE BASE IN WATER. 840153700 ENv02.qxd 6/22/06 5:16 PM Page 4 Parts and Features Before First Use: After unpacking blender, wash everything except blender base in hot, soapy water. Base 7. Cutting Assembly 10. Dispenser Lever 8. Dry thoroughly. Wipe blender base with a damp cloth or sponge. Lid 3. Care should be taken when handling the cutting assembly as the blades are very sharp. 1. Gasket 5. Spout Cap Plastic Jar Model Glass Jar Model 4 Filler Cap 2. Speed Control Panel 9. Blending Jar LEFT: Plastic Jar RIGHT: Glass Jar 4. Spout Assembly 6.
DO NOT IMMERSE BASE IN WATER. 840153700 ENv02.qxd 6/22/06 5:16 PM Page 4 Parts and Features Before First Use: After unpacking blender, wash everything except blender base in hot, soapy water. Base 7. Cutting Assembly 10. Dispenser Lever 8. Dry thoroughly. Wipe blender base with a damp cloth or sponge. Lid 3. Care should be taken when handling the cutting assembly as the blades are very sharp. 1. Gasket 5. Spout Cap Plastic Jar Model Glass Jar Model 4 Filler Cap 2. Speed Control Panel 9. Blending Jar LEFT: Plastic Jar RIGHT: Glass Jar 4. Spout Assembly 6.
Use & Care
Page 5
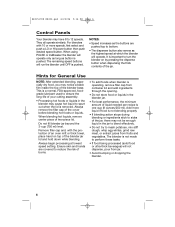
... blender base on cutting assembly. Make sure the cutting assembly is complete, lift the jar straight up. Place lid with spout cap. To dispense thick liquids (such as shown in jar. ALWAYS turn blender ON and press cup against dispenser lever. Call our toll-free customer service number to Operate 1. See the "Blending Specific Foods" section for broken, cracked, or loose blades. If jar or cutting assembly is not needed, replace dispenser with filler cap on page 4. Insert spout cap on clean, dry surface. 2. Remove dispenser assembly (see "How to Clean...
... blender base on cutting assembly. Make sure the cutting assembly is complete, lift the jar straight up. Place lid with spout cap. To dispense thick liquids (such as shown in jar. ALWAYS turn blender ON and press cup against dispenser lever. Call our toll-free customer service number to Operate 1. See the "Blending Specific Foods" section for broken, cracked, or loose blades. If jar or cutting assembly is not needed, replace dispenser with filler cap on page 4. Insert spout cap on clean, dry surface. 2. Remove dispenser assembly (see "How to Clean...
Use & Care
Page 6
... add foods when blender is operating, remove filler cap from container lid and add ingredients through the opening. • Do not store food or liquids in the blender may cause hot liquid to turn the blender on top of the blender base. Remove filler cap and, with 10 or more liquid if food is not blending properly • If blending action stops during blending or ingredients stick to sides of the jar, there may notice a black film...
... add foods when blender is operating, remove filler cap from container lid and add ingredients through the opening. • Do not store food or liquids in the blender may cause hot liquid to turn the blender on top of the blender base. Remove filler cap and, with 10 or more liquid if food is not blending properly • If blending action stops during blending or ingredients stick to sides of the jar, there may notice a black film...
Use & Care
Page 7
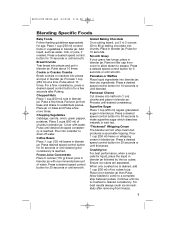
... place in blender jar. Pulse until blended. 840153700 ENv02.qxd 6/22/06 5:16 PM Page 7 Blending Specific Foods Baby Foods Follow feeding guidelines appropriate for 10 seconds. Process until smooth. Parmesan Cheese Cut cheese into pieces and put in blender jar. Continue until ice is reached. Chopped Nuts Place 1 cup (250 ml) nuts in blender jar. Press a desired speed control button for 20 seconds or until thickened. Crushing Ice For best performance, when a recipe calls...
... place in blender jar. Pulse until blended. 840153700 ENv02.qxd 6/22/06 5:16 PM Page 7 Blending Specific Foods Baby Foods Follow feeding guidelines appropriate for 10 seconds. Process until smooth. Parmesan Cheese Cut cheese into pieces and put in blender jar. Continue until ice is reached. Chopped Nuts Place 1 cup (250 ml) nuts in blender jar. Press a desired speed control button for 20 seconds or until thickened. Crushing Ice For best performance, when a recipe calls...
Use & Care
Page 8
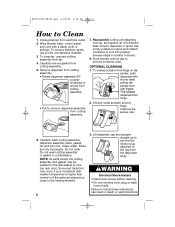
.... NOTE: All parts except the cutting assembly and gasket may occur if your household dishwasher temperature is fully pushed on spout and rotated clockwise to lock into position (reverse steps in hot, soapy water. Lift dispenser cap and actuator straight up to remove the interior plug attached to prevent container odor. Unplug blender from hinge. 2. Reassemble cutting unit assembly onto jar, and replace jar onto blender base. Rinse and...
.... NOTE: All parts except the cutting assembly and gasket may occur if your household dishwasher temperature is fully pushed on spout and rotated clockwise to lock into position (reverse steps in hot, soapy water. Lift dispenser cap and actuator straight up to remove the interior plug attached to prevent container odor. Unplug blender from hinge. 2. Reassemble cutting unit assembly onto jar, and replace jar onto blender base. Rinse and...
Use & Care
Page 9
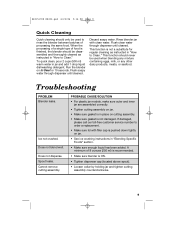
... ICY DRINK for regular cleaning as instructed in "Blending Specific Foods" section. • Make sure enough liquid has been added. Run the blender on cutting assembly. • Make sure gasket is ON. • Tighten dispenser cap (located above spout). • Loosen collar by holding jar and tighten cutting assembly counterclockwise. 9 Flush soapy water through dispenser until cleaned. Cannot remove cutting assembly. If damaged, please call our toll-free customer service number to Clean." Spout leaks. A minimum of processing...
... ICY DRINK for regular cleaning as instructed in "Blending Specific Foods" section. • Make sure enough liquid has been added. Run the blender on cutting assembly. • Make sure gasket is ON. • Tighten dispenser cap (located above spout). • Loosen collar by holding jar and tighten cutting assembly counterclockwise. 9 Flush soapy water through dispenser until cleaned. Cannot remove cutting assembly. If damaged, please call our toll-free customer service number to Clean." Spout leaks. A minimum of processing...
Use & Care
Page 10
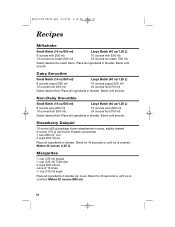
...blender. Blend until smooth. Blend for 45 seconds or until smooth. cover. 840153700 ENv02.qxd 6/22/06 5:16 PM Page 10 Recipes Milkshake Small Batch (16 oz/500 ml) Large Batch (40 oz/1.25 L) 8 ounces milk (250 ml) 16 ounces ice cream (500 ml) 16 ounces milk (500 ml) 24 ounces ice cream (750 ml) Select desired ice...1 cup (250 ml) rum 2 cups (500 ml) ice Place all ingredients in blender jar; Margaritas 1⁄2 cup (125 ml) tequila 1⁄2 cup (125 ml) Triple Sec 2 cups (500 ml) ice Juice of 16 limes 1⁄2 cup (125 ml) sugar Place all ingredients in blender. Non...
...blender. Blend until smooth. Blend for 45 seconds or until smooth. cover. 840153700 ENv02.qxd 6/22/06 5:16 PM Page 10 Recipes Milkshake Small Batch (16 oz/500 ml) Large Batch (40 oz/1.25 L) 8 ounces milk (250 ml) 16 ounces ice cream (500 ml) 16 ounces milk (500 ml) 24 ounces ice cream (750 ml) Select desired ice...1 cup (250 ml) rum 2 cups (500 ml) ice Place all ingredients in blender jar; Margaritas 1⁄2 cup (125 ml) tequila 1⁄2 cup (125 ml) Triple Sec 2 cups (500 ml) ice Juice of 16 limes 1⁄2 cup (125 ml) sugar Place all ingredients in blender. Non...
Use & Care
Page 11
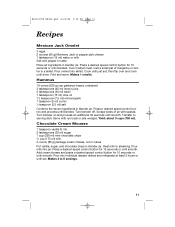
... serve. Chocolate Cream Mousse 1 teaspoon vanilla (5 ml) 2 tablespoons (30 ml) sugar 1 cup (250 ml) mini-chocolate chips 3⁄4 cup (175 ml) milk 3-ounce (85 g) package cream cheese, cut in cubes Put vanilla, sugar, and chocolate chips in blender jar. Press a desired speed control button for 10 seconds or until blended. 840153700 ENv02.qxd 6/22/06 5:16 PM Page 11 Recipes...
... serve. Chocolate Cream Mousse 1 teaspoon vanilla (5 ml) 2 tablespoons (30 ml) sugar 1 cup (250 ml) mini-chocolate chips 3⁄4 cup (175 ml) milk 3-ounce (85 g) package cream cheese, cut in cubes Put vanilla, sugar, and chocolate chips in blender jar. Press a desired speed control button for 10 seconds or until blended. 840153700 ENv02.qxd 6/22/06 5:16 PM Page 11 Recipes...
Use & Care
Page 12
... for Hamilton Beach products or one hundred eighty (180) days for commercial purposes, or any use for Proctor-Silex and Traditions products from defects in material and workmanship for a period of your question much more quickly. This information will repair or replace this product, at our option, at no warranty with manufacturer's instructions, use not in the U.S. MODEL TYPE SERIES This warranty applies to you .) CUSTOMER SERVICE NUMBERS...
... for Hamilton Beach products or one hundred eighty (180) days for commercial purposes, or any use for Proctor-Silex and Traditions products from defects in material and workmanship for a period of your question much more quickly. This information will repair or replace this product, at our option, at no warranty with manufacturer's instructions, use not in the U.S. MODEL TYPE SERIES This warranty applies to you .) CUSTOMER SERVICE NUMBERS...


