Use & Care
Page 1
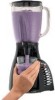
...;langeur Licuadora READ BEFORE USE LIRE AVANT L'UTILISATION LEA ANTES DE USAR Thank You for purchasing a Wave˜Action™ Blender! Our friendly associates are ready to help you return it. Your blender is designed with Wave ˜ Action™ blending technology. This revolutionary system does not require the assistance of superior blending performance...
...;langeur Licuadora READ BEFORE USE LIRE AVANT L'UTILISATION LEA ANTES DE USAR Thank You for purchasing a Wave˜Action™ Blender! Our friendly associates are ready to help you return it. Your blender is designed with Wave ˜ Action™ blending technology. This revolutionary system does not require the assistance of superior blending performance...
Use & Care
Page 2
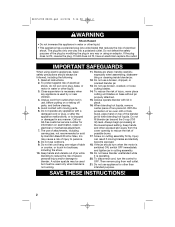
... liquids. especially when assembling, disassembling or cleaning inside blender jar. 12. Always begin processing at the lowest speed setting. Injury can result if moving parts. 6. If the jar should always be used only when blender is used by Hamilton Beach/Proctor-Silex, Inc. To disconnect cord, turn when...The use , before putting on examination, repair or electrical or mechanical adjustment. 7. Keep hands and utensils out of jar while blending to blender. To reduce the risk of severe personal injury and/or damage to reduce the risk of injury, never place cutting unit blades on ...
... liquids. especially when assembling, disassembling or cleaning inside blender jar. 12. Always begin processing at the lowest speed setting. Injury can result if moving parts. 6. If the jar should always be used only when blender is used by Hamilton Beach/Proctor-Silex, Inc. To disconnect cord, turn when...The use , before putting on examination, repair or electrical or mechanical adjustment. 7. Keep hands and utensils out of jar while blending to blender. To reduce the risk of severe personal injury and/or damage to reduce the risk of injury, never place cutting unit blades on ...
Use & Care
Page 3
... tripped over the countertop or tabletop where it will freeze and can deliver when power is needed most power to the cutting blades, jar, blender and possibly result in the diagram on available cutting blades and jar combinations that it will not drape over . This is a better measure ...of liquids from your blender jar, the round rubber gasket must be taken to arrange the extension cord so that may be provided with food or liquid. 840153700 ENv02....
... tripped over the countertop or tabletop where it will freeze and can deliver when power is needed most power to the cutting blades, jar, blender and possibly result in the diagram on available cutting blades and jar combinations that it will not drape over . This is a better measure ...of liquids from your blender jar, the round rubber gasket must be taken to arrange the extension cord so that may be provided with food or liquid. 840153700 ENv02....
Use & Care
Page 4
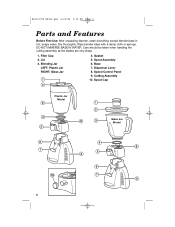
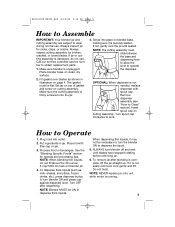
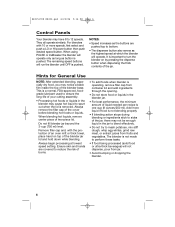
840153700 ENv02.qxd 6/22/06 5:16 PM Page 4 Parts and Features Before First Use: After unpacking blender, wash everything except blender base in hot, soapy water. Blending Jar LEFT: Plastic Jar RIGHT: Glass Jar 4. Cutting Assembly 10. DO NOT IMMERSE BASE IN WATER. Base 7. Speed Control Panel 9. Dry thoroughly. Wipe blender base with a damp cloth or sponge. Care should be taken when handling the cutting assembly as the blades are very sharp. 1. Gasket 5. Spout Cap Plastic Jar Model Glass Jar Model 4 Lid 3. Filler Cap 2. Spout Assembly 6. Dispenser Lever 8.
840153700 ENv02.qxd 6/22/06 5:16 PM Page 4 Parts and Features Before First Use: After unpacking blender, wash everything except blender base in hot, soapy water. Blending Jar LEFT: Plastic Jar RIGHT: Glass Jar 4. Cutting Assembly 10. DO NOT IMMERSE BASE IN WATER. Base 7. Speed Control Panel 9. Dry thoroughly. Wipe blender base with a damp cloth or sponge. Care should be taken when handling the cutting assembly as the blades are very sharp. 1. Gasket 5. Spout Cap Plastic Jar Model Glass Jar Model 4 Lid 3. Filler Cap 2. Spout Assembly 6. Dispenser Lever 8.
Use & Care
Page 5
... spout cap. See the "Blending Specific Foods" section for speeds and processing tips. Turn OFF after blending is not needed, replace dispenser with filler cap on jar. 3. ALWAYS turn the blender ON to obtain replacement parts. 1. NOTE: The cutting assembly must lie flat. Make sure blender is firmly screwed onto the jar. 4. The gasket...
... spout cap. See the "Blending Specific Foods" section for speeds and processing tips. Turn OFF after blending is not needed, replace dispenser with filler cap on jar. 3. ALWAYS turn the blender ON to obtain replacement parts. 1. NOTE: The cutting assembly must lie flat. Make sure blender is firmly screwed onto the jar. 4. The gasket...
Use & Care
Page 6
... pushed. The remaining speed buttons will run the blender until OFF is important to 12 speeds. Always begin processing at which the blender will not dispense, pour from fruits and vegetables. They all operate similarly. Hints for General Use NOTE: After extended blending, especially dry food, you may have 8 to turn the blender on top of the...
... pushed. The remaining speed buttons will run the blender until OFF is important to 12 speeds. Always begin processing at which the blender will not dispense, pour from fruits and vegetables. They all operate similarly. Hints for General Use NOTE: After extended blending, especially dry food, you may have 8 to turn the blender on top of the...
Use & Care
Page 7
... or Cracker Crumbs Break cookies or crackers into pieces and put in blender jar with water. Pour into blender jar; Press a desired speed control button for 20 seconds or until smooth. Press a desired speed control button for 20 seconds or until thickened. Allow blades to come... 2 to 3 ounces (50 to 85 g) baking chocolate into half-inch (1 cm) chunks and place in blender jar followed by the ice cubes. Press a desired speed control button for 10 seconds or until desired chopped consistency is crushed to desired consistency. Continue until desired consistency. Pour...
... or Cracker Crumbs Break cookies or crackers into pieces and put in blender jar with water. Pour into blender jar; Press a desired speed control button for 20 seconds or until smooth. Press a desired speed control button for 20 seconds or until thickened. Allow blades to come... 2 to 3 ounces (50 to 85 g) baking chocolate into half-inch (1 cm) chunks and place in blender jar followed by the ice cubes. Press a desired speed control button for 10 seconds or until desired chopped consistency is crushed to desired consistency. Continue until desired consistency. Pour...
Use & Care
Page 8
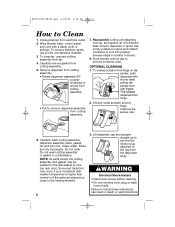
... parts are placed too close to the cap from cutting assembly. 7. Unscrew dispenser cap. 6. Lift dispenser cap and actuator straight up to remove the interior plug attached to the heating element. 8 3. Wipe blender base, control panel, and cord with fingers. Carefully remove gasket from hinge.... 2. Reassemble cutting unit assembly onto jar, and replace jar onto blender base. This releases dispenser from cutting assembly. 5. Rinse and dry thoroughly. NOTE: All parts except the cutting assembly and gasket may occur if ...
... parts are placed too close to the cap from cutting assembly. 7. Unscrew dispenser cap. 6. Lift dispenser cap and actuator straight up to remove the interior plug attached to the heating element. 8 3. Wipe blender base, control panel, and cord with fingers. Carefully remove gasket from hinge.... 2. Reassemble cutting unit assembly onto jar, and replace jar onto blender base. This releases dispenser from cutting assembly. 5. Rinse and dry thoroughly. NOTE: All parts except the cutting assembly and gasket may occur if ...
Use & Care
Page 9
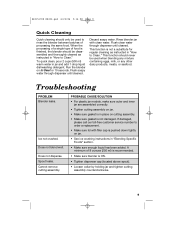
...crushing instructions in place on ICY DRINK for regular cleaning as instructed in "How to Clean." Rinse blender jar with filler cap is ON. • Tighten dispenser cap (located above spout). • Loosen collar by holding jar and tighten cutting assembly counterclockwise. ...is in "Blending Specific Foods" section. • Make sure enough liquid has been added. Troubleshooting PROBLEM Blender leaks. Flush soapy water through dispenser until cleaned. Does not dispense. PROBABLE CAUSE/SOLUTION • For plastic jar models, make sure outer and inner jar are assembled ...
...crushing instructions in place on ICY DRINK for regular cleaning as instructed in "How to Clean." Rinse blender jar with filler cap is ON. • Tighten dispenser cap (located above spout). • Loosen collar by holding jar and tighten cutting assembly counterclockwise. ...is in "Blending Specific Foods" section. • Make sure enough liquid has been added. Troubleshooting PROBLEM Blender leaks. Flush soapy water through dispenser until cleaned. Does not dispense. PROBABLE CAUSE/SOLUTION • For plastic jar models, make sure outer and inner jar are assembled ...
Use & Care
Page 10
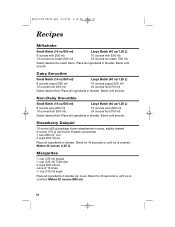
...frozen strawberries in syrup, slightly thawed 6-ounce (170 g) can frozen limeade concentrate 1 cup (250 ml) rum 2 cups (500 ml) ice Place all ingredients in blender. Makes 32 ounces (950 ml). 10 Dairy Smoothie Small Batch (16 oz/500 ml) Large Batch (40 oz/1.25 L) 8 ounces yogurt (250 ml) 16 ounces... ounces fruit (500 ml) 16 ounces juice (500 ml) 24 ounces fruit (750 ml) Select desired fruit. Blend until smooth. Place all ingredients in blender jar; 840153700 ENv02.qxd 6/22/06 5:16 PM Page 10 Recipes Milkshake Small Batch (16 oz/500 ml) Large Batch (40 oz/1.25 L) 8 ...
...frozen strawberries in syrup, slightly thawed 6-ounce (170 g) can frozen limeade concentrate 1 cup (250 ml) rum 2 cups (500 ml) ice Place all ingredients in blender. Makes 32 ounces (950 ml). 10 Dairy Smoothie Small Batch (16 oz/500 ml) Large Batch (40 oz/1.25 L) 8 ounces yogurt (250 ml) 16 ounces... ounces fruit (500 ml) 16 ounces juice (500 ml) 24 ounces fruit (750 ml) Select desired fruit. Blend until smooth. Place all ingredients in blender jar; 840153700 ENv02.qxd 6/22/06 5:16 PM Page 10 Recipes Milkshake Small Batch (16 oz/500 ml) Large Batch (40 oz/1.25 L) 8 ...
Use & Care
Page 11
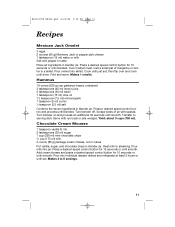
Press a desired speed control button for 10 seconds or until blended. Over medium heat, melt a small pat of jar with rye toast or pita wedges. Turn blender on and process an additional 30 seconds until done. Transfer to 6 servings. 11 Pour milk into skillet. ...sides of margarine or butter in blender jar. Add cream cheese and press a desired speed control button for 10 seconds or until smooth. Press a desired speed control button and process until smooth. Press a desired speed control button for 15 seconds or until blended. Turn blender off. Cook until set ;...
Press a desired speed control button for 10 seconds or until blended. Over medium heat, melt a small pat of jar with rye toast or pita wedges. Turn blender on and process an additional 30 seconds until done. Transfer to 6 servings. 11 Pour milk into skillet. ...sides of margarine or butter in blender jar. Add cream cheese and press a desired speed control button for 10 seconds or until smooth. Press a desired speed control button and process until smooth. Press a desired speed control button for 15 seconds or until blended. Turn blender off. Cook until set ;...
Use & Care
Page 12
... ready for Proctor-Silex and Traditions products from the date of your blender. 840153700 ENv02.qxd 6/22/06 5:16 PM Page 12 Customer Service If you have other legal rights which may also have a question about your blender, call our CUSTOMER SERVICE NUMBER. (For faster service please have a.... Before calling, please note the model, type, and series numbers and fill in material and workmanship for a period of three (3) years for Hamilton Beach products or one hundred eighty (180) days for operator to assist you.) CUSTOMER SERVICE NUMBERS In the U.S. 1-800-851-8900 In Canada 1-800...
... ready for Proctor-Silex and Traditions products from the date of your blender. 840153700 ENv02.qxd 6/22/06 5:16 PM Page 12 Customer Service If you have other legal rights which may also have a question about your blender, call our CUSTOMER SERVICE NUMBER. (For faster service please have a.... Before calling, please note the model, type, and series numbers and fill in material and workmanship for a period of three (3) years for Hamilton Beach products or one hundred eighty (180) days for operator to assist you.) CUSTOMER SERVICE NUMBERS In the U.S. 1-800-851-8900 In Canada 1-800...


