
Operation Manual
Page 2
...24. Extreme caution must be used when moving parts. 20. Do not store any other hot liquids. 11. Do not leave blender unattended while it is intended for use , and before putting on examination, repair, or electrical or mechanical adjustment. - To prevent... If cutter assembly blades are sharp. Inspect container and cutter assembly daily. Start blending at lowest speed. 28. When using blender. Disconnect power before using electrical appliances, basic safety precautions should be followed, including the following: 1. Check cutter for instructions on...
...24. Extreme caution must be used when moving parts. 20. Do not store any other hot liquids. 11. Do not leave blender unattended while it is intended for use , and before putting on examination, repair, or electrical or mechanical adjustment. - To prevent... If cutter assembly blades are sharp. Inspect container and cutter assembly daily. Start blending at lowest speed. 28. When using blender. Disconnect power before using electrical appliances, basic safety precautions should be followed, including the following: 1. Check cutter for instructions on...
Operation Manual
Page 3
... not use , rinse with sanitizing solution, replace lid and filler cap and run on the bleach. 1. EST Monday - Electrical Shock Hazard Disconnect power before cleaning blender base.
... not use , rinse with sanitizing solution, replace lid and filler cap and run on the bleach. 1. EST Monday - Electrical Shock Hazard Disconnect power before cleaning blender base.

Operation Manual
Page 4
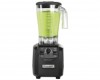
Become familiar with all parts and features before using your blender. Removable Filler Cap Lid 64-oz. Parts and Features The parts and features for blending and mixing beverages. Your blender is designed for the blender are shown on this page. Polycarbonate Container ON/OFF/Circuit Breaker Control Panel Timer Knob* * = 3 Min. Max High Speed Low Speed Pulse (Pulse runs at high speed) 4 Cutter Assembly Jar Pad Blender Base Control Panel Start ON (I) STOP Light indicates ready to operate
Become familiar with all parts and features before using your blender. Removable Filler Cap Lid 64-oz. Parts and Features The parts and features for blending and mixing beverages. Your blender is designed for the blender are shown on this page. Polycarbonate Container ON/OFF/Circuit Breaker Control Panel Timer Knob* * = 3 Min. Max High Speed Low Speed Pulse (Pulse runs at high speed) 4 Cutter Assembly Jar Pad Blender Base Control Panel Start ON (I) STOP Light indicates ready to operate
Operation Manual
Page 5
...highest graduation marking. • Cutter assembly blades are not sharp or are loose, discontinue use immediately and replace the container. Weekly Unplug the blender, and then inspect the power cord insulation and power plug for wear, nicks, and broken or loose blades. Plug unit into electric outlet to... container needs to cool down for repair or replacement. See "Replacement Parts". Inspect the cutter by rotating the drive end of the blender base. If it trips again immediately or frequently, contact Technical Service. • Check container to create a fluid blend.
...highest graduation marking. • Cutter assembly blades are not sharp or are loose, discontinue use immediately and replace the container. Weekly Unplug the blender, and then inspect the power cord insulation and power plug for wear, nicks, and broken or loose blades. Plug unit into electric outlet to... container needs to cool down for repair or replacement. See "Replacement Parts". Inspect the cutter by rotating the drive end of the blender base. If it trips again immediately or frequently, contact Technical Service. • Check container to create a fluid blend.


