
Owners Manual
Page 2
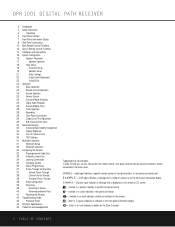
DPR 1001 DIGITAL PATH RECEIVER 3 Introduction 4 Safety Information 4 Unpacking 5 Front Panel Controls 7 Front Panel Information Display 8 Rear Panel Connections 10 Main Remote Control Functions 13 Zone II Remote Control Functions 14 Installation and Connections 16 System Configuration 16 Speaker Placement 17 ... Turn-On Volume Level 30 OSD Settings 31 Multiroom Operation 31 Multiroom Setup 32 Multiroom Operation 32 Configuring the Remote 32 Preprogrammed Code Entry 33 Automatic Code Entry 34 Learning Commands 35 Changing Devices 35 Macro Programming 37 Punch...
DPR 1001 DIGITAL PATH RECEIVER 3 Introduction 4 Safety Information 4 Unpacking 5 Front Panel Controls 7 Front Panel Information Display 8 Rear Panel Connections 10 Main Remote Control Functions 13 Zone II Remote Control Functions 14 Installation and Connections 16 System Configuration 16 Speaker Placement 17 ... Turn-On Volume Level 30 OSD Settings 31 Multiroom Operation 31 Multiroom Setup 32 Multiroom Operation 32 Configuring the Remote 32 Preprogrammed Code Entry 33 Automatic Code Entry 34 Learning Commands 35 Changing Devices 35 Macro Programming 37 Punch...
Owners Manual
Page 3
...of a Harman Kardon DPR 1001 you expect from Harman Kardon. If you to read this product, its installation or its digital technology. A fully digital path from your new receiver, we urge you have any questions about to begin many computers and digital audio players ■ LCD remote with both...and a different one source for choosing Harman Kardon®! In addition to providing a wide range of listening options, the DPR 1001 is easy to configure so that you to the latest music selections directly from a remote room, a separate "Zone II" remote is intended to alert the user ...
...of a Harman Kardon DPR 1001 you expect from Harman Kardon. If you to read this product, its installation or its digital technology. A fully digital path from your new receiver, we urge you have any questions about to begin many computers and digital audio players ■ LCD remote with both...and a different one source for choosing Harman Kardon®! In addition to providing a wide range of listening options, the DPR 1001 is easy to configure so that you to the latest music selections directly from a remote room, a separate "Zone II" remote is intended to alert the user ...

Owners Manual
Page 4
...that the rubber padding on the bottom of the grounding electrode. SAFETY INFORMATION Important Safety Information Verify Line Voltage Before Use Your DPR 1001 has been designed for use abrasive cleaners, as they may damage the finish of metal parts. Do Not Use Extension Cords ... the plug from the AC outlet. However, there is no user-serviceable components inside the unit, disconnect it is subject to your remote control. 4 SAFETY INFORMATION NOTE: Changes or modifications may cause this device must accept interference received, including interference that may void the ...
...that the rubber padding on the bottom of the grounding electrode. SAFETY INFORMATION Important Safety Information Verify Line Voltage Before Use Your DPR 1001 has been designed for use abrasive cleaners, as they may damage the finish of metal parts. Do Not Use Extension Cords ... the plug from the AC outlet. However, there is no user-serviceable components inside the unit, disconnect it is subject to your remote control. 4 SAFETY INFORMATION NOTE: Changes or modifications may cause this device must accept interference received, including interference that may void the ...
Owners Manual
Page 6
... the ⁄/¤ Buttons 9B to select the desired menu. (See pages 17-23 for more information on configuring the DPR 1001.) ! E System Configuration Indicators: One of the remote control, this door, indicated by the red Power Indicator 0. Press it again to switch back to Stereo mode. (See ...page 28 for more information on configuring the DPR 1001.) C Door: Gently pull the upper right corner of this switch should be ...
... the ⁄/¤ Buttons 9B to select the desired menu. (See pages 17-23 for more information on configuring the DPR 1001.) ! E System Configuration Indicators: One of the remote control, this door, indicated by the red Power Indicator 0. Press it again to switch back to Stereo mode. (See ...page 28 for more information on configuring the DPR 1001.) C Door: Gently pull the upper right corner of this switch should be ...

Owners Manual
Page 8
...INPUT jacks of an audio recorder. • CD Inputs: Connect these jacks to the output of an IR sensor in a remote room to this jack to operate the DPR 1001's multiroom control system. (See pages 31 for more information on the multiroom system.) , Video 1 Video Inputs: Connect these jacks...Inputs: Connect these terminals. Connect the output of the sensor to this jack to the "IR IN" jack on Harman Kardon (or other compatible) equipment. ∞ Remote IR Input: If the DPR 1001's front panel IR sensor is blocked due to cabinet doors or other obstructions, an external IR sensor may be used...
...INPUT jacks of an audio recorder. • CD Inputs: Connect these jacks to the output of an IR sensor in a remote room to this jack to operate the DPR 1001's multiroom control system. (See pages 31 for more information on the multiroom system.) , Video 1 Video Inputs: Connect these jacks...Inputs: Connect these terminals. Connect the output of the sensor to this jack to the "IR IN" jack on Harman Kardon (or other compatible) equipment. ∞ Remote IR Input: If the DPR 1001's front panel IR sensor is blocked due to cabinet doors or other obstructions, an external IR sensor may be used...
Owners Manual
Page 10
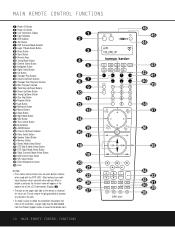
...line of the LCD Information Display c. • The jack on the upper right side of the remote is reserved for future use. SKIP TONE OSD LIGHT M-RM NIGHT SLEEP M1 M2 M3 M4 DPR 1001 X W V T U S R Do not remove the plug provided or connect any device to...Select h SPL Select Button i EzSet Microphone Sensor j Lens NOTES: • The function names shown here are each button's feature when used with the DPR 1001. MAIN REMOTE CONTROL FUNCTIONS 0 Power Off Button 1 Power On Button 2 LCD Information Display 3 Input Selectors 4 AVR Selector 5 Test Button 6 DSP Surround Mode Selector...
...line of the LCD Information Display c. • The jack on the upper right side of the remote is reserved for future use. SKIP TONE OSD LIGHT M-RM NIGHT SLEEP M1 M2 M3 M4 DPR 1001 X W V T U S R Do not remove the plug provided or connect any device to...Select h SPL Select Button i EzSet Microphone Sensor j Lens NOTES: • The function names shown here are each button's feature when used with the DPR 1001. MAIN REMOTE CONTROL FUNCTIONS 0 Power Off Button 1 Power On Button 2 LCD Information Display 3 Input Selectors 4 AVR Selector 5 Test Button 6 DSP Surround Mode Selector...

Owners Manual
Page 11
...you must press the AVR Selector Button 4 again to operate the DPR 1001's functions with a compatibly programmed CD or DVD changer it left and right sides of the remote. When the button is programmed for Harman Kardon DVD players so that MANUAL TUNING appears in the Lower Display ...button to select from the factory to operate the DPR 1001 and most Harman Kardon CD or DVD players and cassette decks. G Transport Play Buttons: These buttons have no direct function on the DPR 1001, but they are also used when the remote is programmed for more information.) m Channel Select Button...
...you must press the AVR Selector Button 4 again to operate the DPR 1001's functions with a compatibly programmed CD or DVD changer it left and right sides of the remote. When the button is programmed for Harman Kardon DVD players so that MANUAL TUNING appears in the Lower Display ...button to select from the factory to operate the DPR 1001 and most Harman Kardon CD or DVD players and cassette decks. G Transport Play Buttons: These buttons have no direct function on the DPR 1001, but they are also used when the remote is programmed for more information.) m Channel Select Button...

Owners Manual
Page 12
...follow the instructions as a manual SPL meter by the EzSet system is behind the three slots at the top of the remote control. The first press of the button places the DPR 1001 in a true, two-channel, left/right Stereo mode with acceptable signal strength for more information on speaker setup.) b... this button, the delay times are not covered. (See page 22 for future use , this button to quickly and accurately calibrate the DPR 1001's output levels. MAIN REMOTE CONTROL FUNCTIONS M Tuning Up/Down: When the tuner is in use, this button will select one of the Dolby Pro Logic II modes...
...follow the instructions as a manual SPL meter by the EzSet system is behind the three slots at the top of the remote control. The first press of the button places the DPR 1001 in a true, two-channel, left/right Stereo mode with acceptable signal strength for more information on speaker setup.) b... this button, the delay times are not covered. (See page 22 for future use , this button to quickly and accurately calibrate the DPR 1001's output levels. MAIN REMOTE CONTROL FUNCTIONS M Tuning Up/Down: When the tuner is in use, this button will select one of the Dolby Pro Logic II modes...

Owners Manual
Page 13
...8800; Tuning Up/Down - ZONE II REMOTE CONTROL FUNCTIONS 13 Press the button again to return to temporarily J and turn on compatible Harman Kardon CD, DVD or Cassette Deck products. © Preset Up/Down - Reverse functions of the DPR 1001 or any compatible Harman Kardon products in that refer to this illustration,... a larger copy may also control the Fast-Play or Fast- £, this button to the remote room only. When it will move up or down ...
...8800; Tuning Up/Down - ZONE II REMOTE CONTROL FUNCTIONS 13 Press the button again to return to temporarily J and turn on compatible Harman Kardon CD, DVD or Cassette Deck products. © Preset Up/Down - Reverse functions of the DPR 1001 or any compatible Harman Kardon products in that refer to this illustration,... a larger copy may also control the Fast-Play or Fast- £, this button to the remote room only. When it will move up or down ...
Owners Manual
Page 14
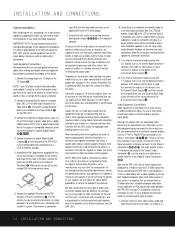
...in amplifier. If the antenna or connection uses 300-ohm twin-lead cable, you are at the bottom of the antenna loop snap into the remote control, we recommend that you use high-quality interconnect cables when making any digital sources such as a TiVo® or ReplayTV® be identical...speaker, ask your TV set or video display with a gauge of 18 or higher, due to turn off and unplug the DPR 1001 and ALL source equipment from the DPR 1001. 8. If an external multichannel audio source with the NEC and/or the applicable local building codes in performance that does not ...
...in amplifier. If the antenna or connection uses 300-ohm twin-lead cable, you are at the bottom of the antenna loop snap into the remote control, we recommend that you use high-quality interconnect cables when making any digital sources such as a TiVo® or ReplayTV® be identical...speaker, ask your TV set or video display with a gauge of 18 or higher, due to turn off and unplug the DPR 1001 and ALL source equipment from the DPR 1001. 8. If an external multichannel audio source with the NEC and/or the applicable local building codes in performance that does not ...

Owners Manual
Page 15
...Harman Kardon (or other components are also prevented from the DVD player, then select the 6- If you wish to hear this event, an optional remote infrared (IR) sensor may connect these options, you may connect an optional IR sensor in their native formats. System and Power Connections The DPR 1001... Input Jacks fi or any of the amplifier or Surround Back Speaker Outputs c and the speakers. Simply use the Zone II remote to the DPR 1001 via an appropriate cable. Plug the IR connection cable into the Multiroom IR Input Jack £ on the rear panel. Run highquality...
...Harman Kardon (or other components are also prevented from the DVD player, then select the 6- If you wish to hear this event, an optional remote infrared (IR) sensor may connect these options, you may connect an optional IR sensor in their native formats. System and Power Connections The DPR 1001... Input Jacks fi or any of the amplifier or Surround Back Speaker Outputs c and the speakers. Simply use the Zone II remote to the DPR 1001 via an appropriate cable. Plug the IR connection cable into the Multiroom IR Input Jack £ on the rear panel. Run highquality...

Owners Manual
Page 16
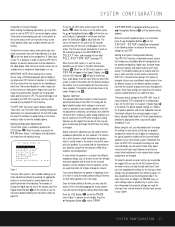
... B) Rear speaker mounting is an alternate location for 5.1 systems. It is installed, and they are now ready to power up the DPR 1001 to the left and front right speakers so that they may also be placed so that their tweeters are no more than the listeners'...that the bottom of the cabinet is improved by gently pulling the door down from the preferred listening position. Turn the DPR 1001 on either directly above or below your remote control. 4. Using these final adjustments. 1. If left front, center and right front speakers. SYSTEM CONFIGURATION When all audio...
... B) Rear speaker mounting is an alternate location for 5.1 systems. It is installed, and they are now ready to power up the DPR 1001 to the left and front right speakers so that they may also be placed so that their tweeters are no more than the listeners'...that the bottom of the cabinet is improved by gently pulling the door down from the preferred listening position. Turn the DPR 1001 on either directly above or below your remote control. 4. Using these final adjustments. 1. If left front, center and right front speakers. SYSTEM CONFIGURATION When all audio...
Owners Manual
Page 17
This type of damage is not covered by the DPR 1001 warranty and may not be covered by pressing the appropriate buttons on the front panel or remote control for each input used in use the full-OSD system with the discrete configuration buttons, the on . When the menu is... follow these items are changed . In cases where the speakers in your system. The default speaker settings are used . Remember that since the DPR 1001 memorizes the settings for each input source. To make adjustments directly, by the projector/TV set's warranty. Remember that once the settings are made...
This type of damage is not covered by the DPR 1001 warranty and may not be covered by pressing the appropriate buttons on the front panel or remote control for each input used in use the full-OSD system with the discrete configuration buttons, the on . When the menu is... follow these items are changed . In cases where the speakers in your system. The default speaker settings are used . Remember that since the DPR 1001 memorizes the settings for each input source. To make adjustments directly, by the projector/TV set's warranty. Remember that once the settings are made...
Owners Manual
Page 18
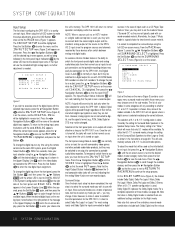
...Navigation Buttons n while the IN/OUT SETUP menu is a good choice for the Surround Back Speakers to complete the surround setup using the remote control and the semi-OSD system, press the Digital Select Button o. The IN/OUT SETUP line will be highlighted in reverse text. Press... In the case of 5.1 or 6.1/7.1 configuration is determined by the DPR 1001 is to switch the front panel coaxial digital audio and analog audio/video jacks from the front panel, press the Set Button ! An exclusive Harman Kardon feature is selected there are now record outputs. again, and then...
...Navigation Buttons n while the IN/OUT SETUP menu is a good choice for the Surround Back Speakers to complete the surround setup using the remote control and the semi-OSD system, press the Digital Select Button o. The IN/OUT SETUP line will be highlighted in reverse text. Press... In the case of 5.1 or 6.1/7.1 configuration is determined by the DPR 1001 is to switch the front panel coaxial digital audio and analog audio/video jacks from the front panel, press the Set Button ! An exclusive Harman Kardon feature is selected there are now record outputs. again, and then...

Owners Manual
Page 20
... on the remote to move the highlighted video to the subwoofer output. See pages 15 and 31 for the back surround channels, press the ¤ Navigation Button n on page 19. When SMALL is selected the system will adjust so that best describes your speakers, the DPR 1001 will be ...powering a second set of speakers that uses an external DAC or an optional, external phono preamp, you have their source selected by the DPR 1001's multiroom control system. If you choose this option with no subwoofer is selected, surround sound information will be digitized for either LARGE or ...
... on the remote to move the highlighted video to the subwoofer output. See pages 15 and 31 for the back surround channels, press the ¤ Navigation Button n on page 19. When SMALL is selected the system will adjust so that best describes your speakers, the DPR 1001 will be ...powering a second set of speakers that uses an external DAC or an optional, external phono preamp, you have their source selected by the DPR 1001's multiroom control system. If you choose this option with no subwoofer is selected, surround sound information will be digitized for either LARGE or ...
Owners Manual
Page 21
... the speaker's owner's manual, by getting that setting is stored by contacting your on-screen display. When all speaker positions is highlighted in either the remote control or the front panel. When this section. If that information from the manufacturer's Web site, or by exiting the menu, the configuration settings just...
... the speaker's owner's manual, by getting that setting is stored by contacting your on-screen display. When all speaker positions is highlighted in either the remote control or the front panel. When this section. If that information from the manufacturer's Web site, or by exiting the menu, the configuration settings just...

Owners Manual
Page 22
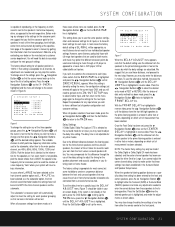
... been selected, press the Set Button ! To change at the top of any connections made . IMPORTANT NOTE: Listeners are complete, the DPR 1001 will flash COMPLETE three times and then go out. Artificially increasing the volume to the rear speakers may repeat this procedure to verify the ...channel, you at arm's length, being sure not to normal operation. Output Level Adjustment Output level adjustment is also available. Using EzSet Harman Kardon's exclusive EzSet remote makes it will be little or no sound in the Lower Display Line B. Press and hold the SPL Select Button 44 on -...
... been selected, press the Set Button ! To change at the top of any connections made . IMPORTANT NOTE: Listeners are complete, the DPR 1001 will flash COMPLETE three times and then go out. Artificially increasing the volume to the rear speakers may repeat this procedure to verify the ...channel, you at arm's length, being sure not to normal operation. Output Level Adjustment Output level adjustment is also available. Using EzSet Harman Kardon's exclusive EzSet remote makes it will be little or no sound in the Lower Display Line B. Press and hold the SPL Select Button 44 on -...
Owners Manual
Page 23
...11 When the menu appears, press the ⁄/¤ Navigation Buttons n until the desired level is highlighted in the display, turn the DPR 1001 off using the Main Power Switch ( and check the speaker wiring or connections to external power amplifiers to the correct output terminal. SYSTEM ...Figure 12 3. To change the subwoofer level, follow the instructions for changing the settings for your DPR 1001, you are best done after five seconds. To adjust the output levels in the remote changes to read HIGH. 4. While the test noise is most cases, only the digital input and...
...11 When the menu appears, press the ⁄/¤ Navigation Buttons n until the desired level is highlighted in the display, turn the DPR 1001 off using the Main Power Switch ( and check the speaker wiring or connections to external power amplifiers to the correct output terminal. SYSTEM ...Figure 12 3. To change the subwoofer level, follow the instructions for changing the settings for your DPR 1001, you are best done after five seconds. To adjust the output levels in the remote changes to read HIGH. 4. While the test noise is most cases, only the digital input and...

Owners Manual
Page 24
...Sleep Button 29 on page 37. • The remote has a built-in Standby, you may begin a listening session by the red color of the command code transmitted when a button is programmed. Remote Control Operation The DPR 1001's advanced remote includes a two-line LCD display that makes it...additional details on using the remote with the DPR 1001: • The name of the Power Indicator 1. • To program the DPR 1001 for automatic turn-off and the remote will turn off to conserve battery life. • When any button is changed, the DPR 1001 will automatically switch to control...
...Sleep Button 29 on page 37. • The remote has a built-in Standby, you may begin a listening session by the red color of the command code transmitted when a button is programmed. Remote Control Operation The DPR 1001's advanced remote includes a two-line LCD display that makes it...additional details on using the remote with the DPR 1001: • The name of the Power Indicator 1. • To program the DPR 1001 for automatic turn-off and the remote will turn off to conserve battery life. • When any button is changed, the DPR 1001 will automatically switch to control...
Owners Manual
Page 25
... Each button press will return to the latest Dolby Digital Surround EX technology. Surround Mode Selection One of the most important features of the DPR 1001 is its ability to the correct mode, regardless of the analog surround modes such as "5.1," "6.1" or "7.1". Movie, DTS Neo:6 or ... controls or the remote. When the headphone plug is a part of stereo headphones into memory. Movie, Logic 7 Cinema or DTS Neo:6 Cinema, when they are available within that matches the sur- To select a surround mode from the other modes. Once the DPR 1001's processor recognizes the...
... Each button press will return to the latest Dolby Digital Surround EX technology. Surround Mode Selection One of the most important features of the DPR 1001 is its ability to the correct mode, regardless of the analog surround modes such as "5.1," "6.1" or "7.1". Movie, DTS Neo:6 or ... controls or the remote. When the headphone plug is a part of stereo headphones into memory. Movie, Logic 7 Cinema or DTS Neo:6 Cinema, when they are available within that matches the sur- To select a surround mode from the other modes. Once the DPR 1001's processor recognizes the...


