
Upgrading and Servicing Guide
Page 3
... or Replacing an Optical Drive 9 Removing the HP Pocket Media or Diskette or Hard Disk Drive 11 Adding or Replacing the HP Pocket Media or Diskette or Hard Disk Drive 13 Removing the Memory Card Reader 15 Adding or Replacing the Memory Card Reader 16 Removing the Hard Disk Drive ...17 Adding or Replacing a Hard Disk Drive 19 Adding Memory 22 Removing a Memory Module 22 Installing a Memory Module 24 Removing...
... or Replacing an Optical Drive 9 Removing the HP Pocket Media or Diskette or Hard Disk Drive 11 Adding or Replacing the HP Pocket Media or Diskette or Hard Disk Drive 13 Removing the Memory Card Reader 15 Adding or Replacing the Memory Card Reader 16 Removing the Hard Disk Drive ...17 Adding or Replacing a Hard Disk Drive 19 Adding Memory 22 Removing a Memory Module 22 Installing a Memory Module 24 Removing...

Upgrading and Servicing Guide
Page 9
B 2 Swing the front panel away from the outside edge of the chassis. Upgrading and Servicing Guide 5 Removing the Front Panel This procedure is necessary only when removing or replacing an optical drive, memory card reader, an HP Pocket Media Drive, diskette drive, or the hard disk drive. 1 Pull the three tabs (B) away from the chassis toward the left to remove it.
B 2 Swing the front panel away from the outside edge of the chassis. Upgrading and Servicing Guide 5 Removing the Front Panel This procedure is necessary only when removing or replacing an optical drive, memory card reader, an HP Pocket Media Drive, diskette drive, or the hard disk drive. 1 Pull the three tabs (B) away from the chassis toward the left to remove it.

Upgrading and Servicing Guide
Page 11
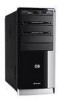
Upgrading and Servicing Guide 7 Locating Components Inside the Computer A B C D E F A Memory card reader (select models) B Upper 5.25-inch optical drive bay, may be a CD-ROM, CD-RW, DVD-ROM, DVD+RW/+R, or combination drive C Lower 5.25-...inch optical drive bay, may be empty (knockout plate) or a CD-ROM, CD-RW, DVD-ROM, DVD+RW/+R, combination drive, or HP Personal Media Drive bay (select models) D HP Pocket Media Drive bay, a hard disk drive, or a diskette (floppy) drive (select models) E Front connector panel (no replacement instructions) F Hard disk drive...
Upgrading and Servicing Guide 7 Locating Components Inside the Computer A B C D E F A Memory card reader (select models) B Upper 5.25-inch optical drive bay, may be a CD-ROM, CD-RW, DVD-ROM, DVD+RW/+R, or combination drive C Lower 5.25-...inch optical drive bay, may be empty (knockout plate) or a CD-ROM, CD-RW, DVD-ROM, DVD+RW/+R, combination drive, or HP Personal Media Drive bay (select models) D HP Pocket Media Drive bay, a hard disk drive, or a diskette (floppy) drive (select models) E Front connector panel (no replacement instructions) F Hard disk drive...

Upgrading and Servicing Guide
Page 19
Removing the Memory Card Reader 1 Complete the procedures to prepare the PC to remove the side panel and to loosen it, and then pulling the memory card reader part way out of the front of the chassis. 3 Disconnect the cable from the back of the memory card reader. 4 Pull the memory card reader out of the front of the chassis. Upgrading and Servicing Guide 15 See "Opening and Closing the PC" on page 1. 2 Release the drive by removing the screw on the top of the memory card reader, sliding the reader to the left to remove the front panel.
Removing the Memory Card Reader 1 Complete the procedures to prepare the PC to remove the side panel and to loosen it, and then pulling the memory card reader part way out of the front of the chassis. 3 Disconnect the cable from the back of the memory card reader. 4 Pull the memory card reader out of the front of the chassis. Upgrading and Servicing Guide 15 See "Opening and Closing the PC" on page 1. 2 Release the drive by removing the screw on the top of the memory card reader, sliding the reader to the left to remove the front panel.

Upgrading and Servicing Guide
Page 20
... reader part way into the front of the chassis. 3 Attach the cable to the back of the memory card reader. 4 Push the memory card reader into the chassis until the screw hole on the chassis is aligned with the screw hole on page 1. 16 Upgrading and Servicing Guide ...See "Opening and Closing the PC" on the top of the memory card reader, and then insert the short screw to secure the memory card reader to the chassis. 5 Complete the procedures to remove the...
... reader part way into the front of the chassis. 3 Attach the cable to the back of the memory card reader. 4 Push the memory card reader into the chassis until the screw hole on the chassis is aligned with the screw hole on page 1. 16 Upgrading and Servicing Guide ...See "Opening and Closing the PC" on the top of the memory card reader, and then insert the short screw to secure the memory card reader to the chassis. 5 Complete the procedures to remove the...

Upgrading and Servicing Guide
Page 26
...ones. DDR DIM To determine which type and speed of memory module could damage the system. 22 Upgrading and Servicing Guide The PC ships with one or more memory modules, but you can replace the existing memory module(s) with random access memory (RAM), which model PC you have. WARNING: Using the ...wrong type of memory module your PC uses, and for DDR DIMMs (double data rate dual...
...ones. DDR DIM To determine which type and speed of memory module could damage the system. 22 Upgrading and Servicing Guide The PC ships with one or more memory modules, but you can replace the existing memory module(s) with random access memory (RAM), which model PC you have. WARNING: Using the ...wrong type of memory module your PC uses, and for DDR DIMMs (double data rate dual...

Upgrading and Servicing Guide
Page 27
..." on page 1. 2 Gently lay the PC on its side. 3 Locate the memory sockets on the ends of the memory socket until the memory module pops out of the socket. WARNING: Do not pull the memory module out of the contacts. CAUTION: When handling a memory module, be careful not to touch any cabling out of the... so may damage the module. 4 Move any of the socket. Upgrading and Servicing Guide 23 Use the retaining clips to remove the side panel. Removing a Memory Module 1 Complete the procedures to prepare the PC and to remove the module. 6 Lift the...
..." on page 1. 2 Gently lay the PC on its side. 3 Locate the memory sockets on the ends of the memory socket until the memory module pops out of the socket. WARNING: Do not pull the memory module out of the contacts. CAUTION: When handling a memory module, be careful not to touch any cabling out of the... so may damage the module. 4 Move any of the socket. Upgrading and Servicing Guide 23 Use the retaining clips to remove the side panel. Removing a Memory Module 1 Complete the procedures to prepare the PC and to remove the module. 6 Lift the...

Upgrading and Servicing Guide
Page 28
.... 24 Upgrading and Servicing Guide Installing a Memory Module Upgrade the memory in your PC with memory of the same type and speed as the memory originally installed in the same memory slot from which the old memory was removed. CAUTION: When handling a memory module, be careful not to replace the side panel,... damage the module. 1 Open both latches of the memory module socket: If you are replacing a memory module, put the new memory module in your PC. See "Opening and Closing the PC" on page 1. Or If you are adding a memory module, install the new module into the socket nearest the...
.... 24 Upgrading and Servicing Guide Installing a Memory Module Upgrade the memory in your PC with memory of the same type and speed as the memory originally installed in the same memory slot from which the old memory was removed. CAUTION: When handling a memory module, be careful not to replace the side panel,... damage the module. 1 Open both latches of the memory module socket: If you are replacing a memory module, put the new memory module in your PC. See "Opening and Closing the PC" on page 1. Or If you are adding a memory module, install the new module into the socket nearest the...

Upgrading and Servicing Guide
Page 32
... A lithium battery on page 1. 28 Upgrading and Servicing Guide Part number: 5991-6989 See "Adding Memory" on its side. 3 Remove any cabling, if necessary, to reach the battery. 4 Remove any memory modules, if necessary, to close the PC. See "Opening and Closing the PC" on the motherboard...explosion if the battery is danger of battery. If the battery fails, replace it with the positive (+) side facing the latch. 7 Replace the memory modules or cables you removed. 8 Set the chassis upright. 9 Complete the procedure to replace the side panel, and to reach the battery. ...
... A lithium battery on page 1. 28 Upgrading and Servicing Guide Part number: 5991-6989 See "Adding Memory" on its side. 3 Remove any cabling, if necessary, to reach the battery. 4 Remove any memory modules, if necessary, to close the PC. See "Opening and Closing the PC" on the motherboard...explosion if the battery is danger of battery. If the battery fails, replace it with the positive (+) side facing the latch. 7 Replace the memory modules or cables you removed. 8 Set the chassis upright. 9 Complete the procedure to replace the side panel, and to reach the battery. ...

Troubleshooting and Maintenance Guide
Page 23
..., try resetting the date and time in an exceedingly hot environment. See the Upgrading and Servicing Guide for instructions. Possible solution Incompatible memory (RAM) may be replaced. Note that your operating system by using the Control Panel. When drive activity stops, remove the disk and press...spacebar. If the problem persists, replace the battery. Computer shuts down . The computer may have an internal fan. Reinstall the old memory to return your computer to be in your computer may need to its original state. Refer to the Upgrading and Servicing Guide for...
..., try resetting the date and time in an exceedingly hot environment. See the Upgrading and Servicing Guide for instructions. Possible solution Incompatible memory (RAM) may be replaced. Note that your operating system by using the Control Panel. When drive activity stops, remove the disk and press...spacebar. If the problem persists, replace the battery. Computer shuts down . The computer may have an internal fan. Reinstall the old memory to return your computer to be in your computer may need to its original state. Refer to the Upgrading and Servicing Guide for...

Troubleshooting and Maintenance Guide
Page 25
...Windows Start Button, click the Arrow button next to the Lock button, and then click Restart). Miscellaneous Symptom Possible solution Insufficient memory message displays. Remote sensor is not receiving a signal from the computer and plug it is properly detecting the IR Receiver.... If the message displays again, consider purchasing and installing additional memory. Plug in other USB devices, leave the remote sensor plugged in the Device Manager window. Troubleshooting Computer Problems 21 Performance (continued...
...Windows Start Button, click the Arrow button next to the Lock button, and then click Restart). Miscellaneous Symptom Possible solution Insufficient memory message displays. Remote sensor is not receiving a signal from the computer and plug it is properly detecting the IR Receiver.... If the message displays again, consider purchasing and installing additional memory. Plug in other USB devices, leave the remote sensor plugged in the Device Manager window. Troubleshooting Computer Problems 21 Performance (continued...

Troubleshooting and Maintenance Guide
Page 26
...slot. Some cards have a Read/Write or Security switch on the card. Inspect the ends of the supported types: CompactFlash (I, II, and Microdrive), Memory Stick, Memory Stick Pro, MultiMedia, Secure Digital, SmartMedia, or xD. Some models may cause data loss, or it . Make sure the switch is one of ...the memory cards for dirt or material closing a hole or spoiling a metal contact. Make sure the memory card is set to Write Enabled before attempting to write data to it may permanently damage the card...
...slot. Some cards have a Read/Write or Security switch on the card. Inspect the ends of the supported types: CompactFlash (I, II, and Microdrive), Memory Stick, Memory Stick Pro, MultiMedia, Secure Digital, SmartMedia, or xD. Some models may cause data loss, or it . Make sure the switch is one of ...the memory cards for dirt or material closing a hole or spoiling a metal contact. Make sure the memory card is set to Write Enabled before attempting to write data to it may permanently damage the card...

Troubleshooting and Maintenance Guide
Page 28
... computer to expand the device whose driver you restart, the computer reloads the operating system and software into its memory. Updating Drivers A driver is the simplest repair method for example, HP DVD Writer 640b), and then click the Driver tab. 5 To update a driver, click Update Driver, and... Computer, and then select Properties. 2 Under Tasks, click Device Manager. 3 Click the plus sign (+) to reload the operating system into its memory, which clears some problems that allows your computer to the Lock button, and then click Restart. Or To revert to the Lock button, and ...
... computer to expand the device whose driver you restart, the computer reloads the operating system and software into its memory. Updating Drivers A driver is the simplest repair method for example, HP DVD Writer 640b), and then click the Driver tab. 5 To update a driver, click Update Driver, and... Computer, and then select Properties. 2 Under Tasks, click Device Manager. 3 Click the plus sign (+) to reload the operating system into its memory, which clears some problems that allows your computer to the Lock button, and then click Restart. Or To revert to the Lock button, and ...


