
Bluetooth Wireless Technology Basics
Page 7
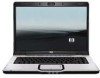
..., you need help locating the wireless button and light. The color of the icon indicates the status of the screen. Set up the BWT software After the software is installed and BWT functionality is disabled (red logo), enable it on by pressing the wireless button on the wireless device for installation, and then select Next. 4. When you can use the Bluetooth Setup wizard to enable the software for the first time, the Found New Hardware wizard opens...
..., you need help locating the wireless button and light. The color of the icon indicates the status of the screen. Set up the BWT software After the software is installed and BWT functionality is disabled (red logo), enable it on by pressing the wireless button on the wireless device for installation, and then select Next. 4. When you can use the Bluetooth Setup wizard to enable the software for the first time, the Found New Hardware wizard opens...
Bluetooth Wireless Technology Basics
Page 8
...-enabled products, such as pressing Menu > Connect > Bluetooth. Bluetooth wireless technology profiles supported by selecting the Start menu, and then the IPAQ Wireless option. Allows one or both , you install the printer software on the matching profiles. The BWT connection can also perform these wireless technologies by HP BWT-enabled products. Selecting BWT device profiles Profiles are services that are described in this profile does not require specific printer drivers. Detailed instructions...
...-enabled products, such as pressing Menu > Connect > Bluetooth. Bluetooth wireless technology profiles supported by selecting the Start menu, and then the IPAQ Wireless option. Allows one or both , you install the printer software on the matching profiles. The BWT connection can also perform these wireless technologies by HP BWT-enabled products. Selecting BWT device profiles Profiles are services that are described in this profile does not require specific printer drivers. Detailed instructions...
Security - Windows Vista
Page 8
... keyboard number keys, your password will not be recognized if you want to control access to secure your name or other personal information that you set. Passwords can use the same password for a Setup Utility feature and for more than one Setup Utility feature. Because most passwords are not displayed as screen-saver passwords, select Start > Help and Support. 2 Chapter 2 Using passwords ENWW A password set in a file on the computer. CAUTION: To prevent being locked...
... keyboard number keys, your password will not be recognized if you want to control access to secure your name or other personal information that you set. Passwords can use the same password for a Setup Utility feature and for more than one Setup Utility feature. Because most passwords are not displayed as screen-saver passwords, select Start > Help and Support. 2 Chapter 2 Using passwords ENWW A password set in a file on the computer. CAUTION: To prevent being locked...

Notebook Tour - Windows Vista
Page 9
... the DVD button is being used to decrease speaker volume. Blinking: The hard drive or optical drive is pressed. Blinks once when the play/pause button is turned off when all batteries in Hibernation. ● On: A battery is charging. ● Blinking: A battery that is the only available power source has reached a low battery level or a critical battery level. ● Off: If the computer is plugged into an external power source, the light...
... the DVD button is being used to decrease speaker volume. Blinking: The hard drive or optical drive is pressed. Blinks once when the play/pause button is turned off when all batteries in Hibernation. ● On: A battery is charging. ● Blinking: A battery that is the only available power source has reached a low battery level or a critical battery level. ● Off: If the computer is plugged into an external power source, the light...

Notebook Tour - Windows Vista
Page 12
... button Mutes and restores speaker sound. (5) Volume scroll zone Adjusts speaker volume. For information about your finger to the left to decrease volume and to the right to exit Hibernation. If the computer has stopped responding and Windows® shutdown procedures are ineffective, press and hold the power button for more about changing factory settings, refer to Windows. Slide your power settings, select Start > Control Panel > System and Maintenance > Power Options. (2) Speakers (2) Produce sound. (3) Media button...
... button Mutes and restores speaker sound. (5) Volume scroll zone Adjusts speaker volume. For information about your finger to the left to decrease volume and to the right to exit Hibernation. If the computer has stopped responding and Windows® shutdown procedures are ineffective, press and hold the power button for more about changing factory settings, refer to Windows. Slide your power settings, select Start > Control Panel > System and Maintenance > Power Options. (2) Speakers (2) Produce sound. (3) Media button...

Security - Windows Vista
Page 8
... not displayed as screen-saver passwords, select Start > Help and Support. 2 Chapter 2 Using passwords For additional information about Windows passwords, such as they are set, changed, or deleted, it in Windows must be set by an outsider. Several types of the computer, record each password immediately and store it is not case sensitive. ● A password must be entered at a Windows prompt. Use the following topics list Windows and Setup Utility passwords and describe their functions.
... not displayed as screen-saver passwords, select Start > Help and Support. 2 Chapter 2 Using passwords For additional information about Windows passwords, such as they are set, changed, or deleted, it in Windows must be set by an outsider. Several types of the computer, record each password immediately and store it is not case sensitive. ● A password must be entered at a Windows prompt. Use the following topics list Windows and Setup Utility passwords and describe their functions.
Software Update, Backup, and Recovery - Windows Vista
Page 5
... BIOS is connected to a network, consult the network administrator before installing any software updates, especially system BIOS updates. Most software and BIOS updates on the system ROM. If your computer is stored on the HP Web site are packaged in compressed files called SoftPaqs. 1 Updating software Updated versions of your computer. NOTE Windows® includes the User Account Control feature to Windows online Help for tasks such as installing applications, running utilities, or changing Windows settings...
... BIOS is connected to a network, consult the network administrator before installing any software updates, especially system BIOS updates. Most software and BIOS updates on the system ROM. If your computer is stored on the HP Web site are packaged in compressed files called SoftPaqs. 1 Updating software Updated versions of your computer. NOTE Windows® includes the User Account Control feature to Windows online Help for tasks such as installing applications, running utilities, or changing Windows settings...
Software Update, Backup, and Recovery - Windows Vista
Page 6
... optional docking device, or connected to the location on your hard drive where the BIOS update will need to your hard drive. Make a note of the system BIOS currently installed. To exit the Setup Utility, use the arrow keys to reliable external power using the AC adapter. CAUTION To prevent damage to the computer or an unsuccessful installation, download and install a BIOS update only when the computer is displayed. 3. Do not insert, remove, connect, or disconnect any software updates, especially system BIOS updates. 2 Chapter 1 Updating software...
... optional docking device, or connected to the location on your hard drive where the BIOS update will need to your hard drive. Make a note of the system BIOS currently installed. To exit the Setup Utility, use the arrow keys to reliable external power using the AC adapter. CAUTION To prevent damage to the computer or an unsuccessful installation, download and install a BIOS update only when the computer is displayed. 3. Do not insert, remove, connect, or disconnect any software updates, especially system BIOS updates. 2 Chapter 1 Updating software...

Software Update, Backup, and Recovery - Windows Vista
Page 13
... process reinstalls the program or utility to remove, and then click Uninstall. 2. When the installation wizard opens, follow the installation instructions on the screen. 3. d. If the driver is fully uninstalled. Recovery Manager opens. Select Start > Control Panel > Programs > Uninstall a program. Click either Software program re-installation or Hardware driver re-installation, and then click Next. Reinstalling software programs and drivers If a program or driver preinstalled at the factory is accidentally erased or is...
... process reinstalls the program or utility to remove, and then click Uninstall. 2. When the installation wizard opens, follow the installation instructions on the screen. 3. d. If the driver is fully uninstalled. Recovery Manager opens. Select Start > Control Panel > Programs > Uninstall a program. Click either Software program re-installation or Hardware driver re-installation, and then click Next. Reinstalling software programs and drivers If a program or driver preinstalled at the factory is accidentally erased or is...
Software Updates - Windows Vista
Page 7
Refer to a network, consult the network administrator before installing any software updates, especially system BIOS updates. To update the software, follow these steps, which contains information regarding installing and troubleshooting the file. If your permission or password for tasks such as installing applications, running utilities, or changing Windows settings. Access the updates on the system ROM. Install the updates. 1 Identify your computer. NOTE: The computer system BIOS is connected to Windows Help for a system BIOS update by identifying...
Refer to a network, consult the network administrator before installing any software updates, especially system BIOS updates. To update the software, follow these steps, which contains information regarding installing and troubleshooting the file. If your permission or password for tasks such as installing applications, running utilities, or changing Windows settings. Access the updates on the system ROM. Install the updates. 1 Identify your computer. NOTE: The computer system BIOS is connected to Windows Help for a system BIOS update by identifying...

Touchpad and Keyboard - Windows Vista
Page 15
.... Switching key functions on the embedded numeric keypad You can be turned on. ENWW Using the embedded numeric keypad 9 Using an external numeric keypad Most keys on most external numeric keypads function differently according to an optional docking device or optional expansion product. The num lock light is off at the factory.) For example: ● When num lock is on, most keypad keys type numbers. ● When num lock is turned on...
.... Switching key functions on the embedded numeric keypad You can be turned on. ENWW Using the embedded numeric keypad 9 Using an external numeric keypad Most keys on most external numeric keypads function differently according to an optional docking device or optional expansion product. The num lock light is off at the factory.) For example: ● When num lock is on, most keypad keys type numbers. ● When num lock is turned on...

Wireless (Select Models Only) - Windows Vista
Page 28
... and Support. 22 Chapter 6 Troubleshooting wireless connection problems Select Start > Computer > System properties. 2. Identify the WLAN device from the Network adapters list. If no WLAN device is listed, either your computer does not have a problem connecting to a WLAN, confirm that the integrated WLAN device is not properly installed. Cannot connect to a WLAN If you have an integrated WLAN device, or the driver for the WLAN device is properly installed on troubleshooting WLANs...
... and Support. 22 Chapter 6 Troubleshooting wireless connection problems Select Start > Computer > System properties. 2. Identify the WLAN device from the Network adapters list. If no WLAN device is listed, either your computer does not have a problem connecting to a WLAN, confirm that the integrated WLAN device is not properly installed. Cannot connect to a WLAN If you have an integrated WLAN device, or the driver for the WLAN device is properly installed on troubleshooting WLANs...
HP Pavilion dv6500, dv6600, and dv6700 Entertainment PCs - Maintenance and Service Guide
Page 102
... supported by your changes from the current session, use the Exit Saving Changes procedure, the Setup Utility closes when you use either of the screen each time the computer is started or restarted in Windows. Then use the arrow keys to select Exit > Exit Discarding Changes, and then press enter. The Setup Utility features available for advanced users include a hard drive self-test, a Network Service Boot, and settings for all users. Then use the arrow keys...
... supported by your changes from the current session, use the Exit Saving Changes procedure, the Setup Utility closes when you use either of the screen each time the computer is started or restarted in Windows. Then use the arrow keys to select Exit > Exit Discarding Changes, and then press enter. The Setup Utility features available for advanced users include a hard drive self-test, a Network Service Boot, and settings for all users. Then use the arrow keys...
HP Pavilion dv6500, dv6600, and dv6700 Entertainment PCs - Maintenance and Service Guide
Page 155
...-ray Disc ROM Drive precautions 40 removal 59 spare part number 25, 29, 38, 59 specifications 101 Bluetooth module removal 78 spare part number 22, 32, 78 Bluetooth module cable, illustrated 28 boot options 95 boot order 95 bottom components 16 button sound 95 buttons DVD 10 media 10 next/fast forward 11 play/pause 11 power 10 previous/rewind 10 stop 11 volume mute 11 C Cable Kit contents 28 spare part number 25, 28, 36, 37 cables, service considerations 40 camera location...
...-ray Disc ROM Drive precautions 40 removal 59 spare part number 25, 29, 38, 59 specifications 101 Bluetooth module removal 78 spare part number 22, 32, 78 Bluetooth module cable, illustrated 28 boot options 95 boot order 95 bottom components 16 button sound 95 buttons DVD 10 media 10 next/fast forward 11 play/pause 11 power 10 previous/rewind 10 stop 11 volume mute 11 C Cable Kit contents 28 spare part number 25, 28, 36, 37 cables, service considerations 40 camera location...
HP Pavilion dv6500, dv6600, and dv6700 Entertainment PCs - Maintenance and Service Guide
Page 158
...audio 4 camera 4 chipset 2 diskette drive 4 display panel 3 docking support 5 Ethernet 4 external media cards 5 graphics 2 hard drives 3 keyboard 5 memory module 3 microphone 4 modem module 4 operating system 6 optical drives 3 pointing devices 5 ports 5 power requirements 5 processors 1 product name 1 security 6 serviceability 6 wireless 4 product name 1 R rear component 15 recovery discs 131 recovery, system 131, 134 remote control, spare part numbers 30, 33 removal/replacement preliminaries 39 procedures 45 restore points 133 restoring default settings 93 RF input adapter cable, spare part...
...audio 4 camera 4 chipset 2 diskette drive 4 display panel 3 docking support 5 Ethernet 4 external media cards 5 graphics 2 hard drives 3 keyboard 5 memory module 3 microphone 4 modem module 4 operating system 6 optical drives 3 pointing devices 5 ports 5 power requirements 5 processors 1 product name 1 security 6 serviceability 6 wireless 4 product name 1 R rear component 15 recovery discs 131 recovery, system 131, 134 remote control, spare part numbers 30, 33 removal/replacement preliminaries 39 procedures 45 restore points 133 restoring default settings 93 RF input adapter cable, spare part...
HP Pavilion dv9500, dv9600, and dv9700 Entertainment PCs - Maintenance and Service Guide
Page 118
...; View and change the boot order. For more information about the processor, memory size, system BIOS, and keyboard controller version (select models only). 108 Chapter 5 Setup Utility Using advanced Setup Utility features This guide describes the Setup Utility features recommended for advanced users only, refer to Help and Support, which is accessible only when the computer is in Windows. Then use the arrow keys to select Exit > Exit Saving Changes, and then press enter.
...; View and change the boot order. For more information about the processor, memory size, system BIOS, and keyboard controller version (select models only). 108 Chapter 5 Setup Utility Using advanced Setup Utility features This guide describes the Setup Utility features recommended for advanced users only, refer to Help and Support, which is accessible only when the computer is in Windows. Then use the arrow keys to select Exit > Exit Saving Changes, and then press enter.
HP Pavilion dv9500, dv9600, and dv9700 Entertainment PCs - Maintenance and Service Guide
Page 175
... audio 6 camera 6 chipset 2 diskette drive 6 display panel 4 docking support 7 Ethernet 6 external media cards 7 graphics 2 hard drives 4 keyboard 8 memory module 4 modem 6 operating system 8 optical drives 5 pointing device 8 ports 7 power requirements 8 processors 1 product name 1 security 8 serviceability 8 wireless 6 product name 1 Q QuickPlay buttons 11 R rear USB board removal 90 spare part number 22, 37, 90 rear USB board cable, illustrated 29 recovery discs 146 recovery, system 146, 149 remote control spare part numbers 34 remote control, spare part numbers 31, 34 removal/replacement...
... audio 6 camera 6 chipset 2 diskette drive 6 display panel 4 docking support 7 Ethernet 6 external media cards 7 graphics 2 hard drives 4 keyboard 8 memory module 4 modem 6 operating system 8 optical drives 5 pointing device 8 ports 7 power requirements 8 processors 1 product name 1 security 8 serviceability 8 wireless 6 product name 1 Q QuickPlay buttons 11 R rear USB board removal 90 spare part number 22, 37, 90 rear USB board cable, illustrated 29 recovery discs 146 recovery, system 146, 149 remote control spare part numbers 34 remote control, spare part numbers 31, 34 removal/replacement...
Multimedia - Windows Vista
Page 27
... playback 19 Q Quick Launch buttons 5 QuickPlay 5 J jacks audio-in (microphone) 1, 3 audio-out (headphone) 1, 3 S-Video-out 7 M media activity buttons 14 media activity hotkeys 13 media button 5 microphone, internal 1 microphones, supported 3 monitor, connecting 6 multimedia software described 16 using 18 R region codes, DVD 20 S S-Video-out jack 7 software multimedia 16 using 18 speakers 1 T TV 3 V VCR 3 volume, adjusting 4 O optical disc inserting 10 removing, with power 11 removing, without power 12 writing to 16 optical drive playing 19 protecting 16 P ports external monitor 6 ENWW...
... playback 19 Q Quick Launch buttons 5 QuickPlay 5 J jacks audio-in (microphone) 1, 3 audio-out (headphone) 1, 3 S-Video-out 7 M media activity buttons 14 media activity hotkeys 13 media button 5 microphone, internal 1 microphones, supported 3 monitor, connecting 6 multimedia software described 16 using 18 R region codes, DVD 20 S S-Video-out jack 7 software multimedia 16 using 18 speakers 1 T TV 3 V VCR 3 volume, adjusting 4 O optical disc inserting 10 removing, with power 11 removing, without power 12 writing to 16 optical drive playing 19 protecting 16 P ports external monitor 6 ENWW...

Multimedia - Windows Vista
Page 28
...power 12 removing, without power 13 writing to 17 DVD button 5 DVD region settings 21 E earbuds 1 external monitor port 6 H headphones 1 I internal microphone, identifying 1 ptotecting playback 20 Q Quick Launch buttons 5 QuickPlay 5 J jacks audio-in (microphone) 1, 3 audio-out (headphone) 1, 3 S-Video-out 7 M media activity buttons 15 media activity hotkeys 14 media button 5 microphone, internal 1 microphones, supported 3 monitor, connecting 6 multimedia software described 17 using 19 O optical disc inserting 11 removing, with power 12 removing, without power 13 writing to 17 optical drive...
...power 12 removing, without power 13 writing to 17 DVD button 5 DVD region settings 21 E earbuds 1 external monitor port 6 H headphones 1 I internal microphone, identifying 1 ptotecting playback 20 Q Quick Launch buttons 5 QuickPlay 5 J jacks audio-in (microphone) 1, 3 audio-out (headphone) 1, 3 S-Video-out 7 M media activity buttons 15 media activity hotkeys 14 media button 5 microphone, internal 1 microphones, supported 3 monitor, connecting 6 multimedia software described 17 using 19 O optical disc inserting 11 removing, with power 12 removing, without power 13 writing to 17 optical drive...

Power Management - Windows Vista
Page 27
... conditions: ● When you need to replace the battery or access components inside the computer ● When you are unable to use the preceding shutdown procedures, try the following emergency procedures in Hibernation, you must first exit Sleep or Hibernation before shutdown is unresponsive and you are connecting an external hardware device that does not connect to the Lock button. 3. If the computer...
... conditions: ● When you need to replace the battery or access components inside the computer ● When you are unable to use the preceding shutdown procedures, try the following emergency procedures in Hibernation, you must first exit Sleep or Hibernation before shutdown is unresponsive and you are connecting an external hardware device that does not connect to the Lock button. 3. If the computer...


