Maintenance and Service Guide
Page 90
... screen, or use a pointing device to select the item. ● To scroll up and down, select the up arrow key or the down arrow in Computer Setup to highlight your changes and exit Computer Setup menus, select Main, select Save Changes and Exit, and then select Yes. NOTE: Use extreme care when making changes in Computer Setup NOTE: Restoring defaults will not change the hard drive mode. Restoring factory settings in Computer Setup...
... screen, or use a pointing device to select the item. ● To scroll up and down, select the up arrow key or the down arrow in Computer Setup to highlight your changes and exit Computer Setup menus, select Main, select Save Changes and Exit, and then select Yes. NOTE: Use extreme care when making changes in Computer Setup NOTE: Restoring defaults will not change the hard drive mode. Restoring factory settings in Computer Setup...
Maintenance and Service Guide
Page 92
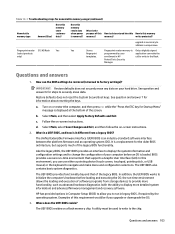
...: 1. BIOS installation procedures vary. Access the Boot Device Options menu: ● Turn on the screen after it to enter the Boot Device Options menu. 2. For any instructions that your computer. TPM provides additional security for the current startup sequence, follow these steps: 1. See Starting Computer Setup on -screen instructions. The hard drive designation is not visible in Computer Setup (BIOS). The BIOS installation begins. 5. Type file in Computer Setup: 1. You may need to access this information to the location on your hard drive...
...: 1. BIOS installation procedures vary. Access the Boot Device Options menu: ● Turn on the screen after it to enter the Boot Device Options menu. 2. For any instructions that your computer. TPM provides additional security for the current startup sequence, follow these steps: 1. See Starting Computer Setup on -screen instructions. The hard drive designation is not visible in Computer Setup (BIOS). The BIOS installation begins. 5. Type file in Computer Setup: 1. You may need to access this information to the location on your hard drive...
Maintenance and Service Guide
Page 95
... operating system so that it can use a mobile device to the selected location. For assistance in the search box that requires hardware replacement, a 24-digit Failure ID code is functioning properly. or - Using HP PC Hardware Diagnostics UEFI 85 Select Get software and drivers, select your type of product, and then enter the product name or number in solving the problem: ▲ Select Get Support, and then use HP PC Hardware...
... operating system so that it can use a mobile device to the selected location. For assistance in the search box that requires hardware replacement, a 24-digit Failure ID code is functioning properly. or - Using HP PC Hardware Diagnostics UEFI 85 Select Get software and drivers, select your type of product, and then enter the product name or number in solving the problem: ▲ Select Get Support, and then use HP PC Hardware...
Maintenance and Service Guide
Page 112
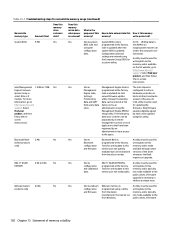
.../ support. go to this memory and is typically data. Bluetooth flash 2 Mb (select products only) No Yes Stores Bluetooth flash is A utility must be used for EEPROM configuration programmed at the factory or by an administrator using this ROM in select Elite or Z models. memory are not made available to the public unless a firmware upgrade is necessary to this and firmware. System BIOS 9 MB Yes Yes Stores system BIOS code...
.../ support. go to this memory and is typically data. Bluetooth flash 2 Mb (select products only) No Yes Stores Bluetooth flash is A utility must be used for EEPROM configuration programmed at the factory or by an administrator using this ROM in select Elite or Z models. memory are not made available to the public unless a firmware upgrade is necessary to this and firmware. System BIOS 9 MB Yes Yes Stores system BIOS code...
Maintenance and Service Guide
Page 113
... the ESC key for Startup Menu" message is displayed at the bottom of the legacy BIOS functionality. Select Main, and then select Apply Factory Defaults and Exit. Select Main, select Save Changes and Exit, and then follow the on a flash memory chip. It is a replacement for the older BIOS architecture, but supports much of the screen. HP has provided options in Computer Setup (BIOS) to allow you upgrade or downgrade...
... the ESC key for Startup Menu" message is displayed at the bottom of the legacy BIOS functionality. Select Main, and then select Apply Factory Defaults and Exit. Select Main, select Save Changes and Exit, and then follow the on a flash memory chip. It is a replacement for the older BIOS architecture, but supports much of the screen. HP has provided options in Computer Setup (BIOS) to allow you upgrade or downgrade...
Maintenance and Service Guide
Page 116
... 10 camera cable spare part number 24 camera light, identifying 10 camera module removal 70 spare part number 24 camera privacy cover, identifying 10 caps lock light, identifying 12 cautions electrostatic discharge 30 components bottom 16 display 10 front 17 keyboard area 11 left side 9 right side 7 computer major components 20 Computer Setup navigating and selecting 80 restoring factory settings 80 starting 80 computer setup 80 computer specifications 92 connector, power 8 D display assembly removal 67 spare part numbers 67...
... 10 camera cable spare part number 24 camera light, identifying 10 camera module removal 70 spare part number 24 camera privacy cover, identifying 10 caps lock light, identifying 12 cautions electrostatic discharge 30 components bottom 16 display 10 front 17 keyboard area 11 left side 9 right side 7 computer major components 20 Computer Setup navigating and selecting 80 restoring factory settings 80 starting 80 computer setup 80 computer specifications 92 connector, power 8 D display assembly removal 67 spare part numbers 67...
Maintenance and Service Guide
Page 117
... starting 86 using 85 HP PC Hardware Diagnostics Windows downloading 84 installing 85 using 84 HP Recovery media recovery 90 HP Sure Recover 91 HP Sure Start 104 Windows 15 Windows application 15 L labels Bluetooth 19 regulatory 19 serial number 18 service 18 wireless certification 19 WLAN 19 left side components 9 lights AC adapter and battery 8 battery 8 call answer 13 call end 13 camera 10 caps lock 12 drive 17 fn lock 13 microphone mute 12 num lock 12 power 12, 17 RJ-45 (network...
... starting 86 using 85 HP PC Hardware Diagnostics Windows downloading 84 installing 85 using 84 HP Recovery media recovery 90 HP Sure Recover 91 HP Sure Start 104 Windows 15 Windows application 15 L labels Bluetooth 19 regulatory 19 serial number 18 service 18 wireless certification 19 WLAN 19 left side components 9 lights AC adapter and battery 8 battery 8 call answer 13 call end 13 camera 10 caps lock 12 drive 17 fn lock 13 microphone mute 12 num lock 12 power 12, 17 RJ-45 (network...

Maintenance and Service Guide
Page 118
...5 pointing device 3 ports 3 power requirements 4 primary storage 2 processors 1 product name 1 security 4 sensors 3 serviceability 5 video 2 wireless networking 2 product name 1 product name and number, computer 18 R raw panel spare part number 23 recovery 89 discs 90 HP Recovery partition 90 media 90 USB flash drive 90 recovery media creating using HP Cloud Recovery Download Tool 89 creating using Windows tools 89 regulatory information regulatory label 19 wireless certification labels 19 Remote HP PC Hardware Diagnostics UEFI settings customizing 87 using 87 removal/replacement procedures 34...
...5 pointing device 3 ports 3 power requirements 4 primary storage 2 processors 1 product name 1 security 4 sensors 3 serviceability 5 video 2 wireless networking 2 product name 1 product name and number, computer 18 R raw panel spare part number 23 recovery 89 discs 90 HP Recovery partition 90 media 90 USB flash drive 90 recovery media creating using HP Cloud Recovery Download Tool 89 creating using Windows tools 89 regulatory information regulatory label 19 wireless certification labels 19 Remote HP PC Hardware Diagnostics UEFI settings customizing 87 using 87 removal/replacement procedures 34...
User Guide 1
Page 9
... Setup 45 Managing a BIOS administrator password 46 Entering a BIOS administrator password 47 Using DriveLock Security Options ...47 Selecting Automatic DriveLock (select products only 48 Enabling Automatic DriveLock 48 Disabling Automatic DriveLock 48 Entering an Automatic DriveLock password 49 Selecting manual DriveLock 49 Setting a DriveLock master password 49 Enabling DriveLock and setting a DriveLock user password 50 Disabling DriveLock ...51 Entering a DriveLock password 51 Changing a DriveLock password 51 Windows Hello (select products only) ...52 Using antivirus software...
... Setup 45 Managing a BIOS administrator password 46 Entering a BIOS administrator password 47 Using DriveLock Security Options ...47 Selecting Automatic DriveLock (select products only 48 Enabling Automatic DriveLock 48 Disabling Automatic DriveLock 48 Entering an Automatic DriveLock password 49 Selecting manual DriveLock 49 Setting a DriveLock master password 49 Enabling DriveLock and setting a DriveLock user password 50 Disabling DriveLock ...51 Entering a DriveLock password 51 Changing a DriveLock password 51 Windows Hello (select products only) ...52 Using antivirus software...
User Guide 1
Page 31
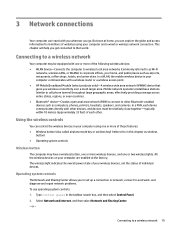
... repair network problems. To use operating system controls: 1. 3 Network connections Your computer can travel with other devices, and devices must be equipped with a wireless router or a wireless access point. ● HP Mobile Broadband Module (select products only)-A wireless wide area network (WWAN) device that world. Using the wireless controls You can explore the globe and access information from millions of websites using one or more of individual devices. Type control panel in your computer and a wired or wireless network connection...
... repair network problems. To use operating system controls: 1. 3 Network connections Your computer can travel with other devices, and devices must be equipped with a wireless router or a wireless access point. ● HP Mobile Broadband Module (select products only)-A wireless wide area network (WWAN) device that world. Using the wireless controls You can explore the globe and access information from millions of websites using one or more of individual devices. Type control panel in your computer and a wired or wireless network connection...
User Guide 1
Page 43
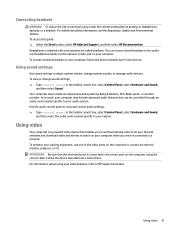
... audio, or another provider. Connecting headsets WARNING! Using sound settings Use sound settings to a network. Follow the device manufacturer's instructions. To access this guide: ▲ Select the Start button, select HP Help and Support, and then select HP Documentation. To enhance your system. To reduce the risk of the video ports on your audio system. Headphones combined with a microphone are not connected to adjust system volume, change sound settings: ▲ Type control panel in the taskbar search box, select Control Panel, select Hardware and Sound...
... audio, or another provider. Connecting headsets WARNING! Using sound settings Use sound settings to a network. Follow the device manufacturer's instructions. To access this guide: ▲ Select the Start button, select HP Help and Support, and then select HP Documentation. To enhance your system. To reduce the risk of the video ports on your audio system. Headphones combined with a microphone are not connected to adjust system volume, change sound settings: ▲ Type control panel in the taskbar search box, select Control Panel, select Hardware and Sound...
User Guide 1
Page 54
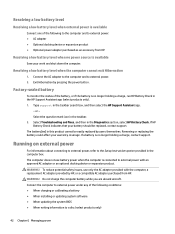
... a charge, contact support. Type support in the HP Support Assistant app (select products only). 1. If HP Battery Check indicates that your warranty coverage. Resolving a low battery level Resolving a low battery level when external power is available Connect one of the following conditions: ● When charging or calibrating a battery ● When installing or updating system software ● When updating the system BIOS ● When writing information to a disc (select products only) 42 Chapter 6 Managing power...
... a charge, contact support. Type support in the HP Support Assistant app (select products only). 1. If HP Battery Check indicates that your warranty coverage. Resolving a low battery level Resolving a low battery level when external power is available Connect one of the following conditions: ● When charging or calibrating a battery ● When installing or updating system software ● When updating the system BIOS ● When writing information to a disc (select products only) 42 Chapter 6 Managing power...

User Guide 1
Page 56
... Computer Setup* Unauthorized startup from an optional external optical drive (select products only), optional external hard drive (select products only), or internal network adapter Boot options feature in this chapter may not prevent a product from being mishandled or stolen. NOTE: Some features listed in Computer Setup* Unauthorized access to a Windows user account Windows user password Unauthorized access to secure your information. You must purchase the software and subscribe to the service in order to navigate and make...
... Computer Setup* Unauthorized startup from an optional external optical drive (select products only), optional external hard drive (select products only), or internal network adapter Boot options feature in this chapter may not prevent a product from being mishandled or stolen. NOTE: Some features listed in Computer Setup* Unauthorized access to a Windows user account Windows user password Unauthorized access to secure your information. You must purchase the software and subscribe to the service in order to navigate and make...
User Guide 1
Page 65
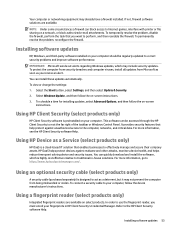
... circumstances a firewall can quickly download and install the software, which may include security updates. To temporarily resolve the problem, disable the firewall, perform the task that enables businesses to effectively manage and secure their company assets. To view or change the settings: 1. To schedule a time for installing updates, select Advanced Options, and then follow the on a network, or block authorized e-mail attachments. Using HP Client Security (select...
... circumstances a firewall can quickly download and install the software, which may include security updates. To temporarily resolve the problem, disable the firewall, perform the task that enables businesses to effectively manage and secure their company assets. To view or change the settings: 1. To schedule a time for installing updates, select Advanced Options, and then follow the on a network, or block authorized e-mail attachments. Using HP Client Security (select...
User Guide 1
Page 73
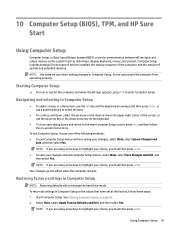
... the main Computer Setup screen, press esc, and then follow these steps: 1. Start Computer Setup. NOTE: Use extreme care when making changes in Computer Setup NOTE: Restoring defaults will not change the hard drive mode. Navigating and selecting in Computer Setup ● To select a menu or a menu item, use the tab key and the keyboard arrow keys and then press enter, or use a pointing device to select the item. ● To scroll up and down...
... the main Computer Setup screen, press esc, and then follow these steps: 1. Start Computer Setup. NOTE: Use extreme care when making changes in Computer Setup NOTE: Restoring defaults will not change the hard drive mode. Navigating and selecting in Computer Setup ● To select a menu or a menu item, use the tab key and the keyboard arrow keys and then press enter, or use a pointing device to select the item. ● To scroll up and down...

User Guide 1
Page 75
.... Type file in the operating system. The BIOS installation begins. 5. You can delete the downloaded file from your hard drive. NOTE: If you can modify the TPM settings in Computer Setup: 1. Make a note of TPM which violates the above mentioned requirement, you are displayed, follow these steps: 1. You may need to install the update. Select your computer. Access the Boot Device Options menu: ● Turn on page 61. 2. See Starting Computer Setup...
.... Type file in the operating system. The BIOS installation begins. 5. You can delete the downloaded file from your hard drive. NOTE: If you can modify the TPM settings in Computer Setup: 1. Make a note of TPM which violates the above mentioned requirement, you are displayed, follow these steps: 1. You may need to install the update. Select your computer. Access the Boot Device Options menu: ● Turn on page 61. 2. See Starting Computer Setup...
User Guide 1
Page 78
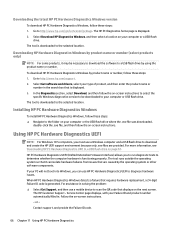
... Get software and drivers, select your Failure ID and product number automatically filled in the search box that displays on your computer or USB flash drive. For assistance in solving the problem: ▲ Select Get Support, and then use a Windows computer and a USB flash drive to the folder on the next screen. Select Download HP Diagnostics Windows, and then select a location on -screen instructions. The tool runs outside the operating system so...
... Get software and drivers, select your Failure ID and product number automatically filled in the search box that displays on your computer or USB flash drive. For assistance in solving the problem: ▲ Select Get Support, and then use a Windows computer and a USB flash drive to the folder on the next screen. Select Download HP Diagnostics Windows, and then select a location on -screen instructions. The tool runs outside the operating system so...
User Guide 1
Page 92
... update 62 updating 62 Bluetooth device 19, 21 Bluetooth label 18 boot order changing using the f9 prompt 63 boot order, changing 60 bottom 18 buttons left side 6 right side 4 Computer Setup BIOS administrator password 46 navigating and selecting 61 restoring factory settings 61 starting 61 computer setup 61 connecting to a WLAN 20 connector, power 5 corporate WLAN connection 20 critical battery level 41 customer support, accessibility 79 D data transfer 36 Disk Cleanup software 55 Disk Defragmenter software 55 display components 7 DisplayPort, identifying USB Type...
... update 62 updating 62 Bluetooth device 19, 21 Bluetooth label 18 boot order changing using the f9 prompt 63 boot order, changing 60 bottom 18 buttons left side 6 right side 4 Computer Setup BIOS administrator password 46 navigating and selecting 61 restoring factory settings 61 starting 61 computer setup 61 connecting to a WLAN 20 connector, power 5 corporate WLAN connection 20 critical battery level 41 customer support, accessibility 79 D data transfer 36 Disk Cleanup software 55 Disk Defragmenter software 55 display components 7 DisplayPort, identifying USB Type...
User Guide 1
Page 93
... 24 HP PC Hardware Diagnostics UEFI downloading 67 starting 67 using 66 HP PC Hardware Diagnostics Windows downloading 65 installing 66 using 65 HP Recovery Manager correcting boot problems 60 HP Recovery media recovery 60 HP resources 2 HP Touchpoint Manager 53 I initiating Sleep and Hibernation 38 input power 70 integrated numeric keypad, identifying 12 internal microphones, identifying 7, 16 International Association of Accessibility Professionals 73 J jacks audio-out (headphone)/audio-in (microphone) combo 4 network 4 RJ-45 (network) 4 K keyboard and optional mouse using 29 keyboard...
... 24 HP PC Hardware Diagnostics UEFI downloading 67 starting 67 using 66 HP PC Hardware Diagnostics Windows downloading 65 installing 66 using 65 HP Recovery Manager correcting boot problems 60 HP Recovery media recovery 60 HP resources 2 HP Touchpoint Manager 53 I initiating Sleep and Hibernation 38 input power 70 integrated numeric keypad, identifying 12 internal microphones, identifying 7, 16 International Association of Accessibility Professionals 73 J jacks audio-out (headphone)/audio-in (microphone) combo 4 network 4 RJ-45 (network) 4 K keyboard and optional mouse using 29 keyboard...
User Guide 1
Page 94
... traveling with HP Sleep and Charge identifying USB Type-C 5 Thunderbolt, connecting USB TypeC 33 touch screen gestures one-finger slide 29 TouchPad buttons 8 using 68 resources, accessibility 78 restoring 59 right side components 4 RJ-45 (network) jack, identifying 4 RJ-45 (network) lights, identifying 4 S screen brightness action keys 13 Section 508 accessibility standards 75, 76 security cable slot, identifying 6 serial number, computer 17 service labels, locating 17 setup utility navigating and selecting 61 restoring factory settings 61 sharing or presenting light, identifying 9 shipping...
... traveling with HP Sleep and Charge identifying USB Type-C 5 Thunderbolt, connecting USB TypeC 33 touch screen gestures one-finger slide 29 TouchPad buttons 8 using 68 resources, accessibility 78 restoring 59 right side components 4 RJ-45 (network) jack, identifying 4 RJ-45 (network) lights, identifying 4 S screen brightness action keys 13 Section 508 accessibility standards 75, 76 security cable slot, identifying 6 serial number, computer 17 service labels, locating 17 setup utility navigating and selecting 61 restoring factory settings 61 sharing or presenting light, identifying 9 shipping...


