Secure Erase SSDs & HDDs
Page 1
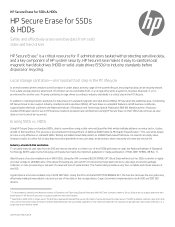
... Erase will instruct the SSDs controller to apply an erase voltage to all user data so that writes multiple patterns on the storage device. Using the ATA command CRYPTO SCRAMBLE EXT, this function removes the encryption key effectively making it impossible to a fresh-out-of-box (FOB) performance state, the National Institute of Standards Technology (NIST) supports the following commands...
... Erase will instruct the SSDs controller to apply an erase voltage to all user data so that writes multiple patterns on the storage device. Using the ATA command CRYPTO SCRAMBLE EXT, this function removes the encryption key effectively making it impossible to a fresh-out-of-box (FOB) performance state, the National Institute of Standards Technology (NIST) supports the following commands...

Maintenance and Service Guide
Page 8
... drive (SSD) ...36 Memory modules ...37 WLAN/Bluetooth combo card ...39 WWAN module ...41 Keyboard ...43 6 Removal and replacement procedures for Authorized Service Provider parts 46 Component replacement procedures ...46 Battery ...47 Heat sink assembly ...49 RTC battery ...51 USB board ...52 RJ-45 board with bracket ...53 Power button board ...54 Speaker assembly ...55 Fingerprint reader assembly ...56 TouchPad ...57 TouchPad button board ...59 NFC module ...60 Smart card reader ...61 Fan ...62 System board ...64 Display assembly ...67 Top cover...
... drive (SSD) ...36 Memory modules ...37 WLAN/Bluetooth combo card ...39 WWAN module ...41 Keyboard ...43 6 Removal and replacement procedures for Authorized Service Provider parts 46 Component replacement procedures ...46 Battery ...47 Heat sink assembly ...49 RTC battery ...51 USB board ...52 RJ-45 board with bracket ...53 Power button board ...54 Speaker assembly ...55 Fingerprint reader assembly ...56 TouchPad ...57 TouchPad button board ...59 NFC module ...60 Smart card reader ...61 Fan ...62 System board ...64 Display assembly ...67 Top cover...

Maintenance and Service Guide
Page 47
... installing new memory may result in Hibernation, turn the computer on, and then shut it must be installed in the bottom of the module opposite the slot rises away from the system board (see Bottom cover on page 47). Disconnect all external devices connected to www.hp.com. 2. Navigate to the computer. 3. Shut down through the operating system. 2. Under Step 2: Select a Download, click the BIOS link. 7. Remove...
... installing new memory may result in Hibernation, turn the computer on, and then shut it must be installed in the bottom of the module opposite the slot rises away from the system board (see Bottom cover on page 47). Disconnect all external devices connected to www.hp.com. 2. Navigate to the computer. 3. Shut down through the operating system. 2. Under Step 2: Select a Download, click the BIOS link. 7. Remove...
Maintenance and Service Guide
Page 92
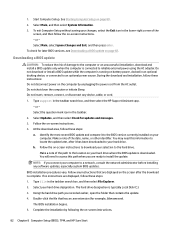
... the on the screen after it to reliable external power using the AC adapter. During the download and installation, follow these steps: a. Do not insert, remove, connect, or disconnect any instructions that are displayed on -screen instructions. 82 Chapter 8 Computer Setup (BIOS), TPM, and HP Sure Start Follow the on battery power, docked in an optional docking device, or connected to the hard drive. Double-click the file that contains the update. 4. Type support in the taskbar...
... the on the screen after it to reliable external power using the AC adapter. During the download and installation, follow these steps: a. Do not insert, remove, connect, or disconnect any instructions that are displayed on -screen instructions. 82 Chapter 8 Computer Setup (BIOS), TPM, and HP Sure Start Follow the on battery power, docked in an optional docking device, or connected to the hard drive. Double-click the file that contains the update. 4. Type support in the taskbar...

Maintenance and Service Guide
Page 98
... see Using HP Recovery media (select products only) on -screen instructions. ● If you want to correct a problem with this computer, you can use the HP Recovery media. NOTE: You must either created or that was installed at the factory. If you have replaced the hard drive, you get started ● HP Recovery Manager recovers only software that you obtained from the HP Recovery partition (select products only) or use the Factory Reset option of HP Recovery Manager to http://www.hp.com/support. 2. For software...
... see Using HP Recovery media (select products only) on -screen instructions. ● If you want to correct a problem with this computer, you can use the HP Recovery media. NOTE: You must either created or that was installed at the factory. If you have replaced the hard drive, you get started ● HP Recovery Manager recovers only software that you obtained from the HP Recovery partition (select products only) or use the Factory Reset option of HP Recovery Manager to http://www.hp.com/support. 2. For software...

Maintenance and Service Guide
Page 111
... and make menu and configuration selections. b. Follow the on -screen instructions. 2. A utility is not installed in a computer. Third-party tools do exist that supports a Graphic User Interface (GUI). What is a UEFI BIOS, and how is an industry-standard software interface between the platform firmware and an operating system (OS). IMPORTANT: Restore defaults does not securely erase any data on an EEPROM. c. The UEFI BIOS provides functionality beyond...
... and make menu and configuration selections. b. Follow the on -screen instructions. 2. A utility is not installed in a computer. Third-party tools do exist that supports a Graphic User Interface (GUI). What is a UEFI BIOS, and how is an industry-standard software interface between the platform firmware and an operating system (OS). IMPORTANT: Restore defaults does not securely erase any data on an EEPROM. c. The UEFI BIOS provides functionality beyond...

Maintenance and Service Guide
Page 114
... camera 9, 10 identifying 9, 10 camera cable spare part number 26 camera light, identifying 9, 10 camera module removal 70 spare part number 26 caps lock light, identifying 12 chipset, product description 1 components bottom 18 cover 20 display 9 front 19 keyboard area 11 left side 8 right side 6 computer major components 22 Computer Setup navigating and selecting 80 restoring factory settings 81 using a USB keyboard or USB mouse to start Computer Setup 80 computer setup 80 computer specifications 91 connector, power 7 D display assembly removal 67 spare part numbers...
... camera 9, 10 identifying 9, 10 camera cable spare part number 26 camera light, identifying 9, 10 camera module removal 70 spare part number 26 caps lock light, identifying 12 chipset, product description 1 components bottom 18 cover 20 display 9 front 19 keyboard area 11 left side 8 right side 6 computer major components 22 Computer Setup navigating and selecting 80 restoring factory settings 81 using a USB keyboard or USB mouse to start Computer Setup 80 computer setup 80 computer specifications 91 connector, power 7 D display assembly removal 67 spare part numbers...

Maintenance and Service Guide
Page 115
..., creating 88 model name 1 mute volume action key 16 N network jack, identifying 7 NFC module removal 60 spare part number 23, 60 NFC tapping area Near Field Communications 11 nonvolatile memory 97 num lock light 13 O operating system, product description 4 original system recovery 88 P Plastics Kit, spare part number 28 pointing device, product description 3 pointing stick, identifying 11 ports HDMI 6 product description 3 USB 3.x SuperSpeed 6 USB 3.x SuperSpeed port with HP Sleep and Charge 8 USB Type-C power connector and Thunderbolt port with HP Sleep and Charge 7 power button board...
..., creating 88 model name 1 mute volume action key 16 N network jack, identifying 7 NFC module removal 60 spare part number 23, 60 NFC tapping area Near Field Communications 11 nonvolatile memory 97 num lock light 13 O operating system, product description 4 original system recovery 88 P Plastics Kit, spare part number 28 pointing device, product description 3 pointing stick, identifying 11 ports HDMI 6 product description 3 USB 3.x SuperSpeed 6 USB 3.x SuperSpeed port with HP Sleep and Charge 8 USB Type-C power connector and Thunderbolt port with HP Sleep and Charge 7 power button board...
Maintenance and Service Guide
Page 116
... audio 2 chipset 1 display panel 1 docking 3 graphics 1 keyboard 3 memory 1 microphone 2 operating system 4 pointing device 3 ports 3 power requirements 4 primary storage 2 processors 1 product name 1 security 4 serviceability 5 video 2 wireless networking 2 product name 1 product name and number, computer 21 R raw panel spare part number 25 recover options 88 recovery discs 87, 90 HP Recovery Manager 88 media 90 starting 89 supported discs 87 system 88 USB flash drive 90 using HP Recovery media 87 recovery media creating using HP Recovery Manager 87 using 86 recovery partition removing...
... audio 2 chipset 1 display panel 1 docking 3 graphics 1 keyboard 3 memory 1 microphone 2 operating system 4 pointing device 3 ports 3 power requirements 4 primary storage 2 processors 1 product name 1 security 4 serviceability 5 video 2 wireless networking 2 product name 1 product name and number, computer 21 R raw panel spare part number 25 recover options 88 recovery discs 87, 90 HP Recovery Manager 88 media 90 starting 89 supported discs 87 system 88 USB flash drive 90 using HP Recovery media 87 recovery media creating using HP Recovery Manager 87 using 86 recovery partition removing...

User Guide
Page 9
... Setting passwords in Windows ...51 Setting passwords in Computer Setup 52 Managing a BIOS administrator password 52 Entering a BIOS administrator password 54 Using DriveLock Security Options ...54 Selecting Automatic DriveLock (select products only 54 Enabling Automatic DriveLock 54 Disabling Automatic DriveLock 55 Entering an Automatic DriveLock password 55 Selecting manual DriveLock 55 Setting a DriveLock master password 56 Enabling DriveLock and setting a DriveLock user password 56 Disabling DriveLock ...57 Entering a DriveLock password 57 Changing a DriveLock password 57 Using...
... Setting passwords in Windows ...51 Setting passwords in Computer Setup 52 Managing a BIOS administrator password 52 Entering a BIOS administrator password 54 Using DriveLock Security Options ...54 Selecting Automatic DriveLock (select products only 54 Enabling Automatic DriveLock 54 Disabling Automatic DriveLock 55 Entering an Automatic DriveLock password 55 Selecting manual DriveLock 55 Setting a DriveLock master password 56 Enabling DriveLock and setting a DriveLock user password 56 Disabling DriveLock ...57 Entering a DriveLock password 57 Changing a DriveLock password 57 Using...

User Guide
Page 10
... 67 Restore and recovery ...67 Recovering using HP Recovery Manager 67 What you need to know before you get started 67 Using the HP Recovery partition (select products only 68 Using HP Recovery media to recover 69 Changing the computer boot order 69 Removing the HP Recovery partition (select products only 69 10 Computer Setup (BIOS), TPM, and HP Sure Start 70 Using Computer Setup ...70 Starting Computer Setup ...70 Using a USB keyboard or USB mouse to start Computer Setup (BIOS 70 Navigating and selecting in Computer Setup 70 Restoring factory settings in Computer Setup 71 Updating...
... 67 Restore and recovery ...67 Recovering using HP Recovery Manager 67 What you need to know before you get started 67 Using the HP Recovery partition (select products only 68 Using HP Recovery media to recover 69 Changing the computer boot order 69 Removing the HP Recovery partition (select products only 69 10 Computer Setup (BIOS), TPM, and HP Sure Start 70 Using Computer Setup ...70 Starting Computer Setup ...70 Using a USB keyboard or USB mouse to start Computer Setup (BIOS 70 Navigating and selecting in Computer Setup 70 Restoring factory settings in Computer Setup 71 Updating...
User Guide
Page 37
...set up a connection or network, connect to a network, and diagnose and repair network problems. To use operating system controls: 1. Type control panel in this chapter as airports, restaurants, coffee shops, hotels, and universities. Select Network and Internet, and then select Network and Sharing Center. The wireless light indicates the overall power state of your computer and a wired or wireless network connection. Using the wireless controls You can control the wireless devices in your computer using your wireless devices, not the status of individual devices. 3 Network connections...
...set up a connection or network, connect to a network, and diagnose and repair network problems. To use operating system controls: 1. Type control panel in this chapter as airports, restaurants, coffee shops, hotels, and universities. Select Network and Internet, and then select Network and Sharing Center. The wireless light indicates the overall power state of your computer and a wired or wireless network connection. Using the wireless controls You can control the wireless devices in your computer using your wireless devices, not the status of individual devices. 3 Network connections...

User Guide
Page 49
... or change system sounds, or manage audio devices. Using video Your computer is connected to the correct port on your computer when you to a network. To enhance your viewing enjoyment, use one of personal injury, lower the volume setting before putting on your computer. As a result, your video features, refer to connect an external monitor, projector, or TV. Using video 37 To access this guide: ▲ Select the Start button, select HP Help and Support...
... or change system sounds, or manage audio devices. Using video Your computer is connected to the correct port on your computer when you to a network. To enhance your viewing enjoyment, use one of personal injury, lower the volume setting before putting on your computer. As a result, your video features, refer to connect an external monitor, projector, or TV. Using video 37 To access this guide: ▲ Select the Start button, select HP Help and Support...

User Guide
Page 62
...order to use a pointing device (TouchPad, pointing stick, or USB mouse) or the keyboard to data Windows BitLocker Unauthorized removal of passwords can be available on password Unauthorized access to Computer Setup (BIOS) BIOS administrator password in Computer Setup* Unauthorized access to the contents of a hard drive DriveLock password (select products only) in Computer Setup* Unauthorized startup from an optional external optical drive (select products only), optional external hard drive (select products only), or internal network adapter Boot options feature in Computer Setup...
...order to use a pointing device (TouchPad, pointing stick, or USB mouse) or the keyboard to data Windows BitLocker Unauthorized removal of passwords can be available on password Unauthorized access to Computer Setup (BIOS) BIOS administrator password in Computer Setup* Unauthorized access to the contents of a hard drive DriveLock password (select products only) in Computer Setup* Unauthorized startup from an optional external optical drive (select products only), optional external hard drive (select products only), or internal network adapter Boot options feature in Computer Setup...
User Guide
Page 71
... available. IMPORTANT: Microsoft sends out alerts regarding Windows updates, which is designed to https://www.hptouchpointmanager.com/. HP Managed Services helps protect devices against unauthorized access to traditional in-house solutions. Using an optional security cable (select products only) A security cable (purchased separately) is highly cost effective relative to the computer, networks, and critical data. Select the Start button, select Settings, and then select Update & Security. 2.
... available. IMPORTANT: Microsoft sends out alerts regarding Windows updates, which is designed to https://www.hptouchpointmanager.com/. HP Managed Services helps protect devices against unauthorized access to traditional in-house solutions. Using an optional security cable (select products only) A security cable (purchased separately) is highly cost effective relative to the computer, networks, and critical data. Select the Start button, select Settings, and then select Update & Security. 2.

User Guide
Page 73
... You can safely delete to free up disk space and help the computer run Disk Defragmenter on battery power. Using Disk Defragmenter HP recommends using Disk Defragmenter to defragment your computer by performing regular maintenance tasks with tools such as Disk Defragmenter and Disk Cleanup. A hard drive installed in optimal condition. 8 Maintenance It is important to perform regular maintenance to keep your computer in an optional docking device or connected to a USB port is...
... You can safely delete to free up disk space and help the computer run Disk Defragmenter on battery power. Using Disk Defragmenter HP recommends using Disk Defragmenter to defragment your computer by performing regular maintenance tasks with tools such as Disk Defragmenter and Disk Cleanup. A hard drive installed in optimal condition. 8 Maintenance It is important to perform regular maintenance to keep your computer in an optional docking device or connected to a USB port is...
User Guide
Page 84
... HP Sure Start At the download area, follow these steps: 1. b. NOTE: If you recorded earlier, open the folder that are displayed, follow these instructions: Do not disconnect power on your computer. Do not insert, remove, connect, or disconnect any software updates, especially system BIOS updates. Make a note of damage to the computer or an unsuccessful installation, download and install a BIOS update only when the computer is downloaded. BIOS installation procedures vary. Type file...
... HP Sure Start At the download area, follow these steps: 1. b. NOTE: If you recorded earlier, open the folder that are displayed, follow these instructions: Do not disconnect power on your computer. Do not insert, remove, connect, or disconnect any software updates, especially system BIOS updates. Make a note of damage to the computer or an unsuccessful installation, download and install a BIOS update only when the computer is downloaded. BIOS installation procedures vary. Type file...

User Guide
Page 92
... lock light 10 four-finger tap TouchPad gesture 33 G GPS 27 H hardware, locating 4 80 Index C6 docking connector, identifying 5 drive light 20 DriveLock description 55 disabling 57 enabling 56 DriveLock master password changing 57 DriveLock password changing 57 entering 57 setting 56 E electrostatic discharge 78 embedded numeric keypad, identifying 14 esc key, identifying 14 external power, using a USB keyboard or USB mouse to start Computer Setup 70 computer setup 70 connecting to a WLAN 26 connector, power 6 corporate WLAN connection...
... lock light 10 four-finger tap TouchPad gesture 33 G GPS 27 H hardware, locating 4 80 Index C6 docking connector, identifying 5 drive light 20 DriveLock description 55 disabling 57 enabling 56 DriveLock master password changing 57 DriveLock password changing 57 entering 57 setting 56 E electrostatic discharge 78 embedded numeric keypad, identifying 14 esc key, identifying 14 external power, using a USB keyboard or USB mouse to start Computer Setup 70 computer setup 70 connecting to a WLAN 26 connector, power 6 corporate WLAN connection...

User Guide
Page 93
...HP Client Security 59 HP Fast Charge 46 HP LAN-WLAN Protection 30 HP MAC Address Manager 30 HP Mobile Connect 27 HP PC Hardware Diagnostics (UEFI) using 74 HP Recovery Manager correcting boot problems 69 starting 68 HP Recovery media recovery 69 using 65 HP Recovery partition recovery 68 removing 69 HP resources 2 HP Touchpoint Manager 59 I initiating Sleep and Hibernation 44 input power 77 integrated numeric keypad, identifying 14 internal microphones, identifying 8, 21 J jacks audio-out (headphone)/audio-in (microphone) combo 5 network 5 RJ-45 (network) 5 K keyboard and optional mouse using...
...HP Client Security 59 HP Fast Charge 46 HP LAN-WLAN Protection 30 HP MAC Address Manager 30 HP Mobile Connect 27 HP PC Hardware Diagnostics (UEFI) using 74 HP Recovery Manager correcting boot problems 69 starting 68 HP Recovery media recovery 69 using 65 HP Recovery partition recovery 68 removing 69 HP resources 2 HP Touchpoint Manager 59 I initiating Sleep and Hibernation 44 input power 77 integrated numeric keypad, identifying 14 internal microphones, identifying 8, 21 J jacks audio-out (headphone)/audio-in (microphone) combo 5 network 5 RJ-45 (network) 5 K keyboard and optional mouse using...
User Guide
Page 94
... 67 USB flash drive 69 using HP Recovery media 66 recovery media creating using HP Recovery Manager 66 using the TouchPad 32 V vents, identifying 7, 12, 19 video 37 DisplayPort device 38 HDMI port 40 Thunderbolt Port device 39 USB Type-C 38, 39 wireless displays 42 volume adjusting 16 mute 16 W Windows system restore point 65, 66 82 Index See audio sound settings, using 37 speaker volume action keys 16 speakers connecting 36 speakers, identifying 13 special keys, using 14 SuperSpeed port and DisplayPort, connecting USB Type-C 38 supported discs, recovery 66 Sure Start using 73 switch screen...
... 67 USB flash drive 69 using HP Recovery media 66 recovery media creating using HP Recovery Manager 66 using the TouchPad 32 V vents, identifying 7, 12, 19 video 37 DisplayPort device 38 HDMI port 40 Thunderbolt Port device 39 USB Type-C 38, 39 wireless displays 42 volume adjusting 16 mute 16 W Windows system restore point 65, 66 82 Index See audio sound settings, using 37 speaker volume action keys 16 speakers connecting 36 speakers, identifying 13 special keys, using 14 SuperSpeed port and DisplayPort, connecting USB Type-C 38 supported discs, recovery 66 Sure Start using 73 switch screen...


