
HP Notebook Hard Drives & Solid State Drives Identifying, Preventing, Diagnosing and Recovering from Drive Failures Care and Mai
Page 6
... power management with Serial ATA hard disk drives. Intel Matrix Storage Manager Driver provides support for the SATA Advanced Host Controller (AHCI) Interface. Updates to the Intel Matrix Storage Manager driver are configured with SATA in AHCI or NATIVE mode Adding SATA drivers using WinPE can be located at the following URL: http://bizsupport2.austin.hp.com/bc/docs/support/SupportManual/c01600726/c01600726.pdf. Procedures for adding SATA drivers to RIS (Remote Installation Service) installation...
... power management with Serial ATA hard disk drives. Intel Matrix Storage Manager Driver provides support for the SATA Advanced Host Controller (AHCI) Interface. Updates to the Intel Matrix Storage Manager driver are configured with SATA in AHCI or NATIVE mode Adding SATA drivers using WinPE can be located at the following URL: http://bizsupport2.austin.hp.com/bc/docs/support/SupportManual/c01600726/c01600726.pdf. Procedures for adding SATA drivers to RIS (Remote Installation Service) installation...
User Guide - Windows 7
Page 5
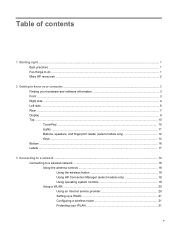
... ...3 Finding your hardware and software information 3 Front ...3 Right side ...4 Left side ...6 Rear ...7 Display ...8 Top ...10 TouchPad ...10 Lights ...11 Buttons, speakers, and fingerprint reader (select models only 12 Keys ...14 Bottom ...16 Labels ...17 3 Connecting to a network ...18 Connecting to a wireless network ...18 Using the wireless controls 18 Using the wireless button 19 Using HP Connection Manager (select models only 19 Using operating system controls 19 Using a WLAN ...20 Using an Internet service provider 20 Setting up a WLAN 21 Configuring a wireless router 21...
... ...3 Finding your hardware and software information 3 Front ...3 Right side ...4 Left side ...6 Rear ...7 Display ...8 Top ...10 TouchPad ...10 Lights ...11 Buttons, speakers, and fingerprint reader (select models only 12 Keys ...14 Bottom ...16 Labels ...17 3 Connecting to a network ...18 Connecting to a wireless network ...18 Using the wireless controls 18 Using the wireless button 19 Using HP Connection Manager (select models only 19 Using operating system controls 19 Using a WLAN ...20 Using an Internet service provider 20 Setting up a WLAN 21 Configuring a wireless router 21...

User Guide - Windows 7
Page 7
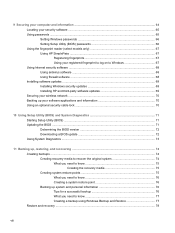
... Connecting a powered USB device 50 Inserting and removing digital storage cards 51 Using optical drives ...52 Inserting an optical disc ...53 Removing an optical disc 54 Sharing drives on the network 54 8 Maintaining your computer ...55 Improving performance ...55 Handling drives ...55 Replacing a hard drive ...56 Using HP 3D DriveGuard 58 Using Disk Defragmenter 58 Using Disk Cleanup ...58 Adding or replacing memory modules 59 Updating programs and drivers ...62 Cleaning your computer ...62 Cleaning the display, sides, and cover...
... Connecting a powered USB device 50 Inserting and removing digital storage cards 51 Using optical drives ...52 Inserting an optical disc ...53 Removing an optical disc 54 Sharing drives on the network 54 8 Maintaining your computer ...55 Improving performance ...55 Handling drives ...55 Replacing a hard drive ...56 Using HP 3D DriveGuard 58 Using Disk Defragmenter 58 Using Disk Cleanup ...58 Adding or replacing memory modules 59 Updating programs and drivers ...62 Cleaning your computer ...62 Cleaning the display, sides, and cover...
User Guide - Windows 7
Page 8
...68 Using firewall software ...68 Installing software updates ...69 Installing Windows security updates 69 Installing HP and third-party software updates 69 Securing your wireless network ...70 Backing up your software applications and information 70 Using an optional security cable lock 70 10 Using Setup Utility (BIOS) and System Diagnostics 71 Starting Setup Utility (BIOS) ...71 Updating the BIOS ...71 Determining the BIOS version 72 Downloading a BIOS update 72 Using System Diagnostics ...73 11 Backing up, restoring, and recovering ...74 Creating backups ...74 Creating recovery media...
...68 Using firewall software ...68 Installing software updates ...69 Installing Windows security updates 69 Installing HP and third-party software updates 69 Securing your wireless network ...70 Backing up your software applications and information 70 Using an optional security cable lock 70 10 Using Setup Utility (BIOS) and System Diagnostics 71 Starting Setup Utility (BIOS) ...71 Updating the BIOS ...71 Determining the BIOS version 72 Downloading a BIOS update 72 Using System Diagnostics ...73 11 Backing up, restoring, and recovering ...74 Creating backups ...74 Creating recovery media...
User Guide - Windows 7
Page 9
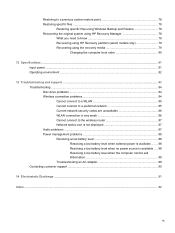
... specific files ...78 Restoring specific files using Windows Backup and Restore 78 Recovering the original system using HP Recovery Manager 78 What you need to know 78 Recovering using HP Recovery partition (select models only 79 Recovering using the recovery media 79 Changing the computer boot order 80 12 Specifications ...81 Input power ...81 Operating environment ...82 13 Troubleshooting and support ...83 Troubleshooting ...84 Disc drive problems ...84 Wireless connection problems 84 Cannot connect to a WLAN 85 Cannot connect to a preferred network 85 Current network security codes...
... specific files ...78 Restoring specific files using Windows Backup and Restore 78 Recovering the original system using HP Recovery Manager 78 What you need to know 78 Recovering using HP Recovery partition (select models only 79 Recovering using the recovery media 79 Changing the computer boot order 80 12 Specifications ...81 Input power ...81 Operating environment ...82 13 Troubleshooting and support ...83 Troubleshooting ...84 Disc drive problems ...84 Wireless connection problems 84 Cannot connect to a WLAN 85 Cannot connect to a preferred network 85 Current network security codes...
User Guide - Windows 7
Page 32
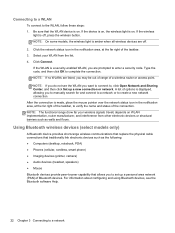
... when all wireless devices are prompted to create a new network connection. Select your wireless signals travel) depends on . If the device is on . A list of options is on , the wireless light is displayed, allowing you may be out of range of the taskbar, to set up a new connection or network. Click Connect. If the wireless light is off . 2. For information about configuring and using Bluetooth devices, see the WLAN you are off , press the wireless button.
... when all wireless devices are prompted to create a new network connection. Select your wireless signals travel) depends on . If the device is on . A list of options is on , the wireless light is displayed, allowing you may be out of range of the taskbar, to set up a new connection or network. Click Connect. If the wireless light is off . 2. For information about configuring and using Bluetooth devices, see the WLAN you are off , press the wireless button.
User Guide - Windows 7
Page 35
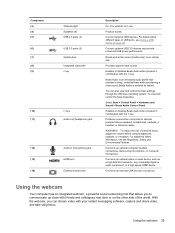
..., stereo array microphone, or monaural microphone. Connects an external VGA monitor or projector. Provides superior bass sound. To view and control the bass properties: Select Start > Control Panel > Hardware and Sound > Beats Audio Control Panel. Produces sound when connected to an optical disc. Using the webcam 25 Connect optional USB 3.0 devices and provide enhanced USB power performance. You can stream video with the fn key. Enables or disables Beats Audio when pressed in use. Connect optional USB devices. Reads and writes (select models only) to optional powered stereo speakers...
..., stereo array microphone, or monaural microphone. Connects an external VGA monitor or projector. Provides superior bass sound. To view and control the bass properties: Select Start > Control Panel > Hardware and Sound > Beats Audio Control Panel. Produces sound when connected to an optical disc. Using the webcam 25 Connect optional USB 3.0 devices and provide enhanced USB power performance. You can stream video with the fn key. Enables or disables Beats Audio when pressed in use. Connect optional USB devices. Reads and writes (select models only) to optional powered stereo speakers...

User Guide - Windows 7
Page 43
... the factory. Most external monitors receive video information from the computer. NOTE: Depending on both the computer and the monitor. Using the keyboard The keyboard allows you to type and the action keys and hot keys allow you to customer support. The action key feature is used for instructions on page 14. CAUTION: Use extreme care when making changes in Setup Utility (BIOS). Help and Support also provides automated troubleshooting tools and access to perform specific functions...
... the factory. Most external monitors receive video information from the computer. NOTE: Depending on both the computer and the monitor. Using the keyboard The keyboard allows you to type and the action keys and hot keys allow you to customer support. The action key feature is used for instructions on page 14. CAUTION: Use extreme care when making changes in Setup Utility (BIOS). Help and Support also provides automated troubleshooting tools and access to perform specific functions...

User Guide - Windows 7
Page 52
... on , you can be changed using Power Options in Hibernation. Using Sleep or Hibernation Microsoft Windows has two power-saving states, Sleep and Hibernation. NOTE: For select models, the Intel Rapid Start Technology (RST) feature is closed, open the display. 42 Chapter 6 Managing power When Sleep is initiated, the screen clears, and your work is saved to resume your work . NOTE: You cannot initiate any type of networking connection or perform any of...
... on , you can be changed using Power Options in Hibernation. Using Sleep or Hibernation Microsoft Windows has two power-saving states, Sleep and Hibernation. NOTE: For select models, the Intel Rapid Start Technology (RST) feature is closed, open the display. 42 Chapter 6 Managing power When Sleep is initiated, the screen clears, and your work is saved to resume your work . NOTE: You cannot initiate any type of networking connection or perform any of...
User Guide - Windows 7
Page 56
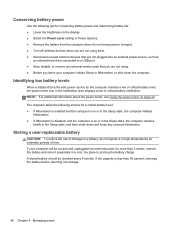
... brightness on the display. ● Select the Power saver setting in Power Options. ● Remove the battery from external power for more than 50 percent, recharge the battery before returning it to storage. 46 Chapter 6 Managing power If your computer, initiate Sleep or Hibernation, or shut down and loses any external media cards that are not plugged into an external power source, such as an external hard drive connected to a USB port. ● Stop, disable, or remove...
... brightness on the display. ● Select the Power saver setting in Power Options. ● Remove the battery from external power for more than 50 percent, recharge the battery before returning it to storage. 46 Chapter 6 Managing power If your computer, initiate Sleep or Hibernation, or shut down and loses any external media cards that are not plugged into an external power source, such as an external hard drive connected to a USB port. ● Stop, disable, or remove...
User Guide - Windows 7
Page 57
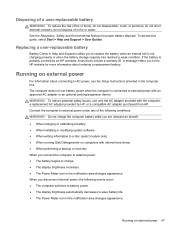
... dispose of a user-replaceable battery WARNING! Connect the computer to external power under any of fire or burns, do not short external contacts; The computer does not use only the AC adapter provided with internal hard drives ● When performing a backup or recovery When you to the HP website for proper battery disposal. To access this guide, select Start > Help and Support > User Guides. To reduce potential safety issues, use battery power when the computer...
... dispose of a user-replaceable battery WARNING! Connect the computer to external power under any of fire or burns, do not short external contacts; The computer does not use only the AC adapter provided with internal hard drives ● When performing a backup or recovery When you to the HP website for proper battery disposal. To access this guide, select Start > Help and Support > User Guides. To reduce potential safety issues, use battery power when the computer...

User Guide - Windows 7
Page 58
... the factory setting. Save your computer at least 5 seconds. ● Disconnect the computer from external power for at the optimum level of comfort. Using HP CoolSense (select models only) HP CoolSense automatically detects when the computer is not in a stationary position and adjusts performance and fan settings to keep the surface temperature of your work and close all open programs. 2. Select Start > Control Panel > Hardware and Sound > HP CoolSense...
... the factory setting. Save your computer at least 5 seconds. ● Disconnect the computer from external power for at the optimum level of comfort. Using HP CoolSense (select models only) HP CoolSense automatically detects when the computer is not in a stationary position and adjusts performance and fan settings to keep the surface temperature of your work and close all open programs. 2. Select Start > Control Panel > Hardware and Sound > HP CoolSense...
User Guide - Windows 7
Page 68
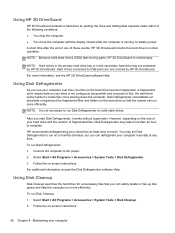
.... Disk Defragmenter consolidates (or physically reorganizes) the fragmented files and folders on the size of fragmented files, Disk Defragmenter may set Disk Defragmenter to complete. Follow the on battery power. For more efficiently. However, depending on the hard drive so that you start Disk Defragmenter, it works without supervision. NOTE: Because solid-state drives (SSD) lack moving parts, HP 3D DriveGuard is running on -screen instructions.
.... Disk Defragmenter consolidates (or physically reorganizes) the fragmented files and folders on the size of fragmented files, Disk Defragmenter may set Disk Defragmenter to complete. Follow the on battery power. For more efficiently. However, depending on the hard drive so that you start Disk Defragmenter, it works without supervision. NOTE: Because solid-state drives (SSD) lack moving parts, HP 3D DriveGuard is running on -screen instructions.
User Guide - Windows 7
Page 75
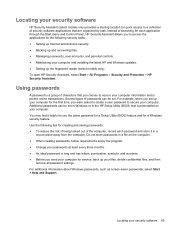
... and recovering files. ● Managing passwords, user accounts, and parental controls. ● Maintaining your computer and installing the latest HP and Windows updates. ● Setting up the fingerprint reader (select models only). Using passwords A password is a group of characters that you choose to secure your computer information and to protect online transactions. For additional information about Windows passwords, such as screen-saver passwords, select Start > Help and Support. Locating your security software HP Security...
... and recovering files. ● Managing passwords, user accounts, and parental controls. ● Maintaining your computer and installing the latest HP and Windows updates. ● Setting up the fingerprint reader (select models only). Using passwords A password is a group of characters that you choose to secure your computer information and to protect online transactions. For additional information about Windows passwords, such as screen-saver passwords, select Start > Help and Support. Locating your security software HP Security...

User Guide - Windows 7
Page 76
... the user password to exit Sleep or Hibernation. See Setting password protection on wakeup on page 43 for Startup Menu" message is displayed, you turn on password at the first password check before the "Press the ESC key for Startup Menu" message is displayed in place of the power-on password. Setting Setup Utility (BIOS) passwords Password Administrator password Power-on password Function ● Must be entered each time you must enter the administrator password to access Setup Utility (BIOS). ● Must be used to...
... the user password to exit Sleep or Hibernation. See Setting password protection on wakeup on page 43 for Startup Menu" message is displayed, you turn on password at the first password check before the "Press the ESC key for Startup Menu" message is displayed in place of the power-on password. Setting Setup Utility (BIOS) passwords Password Administrator password Power-on password Function ● Must be entered each time you must enter the administrator password to access Setup Utility (BIOS). ● Must be used to...

User Guide - Windows 7
Page 82
... your hard drive. Make a note of the date, name, or other identifier. BIOS installation procedures vary. Open Windows Explorer by using the AC adapter. The hard drive designation is downloaded. Start Setup Utility (BIOS). 2. Use the arrow keys to an optional power source. To exit Setup Utility (BIOS) without saving your computer. Do not download or install a BIOS update while the computer is complete. Do not insert, remove, connect, or disconnect any instructions that are already in an optional docking device, or connected...
... your hard drive. Make a note of the date, name, or other identifier. BIOS installation procedures vary. Open Windows Explorer by using the AC adapter. The hard drive designation is downloaded. Start Setup Utility (BIOS). 2. Use the arrow keys to an optional power source. To exit Setup Utility (BIOS) without saving your computer. Do not download or install a BIOS update while the computer is complete. Do not insert, remove, connect, or disconnect any instructions that are already in an optional docking device, or connected...

User Guide - Windows 7
Page 89
... restore your system without the need for recovery discs or a recovery flash drive. or - ● Turn on or restart the computer, and then press esc while the "Press the ESC key for Startup Menu" message is displayed at system bootup. 4. Recovering using HP Recovery partition (select models only) The HP Recovery partition (select models only), allows you can only be used if the hard drive is still working. Insert the recovery flash drive into the optical drive on the screen. 2. Recovering using the recovery media...
... restore your system without the need for recovery discs or a recovery flash drive. or - ● Turn on or restart the computer, and then press esc while the "Press the ESC key for Startup Menu" message is displayed at system bootup. 4. Recovering using HP Recovery partition (select models only) The HP Recovery partition (select models only), allows you can only be used if the hard drive is still working. Insert the recovery flash drive into the optical drive on the screen. 2. Recovering using the recovery media...
User Guide - Windows 7
Page 102
... settings hot key 35 battery conserving power 46 disposing 47 replacing 47 storing 46 battery bay 16, 17 battery information, finding 45 battery power 45 battery release latch 16 battery temperature 46 Beats Audio 14, 25, 27, 35 Beats Audio Control Panel 27 Beats Audio hot key 27 BIOS determining version 72 downloading an update 72 updating 71 Bluetooth device 18, 22 Bluetooth label 17 boot order changing 80 buttons left TouchPad 10, 36 optical drive eject 4 power 12, 13 right TouchPad 10, 36 C cables USB...
... settings hot key 35 battery conserving power 46 disposing 47 replacing 47 storing 46 battery bay 16, 17 battery information, finding 45 battery power 45 battery release latch 16 battery temperature 46 Beats Audio 14, 25, 27, 35 Beats Audio Control Panel 27 Beats Audio hot key 27 BIOS determining version 72 downloading an update 72 updating 71 Bluetooth device 18, 22 Bluetooth label 17 boot order changing 80 buttons left TouchPad 10, 36 optical drive eject 4 power 12, 13 right TouchPad 10, 36 C cables USB...
User Guide - Windows 7
Page 103
...17 mouse, external setting preferences 32 mute light, identifying 11 N network jack, identifying 6 num lock key, identifying 15, 35 O operating environment 82 operating system Microsoft Certificate of Authenticity label 17 Product Key 17 optical disc inserting 53 removing 54 optical drive eject button, identifying 4 optical drive light, identifying 4 optical drive, identifying 4, 25 optional external devices, using 50 original system recovery 78 P passwords Setup Utility (BIOS) 66 Windows 66 pinching TouchPad gesture 39 ports external monitor 6, 25, 29 HDMI 6, 25, 30 Intel Wireless Display 31...
...17 mouse, external setting preferences 32 mute light, identifying 11 N network jack, identifying 6 num lock key, identifying 15, 35 O operating environment 82 operating system Microsoft Certificate of Authenticity label 17 Product Key 17 optical disc inserting 53 removing 54 optical drive eject button, identifying 4 optical drive light, identifying 4 optical drive, identifying 4, 25 optional external devices, using 50 original system recovery 78 P passwords Setup Utility (BIOS) 66 Windows 66 pinching TouchPad gesture 39 ports external monitor 6, 25, 29 HDMI 6, 25, 30 Intel Wireless Display 31...

User Guide - Windows 7
Page 104
... creating recovery media 74 RJ-45 (network) jack, identifying 6 rotating TouchPad gesture 40 S scrolling TouchPad gesture 39 security cable lock, installing 70 security cable slot, identifying 5 security, wireless 21 serial number 17 serial number, computer 17 service labels locating 17 setting password protection on wakeup 43 setup of WLAN 21 Setup Utility (BIOS) passwords 66 shipping the computer 63 shutdown 48 Sleep exiting 42 initiating 42 slots Digital Media 3 security cable 5 software CyberLink PowerDVD 31 Disk Cleanup 58 Disk Defragmenter 58 HP Connection Manager 19 software updates...
... creating recovery media 74 RJ-45 (network) jack, identifying 6 rotating TouchPad gesture 40 S scrolling TouchPad gesture 39 security cable lock, installing 70 security cable slot, identifying 5 security, wireless 21 serial number 17 serial number, computer 17 service labels locating 17 setting password protection on wakeup 43 setup of WLAN 21 Setup Utility (BIOS) passwords 66 shipping the computer 63 shutdown 48 Sleep exiting 42 initiating 42 slots Digital Media 3 security cable 5 software CyberLink PowerDVD 31 Disk Cleanup 58 Disk Defragmenter 58 HP Connection Manager 19 software updates...


