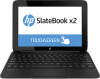

User Guide
Page 4
Encrypt your computer ...13 9 Backing up and recovering your data ...15 Updating apps, widgets, and the operating system 15 Backing up and resetting ...15 Resetting factory data ...15 Starting up using the recovery menu 16 Updating the system using an OTA (over-the-air) update 16 Updating the system using a file-based update 16 10 Using storage ...17 Accessing tablet storage using a USB cable (select models only 17 Accessing external SD cards or USB drives 17 Unmounting/disconnecting external SD cards or USB drives 17 11 More HP resources ...18 iv
Encrypt your computer ...13 9 Backing up and recovering your data ...15 Updating apps, widgets, and the operating system 15 Backing up and resetting ...15 Resetting factory data ...15 Starting up using the recovery menu 16 Updating the system using an OTA (over-the-air) update 16 Updating the system using a file-based update 16 10 Using storage ...17 Accessing tablet storage using a USB cable (select models only 17 Accessing external SD cards or USB drives 17 Unmounting/disconnecting external SD cards or USB drives 17 11 More HP resources ...18 iv

User Guide
Page 5
... computer. 1. If you can use this email address for your region. 4. NOTE: Only the adapter included with your computer is displayed. 3. To change the physical keyboard layout if needed, touch Setting, touch Language & Input, and then touch HP Keyboard. You can add them later. 1 Press and hold the power button on the top edge to select a language. To set up keyboard layouts, and then select the...
... computer. 1. If you can use this email address for your region. 4. NOTE: Only the adapter included with your computer is displayed. 3. To change the physical keyboard layout if needed, touch Setting, touch Language & Input, and then touch HP Keyboard. You can add them later. 1 Press and hold the power button on the top edge to select a language. To set up keyboard layouts, and then select the...

User Guide
Page 6
... open Quick Settings, and then touch one of basic Android features. For release instructions, see the printed Setup Instructions poster included in the box with your computer. ● To open the on -screen keyboard, you must first release the tablet from the following is a list of the boxes to easily access Wi-Fi settings, manage display brightness, open a specific setting. 2 Chapter 2 Using Android features Type one or more . Using Quick Settings Use Quick Settings to open the main Settings menu...
... open Quick Settings, and then touch one of basic Android features. For release instructions, see the printed Setup Instructions poster included in the box with your computer. ● To open the on -screen keyboard, you must first release the tablet from the following is a list of the boxes to easily access Wi-Fi settings, manage display brightness, open a specific setting. 2 Chapter 2 Using Android features Type one or more . Using Quick Settings Use Quick Settings to open the main Settings menu...

User Guide
Page 7
... then touch Settings. 2. You don't need to type, and lift it after each letter, use Gesture Typing to input a word without lifting your finger over the letters you want to worry about spaces because they're added automatically for you. Glide your finger. Under System, touch Accessibility, and then touch Magnification gestures. Using Gesture Typing 3 Using Screen Magnification Users with visual impairments can enter full-screen...
... then touch Settings. 2. You don't need to type, and lift it after each letter, use Gesture Typing to input a word without lifting your finger over the letters you want to worry about spaces because they're added automatically for you. Glide your finger. Under System, touch Accessibility, and then touch Magnification gestures. Using Gesture Typing 3 Using Screen Magnification Users with visual impairments can enter full-screen...

User Guide
Page 8
... to use the Search feature and other keyboard shortcuts. Back-Opens the previous screen. (3) Home-Opens the central Home screen. ● To see a left or right Home screen, swipe to the left to display notifications. ● Swipe from the upper right to display Quick Settings. ● Hold the Home button and swipe up to the Google circle icons to display Google Now cards. ● Touch...
... to use the Search feature and other keyboard shortcuts. Back-Opens the previous screen. (3) Home-Opens the central Home screen. ● To see a left or right Home screen, swipe to the left to display notifications. ● Swipe from the upper right to display Quick Settings. ● Hold the Home button and swipe up to the Google circle icons to display Google Now cards. ● Touch...

User Guide
Page 10
...battery widget, which displays both the tablet and the base battery status. ● To open an app, touch its icon. ● To add a widget to the Home screen, touch and hold the icon, and then slide it to the location where you want it to be. ● To remove a widget from the Home screen, touch... slide it to the location where you want it to the Remove icon at the top of the screen. Touch the All apps icon, and then touch Settings. 2. You can view and scroll through the updated content without opening the widget. NOTE: The Remove icon is updated frequently. Select Google, and...
...battery widget, which displays both the tablet and the base battery status. ● To open an app, touch its icon. ● To add a widget to the Home screen, touch and hold the icon, and then slide it to the location where you want it to be. ● To remove a widget from the Home screen, touch... slide it to the location where you want it to the Remove icon at the top of the screen. Touch the All apps icon, and then touch Settings. 2. You can view and scroll through the updated content without opening the widget. NOTE: The Remove icon is updated frequently. Select Google, and...

User Guide
Page 14
... the network, and then touch Forget. Connect to networks Under WIRELESS & NETWORKS, turn off Bluetooth when it visible to which you can pair a Bluetooth device, such as a headset, keyboard, or mouse with your device name to make it is turned on Bluetooth, and then touch Bluetooth. 4. To connect to networks. 6 Connecting to networks The following section explains how to connect to a wireless network, touch the All apps icon, and then touch Settings. 2. Type the security key, if required, and then touch Connect.
... the network, and then touch Forget. Connect to networks Under WIRELESS & NETWORKS, turn off Bluetooth when it visible to which you can pair a Bluetooth device, such as a headset, keyboard, or mouse with your device name to make it is turned on Bluetooth, and then touch Bluetooth. 4. To connect to networks. 6 Connecting to networks The following section explains how to connect to a wireless network, touch the All apps icon, and then touch Settings. 2. Type the security key, if required, and then touch Connect.

User Guide
Page 15
...; Display-Adjust Brightness, Wallpaper, Sleep, and Font size. ◦ HDMI-Adjust 3D Stereoscopic output using an HDMI connection. ◦ Storage-View available space in computer memory and SD™ card memory. ◦ Battery-View battery charge percentage and battery usage by each installed app is also displayed. ◦ More...-Enable or disable Airplane mode. ● DEVICE NOTE: Some of the data used during the selected period. Swipe from your device to networks, set backup preferences. ◦ Location services-Enable or disable Location...
...; Display-Adjust Brightness, Wallpaper, Sleep, and Font size. ◦ HDMI-Adjust 3D Stereoscopic output using an HDMI connection. ◦ Storage-View available space in computer memory and SD™ card memory. ◦ Battery-View battery charge percentage and battery usage by each installed app is also displayed. ◦ More...-Enable or disable Airplane mode. ● DEVICE NOTE: Some of the data used during the selected period. Swipe from your device to networks, set backup preferences. ◦ Location services-Enable or disable Location...

User Guide
Page 16
... zone, time format, and date format. ◦ Accessibility-Enable or disable TalkBack, Large text, Auto-rotate screen, Speak passwords, Text-to your computer. 12 Chapter 7 Using Settings NOTE: Factory data reset is available in PERSONAL DATA. ● ACCOUNTS-Existing accounts are displayed. ◦ Add an email account or another type of account-Under ACCOUNTS, touch + Add account, and then follow the on-screen instructions. ◦ Sync...
... zone, time format, and date format. ◦ Accessibility-Enable or disable TalkBack, Large text, Auto-rotate screen, Speak passwords, Text-to your computer. 12 Chapter 7 Using Settings NOTE: Factory data reset is available in PERSONAL DATA. ● ACCOUNTS-Existing accounts are displayed. ◦ Add an email account or another type of account-Under ACCOUNTS, touch + Add account, and then follow the on-screen instructions. ◦ Sync...
User Guide
Page 17
... -screen instructions. If you encrypt the computer, you can encrypt all of your data. The Encrypt tablet button is unavailable if your battery is not charged or your computer is not plugged in any direction. ● Password-Enter four or more letters or numbers. To access Settings, touch the All apps icon, and then touch Settings. 2. A factory data reset must unlock the screen before changing the lock settings. ● Slide-Unlock...
... -screen instructions. If you encrypt the computer, you can encrypt all of your data. The Encrypt tablet button is unavailable if your battery is not charged or your computer is not plugged in any direction. ● Password-Enter four or more letters or numbers. To access Settings, touch the All apps icon, and then touch Settings. 2. A factory data reset must unlock the screen before changing the lock settings. ● Slide-Unlock...
User Guide
Page 19
... AC adapter. 2. Backing up and resetting 1. To restore factory settings: 1. Under PERSONAL, touch Backup & reset. 4. Go to the Google Play store to download the latest versions of loss. If you when it is ready to install the updates. Turn off your tablet. Select one or more of the following methods. To access Settings, touch the All apps icon, and then touch Settings. 3. Technology is always changing, and updating apps...
... AC adapter. 2. Backing up and resetting 1. To restore factory settings: 1. Under PERSONAL, touch Backup & reset. 4. Go to the Google Play store to download the latest versions of loss. If you when it is ready to install the updates. Turn off your tablet. Select one or more of the following methods. To access Settings, touch the All apps icon, and then touch Settings. 3. Technology is always changing, and updating apps...

User Guide
Page 20
... user data, and then press the power button to finish the process. To access Settings, touch the All Apps icon, and then touch Settings. 4. Follow the on -screen instructions to boot into the recovery menu. 6. The system may reboot as updates are applied. Select Apply update from http://www.hp.com. 3. Updating the system using a file-based update 1. Turn off the computer, and then insert the SD card containing the update.zip file. 5. Download...
... user data, and then press the power button to finish the process. To access Settings, touch the All Apps icon, and then touch Settings. 4. Follow the on -screen instructions to boot into the recovery menu. 6. The system may reboot as updates are applied. Select Apply update from http://www.hp.com. 3. Updating the system using a file-based update 1. Turn off the computer, and then insert the SD card containing the update.zip file. 5. Download...

User Guide
Page 21
.... 2. Unmounting/disconnecting external SD cards or USB drives NOTE: Always unmount external storage devices before disconnecting. Press the Home button, touch the All Apps icon, and then touch Settings. 2. Accessing tablet storage using a USB cable: 1. Connect the USB cable to your host computer. For more information on your tablet is listed in the portable devices area of the host computer. 3. Turn on your files from external storage devices, see the software help for...
.... 2. Unmounting/disconnecting external SD cards or USB drives NOTE: Always unmount external storage devices before disconnecting. Press the Home button, touch the All Apps icon, and then touch Settings. 2. Accessing tablet storage using a USB cable: 1. Connect the USB cable to your host computer. For more information on your tablet is listed in the portable devices area of the host computer. 3. Turn on your files from external storage devices, see the software help for...

HP SlateBook 10 x2 PC Maintenance and Service Guide
Page 6
Volume button board 28 TouchScreen cable 29 Battery ...30 Bezel ...31 Speakers 33 System board 34 Keyboard base component replacement procedures 36 Bottom cover 36 Battery ...37 Media card reader board 38 Hinge assembly 39 Docking board 41 TouchPad 43 5 Specifications ...44 6 Backing up and recovering your data 46 Updating apps, widgets, and the operating system 46 Back up and reset ...46 Factory data reset ...47 Android system recovery mode 47 7 Power cord set requirements 48 Requirements for...
Volume button board 28 TouchScreen cable 29 Battery ...30 Bezel ...31 Speakers 33 System board 34 Keyboard base component replacement procedures 36 Bottom cover 36 Battery ...37 Media card reader board 38 Hinge assembly 39 Docking board 41 TouchPad 43 5 Specifications ...44 6 Backing up and recovering your data 46 Updating apps, widgets, and the operating system 46 Back up and reset ...46 Factory data reset ...47 Android system recovery mode 47 7 Power cord set requirements 48 Requirements for...

HP SlateBook 10 x2 PC Maintenance and Service Guide
Page 19
Spare part number Description 728147-001 Hinge assembly in smoke silver finish (includes cables) 728148-001 Media card reader board (includes cable) 728149-001 TouchPad (includes cable) 728150-001 Power button board (includes cable) 728151-001 Volume button board (includes cable) 728152-001 10.1-inch, AG, UWVA, WLED TouchScreen display panel 728153-001 Rubber Feet Kit (includes keyboard base rubber feet) 728154-001 Speaker Kit (includes left and right speakers and cables) 728155...
Spare part number Description 728147-001 Hinge assembly in smoke silver finish (includes cables) 728148-001 Media card reader board (includes cable) 728149-001 TouchPad (includes cable) 728150-001 Power button board (includes cable) 728151-001 Volume button board (includes cable) 728152-001 10.1-inch, AG, UWVA, WLED TouchScreen display panel 728153-001 Rubber Feet Kit (includes keyboard base rubber feet) 728154-001 Speaker Kit (includes left and right speakers and cables) 728155...
HP SlateBook 10 x2 PC Maintenance and Service Guide
Page 26
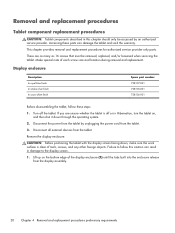
... size and location during removal and replacement. If you are as many as 16 screws that must be accessed by unplugging the power cord from the tablet. 3. Failure to the display screen. 1. This chapter provides removal and replacement procedures for authorized service provider only parts. Display enclosure Description In royal blue finish In smoke silver finish In snow white finish Spare part number 728137...
... size and location during removal and replacement. If you are as many as 16 screws that must be accessed by unplugging the power cord from the tablet. 3. Failure to the display screen. 1. This chapter provides removal and replacement procedures for authorized service provider only parts. Display enclosure Description In royal blue finish In smoke silver finish In snow white finish Spare part number 728137...

HP SlateBook 10 x2 PC Maintenance and Service Guide
Page 42
... service provider. Keyboard base component replacement procedures CAUTION: Keyboard base components described in the Rubber Feet Kit, spare part number 728153-001. 2. Make special note of each screw size and location during removal and replacement. Description In royal blue finish In smoke silver finish In snow white finish Spare part number 728140-001 728138-001 728139-001 Before disassembling the keyboard base, follow these parts...
... service provider. Keyboard base component replacement procedures CAUTION: Keyboard base components described in the Rubber Feet Kit, spare part number 728153-001. 2. Make special note of each screw size and location during removal and replacement. Description In royal blue finish In smoke silver finish In snow white finish Spare part number 728140-001 728138-001 728139-001 Before disassembling the keyboard base, follow these parts...

HP SlateBook 10 x2 PC Maintenance and Service Guide
Page 43
... in the keyboard base (includes cable) Spare part number 722231-005 Before removing the keyboard base battery, follow these steps: 1. Disconnect the power from the tablet and keyboard base by HP, or a compatible battery purchased from HP. To prevent loss of information. Removal and replacement procedures 37 To reduce potential safety issues, use only in Hibernation, turn the tablet on page 36). Battery Description 2-cell, 21-Wh...
... in the keyboard base (includes cable) Spare part number 722231-005 Before removing the keyboard base battery, follow these steps: 1. Disconnect the power from the tablet and keyboard base by HP, or a compatible battery purchased from HP. To prevent loss of information. Removal and replacement procedures 37 To reduce potential safety issues, use only in Hibernation, turn the tablet on page 36). Battery Description 2-cell, 21-Wh...

HP SlateBook 10 x2 PC Maintenance and Service Guide
Page 52
... passwords, and other settings to Google servers. ● Backup account-Select a Google account for backing up and restoring your tablet. To access Settings, touch the All apps icon, and then touch Settings. 2. Under BACKUP & RESTORE, select one or more of HP and third-party apps and widgets. Back up & reset. 3. 6 Backing up and recovering your data Updating apps, widgets, and the operating system HP recommends that you update...
... passwords, and other settings to Google servers. ● Backup account-Select a Google account for backing up and restoring your tablet. To access Settings, touch the All apps icon, and then touch Settings. 2. Under BACKUP & RESTORE, select one or more of HP and third-party apps and widgets. Back up & reset. 3. 6 Backing up and recovering your data Updating apps, widgets, and the operating system HP recommends that you update...

HP SlateBook 10 x2 PC Maintenance and Service Guide
Page 58
... USB 5 power button 4 power button board removal 26 spare part number 8, 13, 26 power connector 5 power cord set requirements 48 spare part numbers 12 power requirements, product description 2 processor, product description 1 product description audio 1 chipset 1 display panel 1 external media cards 2 graphics 1 memory 1 microphone 1 operating system 3 ports 2 power requirements 2 processors 1 product name 1 sensors 2 serviceability 3 storage 1 video 1 wireless 2 product name 1 R rear webcam location 4 removal 21 spare part number 8, 14, 21 recent apps key 5 Rubber Feet Kit, spare part number...
... USB 5 power button 4 power button board removal 26 spare part number 8, 13, 26 power connector 5 power cord set requirements 48 spare part numbers 12 power requirements, product description 2 processor, product description 1 product description audio 1 chipset 1 display panel 1 external media cards 2 graphics 1 memory 1 microphone 1 operating system 3 ports 2 power requirements 2 processors 1 product name 1 sensors 2 serviceability 3 storage 1 video 1 wireless 2 product name 1 R rear webcam location 4 removal 21 spare part number 8, 14, 21 recent apps key 5 Rubber Feet Kit, spare part number...


