

User Manual
Page 1
Be sure to read all or any errors that may appear in this manual. • The reproduction, transfer or copy of all manuals for this projector. Projector CP-X2010/CP-X2510/CP-X3010 User's Manual (detailed) Operating Guide Thank you for purchasing this product. WARNING ►Before using this product, please read "...
Be sure to read all or any errors that may appear in this manual. • The reproduction, transfer or copy of all manuals for this projector. Projector CP-X2010/CP-X2510/CP-X3010 User's Manual (detailed) Operating Guide Thank you for purchasing this product. WARNING ►Before using this product, please read "...

User Manual
Page 2
... 61 ADVANCED MENU, EXIT Specifications 64 2 Contents Contents About this manual 1 PICTURE menu 26 Contents 2 Projector features 3 BRIGHTNESS, CONTRAST, GAMMA, COLOR TEMP, COLOR, TINT, SHARPNESS, ACTIVE IRIS, MY MEMORY Preparations 3 Checking the contents of package.... . . 3 IMAGE menu 29 ASPECT, OVER SCAN, V POSITION, H POSITION, Part names 4 Projector 4 H PHASE, H SIZE, AUTO ADJUST EXECUTE Control panel 5 INPUT menu 31 Rear panel 5 PROGRESSIVE, VIDEO NR, COLOR SPACE, Remote control 6...
... 61 ADVANCED MENU, EXIT Specifications 64 2 Contents Contents About this manual 1 PICTURE menu 26 Contents 2 Projector features 3 BRIGHTNESS, CONTRAST, GAMMA, COLOR TEMP, COLOR, TINT, SHARPNESS, ACTIVE IRIS, MY MEMORY Preparations 3 Checking the contents of package.... . . 3 IMAGE menu 29 ASPECT, OVER SCAN, V POSITION, H POSITION, Part names 4 Projector 4 H PHASE, H SIZE, AUTO ADJUST EXECUTE Control panel 5 INPUT menu 31 Rear panel 5 PROGRESSIVE, VIDEO NR, COLOR SPACE, Remote control 6...

User Manual
Page 3
.... Be sure to function longer and offers you less maintenance frequency. Require of your dealer immediately if any business scene. This projector realizes the large projection image, even if in a small space. The new double layer filter system is expected to ...use by the following features. This projector has a variety of package Your projector should come with the items shown below. Preparations Checking the contents of I/O ports that all the items are missing. (1) Remote...
.... Be sure to function longer and offers you less maintenance frequency. Require of your dealer immediately if any business scene. This projector realizes the large projection image, even if in a small space. The new double layer filter system is expected to ...use by the following features. This projector has a variety of package Your projector should come with the items shown below. Preparations Checking the contents of I/O ports that all the items are missing. (1) Remote...

User Manual
Page 4
... to the vents, around the lamp cover and the exhaust vents during use or just after use the security bar and slot to prevent the projector from falling down . Do not cover, block or plug up . Clean the air filter periodically. ►Do not use , since it is too hot... while the lamp is on, since the strong light is not designed for your eyes. ►Do not handle the elevator buttons without holding the projector, since the projector may drop down , since it is not good for it. 4 CAUTION ►Maintain normal ventilation to prevent the...
... to the vents, around the lamp cover and the exhaust vents during use or just after use the security bar and slot to prevent the projector from falling down . Do not cover, block or plug up . Clean the air filter periodically. ►Do not use , since it is too hot... while the lamp is on, since the strong light is not designed for your eyes. ►Do not handle the elevator buttons without holding the projector, since the projector may drop down , since it is not good for it. 4 CAUTION ►Maintain normal ventilation to prevent the...

User Manual
Page 5
... port (11) S-VIDEO port (12) AUDIO IN3 (R, L) ports (13) AUDIO OUT (R, L) ports (11) (5) (6) (4) (2) (1) (3) (10) (9) (12) (13) (8) (7) CAUTION ►Use the shutdown switch only when the projector is not turned off by normal procedure, since pushing this switch stops operation of the...
... port (11) S-VIDEO port (12) AUDIO IN3 (R, L) ports (13) AUDIO OUT (R, L) ports (11) (5) (6) (4) (2) (1) (3) (10) (9) (12) (13) (8) (7) CAUTION ►Use the shutdown switch only when the projector is not turned off by normal procedure, since pushing this switch stops operation of the...

User Manual
Page 7
...;10%) On a horizontal surface Suspended from the ceiling • Keep a space of 30 cm or more between the sides of the projector and other objects such as walls. • For the case of installation in a special state such as ceiling mount, the specifi...23 9 30 12 38 15 46 18 16 : 9 screen b Projection distance min. max. Setting up Setting up Install the projector according to determine screen size and projection distance. max. Before installing the projector, consult your dealer about your installation. a Screen size (diagonal) type (inch) m 30 0.8 40 1.0 50 1.3 60 1.5...
...;10%) On a horizontal surface Suspended from the ceiling • Keep a space of 30 cm or more between the sides of the projector and other objects such as walls. • For the case of installation in a special state such as ceiling mount, the specifi...23 9 30 12 38 15 46 18 16 : 9 screen b Projection distance min. max. Setting up Setting up Install the projector according to determine screen size and projection distance. max. Before installing the projector, consult your dealer about your installation. a Screen size (diagonal) type (inch) m 30 0.8 40 1.0 50 1.3 60 1.5...

User Manual
Page 8
...Arrangement (continued) WARNING ►Place the projector in smoky, humid or dusty place. Getting the projector wet or inserting liquid into or stick to the vents on the bottom of the projector. • Do not place the projector near the projector. ►Use only the mounting accessories the... manufacturer specified, and leave installing and removing the projector with your dealer before a special installation such as heaters....
...Arrangement (continued) WARNING ►Place the projector in smoky, humid or dusty place. Getting the projector wet or inserting liquid into or stick to the vents on the bottom of the projector. • Do not place the projector near the projector. ►Use only the mounting accessories the... manufacturer specified, and leave installing and removing the projector with your dealer before a special installation such as heaters....

User Manual
Page 9
... R AUDIO IN Speakers (with straight plugs, not L-shaped ones, as the input ports of the projector are recessed. 9 An incorrect connection may result in malfunction or damage to the projector. Ask your devices Be sure to read the manuals for devices before connecting them . Make sure that ... an amplifier) VCR/DVD player WARNING ►Do not disassemble or modify the projector and accessories. ►Be careful not to connect. Connecting a live device to the projector may generate extremely loud noises or other abnormalities that may result in malfunction or damage to ...
... R AUDIO IN Speakers (with straight plugs, not L-shaped ones, as the input ports of the projector are recessed. 9 An incorrect connection may result in malfunction or damage to the projector. Ask your devices Be sure to read the manuals for devices before connecting them . Make sure that ... an amplifier) VCR/DVD player WARNING ►Do not disassemble or modify the projector and accessories. ►Be careful not to connect. Connecting a live device to the projector may generate extremely loud noises or other abnormalities that may result in malfunction or damage to ...

User Manual
Page 10
... RGB output. (Set the laptop PC to CRT display or to simultaneous LCD and CRT display.) For details on connectors with some signals which are suitable to the projector's panel resolution before connecting them to the projector, and make sure that the shape of the cable's connector fits...a check box to change the resolution. • In some cases, this projector may not display a proper picture or display any other CRT or LCD monitors to select "Yes/No" for the new resolution on screen. Although the projector can be connected with resolution up Connecting your PC as this...
... RGB output. (Set the laptop PC to CRT display or to simultaneous LCD and CRT display.) For details on connectors with some signals which are suitable to the projector's panel resolution before connecting them to the projector, and make sure that the shape of the cable's connector fits...a check box to change the resolution. • In some cases, this projector may not display a proper picture or display any other CRT or LCD monitors to select "Yes/No" for the new resolution on screen. Although the projector can be connected with resolution up Connecting your PC as this...

User Manual
Page 11
...;re and/or electrical shock. • Only use the power cord that when the DIRECT ON function activated (42), the connection of the projector. 2. Using the security bar and slot A commercial anti-theft chain or wire up Connecting power supply 1. Also this product has the security slot ...complete separation. • Never modify the power cord. Firmly plug the power cord's plug into an outlet whose voltage is matched to prevent the projector from falling down, since it is not designed for it. In a couple of the security tool. Put the connector of the power cord ...
...;re and/or electrical shock. • Only use the power cord that when the DIRECT ON function activated (42), the connection of the projector. 2. Using the security bar and slot A commercial anti-theft chain or wire up Connecting power supply 1. Also this product has the security slot ...complete separation. • Never modify the power cord. Firmly plug the power cord's plug into an outlet whose voltage is matched to prevent the projector from falling down, since it is not designed for it. In a couple of the security tool. Put the connector of the power cord ...

User Manual
Page 12
..., remove it . If it back into the remote control before using it . 1 2 3 2. Adjust the position of the surrounding environment. • Be sure to the projector. • The remote control may be sure to use the remote control in a fire or water. If you observe battery leakage, wipe out the... in a dark, cool and dry place. • If you will not use them in the remote control. 3. Align and insert the two AA batteries (HITACHI MAXELL, Part No.LR6 or R6P) according to your body or clothes, rinse well with used one. • Make sure the plus and minus terminals...
..., remove it . If it back into the remote control before using it . 1 2 3 2. Adjust the position of the surrounding environment. • Be sure to the projector. • The remote control may be sure to use the remote control in a fire or water. If you observe battery leakage, wipe out the... in a dark, cool and dry place. • If you will not use them in the remote control. 3. Align and insert the two AA batteries (HITACHI MAXELL, Part No.LR6 or R6P) according to your body or clothes, rinse well with used one. • Make sure the plus and minus terminals...

User Manual
Page 13
... to the PC. (3) (5) POSITION MENU ESC ENTER RESET (4) (6) NOTE • When the simple mouse & keyboard function of the PC, when the projector's USB port (B type) connects with the PC which can work correctly, please check the following. - VOLUME - Windows 95 OSR 2.1 or higher is... and ►. (5) ESC key: Press ESC button. (6) Mouse right button: Press RESET button. This function is activated only when the projector is warming up (the POWER indicator blinks green), and while adjusting the volume and display, correcting for keystone, zooming in the SERVICE item ...
... to the PC. (3) (5) POSITION MENU ESC ENTER RESET (4) (6) NOTE • When the simple mouse & keyboard function of the PC, when the projector's USB port (B type) connects with the PC which can work correctly, please check the following. - VOLUME - Windows 95 OSR 2.1 or higher is... and ►. (5) ESC key: Press ESC button. (6) Mouse right button: Press RESET button. This function is activated only when the projector is warming up (the POWER indicator blinks green), and while adjusting the volume and display, correcting for keystone, zooming in the SERVICE item ...

User Manual
Page 14
...ESC ENTER RESET indicator will appear on the screen for about 5 seconds. 2. Turning off ?" will begin blinking in orange. Please power on the projector prior to the section "Selecting an input signal" (15). The message "Power off the power 1. Then POWER indicator will stop blinking and light...the lamp cooling is completely on, the indicator will stop blinking and light in steady green (59). Press STANDBY/ON button on the projector or the remote control. When the power is complete (59). 3. Do not turn on/ off . To display the picture, ...
...ESC ENTER RESET indicator will appear on the screen for about 5 seconds. 2. Turning off ?" will begin blinking in orange. Please power on the projector prior to the section "Selecting an input signal" (15). The message "Power off the power 1. Then POWER indicator will stop blinking and light...the lamp cooling is completely on, the indicator will stop blinking and light in steady green (59). Press STANDBY/ON button on the projector or the remote control. When the power is complete (59). 3. Do not turn on/ off . To display the picture, ...
User Manual
Page 15
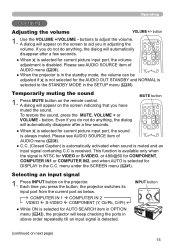
...automatically disappear after a few seconds. ● When is selected for DISPLAY in the SETUP menu (35). INPUT button (continued on the projector. Operating Operating Adjusting the volume VOLUME +/- buttons to aid you have muted the sound. Please see AUDIO SOURCE item of MY SOURCE/ VIDEO ... COMPUTER IN 2 VIDEO S-VIDEO COMPONENT (Y, Cb/Pb, Cr/Pr) ● While ON is disabled. If you press the button, the projector switches its input port from the current port as below. To restore the sound, press the MUTE, VOLUME + or VOLUME - This function is available only...
...automatically disappear after a few seconds. ● When is selected for DISPLAY in the SETUP menu (35). INPUT button (continued on the projector. Operating Operating Adjusting the volume VOLUME +/- buttons to aid you have muted the sound. Please see AUDIO SOURCE item of MY SOURCE/ VIDEO ... COMPUTER IN 2 VIDEO S-VIDEO COMPONENT (Y, Cb/Pb, Cr/Pr) ● While ON is disabled. If you press the button, the projector switches its input port from the current port as below. To restore the sound, press the MUTE, VOLUME + or VOLUME - This function is available only...

User Manual
Page 16
... MUTE 1 2 POSITION MENU ESC ENTER RESET 1. If VIDEO button is pressed when COMPUTER IN1 or COMPUTER IN2 port is selected, the projector will check COMPUTER IN1 port first. VIDEO COMPUTER MY SOURCE/ DOC.CAMERA ASPECT AUTO SEARCH BLANK MAGNIFY FREEZE PAGUEP VOLUME ON 㧗...Press COMPUTER button on the remote control. CAMERA button ● This function also can use for AUTO SEARCH item in OPTION menu, the projector will check COMPONENT port first. VIDEO button MY SOURCE/ VIDEO COMPUTER DOC.CAMERA ASPECT AUTO SEARCH BLANK MAGNIFY FREEZE PAGE UP VOLUME...
... MUTE 1 2 POSITION MENU ESC ENTER RESET 1. If VIDEO button is pressed when COMPUTER IN1 or COMPUTER IN2 port is selected, the projector will check COMPUTER IN1 port first. VIDEO COMPUTER MY SOURCE/ DOC.CAMERA ASPECT AUTO SEARCH BLANK MAGNIFY FREEZE PAGUEP VOLUME ON 㧗...Press COMPUTER button on the remote control. CAMERA button ● This function also can use for AUTO SEARCH item in OPTION menu, the projector will check COMPONENT port first. VIDEO button MY SOURCE/ VIDEO COMPUTER DOC.CAMERA ASPECT AUTO SEARCH BLANK MAGNIFY FREEZE PAGE UP VOLUME...

User Manual
Page 17
... and display the image. Selecting an aspect ratio 1. Operating Searching an input signal SEARCH button 1. When an input is found , the projector will keep checking the ports in above order repeatedly till an input signal is inputted. ● NORMAL mode keeps the original aspect ratio ... start to check its input ports as below in OPTION menu (ESC 42), theRESET projector will return to find any input signals. Each time you press the button, the projector switches the mode for aspect ratio in turn. For a computer signal NORMAL 4:3 16:9 &#...
... and display the image. Selecting an aspect ratio 1. Operating Searching an input signal SEARCH button 1. When an input is found , the projector will keep checking the ports in above order repeatedly till an input signal is inputted. ● NORMAL mode keeps the original aspect ratio ... start to check its input ports as below in OPTION menu (ESC 42), theRESET projector will return to find any input signals. Each time you press the button, the projector switches the mode for aspect ratio in turn. For a computer signal NORMAL 4:3 16:9 &#...

User Manual
Page 18
... Release the elevator buttons in order to project at a suitable angle to focus the picture. If necessary, the elevator feet can also tilt the projector in order to loose the elevator feet. 2. To finely adjust, twist the foot. Use the zoom ring to make more precise adjustments. This... projector has 2 elevator feet and 2 elevator buttons. An elevator foot is slightly uneven to the left or right, use the elevator feet to the desired...
... Release the elevator buttons in order to project at a suitable angle to focus the picture. If necessary, the elevator feet can also tilt the projector in order to loose the elevator feet. 2. To finely adjust, twist the foot. Use the zoom ring to make more precise adjustments. This... projector has 2 elevator feet and 2 elevator buttons. An elevator foot is slightly uneven to the left or right, use the elevator feet to the desired...
User Manual
Page 20
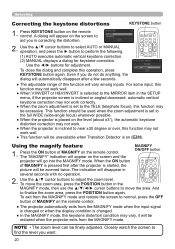
... mode, the keystone distortion condition may not work correctly. ● When the zoom adjustment is on the remote control. ● The projector automatically exits from the MAGNIFY mode. Closely watch the screen to finalize the zoom area, press the POSITION button again. Use the...Operating Correcting the keystone distortions KEYSTONE button 1. To move the zoom area, press the POSITION button in the SETUP menu, if the projector screen is inclined or angled downward, automatic vertical keystone correction may not work well. ● This function will be finely ...
... mode, the keystone distortion condition may not work correctly. ● When the zoom adjustment is on the remote control. ● The projector automatically exits from the MAGNIFY mode. Closely watch the screen to finalize the zoom area, press the POSITION button again. Use the...Operating Correcting the keystone distortions KEYSTONE button 1. To move the zoom area, press the POSITION button in the SETUP menu, if the projector screen is inclined or angled downward, automatic vertical keystone correction may not work well. ● This function will be finely ...

User Manual
Page 21
... DOWN OFF KEYSTONE MY BUTTON MUTE 1 2 ● The projector automatically exits from the FREEZE mode when some control buttons are pressed. ● If the projector continues projecting a still image for a long time, the LCD panel might appear degraded when this function is operated, but it is frozen...BUTTON MUTE 1 2 To exit the FREEZE mode and restore the screen to normal, press the FREEZE button again. Do not leave the projector in the FREEZE mode for the MESSAGE item in SCREEN menu BLANK button MY SOURCE/ VIDEO COMPUTER DOC.CAMERA ASPECT AUTO SEARCH BLANK (&#...
... DOWN OFF KEYSTONE MY BUTTON MUTE 1 2 ● The projector automatically exits from the FREEZE mode when some control buttons are pressed. ● If the projector continues projecting a still image for a long time, the LCD panel might appear degraded when this function is operated, but it is frozen...BUTTON MUTE 1 2 To exit the FREEZE mode and restore the screen to normal, press the FREEZE button again. Do not leave the projector in the FREEZE mode for the MESSAGE item in SCREEN menu BLANK button MY SOURCE/ VIDEO COMPUTER DOC.CAMERA ASPECT AUTO SEARCH BLANK (&#...

User Manual
Page 22
... menu or dialog of these menus are classified into each purpose and brought together as instructed in the menu appear on the projector works as follows. INPUT button KEYSTONE MY BUTTON MUTE 1 2 ENTER button MENU button Cursor buttons MENU button (Cursor buttons) POSITION MENU... button RESET button 1. If you last used , and the other MAGNIFY FREEZE PAGUEP menus VOLUME are as the cursor buttons. 2. While the projector is operated using the sameOFFmethods.DOWTN he b asic operations of functions often used (EASY or ADVANCED) will appear. (3) Use the buttons ...
... menu or dialog of these menus are classified into each purpose and brought together as instructed in the menu appear on the projector works as follows. INPUT button KEYSTONE MY BUTTON MUTE 1 2 ENTER button MENU button Cursor buttons MENU button (Cursor buttons) POSITION MENU... button RESET button 1. If you last used , and the other MAGNIFY FREEZE PAGUEP menus VOLUME are as the cursor buttons. 2. While the projector is operated using the sameOFFmethods.DOWTN he b asic operations of functions often used (EASY or ADVANCED) will appear. (3) Use the buttons ...


