

Owners Guide
Page 1
INC. 3890 Steve Reynolds Blvd., Norcross, GA 30093 Pointe Claire, Tel. 404-279-5600 HITACHI SALES CORPORATION OF HAWAII, INC. 3219 Koapaka Street, Honolulu, HI 96819 Tel. 808-836-3621 P QR10512 ©Hitachi, Ltd. 1994 KS-F(N) HITACHI (HSC) CANADA 3300 Trans Canada Hwy., Quebec, H9R1B1, CANADA Tel. 514-697-9150 Printed in Japan 1 1HITACHI Instruction Manual Video Camera/Recorder VM-1700A / VM-2700A Hitachi Home Electronics (America), Inc.
INC. 3890 Steve Reynolds Blvd., Norcross, GA 30093 Pointe Claire, Tel. 404-279-5600 HITACHI SALES CORPORATION OF HAWAII, INC. 3219 Koapaka Street, Honolulu, HI 96819 Tel. 808-836-3621 P QR10512 ©Hitachi, Ltd. 1994 KS-F(N) HITACHI (HSC) CANADA 3300 Trans Canada Hwy., Quebec, H9R1B1, CANADA Tel. 514-697-9150 Printed in Japan 1 1HITACHI Instruction Manual Video Camera/Recorder VM-1700A / VM-2700A Hitachi Home Electronics (America), Inc.

Owners Guide
Page 2
... THE AC ADAPTER/CHARGER (Provided 16 WHEN USING WITH THE CAR BATTERY (By using optional car battery cord Hitachi VMCC70A)...17 CHECKING THE BATTERY ...18 CHARGING A BATTERY ...19 MAKING A SAMPLE RECORDING 21 IDENTIFICATION AND OPERATION OF CONTROLS 25 DATE/TIME Setting ...30 To correct date/time information after starting the date/time 31 To correct date/time information during programming 31 AUTOMATIC DATE RECORDING 32 AUTO FOCUS...33 The auto focus will not work under the following conditions 33 POWER ZOOM ...35 MACRO...
... THE AC ADAPTER/CHARGER (Provided 16 WHEN USING WITH THE CAR BATTERY (By using optional car battery cord Hitachi VMCC70A)...17 CHECKING THE BATTERY ...18 CHARGING A BATTERY ...19 MAKING A SAMPLE RECORDING 21 IDENTIFICATION AND OPERATION OF CONTROLS 25 DATE/TIME Setting ...30 To correct date/time information after starting the date/time 31 To correct date/time information during programming 31 AUTOMATIC DATE RECORDING 32 AUTO FOCUS...33 The auto focus will not work under the following conditions 33 POWER ZOOM ...35 MACRO...

Owners Guide
Page 6
... a light source, a bright vertical bar may be damaged. 6 Dangerous includes: • Inside a car with the windows closed and in the picture. PRECAUTIONS Any problems that no water, dust, or sand enters the camera/recorder. For maximum pleasure and convenience please read these simple instructions before operating your camera/recorder. Do not leave the viewfinder lens facing sunlight for choosing the video camera/recorder. Be...
... a light source, a bright vertical bar may be damaged. 6 Dangerous includes: • Inside a car with the windows closed and in the picture. PRECAUTIONS Any problems that no water, dust, or sand enters the camera/recorder. For maximum pleasure and convenience please read these simple instructions before operating your camera/recorder. Do not leave the viewfinder lens facing sunlight for choosing the video camera/recorder. Be...
Owners Guide
Page 7
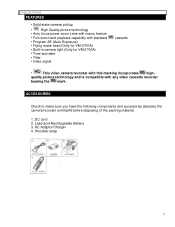
...- DC cord 2. Lead-acid Rechargeable Battery 3. PRECAUTIONS FEATURES • Solid-state camera pickup • High Quality picture technology • Auto focus power zoom Lens with macro feature • Full record and playback capability with standard • Program AE (Auto Exposure) • Flying erase head (Only for VM-2700A) • Built-in camera light (Only for VM-2700A) • Time and date • Titler • Index signal cassette * This video camera/recorder with any video cassette recorder bearing...
...- DC cord 2. Lead-acid Rechargeable Battery 3. PRECAUTIONS FEATURES • Solid-state camera pickup • High Quality picture technology • Auto focus power zoom Lens with macro feature • Full record and playback capability with standard • Program AE (Auto Exposure) • Flying erase head (Only for VM-2700A) • Built-in camera light (Only for VM-2700A) • Time and date • Titler • Index signal cassette * This video camera/recorder with any video cassette recorder bearing...

Owners Guide
Page 8
... operate from the type of power source indicated on the video product and in a risk of fire or electric shock. To prevent electric shock do not use of a Video Camera/Recorder and accessory equipment. This page lists important information that will fit into the outlet, try reversing the plug. Comply with an extension cord, receptacle or other sources, refer to the operating instructions...
... operate from the type of power source indicated on the video product and in a risk of fire or electric shock. To prevent electric shock do not use of a Video Camera/Recorder and accessory equipment. This page lists important information that will fit into the outlet, try reversing the plug. Comply with an extension cord, receptacle or other sources, refer to the operating instructions...

Owners Guide
Page 12
... of damage to or less than cord when disconnecting charger. 8. That the pins on plug of extension cord are the same number, size, and shape as those of the NEC that provides guidelines for AC Adaptor/Charger Model VM-AC68A (T) 2. That wire size should not be stepped on (1) AC Adapter/Charger, (2) battery and (3) product using AC Adaptor/Charger, read all instructions and cautionary markings on , tripped...
... of damage to or less than cord when disconnecting charger. 8. That the pins on plug of extension cord are the same number, size, and shape as those of the NEC that provides guidelines for AC Adaptor/Charger Model VM-AC68A (T) 2. That wire size should not be stepped on (1) AC Adapter/Charger, (2) battery and (3) product using AC Adaptor/Charger, read all instructions and cautionary markings on , tripped...

Owners Guide
Page 16
... upside and remove. POWER SOURCES POWER SOURCES WHEN USING WITH THE BATTERY (Provided) • To attach, align the mark " " of the battery with that of the camera/recorder so that the battery fits into AC electrical outlet. 2. NOTES: • The AC adaptor/charger cannot charge the battery and operate the camera/recorder at the same time. 16 WHEN USING WITH THE AC ADAPTER/CHARGER (Provided) 1. Plug the AC adaptor/charger power cord into...
... upside and remove. POWER SOURCES POWER SOURCES WHEN USING WITH THE BATTERY (Provided) • To attach, align the mark " " of the battery with that of the camera/recorder so that the battery fits into AC electrical outlet. 2. NOTES: • The AC adaptor/charger cannot charge the battery and operate the camera/recorder at the same time. 16 WHEN USING WITH THE AC ADAPTER/CHARGER (Provided) 1. Plug the AC adaptor/charger power cord into...

Owners Guide
Page 17
... with automobiles having a 12-volt negative ground system. • To prevent fire or shock hazard or damage to power the camera/recorder. POWER SOURCES • When using the AC adaptor/charger to the car's cigarette lighter socket. Connect the small plug of the car battery cord to the "DC IN 9.6V" jack of the car battery cord to power the camera/recorder, the battery level indicator may display " ".
... with automobiles having a 12-volt negative ground system. • To prevent fire or shock hazard or damage to power the camera/recorder. POWER SOURCES • When using the AC adaptor/charger to the car's cigarette lighter socket. Connect the small plug of the car battery cord to the "DC IN 9.6V" jack of the car battery cord to power the camera/recorder, the battery level indicator may display " ".

Owners Guide
Page 20
...ºC). Operation time will not light if a hot battery is time to the AC adaptor/charger. If "CHARGE" and "POWER" lights on how much you use zoom and pause). 2. There are no user serviceable parts inside. 11. Throwing the battery into the municipal waste stream. The battery is not recommended; If the battery is stored for an extended period of operating time (depending on the AC adaptor/charger start flashing, remove the battery and...
...ºC). Operation time will not light if a hot battery is time to the AC adaptor/charger. If "CHARGE" and "POWER" lights on how much you use zoom and pause). 2. There are no user serviceable parts inside. 11. Throwing the battery into the municipal waste stream. The battery is not recommended; If the battery is stored for an extended period of operating time (depending on the AC adaptor/charger start flashing, remove the battery and...

Owners Guide
Page 22
... recording time left on the cassette. • If the record/pause mode continues for more than 5 minutes, the camera/recorder's power is in the viewfinder instead of "REC" while the camera/recorder is automatically turned off. To turn on the "POWER" switch, and then slide it to resume recording. After recording, press and hold the small button on again, press "REC/PAUSE" button. Now, press "REC/PAUSE" button to stop mode. 22 Press "REC/PAUSE" button to start shooting the picture. The "REC...
... recording time left on the cassette. • If the record/pause mode continues for more than 5 minutes, the camera/recorder's power is in the viewfinder instead of "REC" while the camera/recorder is automatically turned off. To turn on the "POWER" switch, and then slide it to resume recording. After recording, press and hold the small button on again, press "REC/PAUSE" button. Now, press "REC/PAUSE" button to stop mode. 22 Press "REC/PAUSE" button to start shooting the picture. The "REC...

Owners Guide
Page 23
After playing, press "STOP/EJECT" button 11. Slide the "POWER" switch to "OFF" position to "VIEWING THE PICTURE PLAYED BACK ON YOUR TV" on your TV, you connect the camera/recorder to remove the cassette. 12. Press "REW" button. Always remove the power source from the camera/recorder after use. 23 The picture you just recorded will be seen through the viewfinder. Refer to turn off the camera/recorder. Press "STOP/EJECT" button to your TV. The tape will be...
After playing, press "STOP/EJECT" button 11. Slide the "POWER" switch to "OFF" position to "VIEWING THE PICTURE PLAYED BACK ON YOUR TV" on your TV, you connect the camera/recorder to remove the cassette. 12. Press "REW" button. Always remove the power source from the camera/recorder after use. 23 The picture you just recorded will be seen through the viewfinder. Refer to turn off the camera/recorder. Press "STOP/EJECT" button to your TV. The tape will be...

Owners Guide
Page 25
... light off manually. Lens (with Lens Cap) F1.8 (5 ~ 60 mm) 12:1 power zoom lens features auto focus and auto iris functions. Set the switch to "OFF" to sounds coming from the direction in which the camera is pointed. To open the cover: 25 When the switch is set to this switch is set to "AUTO", the camera light turns on or off automatically according to these jacks and to the audio and video inputs of "LIGHT" switch. Electronic Viewfinder (EVF) Displays...
... light off manually. Lens (with Lens Cap) F1.8 (5 ~ 60 mm) 12:1 power zoom lens features auto focus and auto iris functions. Set the switch to "OFF" to sounds coming from the direction in which the camera is pointed. To open the cover: 25 When the switch is set to this switch is set to "AUTO", the camera light turns on or off automatically according to these jacks and to the audio and video inputs of "LIGHT" switch. Electronic Viewfinder (EVF) Displays...

Owners Guide
Page 27
"POWER" Switch This switch changes the camera/recorder to the record mode or to stop tape movement. Press "PLAY" button to return to normal playback mode or press "STOP/EJECT" button to the playback mode. "F.FWD" Button Press this button during playback of tape, and the tape is in the viewfinder. " " appears in the forward direction approximately 3 times faster than the normal speed to set the date and time during record operation. Press the button during stop or fast forward mode, and fast-rewinding starts. NOTE...
"POWER" Switch This switch changes the camera/recorder to the record mode or to stop tape movement. Press "PLAY" button to return to normal playback mode or press "STOP/EJECT" button to the playback mode. "F.FWD" Button Press this button during playback of tape, and the tape is in the viewfinder. " " appears in the forward direction approximately 3 times faster than the normal speed to set the date and time during record operation. Press the button during stop or fast forward mode, and fast-rewinding starts. NOTE...

Owners Guide
Page 28
.... Ejecting the cassette returns the tracking to the video camera/recorder. When the "POWER" switch is used to begin recording. When this button starts the tape to display a still picture during the playback mode. NOTE: This button may be connected to best fit your optimum focus adjustment. Hand Strap Adjust to open the cassette holder. Be aware of "REC" and the tape stops and the camera/recorder enters the record/pause (stand-by) mode. Power Zoom Switch/ "TRACKING" Control • This switch performs zooming electrically. "REC" appears...
.... Ejecting the cassette returns the tracking to the video camera/recorder. When the "POWER" switch is used to begin recording. When this button starts the tape to display a still picture during the playback mode. NOTE: This button may be connected to best fit your optimum focus adjustment. Hand Strap Adjust to open the cassette holder. Be aware of "REC" and the tape stops and the camera/recorder enters the record/pause (stand-by) mode. Power Zoom Switch/ "TRACKING" Control • This switch performs zooming electrically. "REC" appears...

Owners Guide
Page 30
Use the following procedure to set , press "REW" button. Press and hold the small button on your tape to advance rapidly. Press "F.FWD" or "REW" button to "CAM" position. 2. If it is not charged periodically, it to select year, and then press "STOP/EJECT" 30 Press "F.FWD" button to the camera/recorder for the current date and time. Set "POWER" switch to "OFF" position and connect a charged battery or AC adaptor/charger to...
Use the following procedure to set , press "REW" button. Press and hold the small button on your tape to advance rapidly. Press "F.FWD" or "REW" button to "CAM" position. 2. If it is not charged periodically, it to select year, and then press "STOP/EJECT" 30 Press "F.FWD" button to the camera/recorder for the current date and time. Set "POWER" switch to "OFF" position and connect a charged battery or AC adaptor/charger to...

Owners Guide
Page 31
NOTE: The date/time graphics will change the display and start the internal clock. Press and hold "DATE/TIME" button, and then press "STOP/EJECT" button. To correct date/time information after setting the clock. Correct the incorrect digit by using "F.FWD", "REW" and "STOP/EJECT" buttons. 31 DATE/TIME Setting button. 6. It is pressed. Correct the incorrect digit by using "F.FWD", "REW" and "STOP" buttons. Press "F.FWD" or "REW" button as many times as follows each time the button is recommended...
NOTE: The date/time graphics will change the display and start the internal clock. Press and hold "DATE/TIME" button, and then press "STOP/EJECT" button. To correct date/time information after setting the clock. Correct the incorrect digit by using "F.FWD", "REW" and "STOP/EJECT" buttons. 31 DATE/TIME Setting button. 6. It is pressed. Correct the incorrect digit by using "F.FWD", "REW" and "STOP" buttons. Press "F.FWD" or "REW" button as many times as follows each time the button is recommended...

Owners Guide
Page 48
... camera/recorder records and plays back in long play (LP) or extra long play (EP) cannot be played back on this camcorder. VIEWING THE PICTURE PLAYED BACK ON YOUR TV VIEWING THE PICTURE PLAYED BACK ON YOUR TV To play back the tape recorded by your camera/recorder on any other end of the video/audio cord to "AUDIO" and "VIDEO" of your camera/recorder. 3. Turn on the camera/recorder and then insert the cassette. 5. Place "POWER" switch in "VIDEO" position. 6. After playing press "STOP/EJECT" button...
... camera/recorder records and plays back in long play (LP) or extra long play (EP) cannot be played back on this camcorder. VIEWING THE PICTURE PLAYED BACK ON YOUR TV VIEWING THE PICTURE PLAYED BACK ON YOUR TV To play back the tape recorded by your camera/recorder on any other end of the video/audio cord to "AUDIO" and "VIDEO" of your camera/recorder. 3. Turn on the camera/recorder and then insert the cassette. 5. Place "POWER" switch in "VIDEO" position. 6. After playing press "STOP/EJECT" button...

Owners Guide
Page 49
...Connect the 75 Ohm coaxial cable with camera/recorder connected as illustrated. 5. NOTE: If you want to watch a TV program with antenna adaptor to channel 4. 7. Example 3: If your area. NOTE: Leave the UHF antenna leads connected to "IN FROM ANT" on the TV, as illustrated, slide "POWER" switch of the camera/recorder... "AUDIO", and "VIDEO" jacks on the VCR so there is used in your area, set to the "IN FROM ANT". If channel 3 is no noise. Perform same procedures in steps 4 through 7 of the TV stations in the played back picture, adjust "TRACKING" control on the camcorder. ...
...Connect the 75 Ohm coaxial cable with camera/recorder connected as illustrated. 5. NOTE: If you want to watch a TV program with antenna adaptor to channel 4. 7. Example 3: If your area. NOTE: Leave the UHF antenna leads connected to "IN FROM ANT" on the TV, as illustrated, slide "POWER" switch of the camera/recorder... "AUDIO", and "VIDEO" jacks on the VCR so there is used in your area, set to the "IN FROM ANT". If channel 3 is no noise. Perform same procedures in steps 4 through 7 of the TV stations in the played back picture, adjust "TRACKING" control on the camcorder. ...

Owners Guide
Page 61
.... Auto-focus does not operate. INSERTING OR REMOVING THE CASSETTE Symptom Check Point & Correction Cassette holder cannot be toward outside. Cassette window must be opened Connect the power source. Picture is not turned on cassette. when you slide "EJECT" button Cassette cannot be inserted into The cassette has had the erase the recording mode, even when record prevention tab removed. CAMERA RECORDING SYMPTOM CHECK POINT & CORRECTION Picture does not appear in direction indicated by cassette compartment. Set "POWER" switch to "CAM" position. of focus...
.... Auto-focus does not operate. INSERTING OR REMOVING THE CASSETTE Symptom Check Point & Correction Cassette holder cannot be toward outside. Cassette window must be opened Connect the power source. Picture is not turned on cassette. when you slide "EJECT" button Cassette cannot be inserted into The cassette has had the erase the recording mode, even when record prevention tab removed. CAMERA RECORDING SYMPTOM CHECK POINT & CORRECTION Picture does not appear in direction indicated by cassette compartment. Set "POWER" switch to "CAM" position. of focus...

Owners Guide
Page 62
... is connect to screen. Turn off during too faint or change. No picture appears on television set to "VIDEO" position. Tape is too bright, TV set the information again. camera/recorder channel (3 or 4) depending upon the selected channel in the RF channel select switch of RF output adapter. (TV is older type. TROUBLESHOOTING switch gently using RF output adapter.) Interference on playback picture. PLAYBACK OF PRE-RECORDED CASSETTE Symptom Check Point & Correction "PLAY" button cannot be engaged. playback. . 62...
... is connect to screen. Turn off during too faint or change. No picture appears on television set to "VIDEO" position. Tape is too bright, TV set the information again. camera/recorder channel (3 or 4) depending upon the selected channel in the RF channel select switch of RF output adapter. (TV is older type. TROUBLESHOOTING switch gently using RF output adapter.) Interference on playback picture. PLAYBACK OF PRE-RECORDED CASSETTE Symptom Check Point & Correction "PLAY" button cannot be engaged. playback. . 62...


