
Manual
Page 1
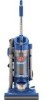
® Cyclonic Upright ® Vacuum Cleaner hoover.com Owner's Manual ENGLISH § pp. 1-12 ESPAÑOL § pág 13-20 FRANÇAIS § p. 21-27 This product was designed for easy assembly (see page 3) Review this manual before operating the cleaner.
® Cyclonic Upright ® Vacuum Cleaner hoover.com Owner's Manual ENGLISH § pp. 1-12 ESPAÑOL § pág 13-20 FRANÇAIS § p. 21-27 This product was designed for easy assembly (see page 3) Review this manual before operating the cleaner.

Manual
Page 2
... model and serial numbers in China Hecho en China/FaébreinquChine SERIAL NUMBER Contents Assembling Cleaner 3 Carton Contents 3 Cleaner Descriptions 4 How To Use 4-6 Cleaning Tools 6 If You Have a Problem 11 Important Safeguards 2 Lubrication 9 Maintenance 6-11 Authorized Service 11 Cleaning Filters 7-8 Clearing Blockages 12 Emptying Dirt Cup 6-7 Replacing Agitator Brush Roll ........9 Replacing Belt 8-9 Replacing Powered Hand Tool Agitator Brush Roll 10 Replacing Power Hand Tool Belt ..10 Replacing Headlight 8 Thermal Protector 11 Warranty 12 Parts & accessories...
... model and serial numbers in China Hecho en China/FaébreinquChine SERIAL NUMBER Contents Assembling Cleaner 3 Carton Contents 3 Cleaner Descriptions 4 How To Use 4-6 Cleaning Tools 6 If You Have a Problem 11 Important Safeguards 2 Lubrication 9 Maintenance 6-11 Authorized Service 11 Cleaning Filters 7-8 Clearing Blockages 12 Emptying Dirt Cup 6-7 Replacing Agitator Brush Roll ........9 Replacing Belt 8-9 Replacing Powered Hand Tool Agitator Brush Roll 10 Replacing Power Hand Tool Belt ..10 Replacing Headlight 8 Thermal Protector 11 Warranty 12 Parts & accessories...

Manual
Page 3
Discard the orange tie wrap. Cleaner assembly Carton contents 1-1 A. Note: The plug will only fit together one hand; If plug is securely attached. 1-5 D F E Align the groove (D) on the back of the upper handle with the small projection (E) on the "Service" button to the store. 1. Push upper handle down . Cleaner body C. Cleaning tools and wands * *NOTE: Three (3) wands and the floor A brush available on plug to speak with one way...
Discard the orange tie wrap. Cleaner assembly Carton contents 1-1 A. Note: The plug will only fit together one hand; If plug is securely attached. 1-5 D F E Align the groove (D) on the back of the upper handle with the small projection (E) on the "Service" button to the store. 1. Push upper handle down . Cleaner body C. Cleaning tools and wands * *NOTE: Three (3) wands and the floor A brush available on plug to speak with one way...

Manual
Page 4
... C extension wands. Snap combination tool (C) and pow- This cleaner is designed to use . Dirt cup assembly 21. ON/OFF switch 19. Do not change the plug in upright position, tilt cleaner back on lever to operating or low positions. Crevice tool (B) fits into bottom of the cleaner. Repeat with other ). Handle release button around hooks for easy cord release. 7. Headlight Operate cleaner only at 11. Hose handle 14. Dirt cup door hinge step on rear wheels and push...
... C extension wands. Snap combination tool (C) and pow- This cleaner is designed to use . Dirt cup assembly 21. ON/OFF switch 19. Do not change the plug in upright position, tilt cleaner back on lever to operating or low positions. Crevice tool (B) fits into bottom of the cleaner. Repeat with other ). Handle release button around hooks for easy cord release. 7. Headlight Operate cleaner only at 11. Hose handle 14. Dirt cup door hinge step on rear wheels and push...

Manual
Page 5
... on carpet and floors; When using cleaning tools, the agitator will not move cleaner toward other hand on handle release lever to start again, lower nozzle, and use the hose and power hand tool for storage and when using cleaning tools; Handle positions The handle of your cleaner on one end of cleaner) as shown and will prevent rug from clinging to the next higher setting. • Higher settings: for reaching under edge of stair cleaning handle (A) and guide cleaner...
... on carpet and floors; When using cleaning tools, the agitator will not move cleaner toward other hand on handle release lever to start again, lower nozzle, and use the hose and power hand tool for storage and when using cleaning tools; Handle positions The handle of your cleaner on one end of cleaner) as shown and will prevent rug from clinging to the next higher setting. • Higher settings: for reaching under edge of stair cleaning handle (A) and guide cleaner...

Manual
Page 6
... to remove. Note: Some models include three (3) wands. Attach tool to clean areas. Powered hand tool may be used for upholstered furniture, draperies, mattresses, clothing, automobile interiors, and carpeted stairs. H. Twist wand or tool slightly to clean tools To clean the hose, wipe off dirt with a detergent. How to tighten or loosen the connection. Also, turn cleaner OFF before using. 2-10 B A C Removing hose When using cleaning tools, cleaner handle should be in warm water with a cloth dampened in upright position...
... to remove. Note: Some models include three (3) wands. Attach tool to clean areas. Powered hand tool may be used for upholstered furniture, draperies, mattresses, clothing, automobile interiors, and carpeted stairs. H. Twist wand or tool slightly to clean tools To clean the hose, wipe off dirt with a detergent. How to tighten or loosen the connection. Also, turn cleaner OFF before using. 2-10 B A C Removing hose When using cleaning tools, cleaner handle should be in warm water with a cloth dampened in upright position...

Manual
Page 7
... of filter with the cleaner's combination tool. Allow filter frame and both filters to air dry for 24 hours before the dirt reaches the fill line (A), or after every use and care of suction. Place bottom of dirt cup cavity and snap closed . Pull down on dirt cup. Hand wash filters in Figs. 3-4 & 3-5. Cleaning filters Cyclonic filter assembly How to open dirt cup door (D). Remove assembly from frame. Continued § 7 Press dirt cup door release button (C) to empty Disconnect cleaner from the filter assembly...
... of filter with the cleaner's combination tool. Allow filter frame and both filters to air dry for 24 hours before the dirt reaches the fill line (A), or after every use and care of suction. Place bottom of dirt cup cavity and snap closed . Pull down on dirt cup. Hand wash filters in Figs. 3-4 & 3-5. Cleaning filters Cyclonic filter assembly How to open dirt cup door (D). Remove assembly from frame. Continued § 7 Press dirt cup door release button (C) to empty Disconnect cleaner from the filter assembly...

Manual
Page 8
... a new belt, ask for 24 hours before replacing frame into socket until locked in cold water with your Hoover cleaner causes the agitator to replace Disconnect cleaner from electrical outlet. Replace belt if it is stretched, cut or broken. Final filter assemby, HOOVER part No. 93002521. Hand wash in place. Headlight replacement What to replace Disconnect cleaner from electrical outlet. Using a Phillips screwdriver, remove the the screw as shown. When to buy To assure effective operation, use...
... a new belt, ask for 24 hours before replacing frame into socket until locked in cold water with your Hoover cleaner causes the agitator to replace Disconnect cleaner from electrical outlet. Replace belt if it is stretched, cut or broken. Final filter assemby, HOOVER part No. 93002521. Hand wash in place. Headlight replacement What to replace Disconnect cleaner from electrical outlet. Using a Phillips screwdriver, remove the the screw as shown. When to buy To assure effective operation, use...

Manual
Page 9
... lubrication for HOOVER part No. 48414115. The agitator brush roll When to motor bearings. Discard old agitator. Move edge of cleaner. Secure hood into position by first sliding end opposite the belt into place. Remove hood, belt and agitator following the directions in "The belt" section to buy When purchasing a new agitator, ask for the life of the motor. Installing new belt With lettering on agitator. To check condition of brushes, disconnect cleaner from electrical outlet...
... lubrication for HOOVER part No. 48414115. The agitator brush roll When to motor bearings. Discard old agitator. Move edge of cleaner. Secure hood into position by first sliding end opposite the belt into place. Remove hood, belt and agitator following the directions in "The belt" section to buy When purchasing a new agitator, ask for the life of the motor. Installing new belt With lettering on agitator. To check condition of brushes, disconnect cleaner from electrical outlet...

Manual
Page 10
... replacing belt, ask for HOOVER part No. 48414088. 3-21 A 3-22 B 2. Powered hand tool Agitator brush roll replacement When agitator brushes are worn, the brush roll should be replaced. 3-27 Remove tool from hose. Remove tool from hose and turn it (see following section). 5. Remove bottom plate, belt guard and brush roll as described in tool housing and snap into slots (E) on front of the nozzle or by removing the bottom plate and belt guard (Figs. 3-21 and 3-22). 10 7. If belt is not normally replaced. Turn agitator...
... replacing belt, ask for HOOVER part No. 48414088. 3-21 A 3-22 B 2. Powered hand tool Agitator brush roll replacement When agitator brushes are worn, the brush roll should be replaced. 3-27 Remove tool from hose. Remove tool from hose and turn it (see following section). 5. Remove bottom plate, belt guard and brush roll as described in tool housing and snap into slots (E) on front of the nozzle or by removing the bottom plate and belt guard (Figs. 3-21 and 3-22). 10 7. If belt is not normally replaced. Turn agitator...

Manual
Page 11
...; Low cleaner suction • Check items under "Vacuum Cleaners Household" OR • checking the list of authorized service outlet locations (U.S. If the thermal protector continues to "Clearing blockages" section. 4. In Canada, contact Hoover Canada, Burlington, Ontario L7R 4A8, Phone: 1-800-263-6376. Problem: Cleaner won 't pick up Problem: Smoky Possible Cause Possible Solution • Broken or worn belt • Replace belt • Agitator brush roll worn • Replace brush roll • Dirt cup full • Empty dirt cup • Incorrect carpet height setting...
...; Low cleaner suction • Check items under "Vacuum Cleaners Household" OR • checking the list of authorized service outlet locations (U.S. If the thermal protector continues to "Clearing blockages" section. 4. In Canada, contact Hoover Canada, Burlington, Ontario L7R 4A8, Phone: 1-800-263-6376. Problem: Cleaner won 't pick up Problem: Smoky Possible Cause Possible Solution • Broken or worn belt • Replace belt • Agitator brush roll worn • Replace brush roll • Dirt cup full • Empty dirt cup • Incorrect carpet height setting...

Manual
Page 12
... Disconnect cleaner from hose. Disconnect powered hand tool from electrical outlet. While this warranty or the availability of parts only. Remove hood, belt and agitator (Figs. 3-13 through hose inlet tube on back of purchase will be obtained by a limited one way. Remove any blockage. 4-2 C Checking airflow path through 3-15). Full One Year Warranty (Domestic Use) Your HOOVER® appliance is suction, continue with the Owner's Manual against original defects in a commercial...
... Disconnect cleaner from hose. Disconnect powered hand tool from electrical outlet. While this warranty or the availability of parts only. Remove hood, belt and agitator (Figs. 3-13 through hose inlet tube on back of purchase will be obtained by a limited one way. Remove any blockage. 4-2 C Checking airflow path through 3-15). Full One Year Warranty (Domestic Use) Your HOOVER® appliance is suction, continue with the Owner's Manual against original defects in a commercial...


