User Manual
Page 5
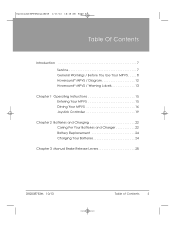
Hoveround-MPV5ManualRevM 1/17/14 10:36 AM Page 5 Table Of Contents Introduction 7 Service 7 General Warnings / Before You Use Your MPV5 . . . . . 8 Hoveround® MPV5 / Diagram 12 Hoveround® MPV5 / Warning Labels 13 Chapter 1 Operating Instructions 15 Entering Your MPV5 15 Driving Your MPV5 16 Joystick Controller 19 Chapter 2 Batteries and Charging 22 Caring For Your Batteries and Charger 22 Battery Replacement 24 Charging Your Batteries 24 Chapter 3 Manual Brake Release Levers 28 D82008753M 10/13 Table of Contents 5
Hoveround-MPV5ManualRevM 1/17/14 10:36 AM Page 5 Table Of Contents Introduction 7 Service 7 General Warnings / Before You Use Your MPV5 . . . . . 8 Hoveround® MPV5 / Diagram 12 Hoveround® MPV5 / Warning Labels 13 Chapter 1 Operating Instructions 15 Entering Your MPV5 15 Driving Your MPV5 16 Joystick Controller 19 Chapter 2 Batteries and Charging 22 Caring For Your Batteries and Charger 22 Battery Replacement 24 Charging Your Batteries 24 Chapter 3 Manual Brake Release Levers 28 D82008753M 10/13 Table of Contents 5
User Manual
Page 6
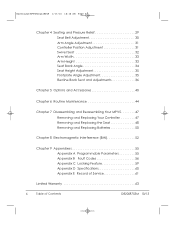
Hoveround-MPV5ManualRevM 1/17/14 10:36 AM Page 6 Chapter 4 Seating and Pressure Relief 29 Seat Belt Adjustment 30 Arm Angle Adjustment 31 Controller Position Adjustment 31 ... and Adjustments 36 Chapter 5 Options and Accessories 40 Chapter 6 Routine Maintenance 44 Chapter 7 Disassembling and Reassembling Your MPV5 47 Removing and Replacing Your Controller 47 Removing and Replacing the Seat 48 Removing and Replacing Batteries 50 Chapter 8 Electromagnetic Interference (EMI 52 Chapter 9 Appendixes 55 Appendix A Programmable Parameters 55 Appendix B Fault Codes 56...
Hoveround-MPV5ManualRevM 1/17/14 10:36 AM Page 6 Chapter 4 Seating and Pressure Relief 29 Seat Belt Adjustment 30 Arm Angle Adjustment 31 Controller Position Adjustment 31 ... and Adjustments 36 Chapter 5 Options and Accessories 40 Chapter 6 Routine Maintenance 44 Chapter 7 Disassembling and Reassembling Your MPV5 47 Removing and Replacing Your Controller 47 Removing and Replacing the Seat 48 Removing and Replacing Batteries 50 Chapter 8 Electromagnetic Interference (EMI 52 Chapter 9 Appendixes 55 Appendix A Programmable Parameters 55 Appendix B Fault Codes 56...
User Manual
Page 8
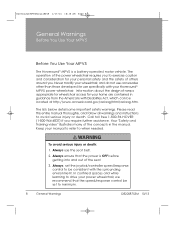
Never modify your power wheelchair, we recommend that the power is a battery-operated motor vehicle. To avoid serious injury or death: 1. In confined spaces and while learning to drive your wheelchair, and do not use accessories...8 General Warnings D82008753M 10/13 Please read this entire manual thoroughly, and follow all warnings and instructions to exercise caution and consideration for your Hoveround® MPV5 power wheelchair. Keep your personal safety and the safety of the power wheelchair requires you require further assistance. The lists below detail some important ...
Never modify your power wheelchair, we recommend that the power is a battery-operated motor vehicle. To avoid serious injury or death: 1. In confined spaces and while learning to drive your wheelchair, and do not use accessories...8 General Warnings D82008753M 10/13 Please read this entire manual thoroughly, and follow all warnings and instructions to exercise caution and consideration for your Hoveround® MPV5 power wheelchair. Keep your personal safety and the safety of the power wheelchair requires you require further assistance. The lists below detail some important ...
User Manual
Page 12
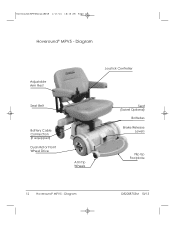
Diagram D82008753M 10/13 Diagram Adjustable Arm Rest • Joystick Controller • Seat Belt • • Battery Cable Connection (if equipped) • Seat (Swivel Optional) • • • Batteries Brake Release Levers Dual Motor Front Wheel Drive • • Anti Tip Wheels • Flip Up Footplate 12 Hoveround® MPV5 - Hoveround-MPV5ManualRevM 1/17/14 10:36 AM Page 12 Hoveround® MPV5 -
Diagram D82008753M 10/13 Diagram Adjustable Arm Rest • Joystick Controller • Seat Belt • • Battery Cable Connection (if equipped) • Seat (Swivel Optional) • • • Batteries Brake Release Levers Dual Motor Front Wheel Drive • • Anti Tip Wheels • Flip Up Footplate 12 Hoveround® MPV5 - Hoveround-MPV5ManualRevM 1/17/14 10:36 AM Page 12 Hoveround® MPV5 -
User Manual
Page 17
Hoveround-MPV5ManualRevM 1/17/14 10:36 AM Page 17 1. A "click" will stop. ... a confined space. 5. To avoid serious injury or death from a fall or collision, set speed/ response control for adequate battery capacity. 4. Gently move in a circle to minimum if you are a less experienced driver or are engaged. 6. Set control... to the right. Observe that , when released, the joystick returns to determine the limits of movement. Check battery gauge for the environment and your power wheelchair. 3. Note that when the chair stops, another "click" will be ...
Hoveround-MPV5ManualRevM 1/17/14 10:36 AM Page 17 1. A "click" will stop. ... a confined space. 5. To avoid serious injury or death from a fall or collision, set speed/ response control for adequate battery capacity. 4. Gently move in a circle to minimum if you are a less experienced driver or are engaged. 6. Set control... to the right. Observe that , when released, the joystick returns to determine the limits of movement. Check battery gauge for the environment and your power wheelchair. 3. Note that when the chair stops, another "click" will be ...
User Manual
Page 19
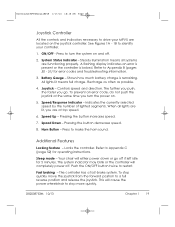
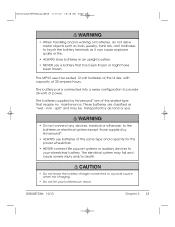
.... This will completely power off. A flashing display indicates an error is present or the controller is remaining. Battery Gauge - Speed Up - Joystick - The further you push, the faster you turn the system on and off... all systems are located on . 5. Hoveround-MPV5ManualRevM 1/17/14 10:36 AM Page 19 Joystick Controller All the controls and indicators necessary to drive your controller. 1. Shows how much battery charge is locked. All lights lit means...Locking feature - Fast braking - See Figures 1A - 1B to identify your MPV5 are functioning properly.
.... This will completely power off. A flashing display indicates an error is present or the controller is remaining. Battery Gauge - Speed Up - Joystick - The further you push, the faster you turn the system on and off... all systems are located on . 5. Hoveround-MPV5ManualRevM 1/17/14 10:36 AM Page 19 Joystick Controller All the controls and indicators necessary to drive your controller. 1. Shows how much battery charge is locked. All lights lit means...Locking feature - Fast braking - See Figures 1A - 1B to identify your MPV5 are functioning properly.

User Manual
Page 22
... protective terminal covers are installed and all warnings about the batteries in this user instruction manual and any part of the battery. • Batteries are tight before using your hands after handling any labels applied to open flame around batteries. Use extreme care when handling batteries. Hoveround-MPV5ManualRevM 1/17/14 10:36 AM Page 22 Chapter...
... protective terminal covers are installed and all warnings about the batteries in this user instruction manual and any part of the battery. • Batteries are tight before using your hands after handling any labels applied to open flame around batteries. Use extreme care when handling batteries. Hoveround-MPV5ManualRevM 1/17/14 10:36 AM Page 22 Chapter...
User Manual
Page 23
...severe injury and/or death. • Do not leave the battery charger connected to your batteries run down. non - The batteries supplied by Hoveround®. • ALWAYS use a battery that require no maintenance. D82008753M 10/13 Chapter 2 23 Hoveround-MPV5ManualRevM 1/17/14 10:36 AM Page 23 • When... as it can cause explosive sparks or fire. • ALWAYS store batteries in an upright position. • NEVER use batteries of 33 ampere hours. The MPV5 uses two sealed 12-volt batteries of the UI size, with capacity of the same type and capacity for this power wheelchair...
...severe injury and/or death. • Do not leave the battery charger connected to your batteries run down. non - The batteries supplied by Hoveround®. • ALWAYS use a battery that require no maintenance. D82008753M 10/13 Chapter 2 23 Hoveround-MPV5ManualRevM 1/17/14 10:36 AM Page 23 • When... as it can cause explosive sparks or fire. • ALWAYS store batteries in an upright position. • NEVER use batteries of 33 ampere hours. The MPV5 uses two sealed 12-volt batteries of the UI size, with capacity of the same type and capacity for this power wheelchair...
User Manual
Page 24
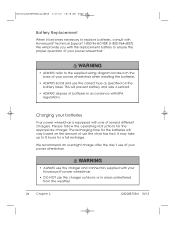
...use of your power wheelchair. • ALWAYS use the charger and connectors supplied with Hoveround® Technical Support 1-800-96-HOVER (1-800-964-6837). We will provide you with the replacement battery to ensure the proper operation of your power wheelchair. • ALWAYS refer to the ... a full recharge. It may take up to 8 hours for the appropriate charger. Hoveround-MPV5ManualRevM 1/17/14 10:36 AM Page 24 Battery Replacement When it becomes necessary to replace batteries, consult with your Hoveround® power wheelchair. • DO NOT use the charger outdoors or in accordance ...
...use of your power wheelchair. • ALWAYS use the charger and connectors supplied with Hoveround® Technical Support 1-800-96-HOVER (1-800-964-6837). We will provide you with the replacement battery to ensure the proper operation of your power wheelchair. • ALWAYS refer to the ... a full recharge. It may take up to 8 hours for the appropriate charger. Hoveround-MPV5ManualRevM 1/17/14 10:36 AM Page 24 Battery Replacement When it becomes necessary to replace batteries, consult with your Hoveround® power wheelchair. • DO NOT use the charger outdoors or in accordance ...

User Manual
Page 25
...D82008753M 10/13 Chapter 2 25 Hoveround-MPV5ManualRevM 1/17/14 10:36 AM Page 25 • DO NOT expose the charger to moisture such as knives and/or scissors in a well-ventilated area free of any electrical or other equipment. • DO NOT attempt to charge a frozen battery. Explosive gas is emitted during the... NOT use the charger as a DC power source for any sparks, high heat or open flame. Do not attempt to charge any other type of battery or any non-rechargeable type of the wall outlet or chair. • Pinching the cable. • Handling sharp objects such as rain, sleet or ...
...D82008753M 10/13 Chapter 2 25 Hoveround-MPV5ManualRevM 1/17/14 10:36 AM Page 25 • DO NOT expose the charger to moisture such as knives and/or scissors in a well-ventilated area free of any electrical or other equipment. • DO NOT attempt to charge a frozen battery. Explosive gas is emitted during the... NOT use the charger as a DC power source for any sparks, high heat or open flame. Do not attempt to charge any other type of battery or any non-rechargeable type of the wall outlet or chair. • Pinching the cable. • Handling sharp objects such as rain, sleet or ...

User Manual
Page 26
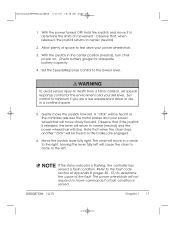
...the charger port. If it is fully seated in the OFF position. 3. Unplug the charger from the joystick controller. 26 Chapter 2 D82008753M 10/13 C. Hoveround-MPV5ManualRevM 1/17/14 10:36 AM Page 26 1. If your charger. Charger Port, Typical Location 4. Follow the specific instructions for your charger is in ... turn OFF the power switch on the port and push the plug in place. Make sure the plug is not pushed all the way, the batteries will not charge or the plug may become hot. Connect the charger output cord into the charger port located on page 24. 7. Figure 2A ...
...the charger port. If it is fully seated in the OFF position. 3. Unplug the charger from the joystick controller. 26 Chapter 2 D82008753M 10/13 C. Hoveround-MPV5ManualRevM 1/17/14 10:36 AM Page 26 1. If your charger. Charger Port, Typical Location 4. Follow the specific instructions for your charger is in ... turn OFF the power switch on the port and push the plug in place. Make sure the plug is not pushed all the way, the batteries will not charge or the plug may become hot. Connect the charger output cord into the charger port located on page 24. 7. Figure 2A ...
User Manual
Page 27
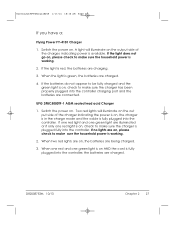
... of the charger indicating the power is on , check to make sure the household power is fully plugged into the controller charging port and the batteries are charged. Switch the power on , please check to be fully charged and the green light is on , the charger is in the charge mode... and the cable is working . 2. If no lights are on . Hoveround-MPV5ManualRevM 1/17/14 10:36 AM Page 27 If you have a: Flying Power FY-4101 Charger 1. If one red light and one green light are...
... of the charger indicating the power is on , check to make sure the household power is fully plugged into the controller charging port and the batteries are charged. Switch the power on , please check to be fully charged and the green light is on , the charger is in the charge mode... and the cable is working . 2. If no lights are on . Hoveround-MPV5ManualRevM 1/17/14 10:36 AM Page 27 If you have a: Flying Power FY-4101 Charger 1. If one red light and one green light are...
User Manual
Page 44
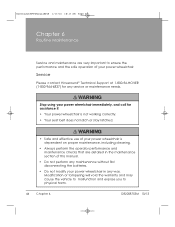
.../14 10:37 AM Page 44 Chapter 6 Routine Maintenance Service and maintenance are detailed in the maintenance section of your power wheelchair. Service Please contact Hoveround® Technical Support at 1-800-96-HOVER (1-800-964-6837) for assistance if: • Your power wheelchair is not working correctly. • Your seat belt... malfunction and expose you to ensure the performance and the safe operation of this manual. • Do not perform any maintenance without first disconnecting the batteries. • Do not modify your power wheelchair in any service or maintenance needs.
.../14 10:37 AM Page 44 Chapter 6 Routine Maintenance Service and maintenance are detailed in the maintenance section of your power wheelchair. Service Please contact Hoveround® Technical Support at 1-800-96-HOVER (1-800-964-6837) for assistance if: • Your power wheelchair is not working correctly. • Your seat belt... malfunction and expose you to ensure the performance and the safe operation of this manual. • Do not perform any maintenance without first disconnecting the batteries. • Do not modify your power wheelchair in any service or maintenance needs.

User Manual
Page 45
Hoveround-MPV5ManualRevM 1/17/14 10:37 AM Page 45 Owner Maintenance Daily • Check drive tires. • Charge batteries (or as required). • Check that the seat belt latches and does not show signs of electrical damage. • Check that the seat swivel lock ...
Hoveround-MPV5ManualRevM 1/17/14 10:37 AM Page 45 Owner Maintenance Daily • Check drive tires. • Charge batteries (or as required). • Check that the seat belt latches and does not show signs of electrical damage. • Check that the seat swivel lock ...

User Manual
Page 50
... the base under the seat with separate removable batteries) Removal 1. Either battery can fit onto either side of the base. Place the battery into the appropriate receptacle of the battery connectors by pushing until a click is fully locked in place. 50 Chapter 7 D82008753M 10/13 Replacement 1. Hoveround-MPV5ManualRevM 1/17/14 10:37 AM Page 50...
... the base under the seat with separate removable batteries) Removal 1. Either battery can fit onto either side of the base. Place the battery into the appropriate receptacle of the battery connectors by pushing until a click is fully locked in place. 50 Chapter 7 D82008753M 10/13 Replacement 1. Hoveround-MPV5ManualRevM 1/17/14 10:37 AM Page 50...
User Manual
Page 51
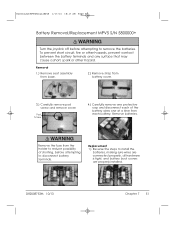
... circuit, fire or other hazards, prevent contact between the battery terminals and any surface that may cause a short, spark or other hazard. Remove batteries. Hoveround-MPV5ManualRevM 1/17/14 10:37 AM Page 51 Battery Removal/Replacement MPV5 S/N 5800000+ Turn the joystick off before attempting to install the batteries, making sure wires are connected properly, all hardware...
... circuit, fire or other hazards, prevent contact between the battery terminals and any surface that may cause a short, spark or other hazard. Remove batteries. Hoveround-MPV5ManualRevM 1/17/14 10:37 AM Page 51 Battery Removal/Replacement MPV5 S/N 5800000+ Turn the joystick off before attempting to install the batteries, making sure wires are connected properly, all hardware...
User Manual
Page 57
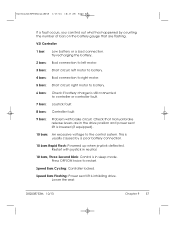
...connection to left motor. 3 bars: Short circuit, left motor to battery. 4 bars: Bad connection to right motor. 5 bars: Short circuit, right motor to battery. 6 bars: Check if battery charger is still connected to restart. Lower the seat. Hoveround-MPV5ManualRevM 1/17/14 10:37 AM Page 57 If a fault ...occurs, you can find out what has happened by a poor battery connection. 10 bars Rapid Flash: Powered ...
...connection to left motor. 3 bars: Short circuit, left motor to battery. 4 bars: Bad connection to right motor. 5 bars: Short circuit, right motor to battery. 6 bars: Check if battery charger is still connected to restart. Lower the seat. Hoveround-MPV5ManualRevM 1/17/14 10:37 AM Page 57 If a fault ...occurs, you can find out what has happened by a poor battery connection. 10 bars Rapid Flash: Powered ...
User Manual
Page 58
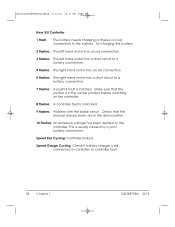
...center position before switching on the controller. 8 flashes: A controller fault is usually caused by a poor battery connection. This is indicated. 9 flashes: Problem with the brake circuit. Try charging the battery. 2 flashes: The left hand motor has a bad connection. 3 flashes: The left hand motor has... joystick is in the drive position. 10 flashes: An excessive voltage has been applied to the battery. Speed Gauge Cycling: Check if battery charger is indicted. Speed Bar Cycling: Controller locked. Hoveround-MPV5ManualRevM 1/17/14 10:37 AM Page 58 New VSI Controller 1 flash: The...
...center position before switching on the controller. 8 flashes: A controller fault is usually caused by a poor battery connection. This is indicated. 9 flashes: Problem with the brake circuit. Try charging the battery. 2 flashes: The left hand motor has a bad connection. 3 flashes: The left hand motor has... joystick is in the drive position. 10 flashes: An excessive voltage has been applied to the battery. Speed Gauge Cycling: Check if battery charger is indicted. Speed Bar Cycling: Controller locked. Hoveround-MPV5ManualRevM 1/17/14 10:37 AM Page 58 New VSI Controller 1 flash: The...

User Manual
Page 60
Note: Specifications and equipment subject to terrain and weight of rider. Hoveround-MPV5ManualRevM 1/17/14 10:37 AM Page 60 Appendix D: MPV5 Specifications Performance Maximum Speed* Range (per battery charge)* Capacity Turning Radius Ground Clearance Maximum step climb Maximum grade climb 5 mph 15 miles 300 lbs ...floor 19.8" Seat height adjustment 0", 1.5", or 2.5" from lowest position Total weight, with batteries 195 lbs Base only 91 lbs Base with batteries 143 lbs Batteries Two U-1 batteries, Sealed AGM Tires and casters Tire type and tread Tire diameter and width Caster type...
Note: Specifications and equipment subject to terrain and weight of rider. Hoveround-MPV5ManualRevM 1/17/14 10:37 AM Page 60 Appendix D: MPV5 Specifications Performance Maximum Speed* Range (per battery charge)* Capacity Turning Radius Ground Clearance Maximum step climb Maximum grade climb 5 mph 15 miles 300 lbs ...floor 19.8" Seat height adjustment 0", 1.5", or 2.5" from lowest position Total weight, with batteries 195 lbs Base only 91 lbs Base with batteries 143 lbs Batteries Two U-1 batteries, Sealed AGM Tires and casters Tire type and tread Tire diameter and width Caster type...
User Manual
Page 63
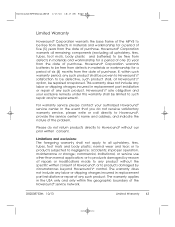
...shall not apply to all upholstery, tires, tubes, foot mats, body plastic and batteries) to be free from defects in replacement part installation or repair of the problem. or to products subjected to Hoveround®, provide the service center's name and address, and indicate the nature of any... reason of repairs or modifications made to any product without our prior written consent. Hoveround-MPV5ManualRevM 1/17/14 10:37 AM Page 63 Limited Warranty Hoveround® Corporation warrants the base frame of the MPV5 to be free from defects in materials and workmanship for a period of five (5)...
...shall not apply to all upholstery, tires, tubes, foot mats, body plastic and batteries) to be free from defects in replacement part installation or repair of the problem. or to products subjected to Hoveround®, provide the service center's name and address, and indicate the nature of any... reason of repairs or modifications made to any product without our prior written consent. Hoveround-MPV5ManualRevM 1/17/14 10:37 AM Page 63 Limited Warranty Hoveround® Corporation warrants the base frame of the MPV5 to be free from defects in materials and workmanship for a period of five (5)...


